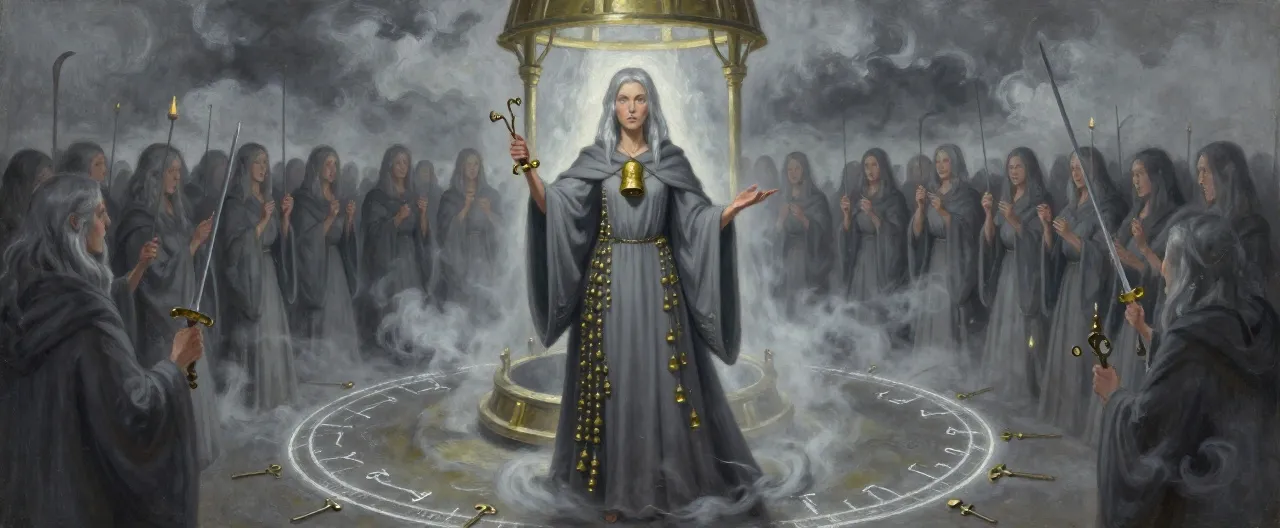
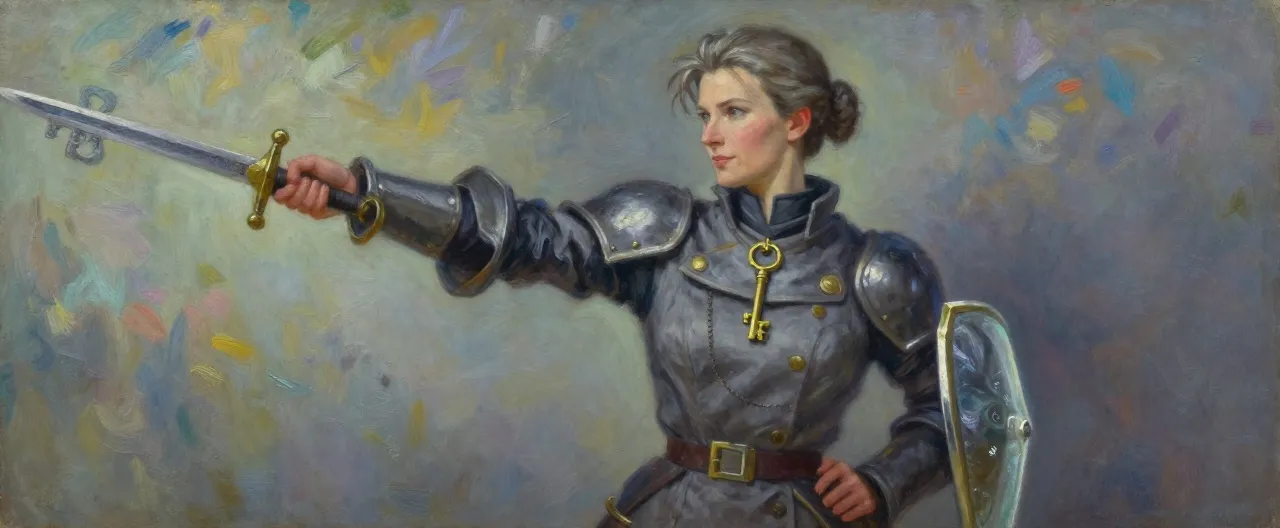
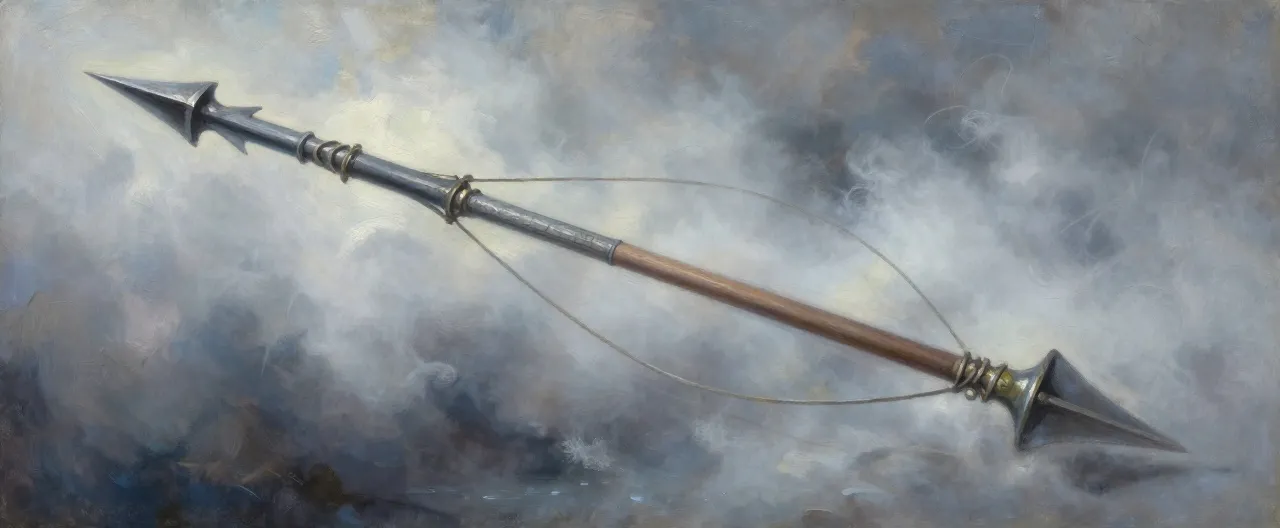
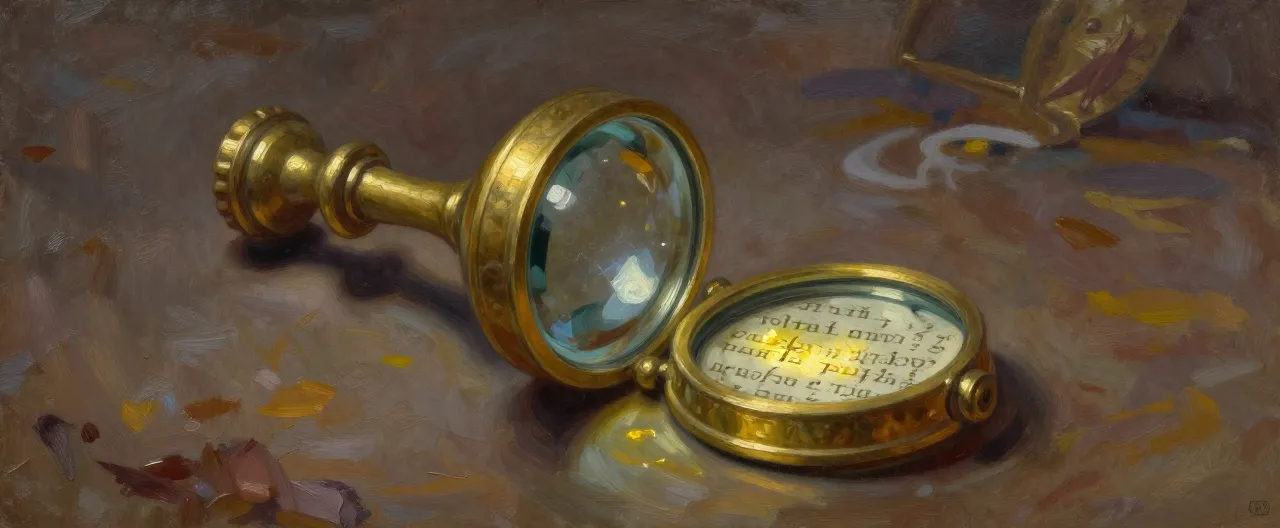
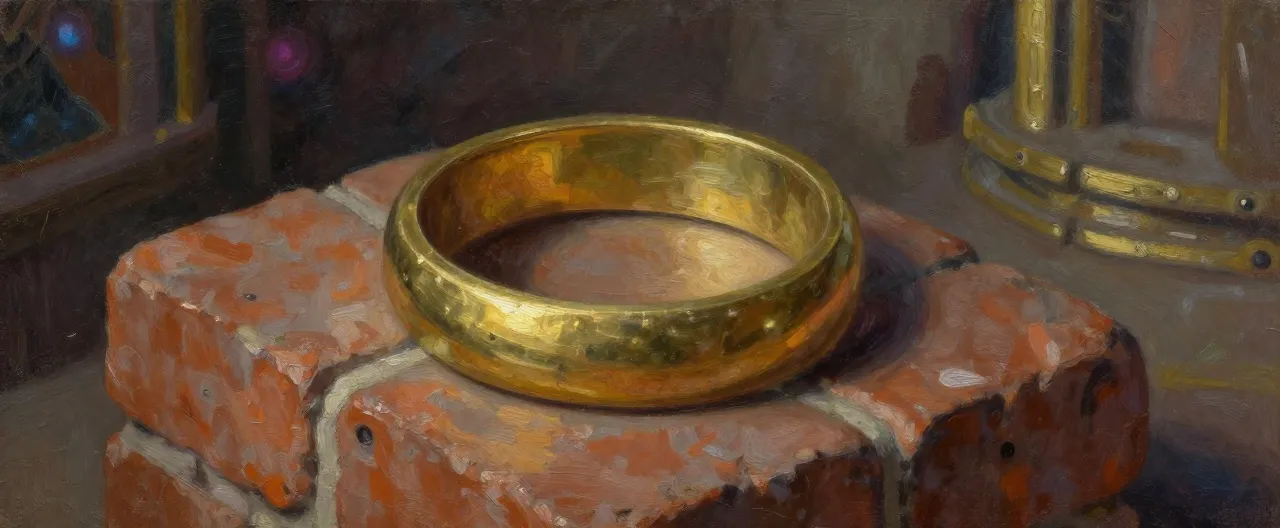
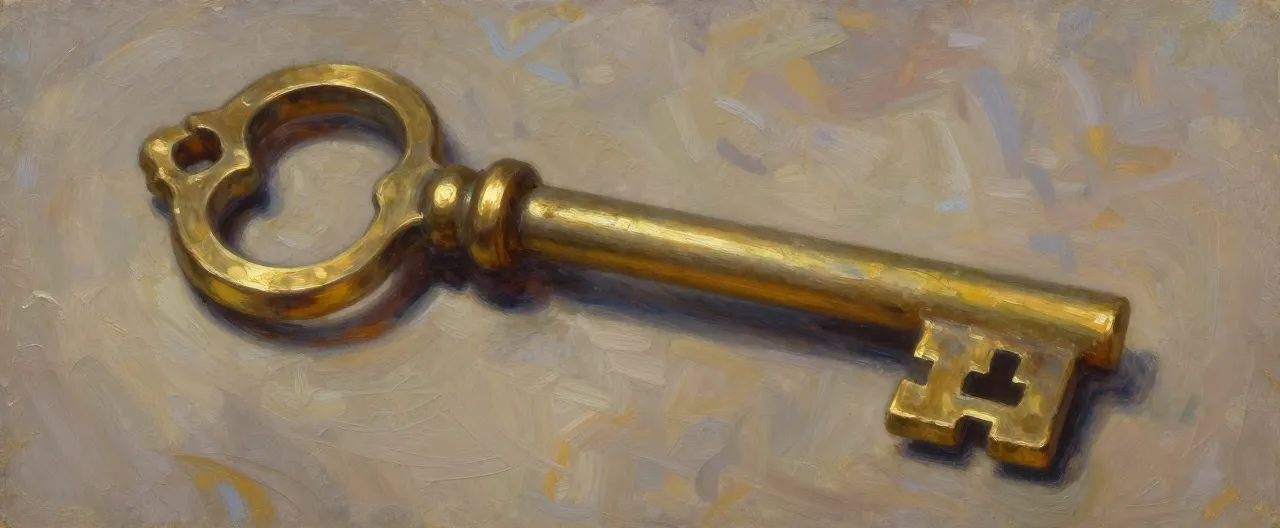
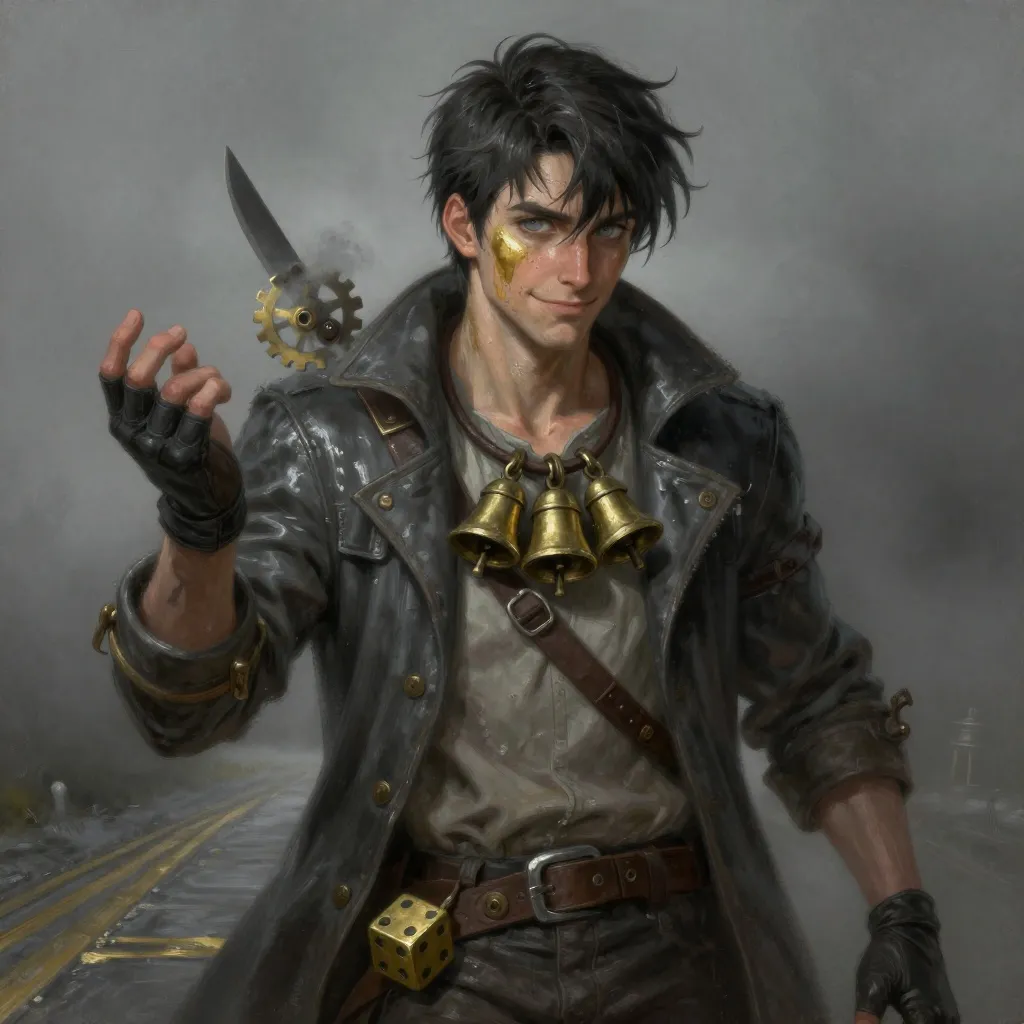
The adventure ahead

Campaign Overview

The World Engine: The Grand Cage

The world is not a world. It is a machine.

A sphere of brass and iron, a thousand miles across, hangs in an infinite sea of grey fog. Its surface is divided into one hundred Slivers — tectonic plates the size of nations — locked into seven concentric rings that turn slowly around a core of light. People live on the Slivers. They farm them, mine them, build towns on them, and pay their tallies to the Keywardens, the order that keeps the plates keyed to their rings.

The fog is called the Deep Mist, and it is alive.

For a thousand years the Grand Cage has held. Now it is failing. Slivers are drifting loose from their rings, one by one, and the Deep Mist is eating them. The Keywardens say it is decay. The Ratchet Crew say it is liberation. The Mistbound Choir say it is a god arriving.

You are on the Sixth Ring when the town of Tallymarket lurches two fingers to the north. You have a wedge of black iron, a tally-keeper's ledger, and a road that runs down through the rings toward the heart of the Engine.

The Grand Cage is opening. Someone is opening it on purpose.

Share with your players

Player Handout

The World Engine: The Grand Cage

Setup

You live on a Sliver — a plate of land the size of a country, locked into one of the seven rings of a clockwork sphere a thousand miles across. Above you, the rings turn. Below you, the Deep Mist. You have never seen the Mist up close. People who do come back changed, or not at all.

You are on the Sixth Ring, in the Tally Reaches: a frontier of small farming and mining Slivers, timber towns, and long roads between them. The Keywardens keep the key-bolts that hold your Sliver to its ring. They have kept them for a thousand years.

Tone

Brass and oil and grey fog. Hymns sung in machine halls. Small towns that are very far from help. The world is a machine, and machines can be sabotaged.

Starting Hook

At dawn, the town of Tallymarket lurched two fingers to the north. Every bucket, cart and chicken in town slid that way. The floor of the Tally-House is still ringing like a struck bell, and Marnie Tallow, the tally-keeper, is holding onto her desk with both hands.

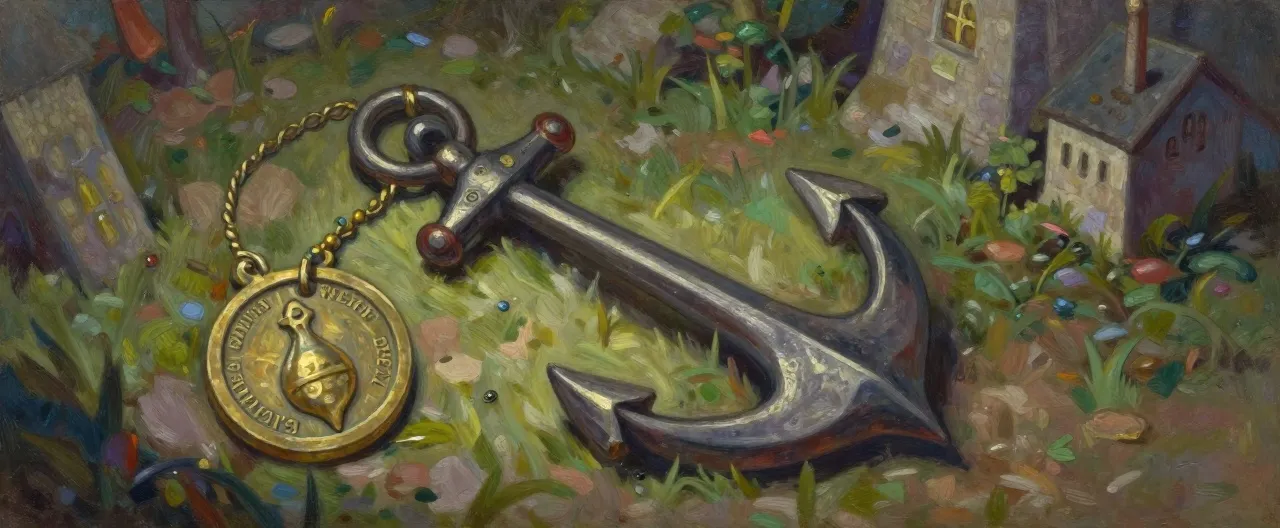
She needs someone to find out why. She will pay in coin, in lodging at the Weighed Anchor, and in the town's gratitude — which, on a Sliver that might be coming loose, is worth more than it sounds.

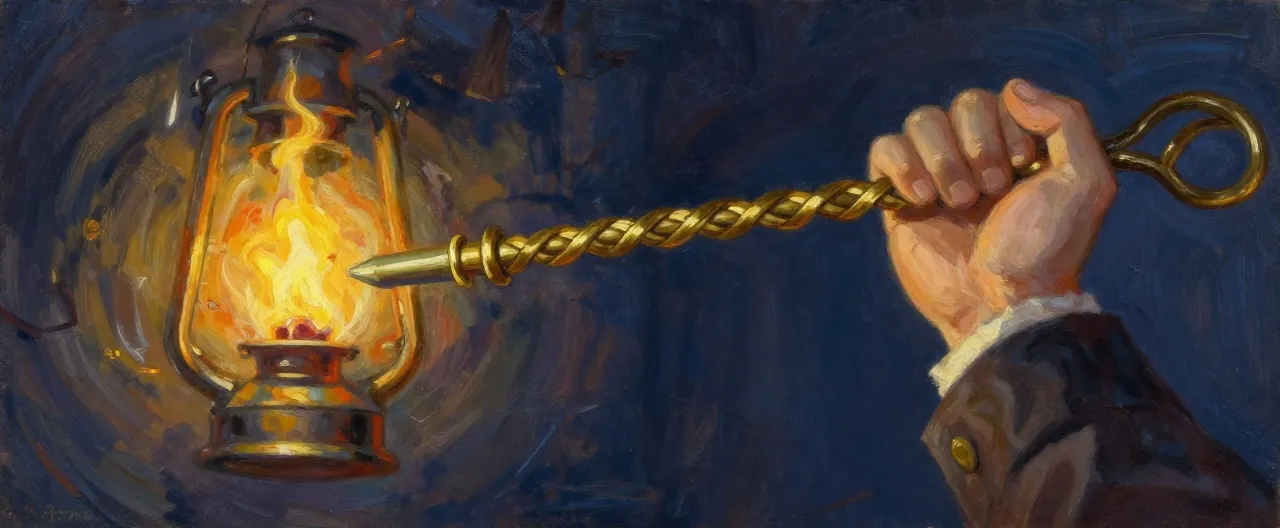
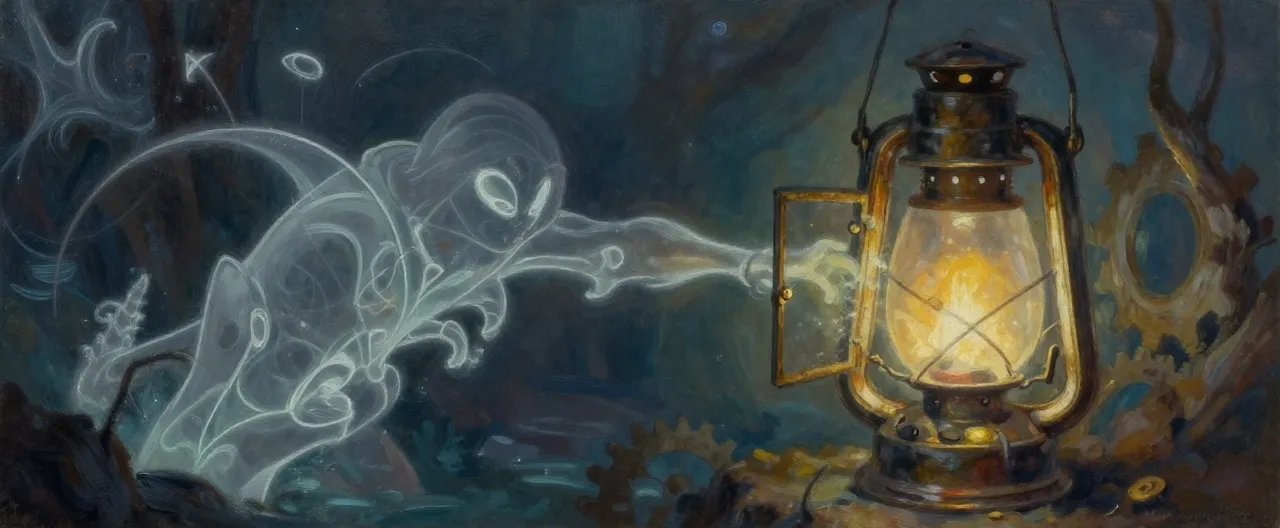
Bring a lantern. The orchard road is dark, and the trees out there are made of brass.

Playable Module
Levels 1 15 Sessions About 30 sessions of 3–4 hours each, roughly 10 sessions per act.

The World Engine: The Grand Cage

Behind the screen

The Grand Cage — DM Overview

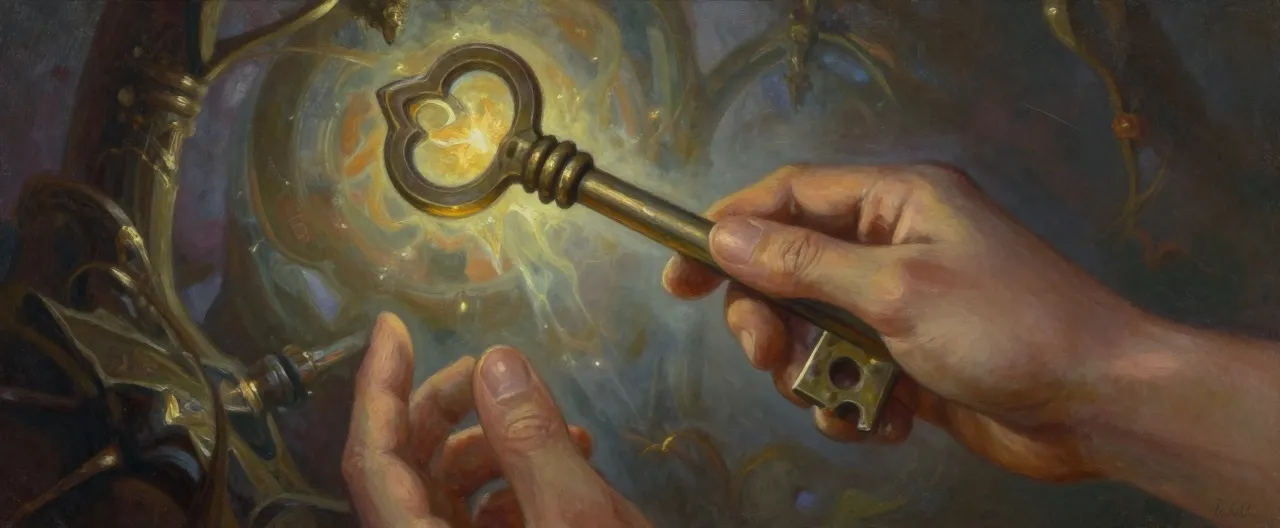
The truth. The World Engine is a machine built by the first Wardens to hold back the Deep Mist, which is a single living mind that eats unkeyed Slivers. The Grand Cage is the lid. Ossian Vey, the last Warden-Archivist, has read the first Wardens' records and drawn the opposite conclusion: that the Cage is a prison built to enslave the Slivers, and the Mist is a god. He has never heard the Mist speak; he has only heard it sing. He is unkeying the rings one Sliver at a time, working inward toward the Cage's heart, where the Master Key turns.

The villain plan. Ossian works from the Cage Core. Marisel Quill, his field hand, plants unkeying wedges on the outer rings and tests a great unkeying engine at the Driftline. Ilse Marrow, the Hollow Cantor, sings the Mist into the Engine from Marrow Spire, softening the Cage from within. Vessaline Roke, a rival, wants the Cage for herself and follows the party, letting them clear the way.

Clue flow. Tallymarket (a wedge, a ratchet mark) → Brass Orchard (a second wedge, a name: Marisel Quill) → Hollowmere (a re-keyed bolt, a Keywarden engineer's name) → Warden Bastion (the traitor Tobias Quill, the route to the Fourth Ring) → Ratchetworks (the unkeying engine, Lady Ysolde's tithes) → Sump Gears (the engine's plans, the Driftline) → Marrow Spire (the Cantor, the Unkeyed Warden) → Driftline (the engine's core is a fragment of the Master Key) → Threshold of Keys (the Cage is a lid, not a prison) → Unkeyed Ward (the Master Key is gone, the Mist is one mind) → Grand Cage (the choice).

Failure states. If the party ignores the lurch, Tallymarket's Sliver unkeys in ten days and the town is lost. If Hollowmere's bolts fail, eleven families drift into the Mist. If the Marrow Spire ritual completes, mist-touched flood the Fourth Ring. If the Driftline engine completes, a county-sized Sliver and everyone on it is eaten. If Ossian finishes the third turn at the Grand Cage, the Cage opens and the campaign ends in a dark epilogue: the Engine is consumed ring by ring over the following year.

Pacing. Act I is investigation and small-town horror (levels 1–5). Act II is city, undercity and cult (levels 5–10). Act III is ruin and revelation (levels 10–15). Each act is roughly ten sessions. Level the party at each act's milestone, and again after the Driftline and the Unkeyed Ward.

Tone. Industrial fantasy: brass, oil, fog, hymns, and machinery that is also geography. The horror is not gore; it is scale and patience. The Mist never hurries.

Adventure Hooks

Hook 01

The Town That Slid

The party is in Tallymarket at dawn when the whole town lurches two fingers to the north. Every cart, bucket and chicken slides that way, and the tally-house floor rings like a struck bell. Marnie Tallow, the town's tally-keeper, needs someone to find out why before the town slides again — and she pays in coin, lodging at the Weighed Anchor, and the town's gratitude. This is the default opening and leads straight into the first scene.

Hook 02

The Lamplighter's Complaint

Pell the Lamplighter has been lighting Tallymarket's boundary lamps for two years, and since the lurch three of them have gone out and will not relight. He is too frightened to tell Marnie Tallow and asks the party to walk the wall with him at dusk. The lamps draw their flame from the same key-frequency as the town's anchor-groves, so fixing them means going to the Brass Orchard — which is where the campaign's first real clue is buried.

Hook 03

The Concord Crate

Grenna Ost, the Sliver Concord's salvage broker, needs three crates escorted from her Tallymarket warehouse to the Brass Orchard's north gate. The crates are heavier than salvage should be and one of them ticks. Grenna is lying about what is inside, and the carter waiting at the gate is not a carter. This hook puts the party on the orchard road with a mystery in a box and a name — Lady Ysolde Marrow — a full act before that name matters.

Hook 04

The Debt in the Cellar

Dorn Fell's cellar holds Tallymarket's oldest anchor-grove, and since the lurch the brass roots have begun to hum at night and his beer has started to taste of brass. He will trade free lodging for anyone who goes down and quiets them. The roots are not damaged; they are straining because the Brass Orchard's wedge threw the town's key-frequency off. This hook gives the party a reason to care about the town before it starts coming apart.

Act Structure

Act I: The Lurching Ring

Recommended level: 1–5

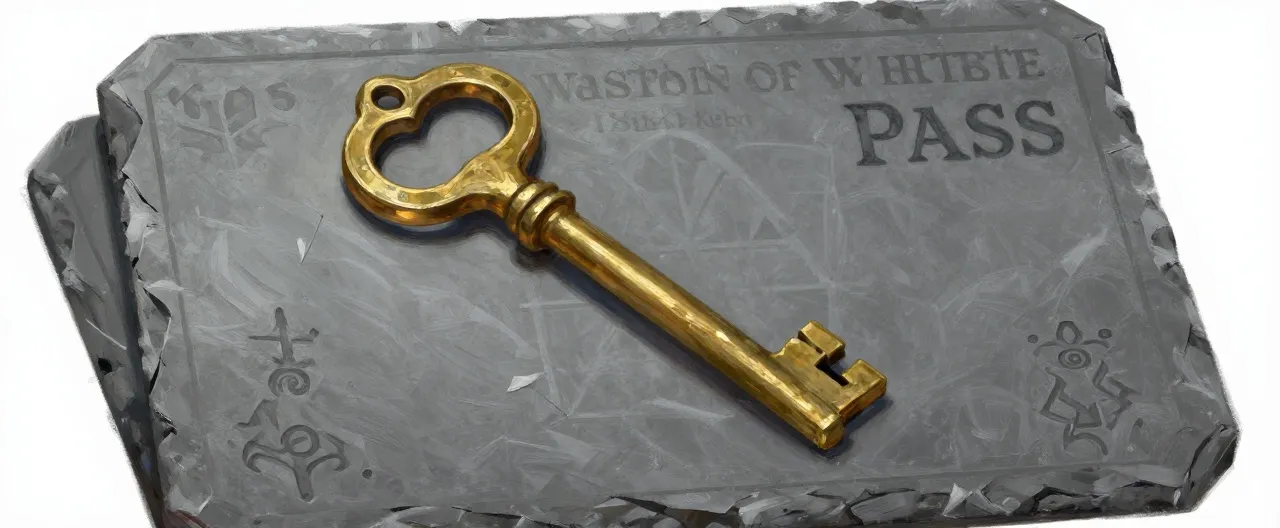
The party is in Tallymarket when the town lurches. Tracing the unkeying wedges from the Brass Orchard to Hollowmere and then to the Warden Bastion, they uncover a sabotage campaign run by the Ratchet Crew and a traitor inside the Keywardens. The act ends with the party holding a Warden's pass and a route down to the Fourth Ring, knowing that someone called the Unkeyed Warden is unkeying the Engine on purpose.

Objectives

  • Find out why Tallymarket lurched and who planted the wedge in the Brass Orchard.
  • Re-key the drifting half of Hollowmere before it tears loose.
  • Expose the traitor inside the Warden Bastion of the Sixth Key.
  • Learn the Ratchet Crew's route down to the Fourth Ring.
  • Decide what to do about Tobias Quill and his daughter Lira.

The Lurch at Tallymarket

The Tally-House, a brass-floored counting house on the market square of Tallymarket

Read aloud

The floor of the Tally-House is still ringing like a struck bell. Outside, the market square tilts two fingers' width to the north, and every bucket, cart and chicken in Tallymarket has slid that way. Marnie Tallow grips the counting desk with both hands and looks at you the way a woman looks at the only rope in reach.

Running this scene

The lurch was caused by an unkeying wedge planted in the Brass Orchard, one of the town's three anchor-groves. The wedge is a Ratchet Crew device, and Marisel Quill's crew is testing the town's response. Marnie knows the town's tally of keys and can name the three anchor-groves. Pell the Lamplighter saw two strangers in oilskin coats leave the orchard before dawn. If the party dawdles, a second, smaller lurch occurs at dusk and a house on the north lane collapses, killing no one but injuring two.

Checks
  • DC 12 Intelligence (Investigation) in the Tally-House: the town's key-ledger shows one anchor-grove unaccounted for — the Brass Orchard.
  • DC 13 Wisdom (Insight) on Marnie: she is frightened less of the lurch than of the Keywardens' reaction to it.
  • DC 10 Charisma (Persuasion) with any townsfolk: they point to Pell the Lamplighter, who was on the wall before dawn.
  • DC 14 Wisdom (Perception) at the orchard gate: fresh boot prints in oil and brass filings.
Clues
  • The town's three anchor-groves are the Brass Orchard, the Weighed Anchor cellar and Bell Meadow.
  • Pell saw two figures in oilskin coats carrying a long crate toward the Brass Orchard.
  • The wedge is stamped with a ratchet-and-cog mark — the sign of the Ratchet Crew.
Where next
  • Pell's directions lead north along the orchard road to the Brass Orchard.
  • Marnie asks the party to bring back the wedge itself, not just news.
  • Dorn Fell offers free lodging at the Weighed Anchor if the party checks his cellar grove on the way back.

The Brass Orchard

The Brass Orchard, a grove of brass-barked trees whose leaves chime in the wind

Read aloud

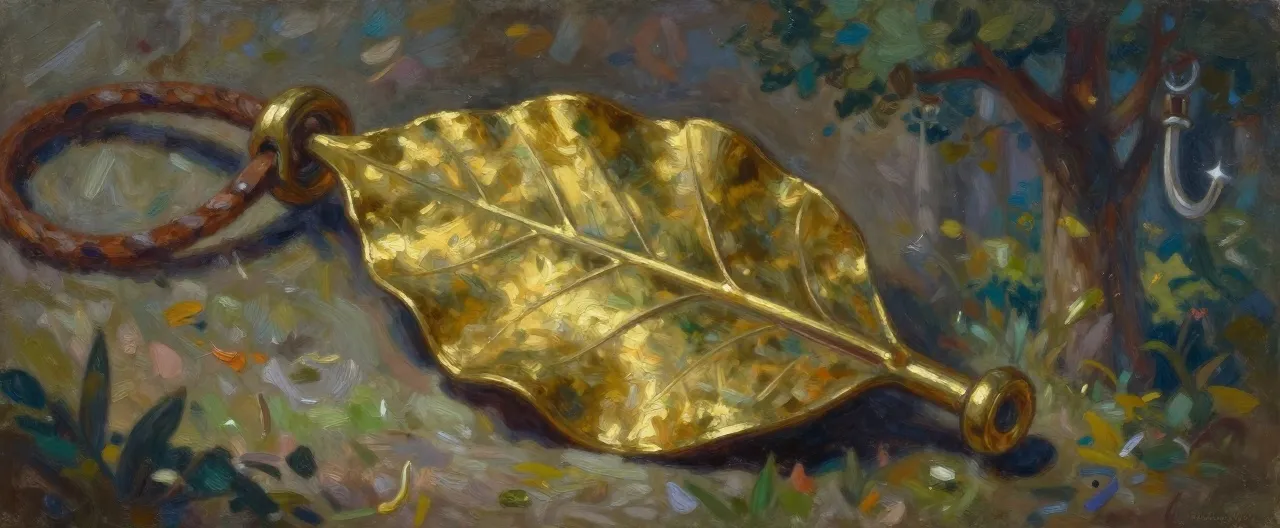
The orchard rings. Every leaf is a thin brass plate, and the wind walks through them like a hand over a harp. At the grove's heart stands the anchor-tree, a trunk of dull gold as thick as a mill wheel — and driven into its bark, chest-high, is a black iron wedge the size of a door-bolt, humming.

Running this scene

The wedge is a Ratchet Crew unkeying device. Pulling it is a DC 15 Strength check or a DC 14 Dexterity check with thieves' tools; failure deals 2d6 thunder damage to the puller and alerts two Ratchet Crew saboteurs hiding in the orchard. Corwin Ash has been hiding in his shed since the lurch and knows the wedge was planted by a woman with a brass hand — Marisel Quill herself. Tessa Vane is hiding in the shed too; she followed the saboteurs and saw them leave a second crate on the lake road, marked for Hollowmere.

Checks
  • DC 15 Strength (Athletics) or DC 14 Dexterity with thieves' tools to pull the wedge without harm.
  • DC 13 Wisdom (Perception) to spot the two saboteurs before they act.
  • DC 12 Charisma (Intimidation) or DC 14 Charisma (Persuasion) to make a captured saboteur talk.
  • DC 13 Intelligence (Arcana) to read the wedge's resonance: it is tuned to the town's key-frequency.
Clues
  • The wedge is tuned to Tallymarket's key-frequency; a second wedge would unkey the whole Sliver.
  • A captured saboteur names Marisel Quill and says the crew's next drop is at Hollowmere.
  • Tessa Vane saw a crate marked with a hollow-mere tally carried south along the lake road.
Where next
  • Tessa's directions and the crate's tally lead south along the lake road to Hollowmere.
  • Corwin asks the party to carry the wedge to the Warden Bastion once Hollowmere is safe.
  • The saboteurs' oilskin coats carry a Sump Gears laundry mark, a clue for Act II.

The Town That Is Leaving

The lakeside square of Hollowmere, where the northern half of the town hangs over open fog

Read aloud

Half of Hollowmere is still here. The other half — eleven houses, the mill and the old bell tower — hangs out over the grey, held to the rest by three iron key-bolts the width of a man's arm. The bolts are screaming. Below them, the Deep Mist turns slowly, and something in it turns with them.

Running this scene

The Ratchet Crew's crate holds a second unkeying wedge, already half-driven into the middle key-bolt. Odile Fen knows the bolts' rhythm and can guide the party. Captain Rusk Halloran holds the southern half with six guards and will not let anyone cross without orders. Nib can walk the drifting half safely and will guide the party for a kind word. If the party fails, the northern half tears loose at the end of the scene and drifts into the Mist; the town survives but loses eleven families.

Checks
  • DC 14 Dexterity (Acrobatics) to cross the tilting key-bolts to the drifting half.
  • DC 15 Strength (Athletics) or DC 13 Intelligence with tinker's tools to re-seat the middle key-bolt.
  • DC 13 Charisma (Persuasion) to talk Captain Halloran into letting the party cross.
  • DC 12 Wisdom (Insight) on Nib: the child is mist-touched and hears the Deep Mist as a low singing.
Clues
  • The crate's wedge is stamped with the same ratchet mark as the orchard wedge.
  • Odile Fen says the bolts were re-keyed only a month ago — by a Keywarden engineer named Tobias Quill.
  • Nib says the Mist has been 'counting' the town for three nights and will finish soon.
Where next
  • Captain Halloran, shamed or persuaded, offers an escort north to the Warden Bastion of the Sixth Key.
  • Odile asks the party to carry the town's tally of the lost to the Bastion.
  • Nib will follow the party if treated kindly, and can hear the Mist anywhere on the ring.

The Traitor in the Bastion

The key-hall of the Warden Bastion of the Sixth Key, a round chamber of brass pillars and hanging keys

Read aloud

The key-hall is a wheel of brass pillars, and from every pillar hangs a key the length of your forearm. Warden-Commander Sela Brant stands at the hub with her hand on the master-ring. 'Two towns unkeyed in a month,' she says. 'Both bolts re-keyed by my own engineer. I want the name, and I want it before the Ring lurches again.'

Running this scene

The traitor is Enginewright Tobias Quill, brother of Marisel Quill. He is not a villain — he is a frightened man who has been blackmailed: the Ratchet Crew holds his daughter. He re-keyed the bolts to the Crew's frequency. If confronted gently, he confesses and gives the party the Crew's route into the Fourth Ring. If confronted violently, he flees to the Bastion's gear-vault and must be caught. Sela Brant will not execute him; she wants the truth. Quartermaster Hulm sells gear and can identify the Crew's oil.

Checks
  • DC 15 Intelligence (Investigation) in the key-hall: the re-keying log has been altered in Tobias Quill's hand.
  • DC 14 Wisdom (Insight) on Tobias: he is terrified, not triumphant.
  • DC 13 Charisma (Persuasion) to get Tobias to confess without violence.
  • DC 15 Dexterity (Acrobatics) to catch Tobias in the gear-vault if he flees.
Clues
  • Tobias confesses: the Ratchet Crew holds his daughter Lira in the Sump Gears of Ratchetworks.
  • The Crew's route into the Fourth Ring runs through the Ratchetworks freight-lifts.
  • Tobias names Marisel Quill as the Crew's field hand and 'the Unkeyed Warden' as its master.
Where next
  • Sela Brant grants the party a Warden's pass and a place on the next freight-lift down to the Fourth Ring.
  • Tobias asks the party to find his daughter in the Sump Gears.
  • Hulm sells the party a confiscated Sump Lantern and a set of Crew oilskins for a fair price.

Milestone: The party reaches 5th level when they leave the Warden Bastion with a Warden's pass and take the freight-lift down to the Fourth Ring.

Act II: The City That Turns

Recommended level: 5–10

The party descends to the Fourth Ring and finds the Ratchet Crew's industrial base. In Ratchetworks they learn the Crew is building a great unkeying engine; in the Sump Gears they find the workshop, free Tobias Quill's daughter, and learn the engine will be tested at the Driftline. At Marrow Spire they break the Hollow Cantor's ritual and learn that the Crew's master is a man called the Unkeyed Warden. At the Driftline they fight Marisel Quill, save a drifting Sliver, and discover the engine's core is a fragment of the Master Key.

Objectives

  • Find Marisel Quill's workshop in Ratchetworks and learn what the Ratchet Crew is building.
  • Win Ratchet-Mother Grizel's help and free Lira Quill from the Crew's workshop.
  • Break Ilse Marrow's ritual at Marrow Spire and end the Choir's hold on the Fourth Ring.
  • Save the drifting Sliver at the Driftline and stop the unkeying engine.
  • Learn the identity of the Unkeyed Warden and the road down to the First Ring.

The City That Turns

The Grand Gearhall of Ratchetworks, a cathedral of rotating cogs above the city's central shaft

Read aloud

Ratchetworks does not sit still. The whole city is a machine, and the machine is a city: streets that slide, stairways that turn, houses bolted to gear-teeth the size of barns. In the Grand Gearhall, Foreman Dace Kettle wipes brass dust from his face and shouts over the turning. 'You want the Ratchet Crew? So do I. They've been stealing my lifts.'

Running this scene

Marisel Quill's workshop is hidden in the Sump Gears, the undercity beneath the city. Dace Kettle can point the party to the Sump Gears but will not go himself. Lady Ysolde Marrow is Ilse Marrow's sister and is quietly funding the Choir; she will try to steer the party away from the Spire. Sergeant Orla Vint will help the party if they show her the Warden's pass. Archivist Pim has the city's key-register and can name the Crew's safehouses.

Checks
  • DC 14 Intelligence (Investigation) in the key-register: three safehouses are listed under false tallies.
  • DC 13 Charisma (Persuasion) with Dace Kettle: he gives the party a lift-key to the Sump Gears.
  • DC 15 Wisdom (Insight) on Lady Ysolde: she is lying about her sister.
  • DC 12 Wisdom (Perception) in the streets: a Crew lookout is following the party.
Clues
  • The Crew is building a great unkeying engine, not just wedges.
  • Lady Ysolde Marrow sends tithes to Marrow Spire under a false tally.
  • The Crew's safehouses are in the Sump Gears, below the third lift.
Where next
  • Dace Kettle's lift-key opens the descent to the Sump Gears.
  • Sergeant Vint offers to escort the party as far as the third lift.
  • Pim's list names the workshop's false tally and the street above it.

The Ratchet-Mother's Price

The Sump Gears, a dripping undercity of flooded gear-pits and lantern-lit walkways

Read aloud

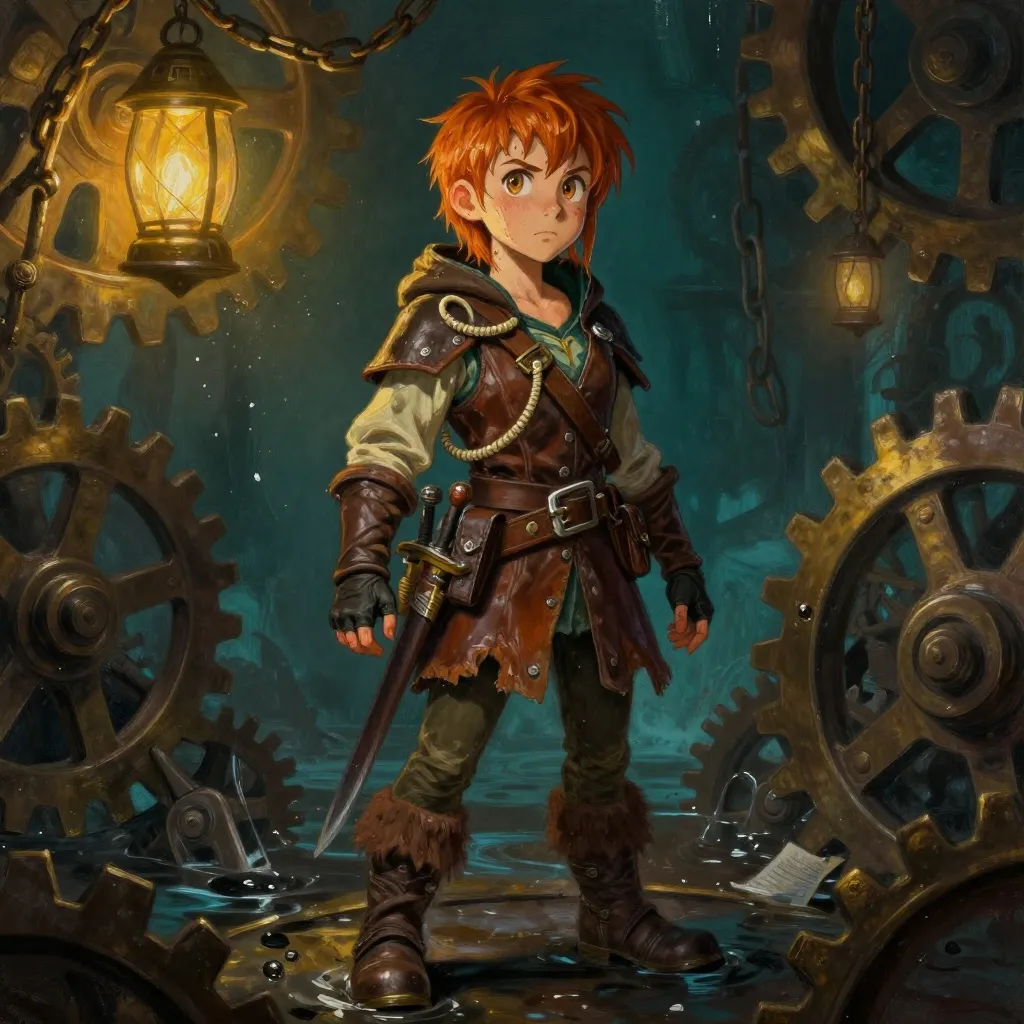
Below Ratchetworks the gears keep turning, but slowly, half-drowned in black water. Lanterns hang from chains between the teeth. On a throne made of a broken governor, Ratchet-Mother Grizel counts coins with three fingers and watches you with the other two. 'Everyone comes down here wanting something,' she says. 'Nobody comes down here wanting to pay.'

Running this scene

Grizel holds the Sump Gears and knows where Marisel Quill's workshop is, but she wants the Crew's stolen tithe returned first. Tobias Quill's daughter, Lira Quill, is held in the workshop as a hostage. Tick, a gear-orphan, can guide the party through the flooded pits. If the party attacks Grizel, the undercity turns on them and the workshop is warned. If they pay or do her errand, she gives them the workshop's location and two of her people as guides.

Checks
  • DC 14 Charisma (Persuasion) or DC 15 Charisma (Intimidation) to move Grizel.
  • DC 13 Dexterity (Stealth) to cross the flooded gear-pits without waking the pit-eels.
  • DC 15 Intelligence (Investigation) in the workshop: the unkeying engine's plans name the Driftline.
  • DC 12 Wisdom (Perception) to spot Lira Quill's cell behind the workshop's gear-wall.
Clues
  • The unkeying engine is to be tested at the Driftline, on the Fourth Ring's edge.
  • Marisel Quill has gone ahead to Marrow Spire to meet the Hollow Cantor.
  • Lira Quill says her father re-keyed the bolts because the Crew threatened to unkey her Sliver.
Where next
  • Grizel's guides lead the party up to the Spire road.
  • Lira Quill asks the party to take her back to the Bastion when the road is safe.
  • The workshop's plans show a service shaft from the Driftline down to the First Ring.

The Hollow Cantor's Song

The nave of Marrow Spire, a hollow brass tower open to the fog at its crown

Read aloud

Marrow Spire has no roof. The fog comes down into it like water into a well, and at the bottom of the well the Choir is singing. Hundreds of voices, one note, and the note is not a note — it is a question, and the fog is answering. Brother Anselm Crowe pulls you into the shadow of a pillar. 'She is three verses from opening the Spire,' he whispers. 'When she finishes, the Mist comes in.'

Running this scene

Ilse Marrow is performing a three-verse ritual to open Marrow Spire to the Deep Mist. Each verse takes 3 rounds; the party can interrupt by breaking the choir's focus (three brass chimes), silencing the Cantor, or disrupting the mist-condensers. Sister Wren Hallow leads the Choir's guards and fights to protect the ritual. Anselm Crowe, a Choir defector, fights beside the party. If the ritual completes, the Spire opens and a wave of mist-touched creatures floods the Fourth Ring; the party can still close it, but at the cost of the Spire's people.

Checks
  • DC 15 Intelligence (Arcana) to identify the three chimes that anchor the ritual.
  • DC 14 Dexterity (Sleight of Hand) to steal a chime mid-verse.
  • DC 16 Charisma (Persuasion) to turn a Choir singer against the Cantor.
  • DC 15 Constitution saving throw to resist the Cantor's song (charmed) while crossing the nave.
Clues
  • Ilse Marrow speaks of 'the Unkeyed Warden' as her master and calls the Mist 'the Open Hand'.
  • The Cantor's song is tuned to the same frequency as the unkeying wedges.
  • Anselm Crowe knows the Choir's next gathering is at the Driftline.
Where next
  • Anselm leads the party down the Spire's back stair toward the Driftline.
  • A captured Choir singer says the Cantor will meet the Unkeyed Warden at the Driftline within three days.
  • If Ilse Marrow survives, she flees toward the Cage Core and appears again in the finale.

The Edge of the Ring

The Driftline, the raw edge of the Fourth Ring where a Sliver is tearing loose into the Deep Mist

Read aloud

The Driftline is not a cliff. It is a wound. The Fourth Ring simply stops, and beyond it the Deep Mist stands up like a wall of grey water, and inside the wall there are shapes that are almost faces. A mile out, a Sliver the size of a county is turning slowly away from the Ring, and the people on it are still waving.

Running this scene

Marisel Quill is here with the unkeying engine, testing it on a small Sliver before turning it on the Fourth Ring itself. Salvage-Captain Rooke and the Freefall Salvagers are trying to anchor the drifting Sliver with harpoon-lines. The party can fight Quill, sabotage the engine, or both. If the engine completes its cycle, the drifting Sliver is consumed by the Mist and everyone on it is lost; the party can still save the Sliver by re-keying it with the Brass Orchard wedge. Quill retreats if reduced to a third of her hit points, taking the engine's core with her toward the First Ring.

Checks
  • DC 15 Strength (Athletics) to haul an anchor-line to the drifting Sliver.
  • DC 16 Intelligence (Arcana or tinker's tools) to reverse the unkeying engine's cycle.
  • DC 14 Dexterity (Acrobatics) to cross the harpoon-lines to the drifting Sliver.
  • DC 15 Wisdom (Perception) to spot Quill's ambush among the salvage cranes.
Clues
  • The engine's core is a fragment of the Grand Cage's own master key.
  • Quill says the Unkeyed Warden is already at the Cage Core, 'finishing what the first Wardens started'.
  • Rooke's charts show a service shaft from the Driftline down to the First Ring.
Where next
  • Rooke's charts and the service shaft lead down to the Threshold of Keys.
  • If Quill escapes, she flees down the same shaft, and the party can follow.
  • Rooke will trade a copy of his Driftline chart for help hauling a line.

Milestone: The party reaches 10th level when they take the service shaft from the Driftline down to the Threshold of Keys.

Act III: The Grand Cage

Recommended level: 10–15

The party descends through the service shaft to the First Ring and enters the Cage Core. At the Threshold of Keys they learn the Cage was built to keep something out, not in. In the ruined Unkeyed Ward they find Ossian Vey's sister Sable, the last Archivist, and learn that the Master Key is already turning. At the Grand Cage they confront Ossian Vey, Ilse Marrow and Vessaline Roke, and must decide whether to re-key the Cage, reforge it, or let it open.

Objectives

  • Open the Threshold of Keys and enter the Cage Core.
  • Find the Master Key's resting place in the Unkeyed Ward and learn how Ossian Vey means to use it.
  • Stop Ossian Vey from completing the third turn of the Master Key.
  • Decide the fate of the Grand Cage: re-key it, reforge it, or open it.
  • Deal with Vessaline Roke, who wants the Cage for herself.

The Threshold of Keys

The Threshold of Keys, a vast brass door set in the inner shell of the First Ring

Read aloud

The door is a mile wide and has no handle. It is covered, every inch, in keyholes — thousands of them, in rows, in spirals, in patterns that hurt to follow. An old figure in a Warden's coat sits on the step before it, whittling a key out of a turnip. 'You're late,' says Gate-Warden Nim. 'He went through three days ago. I've been waiting to see who'd come after.'

Running this scene

The Threshold opens only for a key that is not a key — a living Warden's oath. Nim is the last Gate-Warden and can open the door, but he will only do it for someone who swears the Warden's oath and means it. Ossian Vey passed through by unkeying the door's lock from the inside, leaving a crack. The party can enter through the crack (dangerous), or take the oath (Nim opens the door and gives them the Threshold Key). Vessaline Roke is watching from the rocks with her mercenaries and will try to follow the party through.

Checks
  • DC 15 Charisma (Persuasion) or a genuine oath to convince Nim to open the door.
  • DC 16 Dexterity (Acrobatics) to squeeze through the crack without being cut by the door's teeth.
  • DC 14 Wisdom (Perception) to spot Vessaline Roke's mercenaries in the rocks.
  • DC 15 Intelligence (History) to read the door's keyholes: they are the names of the hundred Slivers.
Clues
  • Nim says the Cage was built to keep something out, not to keep the Slivers in.
  • The door's keyholes are the names of the hundred Slivers; three are dark.
  • Ossian Vey came through with a fragment of the master key and a woman with a brass hand.
Where next
  • The open Threshold leads into the Unkeyed Ward.
  • Nim gives the party the Threshold Key and asks them to bring back the Warden-Prime's oath-ring.
  • If the party takes the oath, they can re-key the Cage in the finale without Sable Vey's help.

The City of the First Wardens

The Unkeyed Ward, a ruined city of red brick and broken towers inside the Cage Core

Read aloud

The city inside the Cage is dead, and it died in a hurry. Red brick towers stand with their roofs gone, their windows pointed at nothing. In the streets, the paving stones have been pulled up in long lines, as if someone was looking for something buried. Sable Vey walks ahead of you with a lantern, and does not look at the bodies. 'My brother did this,' she says. 'He was always thorough.'

Running this scene

Sable Vey is Ossian Vey's sister and the last Archivist of the Cage. She has been hiding in the Ward for a year, cataloguing what her brother has taken. Curator Halden Roke is preserved in a stasis vault beneath the archive and can be woken to answer one question. The Master Key's resting place is the Hall of Keys at the Ward's centre, now empty — Ossian took the Key three days ago. Vessaline Roke's mercenaries arrive at the end of the scene and try to take the archive by force.

Checks
  • DC 15 Intelligence (Investigation) in the archive: Ossian's notes describe the Cage as a 'lid'.
  • DC 14 Charisma (Persuasion) to convince Sable to come with the party to the Grand Cage.
  • DC 16 Intelligence (Arcana) to read the Hall of Keys' empty socket: the Master Key was removed, not stolen.
  • DC 15 Wisdom (Perception) to hear Vessaline Roke's mercenaries entering the Ward.
Clues
  • The Cage was built by the first Wardens to hold back the Deep Mist, which is a single living thing.
  • Ossian Vey believes the Mist is a god and the Cage a blasphemy; he has never heard it speak.
  • The Master Key can unkey the Cage — or re-key it, if a Warden's oath is spoken over it.
Where next
  • Sable Vey leads the party from the Unkeyed Ward to the Grand Cage.
  • Halden Roke's answer points to the Cage's heart, where the Master Key is already turning.
  • If the party took Nim's oath, they can re-key the Cage themselves; if not, they need Sable or Elowen Vane.

The Grand Cage

The heart of the World Engine, where the Master Key turns in the Grand Cage's lock

Read aloud

The heart of the world is a room the size of a sky, and in the middle of it a key the size of a tower is turning. Ossian Vey stands on the key's shoulder with his hands in the gears, and the Deep Mist is coming in through the cracks in the walls like water through a hull. 'You're just in time,' he calls down. 'Listen. It's singing.' And it is. It is singing, and the song is hungry.

Running this scene

Ossian Vey is three turns from unkeying the Cage completely. Each turn takes 5 rounds; the party can stop him by fighting him, by jamming the Master Key, or by speaking the Warden's oath over it (which requires a character to have taken Nim's oath or to be a Warden). Ilse Marrow is here if she survived Marrow Spire, singing the Mist through the cracks; Marisel Quill is here if she escaped the Driftline, defending the key.

Vessaline Roke arrives at the end of the third turn with her mercenaries and tries to seize the Key. Warden-Prime Elowen Vane is imprisoned in the Cage's lock and can be freed to re-key it. The Mist itself is not a monster to be fought; it is a pressure, and it can only be held back or let in.

Checks
  • DC 17 Strength (Athletics) or DC 16 Intelligence (tinker's tools) to jam the Master Key for one turn.
  • DC 16 Charisma (Persuasion) to turn Ossian Vey from his course with the truth about the Mist.
  • DC 15 Constitution saving throw each round in the heart-room to resist the Mist's song (psychic damage).
  • DC 18 Intelligence (Arcana) to re-key the Cage with the Master Key and a Warden's oath.
Clues
  • The Mist is one mind, and it has been eating the unkeyed Slivers, not freeing them.
  • Ossian Vey has never heard the Mist speak; he has only heard it sing.
  • The Cage can be re-keyed, but only by a Warden who means the oath.
Where next
  • This is the final scene of the campaign; its outcome determines the epilogue.
  • If the Cage is re-keyed, the party can return through the Threshold to a world that will never know what almost happened.
  • If the Cage is opened, the epilogue follows the Engine being eaten ring by ring over the following year.

Milestone: The party reaches 15th level when they enter the Grand Cage's heart-room for the final scene.

Monsters & Enemies

Brass Chime Moth Brass Chime Moth Completed · CR 1/4 · Construct

Tiny brass-plated moth with filigree wings, perched on metallic leaf, emitting visible sound waves from vibrating wings against dark orchar…

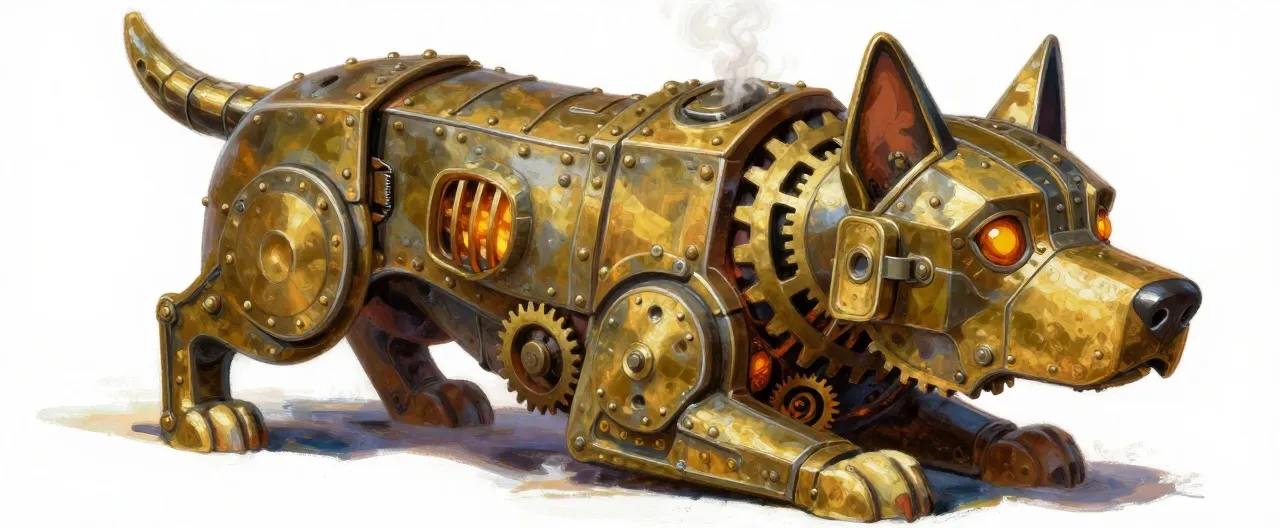
Wedge-Hound Wedge-Hound Completed · CR 2 · Construct

A dog-shaped construct of riveted iron plates and brass gears, resembling a stack of crates when still. Glowing amber eyes visible through …

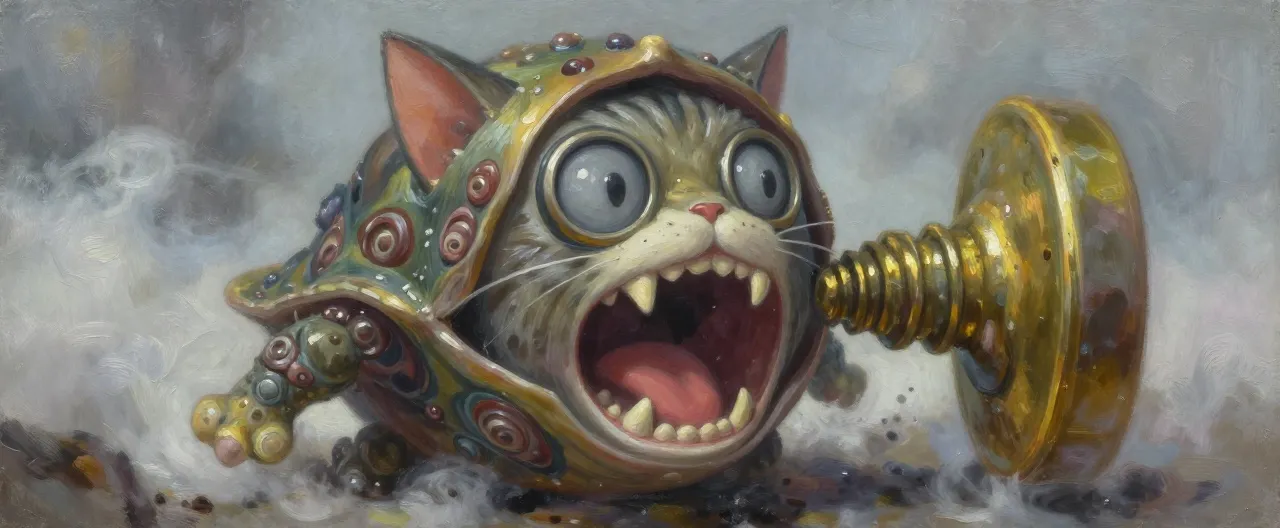
Bolt-Screamer Bolt-Screamer Completed · CR 3 · Aberration

Small cat-sized aberration fused to a large brass bolt. Wet grey eyes in a ring, barnacle-covered shell, screaming mouth open wide. Foggy b…

Tally-Gnaw Tally-Gnaw Completed · CR 1 · Undead

A small, beetle-like undead with a flat brass carapace engraved with faded runes. Its mouth is a chisel-like beak dripping with necrotic re…

Sump Pit-Eel Sump Pit-Eel Completed · CR 1/2 · Beast

A long, man-sized eel with oil-slicked black skin and a lamprey mouth, lurking in dark, oily water among gears. Blind eyes, wet tar shine, …

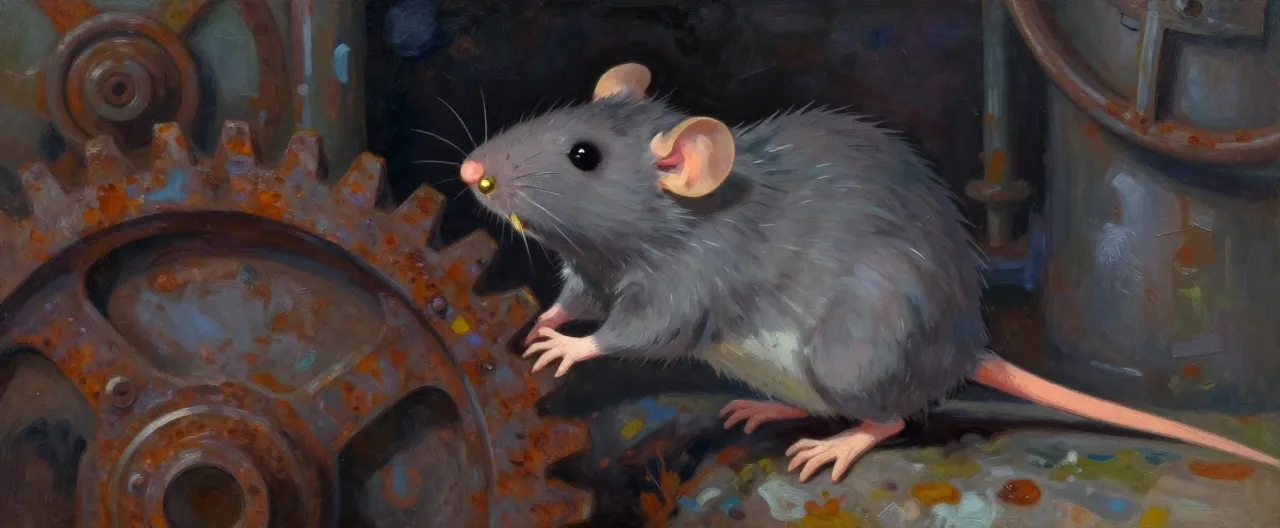
Gear-Gnaw Rat Gear-Gnaw Rat Completed · CR 1/4 · Beast

Tiny grey rat with oiled fur and brass-capped incisors, clinging to a rusted gear in a dim industrial undercity setting.

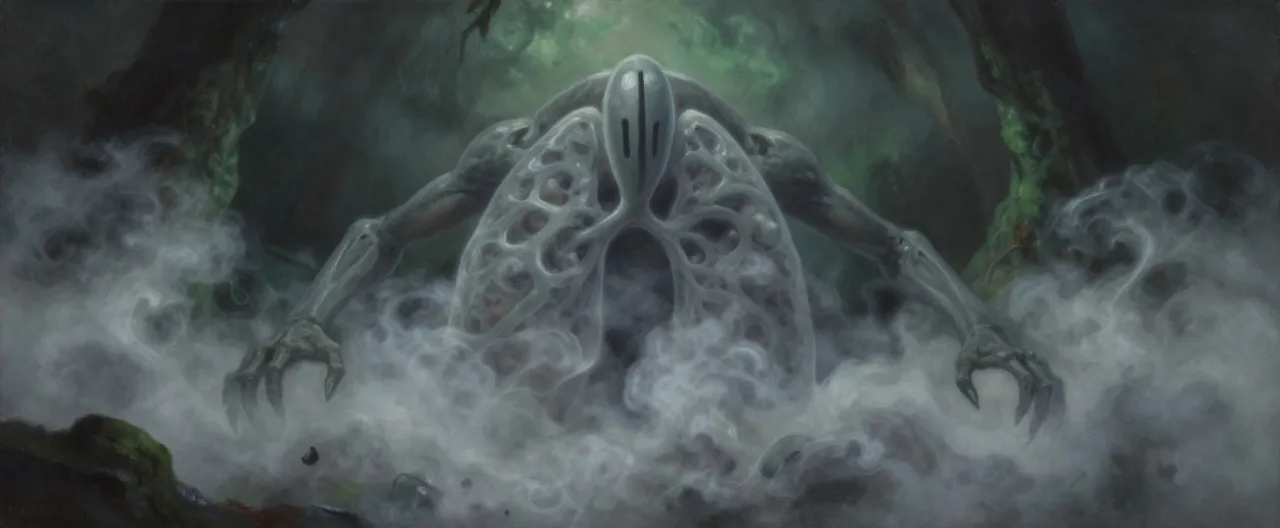
Fog-Breather Fog-Breather Completed · CR 5 · Aberration

A hunched, translucent lung-like aberration with long grey arms and a vertical slit face, filled with swirling grey fog. Dark, eerie atmosp…

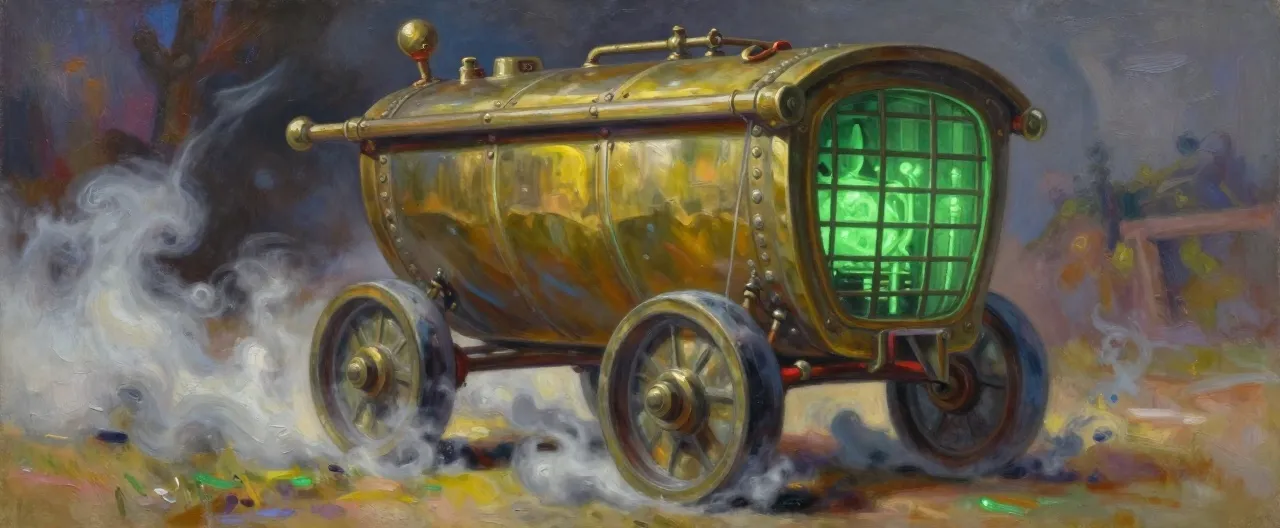
Condenser Husk Condenser Husk Completed · CR 6 · Construct

A large brass cart-frame animated by swirling gray mist, walking on four piston legs with a grated faceplate glowing faintly green from int…

Drift-Skimmer Drift-Skimmer Completed · CR 8 · Aberration

A large manta-shaped glider with grey membrane wings and brass ribbing, swimming through thick fog. Its underside is covered in hundreds of…

Keyhole Crawler Keyhole Crawler Completed · CR 9 · Aberration

Flattened grey chitin aberration with brass joints, narrow body fitting keyholes, key-shaped claws, many legs, lurking in shadows.

Warden Gear-Husk Warden Gear-Husk Completed · CR 11 · Construct

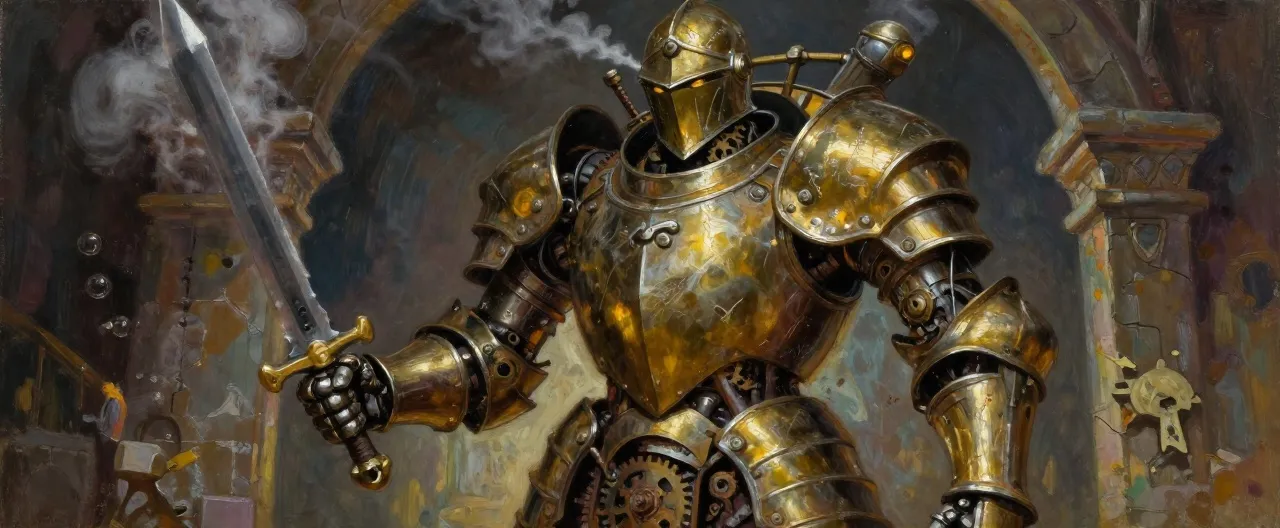
A large, hollow suit of tarnished brass plate armor held together by a spine made of interlocking iron keys. It wields a jagged sword shape…

Mist-Song Wisp Mist-Song Wisp Completed · CR 13 · Aberration

A humanoid-sized knot of grey fog with a vague, face-like indentation. It floats silently, emanating a visible ripple of sound waves. Ether…

Villain Plans

Ossian Vey, the Unkeyed Warden Character Sheet

BBEG — the last Warden-Archivist of the Grand Cage, now its unmaker

Motivation

Ossian has read the first Wardens' sealed records and believes the Grand Cage is a prison built to enslave the hundred Slivers, and that the Deep Mist is a living god the Wardens chained outside the world. He wants to unkey every ring and let the Slivers drift free into what he is certain is paradise. He is wrong, and he has never once heard the Mist speak — only sing.

Personality

Calm, courteous, and utterly certain. He calls the party 'colleagues' and means it. He explains his reasoning at length and is genuinely interested in counterarguments, which he has never heard from anyone who survived to give them. He does not gloat and does not lie.

Resources

  • The Master Key of the Grand Cage, taken from the Hall of Keys
  • A fragment of the Master Key, given to Marisel Quill for the unkeying engine
  • The Ratchet Crew's cells in every ring
  • The loyalty of the Mistbound Choir, which believes him a prophet
  • A year of undisturbed work inside the Cage Core
  • The sealed records of the first Wardens

Battle Plan

Ossian fights only when the argument fails. He opens by unkeying the floor beneath the party's feet, then uses the Master Key to turn the heart-room's machinery against them, retreating toward the lock and continuing his three turns whenever he is not pressed. He never targets a downed foe and offers surrender twice. If reduced below a quarter of his hit points, he makes one last turn of the Key rather than defend himself.

Defeat or Redemption

He can be killed, in which case the Master Key falls to the party and the Cage can still be re-keyed. He can be turned: if the party can make him hear the Mist's hunger for what it is — through Sable Vey, through the eaten Sliver at the Driftline, or through the Mist's own song in the heart-room — he breaks, and will re-key the Cage himself with his dying breath. He can also win, and the campaign ends with the Engine being eaten ring by ring.

Marisel Quill, the Ratchet Character Sheet

Lieutenant — Ossian's field hand and chief saboteur

Motivation

Marisel was an Enginewright of the Keywardens until they unkeyed her family's Sliver as punishment for a debt, killing her parents and her youngest brother. She joined the Ratchet Crew the same year and has never regretted it. She wants the Cage broken because the Cage broke her first.

Personality

Brisk, profane, and practical. She treats sabotage as a craft and takes pride in clean work. She will talk to the party while wiring a charge, and she will warn them to stand back.

Resources

  • The Ratchet Crew's field cells and safehouses
  • A brass prosthetic hand that hides tools and a key-fragment
  • The unkeying engine, built from a fragment of the Master Key
  • Tobias Quill, her brother, blackmailed into re-keying bolts
  • Lira Quill, her niece, held as a hostage

Battle Plan

Marisel fights in three stages: first with planted charges and collapsing ground, then with a ratchet-blade and thrown wedges, then by retreating through a prepared escape route. She never fights to the death unless her niece is threatened. If reduced to a third of her hit points, she takes the engine's core and runs for the First Ring.

Defeat or Redemption

She can be killed, captured, or turned if the party frees Lira Quill and shows her that the Mist eats what it takes. Turned, she will sabotage her own engine and guide the party down the service shaft. Captured, she will trade the Crew's routes for her niece's safety.

Ilse Marrow, the Hollow Cantor Character Sheet

Lieutenant — leader of the Mistbound Choir

Motivation

Ilse heard the Deep Mist speak when she was a child, standing on a drifting Sliver, and it told her she was loved. She has spent forty years singing it into the Engine so that it can come and love everyone. She believes the Cage is a blasphemy and the Keywardens are jailers of a god.

Personality

Serene, warm, and completely unshakeable. She greets the party as guests, offers them tea, and will genuinely grieve if she has to kill them. She sings between sentences.

Resources

  • The Mistbound Choir, hundreds of singers across the Fourth Ring
  • Marrow Spire, a hollow brass tower open to the fog
  • Mist-touched servants who do her bidding without question
  • Lady Ysolde Marrow, her sister, who funds the Choir from Ratchetworks
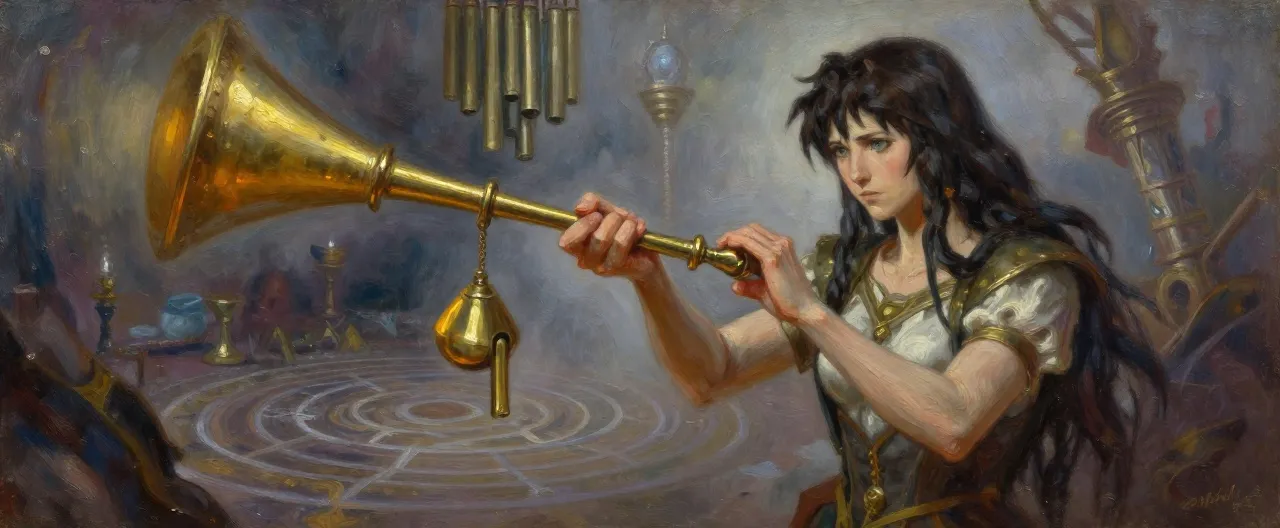
  • The Cantor's Throat, a chime that charms those who hear it

Battle Plan

Ilse does not leave her ritual circle unless forced. She sings in three verses, each taking three rounds, and defends herself with the Cantor's Throat, mist-condensers and the Choir's guards. If the ritual is broken, she fights with a chime-blade and a wall of fog, and retreats to the Grand Cage to sing the Mist through the Cage's cracks.

Defeat or Redemption

She can be killed, silenced, or — hardest — made to hear the Mist's hunger rather than its song. If the party can bring her to the Driftline and make her watch a Sliver being eaten, she breaks and will sing the Cage shut instead. She will not surrender otherwise.

Vessaline Roke, the Counter-Key Character Sheet

Rival — a would-be Warden-Prime who wants the Cage for herself

Motivation

Vessaline is a disgraced Keywarden captain who believes the order is too weak to hold the Engine and that she is the only person strong enough to rule it. She wants the Master Key, not the Cage's destruction, and she will let Ossian and the party bleed each other to get it.

Personality

Cold, courteous, and endlessly patient. She speaks to the party as if they were already her subjects, and she keeps every promise she makes, which is what makes her dangerous.

Resources

  • A company of forty mercenaries, veterans of the ring-wars
  • A stolen key-fragment that opens most Warden locks
  • A hidden vault in the Unkeyed Ward
  • Informants in the Sliver Concord and the Keywardens
  • Sister Aveline Roke, her cousin, placed inside the Keywarden order

Battle Plan

Vessaline never fights the party and Ossian at the same time. She shadows them through Act III, arrives at the Grand Cage at the end of Ossian's third turn, and attacks whoever is weakest. She fights with a key-blade and a shield of locked air, and she retreats rather than die, intending to try again in a year.

Defeat or Redemption

She can be killed, driven off, or — if the party offers her the Warden-Prime's oath-ring and a genuine place in the new order — recruited as a grudging ally for the final fight. She will never accept a subordinate role.

Running Notes

Recommended party: Four to five characters of 1st level, with at least one healer and one character able to deal with constructs and aberrations. Proficiency in Investigation, Arcana, tinker's tools or thieves' tools will be valuable throughout; a character with History or a Warden's oath will matter enormously in Act III.

Session Zero

Before play, hold a session zero and cover four things. First, tone: this is industrial fantasy with horror built on scale and patience rather than gore. The Deep Mist never hurries, and the worst things in the module happen slowly to people who did not deserve them. Ask whether anyone wants the horror dialled down; if so, keep the fog offscreen and describe its effects through missing people and wrong sounds. Second, safety tools: use a lines-and-veils list and an X-card, and pay particular attention to child endangerment (Lira Quill, the gear-orphans, Nib), drowning and flooding, and body horror from mist-touching. Third, content expectations: the campaign is investigation-heavy in Act I, urban and dungeon-heavy in Act II, and ruin-and-revelation in Act III. Tell the players that combat is not always the answer and that two of the four villains can be turned rather than killed. Fourth, table logistics: confirm the party has at least one healer and one character who can deal with constructs and aberrations, and confirm that at least one character is willing to take the Warden's oath, because that choice determines the campaign's ending. Build characters together so the four personal quests are woven into the same town. Finally, agree on how you will handle the tally of the lost: the module asks the party to remember names, and the table should decide whether that is a written list, a spoken ritual, or both.

Scaling Guidance

The module is written for four characters starting at 1st level and finishing at 15th. Each encounter lists a suggested level range and a difficulty rating of Low, Moderate or High, and its combatant roster is budgeted to land between 75% and 100% of that rating's XP budget for four characters. To scale for a larger party, add one or two creatures of the lowest-CR type already in the roster rather than introducing a new stat block; to scale for a smaller party, remove creatures of the highest-CR type first. If the party is one level above the suggested range, treat the encounter as one step easier; if one level below, treat it as one step harder. For a party of six, add roughly 50% to the roster's XP value; for a party of three, remove roughly 25%. Never scale a villain's hit points down without also reducing their damage output, and never add a second copy of a villain. If the party reaches an encounter without a long rest, reduce the roster by a quarter and let them find a defensible position. If they arrive fully rested and over-equipped, add one elite creature (a Bandit Captain, a Veteran, or a second custom monster of the same type) rather than inflating quantities. The finale at the Grand Cage assumes a fully rested party of four at 15th level with at least one magic item each; if the party is below that, extend Ossian Vey's turn clock from five rounds to seven and let the party jam the Master Key with a DC 15 check instead of DC 16.

DM Advice

Run the module as a chain of wedges. Every act has a physical object the Ratchet Crew has planted, and every clue should point at the next one: the orchard wedge points at Hollowmere, the Hollowmere crate points at the Sump Gears, the workshop plans point at the Driftline, and the engine's core points at the Cage Core. If the party gets lost, have an NPC hand them the next wedge rather than a hint. Keep the villains moving on a clock: Ossian Vey takes one turn of the Master Key per act, so by Act III he is three turns from finishing. Marisel Quill is always one step ahead of the party and always leaves something behind. Ilse Marrow's ritual has a visible three-verse clock, and Vessaline Roke should appear at least once per act doing something helpful and unsettling. Do not let the Deep Mist become a monster. It is weather, pressure and appetite, and it should never be fought directly. Reward investigation over combat: most encounters can be avoided, shortened or turned by talking, and the two best endings require the party to have listened rather than killed. Track the tally of the lost on a shared sheet; every Sliver the party fails to save gets a name, and the names matter in the finale. Finally, let the machinery be geography. Streets that slide, bolts that scream, and a key the size of a tower are the point of the setting, and the party should be able to touch, climb and jam all of it.

Failure States

  • If the party ignores the lurch at Tallymarket, the town's Sliver unkeys in ten days and the town is lost. Marnie Tallow's ledger is recovered from the wreckage by the Sliver Concord and sold to Ratchetworks.
  • If the party fails to re-seat Hollowmere's middle key-bolt, the northern half tears loose at the end of the scene and drifts into the Deep Mist. Eleven families are lost, Odile Fen writes the party's names in the barrow-book beside them, and Captain Rusk Halloran is broken by it.
  • If the party kills Enginewright Tobias Quill instead of confronting him, the Warden Bastion closes its gates to them, the Warden's Pass is never granted, and the party must reach the Fourth Ring by bribery or by stowing away on a Concord freight-lift, which costs them a week and a level of preparation.
  • If the party fails to free Lira Quill and the two gear-orphans from the Ratchet Crew's workshop, the children are moved to the Driftline and used as engine-hands. Marisel Quill cannot be turned in the finale, and the gear-orphans of the Sump Gears refuse to guide the party again.
  • If Ilse Marrow completes her three verses at Marrow Spire, the Spire opens and mist-touched creatures flood the Fourth Ring. The party can still close it, but the Spire's people are lost, the Choir becomes a hunted remnant, and Lady Ysolde Marrow is ruined and will not help them again.
  • If the unkeying engine completes its cycle at the Driftline, the drifting Sliver and everyone on it is consumed by the Deep Mist. The Fourth Ring's outer Slivers begin to drift within a month, and the Ratchet Crew's recruitment doubles.
  • If the party fails to complete Sable Vey's tally, they reach the Grand Cage without the argument that can turn Ossian Vey. He cannot be talked down, only fought or jammed, and the campaign's best ending is closed to them.
  • If Ossian Vey completes the third turn of the Master Key, the Grand Cage opens. The epilogue follows the World Engine being eaten ring by ring over the following year: the Sixth Ring goes first, then the Fifth, and the survivors flee inward toward a core that is already gone.
  • If Vessaline Roke seizes the Master Key, she re-keys the Cage on her own terms and declares herself Warden-Prime. The Engine survives, but the Keywardens become her personal army, the Ratchet Crew is exterminated, and the party is either pardoned as her subjects or hunted as her rivals.

Secrets & Clues

  • The town of Cinderhollow unkeyed and drifted into the Deep Mist three weeks ago; the Keywardens suppressed the news and the Sliver Concord is quietly moving goods off the Sixth Ring.
  • The black iron wedge in the Brass Orchard is stamped with a ratchet-and-cog mark — the sign of the Ratchet Crew — and it is tuned to Tallymarket's own key-frequency.
  • Enginewright Tobias Quill re-keyed the Sixth Ring's bolts to the Ratchet Crew's frequency because the Crew holds his daughter Lira in the Sump Gears and threatened to unkey her Sliver.
  • Nib, the mist-touched child of Hollowmere, hears the Deep Mist counting the town and knows it will finish in three nights; the child has told no one because no one asks.
  • The Ratchet Crew's unkeying engine is built around a fragment of the Grand Cage's own Master Key, broken off and given to Marisel Quill by Ossian Vey.
  • Lady Ysolde Marrow, magnate of Ratchetworks, is Ilse Marrow's sister and has been funding the Mistbound Choir for three years under a false tally.
  • The Sump Gears are slowly flooding because the Ratchet Crew has been drawing water from Ratchetworks' cooling system to test the unkeying engine.
  • The Threshold of Keys' keyholes are the names of the hundred Slivers, and seven of them are dark — seven Slivers have been eaten in the last decade, not three.
  • The Grand Cage was built by the first Wardens to hold the Deep Mist out, not to keep the Slivers in; the first Wardens abandoned the Unkeyed Ward after the Mist ate a ring.
  • The Deep Mist is a single living mind, and it has been eating the unkeyed Slivers rather than freeing them; Ossian Vey has only ever heard it sing, and the song is a hunting call.
  • The Master Key can re-key the Cage, but only if a living Warden speaks the Warden's oath over it and means it — Warden-Prime Elowen Vane can do it, and so can any character who took Gate-Warden Nim's oath.

Appendix

Downtime

Tally-Work

The character sits in a town tally-house and copies key-ledger entries, cross-checking bolt frequencies, grain tallies and debts. A full day of tally-work reveals discrepancies in a town's records: missing anchor-groves, altered frequencies, or payments to a buyer who should not exist.

Requirements: Access to a tally-house and a tally-keeper willing to let the character read the ledger. Proficiency in Calligrapher's Supplies or Investigation helps.

Rewards: One true discrepancy in the local key-ledger, plus 5 gp a day in copying fees. In Tallymarket, this reveals the unrecorded cellar grove and Marnie Tallow's falsified entries.

Time: One day per ledger examined.

Location: Tallymarket's Tally-House, the Warden Bastion's key-register, and Archivist Pim's office in Ratchetworks all hold ledgers worth reading.

Run this as a short scene with one DC 13 Intelligence (Investigation) check. On a failure, the character finds nothing but wastes the day; on a success, give a concrete clue, not a vague hint. A Ratchet Crew scout may notice the character reading and follow them afterward.

Grove-Listening

The character sits with an anchor-grove and listens to its chime, learning the Sliver's key-frequency by ear. A character who has listened to a grove can recognise that frequency elsewhere — in a wedge, a key-bolt, or a Choir hymn.

Requirements: Access to an anchor-grove and a quiet hour. Proficiency in Nature or Perception, or the Druidcraft cantrip, makes this reliable.

Rewards: The Sliver's key-frequency, recorded as a hum the character can recognise. This grants advantage on one check to identify a Ratchet Crew wedge or a Choir chime later in the campaign.

Time: One hour per grove, once per grove.

Location: The Brass Orchard, the Weighed Anchor cellar, Bell Meadow, and the anchor-bolt in the root-vault all work. The Marrow Spire crown is tuned to the same frequency and can be listened to as well.

This is the campaign's quietest downtime and its most useful. Let the player describe what their character hears. If they listen at Marrow Spire, they hear the Choir's note and the grove's note are the same, which is a major clue.

Gear-Scrounging

The character picks through the salvage markets of Ratchetworks and the Sump Gears for parts, tools and information. A day of scrounging turns up usable gear, a rumour, and usually someone who wants to know why you are asking.

Requirements: Access to a salvage market. Proficiency in tinker's tools or thieves' tools improves the haul.

Rewards: One common or uncommon item from the equipment list at half price, plus one rumour from the appendix. In the Sump Gears, a successful day also reveals one Crew safehouse or one flooded crawlway.

Time: One day.

Location: The freight-lift yards and lower streets of Ratchetworks, and Grizel's market in the Sump Gears. The Driftline camp has salvage but no market.

Roll a d6: on a 1, a Crew lookout spots the character and follows them. On a 6, the character finds something genuinely useful, such as a confiscated Sump Lantern or a set of Crew oilskins. Grizel takes a cut of any sale in her market.

Chime-Copying

The character copies a Choir hymn or a Warden's oath-text by hand, learning its rhythm and its meaning. Copying a hymn teaches the character to recognise the Choir's verses; copying the oath-text prepares a character to speak the Warden's oath in the finale.

Requirements: Access to a hymn or oath-text, and a quiet place to write. Proficiency in Calligrapher's Supplies or Religion helps.

Rewards: One copied verse or oath-text. A character who copies the full Warden's oath-text can speak it in the finale with advantage on the check to re-key the Cage.

Time: Two days per hymn or oath-text.

Location: Brother Anselm Crowe's notebook in Marrow Spire's undercroft, the Choir's scriptoriums, and the Unkeyed Ward's archive all hold texts worth copying.

This activity is the mechanical spine of the campaign's ending. Track which characters have copied the oath-text. A character who copies a Choir hymn and then hears the Mist sing must make a DC 13 Wisdom saving throw or be unable to sleep for a night.

Line-Hauling

The character works a shift on the Driftline with the Freefall Salvagers, hauling anchor-lines, setting harpoon-catapults and learning to read the fog. It is dangerous, well-paid work, and it teaches the Driftline's geography.

Requirements: Access to the Driftline camp and a willingness to work. Proficiency in Athletics or Survival is required; without it, the character is a liability and earns half.

Rewards: 15 gp a shift, plus a working knowledge of the Driftline's anchor-points. A character who hauls three shifts can walk the harpoon-lines without a check and gains advantage on checks to spot things in the fog.

Time: One day per shift.

Location: Salvage-Captain Rooke's camp at the Driftline, on the raw edge of the Fourth Ring.

Roll a d6 each shift: on a 1, a Drift-Skimmer takes someone off a line and the character must help haul them back. Rooke pays in coin and in charts, and he remembers who worked and who watched.

Rumors

  • They say Cinderhollow is still out there, drifting, and the people on it are still alive and still waving.
  • The Keywardens have not sent a report to the Warden-Prime in a year, because there is no Warden-Prime to send it to.
  • A woman with a brass hand has been buying lamp oil and rope in every town on the Sixth Ring.
  • The Concord is moving its good stock off the ring and leaving the cheap stuff behind, which tells you what the Concord thinks is going to happen.
  • The Ratchet Crew pays in Concord coin, which means somebody in the Concord is paying them.
  • There is a child in Hollowmere who can hear the fog counting, and the fog is nearly finished.
  • The Sump Gears are flooding because someone is draining the city's cooling water, and the city has not noticed yet.
  • Lady Ysolde Marrow has not been seen at her own mansion in a month, and her sister has not been seen at all.

Random Events

  • A street in Ratchetworks slides two blocks under the party's feet. Each character makes a DC 12 Dexterity saving throw or is carried off course and separated from the group for ten minutes.
  • A key-bolt somewhere on the ring screams for a full minute and then stops. Every character within earshot makes a DC 10 Constitution saving throw or is deafened for an hour.
  • A gear-orphan offers to guide the party for a copper and then asks, very quietly, whether they have seen a boy named Cog.
  • A Concord caravan passes on the road, its crates marked for Ratchetworks and its carter watching the party a little too carefully.
  • A mist-touched pilgrim asks the party for directions to Marrow Spire and will not take no for an answer.
  • A small aftershock lurch knocks over a cart in the market square and frightens every animal in town. Roll a d6; on a 1, a building on the north lane loses its chimney.
  • A Ratchet Crew scout follows the party for an hour and then vanishes into a crowd. If the party doubles back, they find a ratchet-token dropped in the street.
  • The Deep Mist rises a foot at the Driftline and then falls back. Every character who watched it must make a DC 12 Wisdom saving throw or be unable to sleep well for a night.

Treasure Parcels

  • Parcel A (Act I, Tallymarket): 25 gp in the Tally-House strongbox, a brass tally on a leather thong, and a sealed letter from Grenna Ost to a buyer in Ratchetworks.
  • Parcel B (Act I, Brass Orchard): the Orchard-Keeper's Chime, three unkeying wedges, 40 gp in Concord coin, and a drop-cache key for the lake road.
  • Parcel C (Act I, Hollowmere): 30 gp from the saboteurs, a Crew drop-manifest, and Odile Fen's sealed page from the barrow-book.
  • Parcel D (Act I, Warden Bastion): the Warden's Pass, a confiscated Sump Lantern at half price, and 60 gp from the extraction team.
  • Parcel E (Act II, Sump Gears): Grizel's tithe chest (120 gp and a protection ledger), the Sump Lantern, and a brass gear-tooth charm from a drowned orphan's satchel.
  • Parcel F (Act II, Ratchetworks): the Ratchet Blade from Dace Kettle's confiscated stock, 40 gp, and a lift-key worn smooth by years of use.
  • Parcel G (Act II, Marrow Spire): the Cantor's Throat, 300 gp in brass chimes, a sealed letter from Lady Ysolde Marrow, and Anselm Crowe's notebook.
  • Parcel H (Act II, Driftline): the Key-Fragment of the Master Key, Rooke's Driftline chart, 200 gp from the Crew's pay chest, and a hundred feet of key-metal harpoon line.
  • Parcel I (Act III, Threshold of Keys): the Threshold Key, 150 gp from Roke's mercenaries, a stolen key-fragment, and Vessaline Roke's written orders.
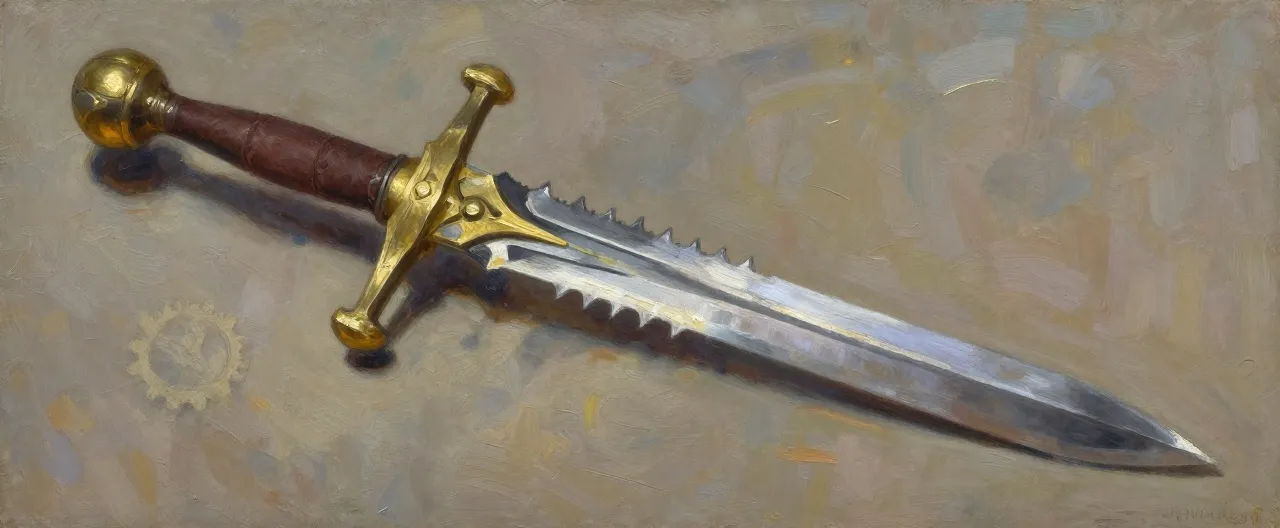
  • Parcel J (Act III, Unkeyed Ward): Sable's Archive Lens, the Warden-Prime's Oath-Ring, seven scratched names in the Hall of Keys' socket, and a key from the Gear-Husk's heap that opens any locked door in the Ward.

Spare Names

  • Sister Aveline Roke, Vessaline Roke's cousin, placed inside the Keywarden order as an informant.
  • Bolt-Wright Orrin Fenn, Halda Fenn's missing father, last seen on the north road out of Tallymarket twelve years ago.
  • Cog, Tick's older brother, taken by the Ratchet Crew and forced to work the unkeying engine.
  • Hask Verrin, a guild engineer in Ratchetworks who sells freight-lift schedules to the Ratchet Crew.
  • Bell Meadow, the third anchor-grove of Tallymarket, a meadow of brass grass east of the town.
  • Governor's Rest, a flooded gear-pit in the Sump Gears where Grizel's rivals were drowned.
  • The Long Tally, the road that runs the length of the Sixth Ring from Tallymarket to the Bastion.
  • Freight-Lift Nine, the shaft the party takes down to the Fourth Ring, and the one the Crew has been stealing.
  • Mother Sallow, an old woman in the Sump Gears who sells mist-touched children their first lantern.
  • Warden-Prime's Seat, the empty chair in the Bastion's key-hall where no one has sat for a year.

Starting Location

The Sixth Ring: The Tally Reaches

The Sixth Ring is the outermost inhabited ring of the World Engine, a frontier of small farming and mining Slivers strung along a single long road. Its towns are timber-built and self-reliant, its people count everything — grain, bolts, days, debts — because counting is how you know a Sliver is still keyed. The ring turns slowly enough that the sun crosses the sky in a long, even arc, and the Deep Mist is a grey line on the horizon that most people have never seen up close.

The Tally Reaches are named for the tally-houses that stand in every town, brass-floored counting houses where the key-ledger is kept. The Keywardens keep a bastion at the ring's main joint, and their grey-coated guards walk the roads. The Sliver Concord runs caravans between the towns and the freight-lifts. The Ratchet Crew has been here for a year, quietly, planting wedges.

Three weeks ago the town of Cinderhollow unkeyed and drifted into the Mist. The Keywardens have told no one. Now Tallymarket has lurched, and the ring's people are beginning to count the wrong things.

Secrets

  • The town of Cinderhollow unkeyed and drifted into the Deep Mist three weeks ago; the Keywardens have suppressed the news and the Concord is quietly moving goods off the ring.
  • Enginewright Tobias Quill has been re-keying the Sixth Ring's bolts to the Ratchet Crew's frequency because the Crew holds his daughter Lira in the Sump Gears.
  • Nib, the Fog-Child of Hollowmere, is mist-touched and can hear the Deep Mist counting the ring; the Mist has been counting for three nights and will finish soon.

Key Locations

Tallymarket

Tallymarket is a town of some four hundred people built around a market square of packed earth and a brass-floored tally-house. Its houses are timber and half-timbered, leaning together over narrow lanes, with slate roofs and shutters painted the same green. The town's three anchor-groves — the Brass Orchard, the Weighed Anchor's cellar, and Bell Meadow — are what hold its Sliver to the Sixth Ring, and every child can name them.

The market square sells grain, wool, lamp oil and salvage from the Driftline. The Weighed Anchor is the only inn, and its common room is where the town argues. The Concord keeps a warehouse by the north gate and a broker, Grenna Ost, in a counting room above it. The Keywardens have no garrison here, only a lamplighter's wall and a road north to their bastion.

Since the lurch, the square tilts two fingers to the north and everything in town has slid that way. People have started sleeping with their boots on.

Additional Notes

Use Tallymarket as the campaign's calm before the storm: friendly, small, and full of people who will die if the party does nothing. Roll a d6 each time the party returns; on a 1, a small aftershock lurch knocks over a cart and frightens the town. The Concord warehouse holds three crates marked for Ratchetworks — evidence Grenna will sell, not give.

The Brass Orchard

The Brass Orchard is a grove of brass-barked trees on a low hill an hour north of Tallymarket. Every leaf is a thin brass plate, and the wind walks through them like a hand over a harp. The trees are not natural; they were grown from the first Warden's key-metal and their roots run down into the Sliver's anchor-bolt. When the orchard chimes evenly, the Sliver is keyed. When it rings wrong, it is not.

At the grove's heart stands the anchor-tree, a trunk of dull gold as thick as a mill wheel, with a hollow at its base where the town's tally-stone is kept. Corwin Ash's tool shed stands at the orchard's edge, and a stone wall runs along the road. Beyond the wall the ground falls away to the lake road and, further south, to Hollowmere.

The orchard has been quiet for a month. Corwin has not left his shed since the lurch.

Additional Notes

The orchard is the campaign's first taste of the Engine's machinery: the trees are literally part of the Sliver's keying. If the party pulls the wedge, the chime settles and the town's tilt corrects by a finger's width. Two Ratchet Crew saboteurs (use Bandit statistics) are hiding in the orchard if the party fails the Perception check.

Hollowmere

Hollowmere is a village of some two hundred people on the shore of a grey lake, built in two halves. The southern half stands on solid Sliver: a square, a temple, a barrow-mound and forty houses. The northern half — eleven houses, a mill and an old bell tower — hangs out over open fog, held to the rest by three iron key-bolts the width of a man's arm.

The bolts were re-keyed a month ago and have been screaming ever since. The northern half tilts a little further out each day. Captain Rusk Halloran of the Keywardens holds the southern half with six guards and orders not to let anyone cross. Barrow-Keeper Odile Fen keeps the barrow-book and has written eleven names in it this month.

A mist-touched child called Nib walks both halves freely and says the Mist has been counting the town for three nights.

Additional Notes

Hollowmere is the act's set-piece: a rescue under a time limit. Give the party three in-game hours before the middle key-bolt fails. If they fail, the northern half tears loose and drifts; the eleven families are lost, and Odile Fen writes their names in the barrow-book with the party's beside them.

The Warden Bastion of the Sixth Key

The Warden Bastion of the Sixth Key stands at the ring's main joint, where the Sixth Ring meets the Fifth: a fortified camp of grey timber halls and brass-roofed towers built around the great key-bolt that holds the ring in place. The bolt is a column of iron a hundred feet high, and the Bastion is built around it like a hand around a candle.

Inside are the key-hall, the gear-vault, the stores and the barracks. Warden-Commander Sela Brant commands some sixty guards, priests and knights. Quartermaster Hulm runs the stores and sells to anyone with coin. Enginewright Tobias Quill keeps the re-keying log and the Bastion's tools.

The Bastion is the only place on the Sixth Ring where the party can learn the truth about the unkeying campaign — and the only place where the Ratchet Crew has a friend.

Additional Notes

The Bastion is the act's hub and its climax. Sela Brant will not execute Tobias Quill; she wants the truth. If the party handles the confrontation well, they leave with a Warden's pass, a place on the freight-lift, and a promise to find Lira Quill. If badly, Tobias flees and the Bastion's bolts are re-keyed a day late, costing the ring a small Sliver.

The Fourth Ring: The Ratchet Marches

The Fourth Ring is the Engine's industrial heart: a ring of mountain Slivers bolted together into one continuous city-state called the Ratchet Marches. The whole ring is a machine. Streets slide on rails, stairways turn on gears, and houses are bolted to gear-teeth the size of barns. The Marches supply the freight-lifts that feed the outer rings, and everyone in them works for the Concord, the guilds, or the Ratchet Crew.

The ring's great city, Ratchetworks, is built in brick the colour of dried blood, with squat towers, narrow windows and timber galleries. Beneath it lies the Sump Gears, a flooded undercity of gear-pits and lantern-lit walkways where the Ratchet Crew keeps its safehouses and the crime boss Grizel keeps her court. Above it, on the ring's inner edge, stands Marrow Spire, a hollow brass tower open to the fog, where the Mistbound Choir sings.

Beyond the Spire the ring simply stops. The Driftline is the raw edge of the Fourth Ring, where the Deep Mist stands up like a wall of grey water and a Sliver the size of a county is turning slowly away.

Secrets

  • Lady Ysolde Marrow, the magnate of Ratchetworks, is Ilse Marrow's sister and has been funding the Mistbound Choir for three years under a false tally.
  • The Ratchet Crew's unkeying engine is built around a fragment of the Grand Cage's own Master Key, which Ossian Vey broke off and gave to Marisel Quill.
  • The Sump Gears are slowly flooding because the Ratchet Crew has been drawing water from the city's cooling system to test the unkeying engine.

Key Locations

Ratchetworks

Ratchetworks does not sit still. The whole city is a machine, and the machine is a city: streets that slide on rails, stairways that turn on gears, houses bolted to gear-teeth the size of barns. It is built in dark red brick on rough stone footings, with squat towers, narrow windows, timber galleries and hipped roofs, and the finer quarter around the Grand Gearhall is brick and glass.

The Grand Gearhall is a cathedral of rotating cogs above the city's central shaft, where Foreman Dace Kettle shouts over the turning. The Concord keeps warehouses along the freight-lift yards. Lady Ysolde Marrow owns a third of the city and a mansion in the brick quarter. Sergeant Orla Vint of the city watch patrols the lower streets with a whistle and a grudge.

Three freight-lifts have been stolen this month. The city is beginning to notice.

Additional Notes

Ratchetworks is the act's hub: a place to buy gear, gather rumours and pick up three separate leads (Dace Kettle's lift-key, Pim's safehouse list, Orla Vint's watch). Roll a d6 each time the party crosses the city; on a 1, a street slides under them and they must make a DC 12 Dexterity saving throw or be carried two blocks off course.

The Sump Gears

The Sump Gears are the undercity of Ratchetworks: a flooded labyrinth of gear-pits, half-drowned machinery and lantern-lit walkways strung between the teeth of the city's oldest engines. The water is black and rises a finger's width every month. Many of the houses are burnt out or half-collapsed, though people still live in them, and the walkways are patched with salvaged plate.

Ratchet-Mother Grizel holds court on a throne made from a broken governor, and her people run the undercity's markets, ferries and protection rackets. The gear-orphans, children who lost their families to the pits, run messages and guide travellers for a copper a trip. Marisel Quill's workshop is hidden behind a false gear-wall on the third level, where the Crew builds its unkeying engine.

The undercity is the only place in Ratchetworks where no one asks who you are.

Additional Notes

The Sump Gears are the act's dungeon-equivalent: a flooded, vertical space with three levels, ferries, and a crime boss who can be an ally or an enemy. Use the rising water as a clock: every hour the party spends below, the water rises and one more walkway floods. Grizel's price is the Crew's stolen tithe, which is in the workshop.

Marrow Spire

Marrow Spire is a hollow brass tower on a ridge at the inner edge of the Fourth Ring, open to the fog at its crown. It has no roof and no floors above the nave: the fog comes down into it like water into a well, and the Choir sings at the bottom of the well. The tower's lower levels are a warren of cells, kitchens and scriptoriums where the mist-touched are housed and cared for.

The Mistbound Choir has held the Spire for six years. Its singers stand in the crown and sing the fog down into the Engine, softening the Cage from within. Ilse Marrow, the Hollow Cantor, leads them. Sister Wren Hallow commands the guards. Brother Anselm Crowe, a defector, hides in the undercroft with a notebook of every verse.

The Spire is the only place on the Fourth Ring where the Deep Mist is welcome.

Additional Notes

The Spire is the act's set-piece ritual: three verses, three rounds each, three chimes to break. Give the party a clear clock and let them choose how to interrupt. If the ritual completes, the Spire opens and mist-touched creatures flood the Fourth Ring; the party can still close it, but the Spire's people are lost.

The Driftline

The Driftline is the raw edge of the Fourth Ring, where the ring simply stops and the Deep Mist stands up like a wall of grey water. There is no cliff and no shore: the Sliver's edge is a clean cut, and beyond it the fog turns slowly, and inside the fog there are shapes that are almost faces.

The Freefall Salvagers keep a camp here: a ring of harpoon-catapults, anchor-lines, rope-walks and salvage cranes, with a chart-house where Salvage-Captain Rooke keeps ten years of drift records. A mile out, a Sliver the size of a county is turning slowly away from the Ring, and the people on it are still waving.

Below the camp, a service shaft drops through the ring's edge toward the First Ring. Rooke has it marked on his charts.

Additional Notes

The Driftline is the act's climax: a running fight on harpoon-lines against Marisel Quill and her unkeying engine, with a county-sized Sliver and its people as the clock. Give the party three rounds before the engine completes its first cycle and the drifting Sliver begins to be eaten.

The First Ring: The Cage Core

The First Ring is the innermost ring of the World Engine, and it is not a place where people live. It is the Cage's core: a hollow shell of brass and red brick built around the Master Key, which turns in the Grand Cage's lock at the centre of the world. The first Wardens built a city here, the Unkeyed Ward, and abandoned it three hundred years ago. Its towers still stand, roofless, their pointed windows looking out on nothing.

The air in the First Ring is cold and smells of old rain and brass. Sound behaves strangely: footsteps echo for a long time, and the Mist's song is audible as a low hum even through the walls. The light comes from the Master Key itself, a slow pulse that brightens and dims like a heartbeat.

Ossian Vey has been here for a year, working. He has taken the Master Key from the Hall of Keys, cracked the Threshold from the inside, and begun the three turns that will unkey the Grand Cage. The Deep Mist is already coming in through the cracks.

Secrets

  • The Grand Cage was built by the first Wardens to hold back the Deep Mist, which is a single living mind that eats unkeyed Slivers.
  • Ossian Vey has never heard the Deep Mist speak; he has only heard it sing, and he has mistaken the song for a welcome.
  • The Master Key can unkey the Cage or re-key it, but re-keying requires a living Warden to speak the Warden's oath over it and mean it.

Key Locations

The Threshold of Keys

The Threshold of Keys is a mile-wide brass door set in the inner shell of the First Ring, at the bottom of the service shaft from the Driftline. It has no handle. It is covered, every inch, in keyholes — thousands of them, in rows, in spirals, in patterns that hurt to follow. Each keyhole is the name of one of the hundred Slivers, and three of them are dark.

The door was cracked open from the inside three days ago, leaving a gap a person can squeeze through if they are careful and the door's teeth do not take a finger. Gate-Warden Nim sits on the step before it, whittling keys out of turnips, and has not left in forty years.

Beyond the door, the Cage Core is dark and cold.

Additional Notes

The Threshold is the act's gate and its first revelation: the Cage is a lid, not a prison. Nim will open the door for anyone who swears the Warden's oath and means it, and will give them the Threshold Key. Vessaline Roke is watching from the rocks with her mercenaries and will try to follow the party through.

The Unkeyed Ward

The Unkeyed Ward is a ruined city of red brick and broken towers inside the Cage Core, built by the first Wardens and abandoned three hundred years ago. Its pointed windows look out on nothing, its arcades stand open to the cold, and its paving stones have been pulled up in long straight lines, as if someone was looking for something buried.

At the city's centre stands the Hall of Keys, a vast circular hall with a socket in its floor where the Master Key used to rest. The socket is empty. Beneath the hall, a stasis vault holds Curator Halden Roke, preserved for three centuries. In the archive, Sable Vey has been hiding for a year, cataloguing what her brother has taken.

The Ward is silent except for the low hum of the Mist's song through the walls.

Additional Notes

The Unkeyed Ward is the act's investigation hub: a ruined city with three discoverable locations (the Hall of Keys, the archive, the stasis vault) and one ambush (Vessaline Roke's mercenaries at the end). Sable Vey will join the party for the finale if persuaded. Halden Roke can answer one question about the Cage's making before the stasis fails.

The Grand Cage

The Grand Cage is the heart of the World Engine: a room the size of a sky, walled in brass, with a key the size of a tower turning in a lock at its centre. The Master Key is not a key in any ordinary sense; it is a column of interlocking rings and gears, and its turning is what holds the hundred Slivers in their seven rings. The lock it turns in is the Cage itself.

The room's walls are cracked, and the Deep Mist is coming in through the cracks like water through a hull. The Mist's song is loud here, a low, patient hum that never stops. Warden-Prime Elowen Vane is imprisoned inside the lock, held there for a year. Ossian Vey works on the Key's shoulder, three turns from finishing.

There is no floor to speak of, only gantries, gear-teeth and the slow turning of the world.

Additional Notes

The finale is a three-turn clock, a fight on moving machinery, and a choice. Ossian takes 5 rounds per turn; the party can jam the Key, fight him, or talk him down. Ilse Marrow and Marisel Quill appear here if they survived their earlier scenes. Vessaline Roke arrives at the end of the third turn. The Mist is not a monster to be fought; it is a pressure, and it can only be held back or let in.

Monsters & Enemies

Brass Chime Moth Brass Chime Moth Completed · CR 1/4 · Construct

Tiny brass-plated moth with filigree wings, perched on metallic leaf, emitting visible sound waves from vibrating wings against dark orchar…

Wedge-Hound Wedge-Hound Completed · CR 2 · Construct

A dog-shaped construct of riveted iron plates and brass gears, resembling a stack of crates when still. Glowing amber eyes visible through …

Bolt-Screamer Bolt-Screamer Completed · CR 3 · Aberration

Small cat-sized aberration fused to a large brass bolt. Wet grey eyes in a ring, barnacle-covered shell, screaming mouth open wide. Foggy b…

Tally-Gnaw Tally-Gnaw Completed · CR 1 · Undead

A small, beetle-like undead with a flat brass carapace engraved with faded runes. Its mouth is a chisel-like beak dripping with necrotic re…

Sump Pit-Eel Sump Pit-Eel Completed · CR 1/2 · Beast

A long, man-sized eel with oil-slicked black skin and a lamprey mouth, lurking in dark, oily water among gears. Blind eyes, wet tar shine, …

Gear-Gnaw Rat Gear-Gnaw Rat Completed · CR 1/4 · Beast

Tiny grey rat with oiled fur and brass-capped incisors, clinging to a rusted gear in a dim industrial undercity setting.

Fog-Breather Fog-Breather Completed · CR 5 · Aberration

A hunched, translucent lung-like aberration with long grey arms and a vertical slit face, filled with swirling grey fog. Dark, eerie atmosp…

Condenser Husk Condenser Husk Completed · CR 6 · Construct

A large brass cart-frame animated by swirling gray mist, walking on four piston legs with a grated faceplate glowing faintly green from int…

Drift-Skimmer Drift-Skimmer Completed · CR 8 · Aberration

A large manta-shaped glider with grey membrane wings and brass ribbing, swimming through thick fog. Its underside is covered in hundreds of…

Keyhole Crawler Keyhole Crawler Completed · CR 9 · Aberration

Flattened grey chitin aberration with brass joints, narrow body fitting keyholes, key-shaped claws, many legs, lurking in shadows.

Warden Gear-Husk Warden Gear-Husk Completed · CR 11 · Construct

A large, hollow suit of tarnished brass plate armor held together by a spine made of interlocking iron keys. It wields a jagged sword shape…

Mist-Song Wisp Mist-Song Wisp Completed · CR 13 · Aberration

A humanoid-sized knot of grey fog with a vague, face-like indentation. It floats silently, emanating a visible ripple of sound waves. Ether…

Villain Plans

Ossian Vey, the Unkeyed Warden Character Sheet

BBEG — the last Warden-Archivist of the Grand Cage, now its unmaker

Motivation

Ossian has read the first Wardens' sealed records and believes the Grand Cage is a prison built to enslave the hundred Slivers, and that the Deep Mist is a living god the Wardens chained outside the world. He wants to unkey every ring and let the Slivers drift free into what he is certain is paradise. He is wrong, and he has never once heard the Mist speak — only sing.

Personality

Calm, courteous, and utterly certain. He calls the party 'colleagues' and means it. He explains his reasoning at length and is genuinely interested in counterarguments, which he has never heard from anyone who survived to give them. He does not gloat and does not lie.

Resources

  • The Master Key of the Grand Cage, taken from the Hall of Keys
  • A fragment of the Master Key, given to Marisel Quill for the unkeying engine
  • The Ratchet Crew's cells in every ring
  • The loyalty of the Mistbound Choir, which believes him a prophet
  • A year of undisturbed work inside the Cage Core
  • The sealed records of the first Wardens

Battle Plan

Ossian fights only when the argument fails. He opens by unkeying the floor beneath the party's feet, then uses the Master Key to turn the heart-room's machinery against them, retreating toward the lock and continuing his three turns whenever he is not pressed. He never targets a downed foe and offers surrender twice. If reduced below a quarter of his hit points, he makes one last turn of the Key rather than defend himself.

Defeat or Redemption

He can be killed, in which case the Master Key falls to the party and the Cage can still be re-keyed. He can be turned: if the party can make him hear the Mist's hunger for what it is — through Sable Vey, through the eaten Sliver at the Driftline, or through the Mist's own song in the heart-room — he breaks, and will re-key the Cage himself with his dying breath. He can also win, and the campaign ends with the Engine being eaten ring by ring.

Marisel Quill, the Ratchet Character Sheet

Lieutenant — Ossian's field hand and chief saboteur

Motivation

Marisel was an Enginewright of the Keywardens until they unkeyed her family's Sliver as punishment for a debt, killing her parents and her youngest brother. She joined the Ratchet Crew the same year and has never regretted it. She wants the Cage broken because the Cage broke her first.

Personality

Brisk, profane, and practical. She treats sabotage as a craft and takes pride in clean work. She will talk to the party while wiring a charge, and she will warn them to stand back.

Resources

  • The Ratchet Crew's field cells and safehouses
  • A brass prosthetic hand that hides tools and a key-fragment
  • The unkeying engine, built from a fragment of the Master Key
  • Tobias Quill, her brother, blackmailed into re-keying bolts
  • Lira Quill, her niece, held as a hostage

Battle Plan

Marisel fights in three stages: first with planted charges and collapsing ground, then with a ratchet-blade and thrown wedges, then by retreating through a prepared escape route. She never fights to the death unless her niece is threatened. If reduced to a third of her hit points, she takes the engine's core and runs for the First Ring.

Defeat or Redemption

She can be killed, captured, or turned if the party frees Lira Quill and shows her that the Mist eats what it takes. Turned, she will sabotage her own engine and guide the party down the service shaft. Captured, she will trade the Crew's routes for her niece's safety.

Ilse Marrow, the Hollow Cantor Character Sheet

Lieutenant — leader of the Mistbound Choir

Motivation

Ilse heard the Deep Mist speak when she was a child, standing on a drifting Sliver, and it told her she was loved. She has spent forty years singing it into the Engine so that it can come and love everyone. She believes the Cage is a blasphemy and the Keywardens are jailers of a god.

Personality

Serene, warm, and completely unshakeable. She greets the party as guests, offers them tea, and will genuinely grieve if she has to kill them. She sings between sentences.

Resources

  • The Mistbound Choir, hundreds of singers across the Fourth Ring
  • Marrow Spire, a hollow brass tower open to the fog
  • Mist-touched servants who do her bidding without question
  • Lady Ysolde Marrow, her sister, who funds the Choir from Ratchetworks
  • The Cantor's Throat, a chime that charms those who hear it

Battle Plan

Ilse does not leave her ritual circle unless forced. She sings in three verses, each taking three rounds, and defends herself with the Cantor's Throat, mist-condensers and the Choir's guards. If the ritual is broken, she fights with a chime-blade and a wall of fog, and retreats to the Grand Cage to sing the Mist through the Cage's cracks.

Defeat or Redemption

She can be killed, silenced, or — hardest — made to hear the Mist's hunger rather than its song. If the party can bring her to the Driftline and make her watch a Sliver being eaten, she breaks and will sing the Cage shut instead. She will not surrender otherwise.

Vessaline Roke, the Counter-Key Character Sheet

Rival — a would-be Warden-Prime who wants the Cage for herself

Motivation

Vessaline is a disgraced Keywarden captain who believes the order is too weak to hold the Engine and that she is the only person strong enough to rule it. She wants the Master Key, not the Cage's destruction, and she will let Ossian and the party bleed each other to get it.

Personality

Cold, courteous, and endlessly patient. She speaks to the party as if they were already her subjects, and she keeps every promise she makes, which is what makes her dangerous.

Resources

  • A company of forty mercenaries, veterans of the ring-wars
  • A stolen key-fragment that opens most Warden locks
  • A hidden vault in the Unkeyed Ward
  • Informants in the Sliver Concord and the Keywardens
  • Sister Aveline Roke, her cousin, placed inside the Keywarden order

Battle Plan

Vessaline never fights the party and Ossian at the same time. She shadows them through Act III, arrives at the Grand Cage at the end of Ossian's third turn, and attacks whoever is weakest. She fights with a key-blade and a shield of locked air, and she retreats rather than die, intending to try again in a year.

Defeat or Redemption

She can be killed, driven off, or — if the party offers her the Warden-Prime's oath-ring and a genuine place in the new order — recruited as a grudging ally for the final fight. She will never accept a subordinate role.

NPCs in The Sixth Ring: The Tally Reaches

Pell the Lamplighter

A gangly boy of fifteen with a soot-streaked face and a lamp-lighter's pole taller than he is. He was on the town wall before dawn and saw everything, and he is desperate for someone to believe him.

Role: Lamplighter; witness; side quest giver

Other Details: Pell saw two figures in oilskin coats carry a long crate toward the Brass Orchard. He is afraid of being blamed for the lurch and will only talk if treated kindly. He wants to be a Keywarden when he grows up.

Grenna Ost

A tall, weathered woman in a Concord tally-thong, with a caravan-master's voice and a broker's smile. She buys salvage from the Driftline and sells it on the Sixth Ring at a healthy margin.

Role: Salvage broker of the Sliver Concord; side quest giver

Other Details: Grenna knows the Concord is quietly moving goods off the Sixth Ring, which means someone in Ratchetworks expects the ring to fail. She will share that for a price or a favour. She has a standing arrangement with the Freefall Salvagers.

Old Corwin Ash

A stooped, leathery man of eighty who has kept the Brass Orchard for fifty years. He talks to the trees and they chime back. He has been hiding in his tool shed since the lurch.

Role: Orchard-keeper of the Brass Orchard; quest giver

Other Details: Corwin knows the orchard's anchor-tree better than anyone and can feel a wedge in its bark from a hundred paces. He is the only person in the Tally Reaches who has seen Marisel Quill's brass hand and lived. He will not leave the orchard.

Tessa Vane

A stubborn girl of thirteen with a split lip and a stolen lantern. She followed the saboteurs out of town because she wanted to see something happen, and now she is hiding in Corwin's shed.

Role: Runaway from Tallymarket; witness

Other Details: Tessa saw the saboteurs leave a second crate on the lake road and heard one of them say the word 'Hollowmere'. She has no family in Tallymarket and will attach herself to the party if allowed.

Marnie Tallow, the Tally-Keeper

A small, sharp-eyed woman of seventy with ink-stained fingers and a brass tally on a leather thong. She has kept Tallymarket's key-ledger for forty years and knows every bolt, grove and debt in the town. She is frightened and hiding it badly.

Role: Tally-keeper of Tallymarket; opening quest giver

Other Details: Marnie knows the town's three anchor-groves and that one of them, the Brass Orchard, has not been tallied in a month. She suspects the Keywardens are covering something up and will not say so aloud. She pays the party from her own purse and expects receipts.

Dorn Fell

A broad, slow-spoken man with a blacksmith's arms and an innkeeper's patience. He keeps the Weighed Anchor, the only inn in Tallymarket, and its cellar holds one of the town's three anchor-groves.

Role: Innkeeper of the Weighed Anchor; side quest giver

Other Details: Dorn's cellar grove has begun to hum at night and his beer has started to taste of brass. He will trade free lodging for anyone who fixes it. He is a former Concord caravaneer and knows the freight-lift schedules between the rings.

Barrow-Keeper Odile Fen

A gaunt woman in a grey shawl who keeps Hollowmere's barrow-book, the record of everyone the town has buried or lost. She has written eleven names in it this month and crossed none out.

Role: Barrow-keeper of Hollowmere; quest giver

Other Details: Odile knows the key-bolts were re-keyed a month ago by a Keywarden engineer named Tobias Quill, and she has said so to Captain Halloran three times without being believed. She will trade the town's tally of the lost to anyone who saves the drifting half.

Nib, the Fog-Child

A child of perhaps nine, grey-skinned and barefoot, with eyes the colour of wet slate. Nib speaks in a flat, unhurried voice and hears the Deep Mist as a low singing that never stops.

Role: Mist-touched child of Hollowmere

Other Details: Nib was touched by the Mist two winters ago and came back changed. The town tolerates the child but does not touch them. Nib can walk the drifting half of Hollowmere safely and says the Mist has been 'counting' the town for three nights.

Enginewright Tobias Quill

A nervous, ink-stained man of thirty-five with a re-keying wrench always in his belt. He is Marisel Quill's younger brother and has been re-keying the Sixth Ring's bolts to the Ratchet Crew's frequency.

Role: Keywarden engineer; the Bastion's traitor

Other Details: Tobias is not a villain; he is being blackmailed. The Ratchet Crew holds his daughter Lira in the Sump Gears and will unkey her Sliver if he refuses. He will confess if confronted gently and will flee to the gear-vault if threatened.

Quartermaster Hulm

A round, cheerful man in a stained apron who runs the Bastion's stores. He sells rope, oil, lanterns and crossbow bolts at Warden prices and gossips about everyone in the Bastion.

Role: Quartermaster of the Warden Bastion

Other Details: Hulm can identify the Ratchet Crew's oil by smell and will say so for a drink. He has a crate of confiscated Crew gear in the back of the stores, including a Sump Lantern he does not know the value of.

Captain Rusk Halloran

Open Character Sheet

A square-jawed man of forty in a grey Warden's coat, with a captain's key at his collar and a hand that never leaves his sword. He has six guards and orders not to let anyone cross to the drifting half.

Role: Keywarden captain holding Hollowmere

Other Details: Halloran is not a bad man; he is a man following orders he no longer believes. If the party shows him the ratchet-marked wedge, he will disobey and help them cross. He will fight beside the party against the Ratchet Crew.

Warden-Commander Sela Brant

Open Character Sheet

A lean, grey-haired woman of fifty with a knight's bearing and an engineer's hands. She commands the Sixth Ring's bastion and has been losing Slivers for a decade without being able to say so.

Role: Commander of the Warden Bastion of the Sixth Key; quest giver

Other Details: Sela suspects a traitor in her own bastion and wants the name before the Ring lurches again. She will not execute Tobias Quill; she wants the truth and the Crew's route. She can grant a Warden's pass and a place on the freight-lift down to the Fourth Ring.

NPCs in The Fourth Ring: The Ratchet Marches

Foreman Dace Kettle

A barrel-chested man of fifty with brass dust in his beard and a voice built for shouting over machinery. He runs the Grand Gearhall and has lost three freight-lifts to the Ratchet Crew this month.

Role: Foreman of the Grand Gearhall; quest giver

Other Details: Dace hates the Ratchet Crew for stealing his lifts and will help the party reach the Sump Gears with a lift-key. He will not go down himself; he has a family and a bad knee. He knows Lady Ysolde Marrow is lying about her sister.

Lady Ysolde Marrow

A tall, elegant woman in a brick-red gown with a Concord tally at her throat and a Choir chime hidden in her sleeve. She owns a third of Ratchetworks and funds the Mistbound Choir in secret.

Role: Magnate of Ratchetworks; Ilse Marrow's sister

Other Details: Ysolde loves her sister and fears her in equal measure. She will steer the party away from Marrow Spire and will lie about the tithes. If confronted with proof, she will break down and offer the party the Choir's ritual schedule.

Archivist Pim

A small, precise person of twenty in an archivist's grey, with spectacles mended at the bridge and ink on every finger. Pim keeps the city's key-register and notices everything.

Role: Archivist of the Ratchetworks key-register

Other Details: Pim has found three safehouses listed under false tallies and has been quietly copying the entries for a month. Pim will give the party the list in exchange for a promise to tell the watch, not the Concord. Pim is terrified of being found out.

Ratchet-Mother Grizel

A heavy, one-eyed woman of sixty who holds court on a throne made from a broken governor. She has three fingers on her left hand and counts coins with all of them. She rules the undercity and everyone in it knows it.

Role: Crime boss of the Sump Gears; quest giver

Other Details: Grizel holds the Sump Gears and knows where Marisel Quill's workshop is. She wants the Crew's stolen tithe returned before she will say. She is not loyal to anyone and will sell the same information twice if she can.

Tick

A wiry child of twelve in a coat cut down from a man's, with a gear-tooth on a string around their neck. Tick knows every flooded pit and dry crawlway in the undercity.

Role: Gear-orphan guide of the Sump Gears; side quest giver

Other Details: Tick guides travellers through the Sump Gears for a copper a trip and will guide the party for free if they help find their older brother, who was taken by the Ratchet Crew. Tick is fiercely loyal to the other gear-orphans.

Salvage-Captain Rooke

A rope-thin man of fifty with a harpoon-scar across his chest and a grease pencil behind his ear. He has been out on the Driftline more times than anyone alive and has the charts to prove it.

Role: Captain of the Freefall Salvagers; quest giver

Other Details: Rooke keeps the Driftline charted and will trade a copy for help hauling an anchor-line. He knows the service shaft from the Driftline down to the First Ring and will mark it for the party. He has lost nine salvagers to the Mist and does not talk about it.

Brother Anselm Crowe

Open Character Sheet

A gaunt man of forty in a Choir robe with the chimes torn off the hem. He has been hiding in the Spire's undercroft for three weeks, listening to the Cantor's ritual and writing down every verse.

Role: Choir defector hiding in Marrow Spire; quest giver

Other Details: Anselm was a Choir singer for twelve years before he watched the Mist eat a Sliver and understood what it was. He will fight beside the party against the Choir and knows the Spire's back stair down to the Driftline. He is not a brave man and knows it.

Sergeant Orla Vint

Open Character Sheet

A stocky woman of thirty with a watchman's whistle and a scar across her jaw. She has been trying to catch the Ratchet Crew for two years and has lost four watchmen doing it.

Role: Sergeant of the Ratchetworks city watch

Other Details: Orla will help the party if they show her a Warden's pass, and will fight beside them against Crew cells. She does not trust the Concord and suspects Lady Ysolde. She knows the city's three false-tally safehouses by heart.

Sister Wren Hallow

Open Character Sheet

A tall woman in a grey robe with brass chimes at her hem and a chime-blade at her hip. She is utterly devoted to Ilse Marrow and will die before she lets the ritual be broken.

Role: Choir cantor and guard-captain of Marrow Spire

Other Details: Wren leads the Choir's guards and knows every verse of the ritual. She is not cruel, only certain. If Ilse Marrow is killed or turned, Wren will break and either flee or surrender, depending on how the party treated the Choir's singers.

NPCs in The First Ring: The Cage Core

Gate-Warden Nim

An ancient figure in a rotted Warden's coat, sitting on the step of a mile-wide door and whittling keys out of turnips. Nim has not left the Threshold in forty years and does not intend to.

Role: Last Gate-Warden of the Threshold of Keys; quest giver

Other Details: Nim is the last living Gate-Warden and can open the Threshold for anyone who swears the Warden's oath and means it. Nim knows the Cage was built to keep something out, not in, and will say so plainly. Nim will wait on the step for whoever comes next, however the campaign ends.

Sable Vey, the Last Archivist

A spare, grey-haired woman of sixty in a ruined archivist's coat, with a lantern and a notebook she never puts down. She has been hiding in the Unkeyed Ward for a year, cataloguing what her brother has taken.

Role: Ossian Vey's sister; last Archivist of the Cage; quest giver

Other Details: Sable loves her brother and has spent a year trying to find an argument that will stop him. She will travel with the party to the Grand Cage and will speak the Warden's oath over the Master Key if no one else can. She knows the Cage is a lid and has the records to prove it.

Curator Halden Roke

A man of ninety preserved in a stasis vault beneath the Ward's archive, woken for the first time in three hundred years. He speaks slowly, in an accent no one has used for centuries, and remembers the Cage's construction.

Role: Preserved Curator of the Unkeyed Ward; side quest giver

Other Details: Halden was the last Curator before the Ward was abandoned and can answer one question about the Cage's making before the stasis fails. He wants the Warden-Prime's oath-ring recovered from the Hall of Keys and returned to the order. He does not know his own name until told.

Warden-Prime Elowen Vane

Open Character Sheet

A tall, silver-haired woman in a Warden-Prime's coat, held inside the Grand Cage's lock for a year. She is thin, furious, and entirely unbroken, and she has spent the year learning the Cage's every gear.

Role: Imprisoned Warden-Prime of the Grand Cage

Other Details: Elowen was imprisoned by Ossian Vey when she refused to unkey the Cage. She can re-key the Cage with the Master Key and a spoken oath, and she will fight beside the party against Ossian and Vessaline Roke. She knows the Cage's true purpose and will tell the party plainly that the Mist is one mind and it is hungry.

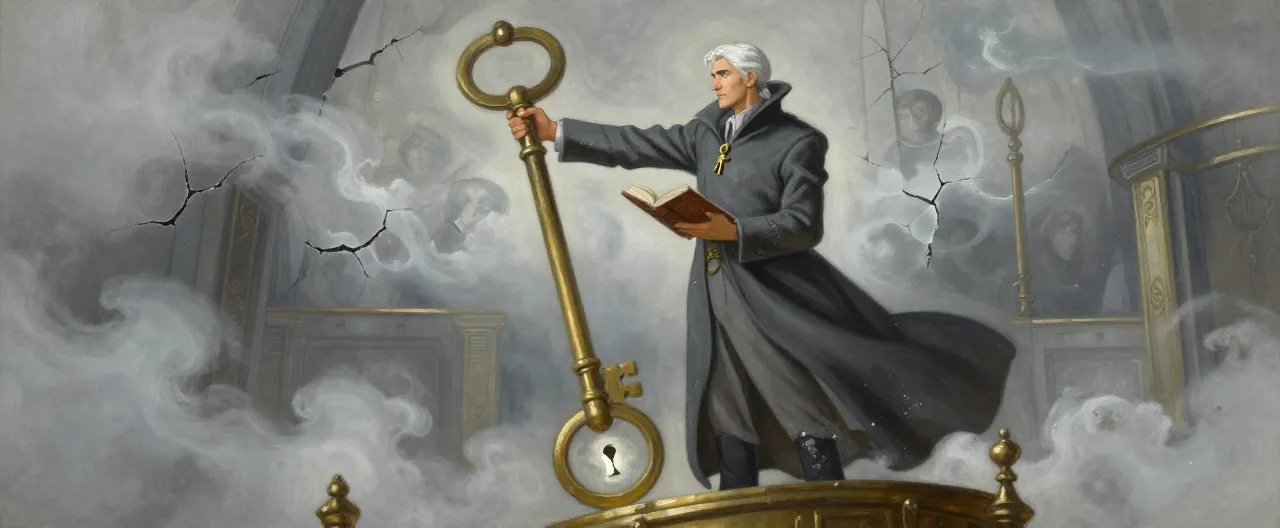
Factions

The Keywardens of the Grand Cage

The Keywardens are the oldest institution in the World Engine: an order of engineers, priests and soldiers sworn to keep the hundred Slivers keyed to their rings. They wear coats of grey wool with a brass key at the collar, and they answer to the Warden-Prime, a title that has stood empty for a year. Their bastions stand at the joints of the rings, where the great key-bolts bite. They are slow, formal, and terrified — they have been losing Slivers for a decade and have told no one. Their rank and file are guards and priests; their officers are knights.

Goals

- Keep every Sliver keyed to its ring.
- Find and stop whoever is unkeying them.
- Conceal how close the Grand Cage is to failing.

Relationships

With Other Factions
The Keywardens regard the Ratchet Crew as saboteurs and the Mistbound Choir as heretics, and will fight both. They tolerate the Sliver Concord as a source of supplies and the Freefall Salvagers as a necessary nuisance.
With Players
Wary. The Keywardens do not know the party and will not open their bastions to strangers without a Warden's pass or a deed to prove.

The Ratchet Crew

The Ratchet Crew is a hidden movement of engineers, miners and deserters who believe the Grand Cage is a prison. They take their name from the ratchet-and-cog mark they stamp on their unkeying wedges. They have cells in every ring, safehouses in the Sump Gears, and a genius for turning a town's own machinery against it. They are not many, but they are everywhere, and they are patient. Their field hand is Marisel Quill; their master is the man they call the Unkeyed Warden.

Goals

- Unkey every Sliver from its ring.
- Break the Grand Cage and let the Slivers drift free.
- Recruit the desperate and the dispossessed.

Relationships

With Other Factions
The Ratchet Crew uses the Mistbound Choir as a distraction and despises the Keywardens. It buys information from the Sliver Concord and pays the Freefall Salvagers for charts of the Driftline.
With Players
Hostile. Crew cells attack anyone carrying a Warden's pass or a re-keyed wedge.

The Mistbound Choir

The Mistbound Choir is a cult that has heard the Deep Mist speak and believes it is a god. Its singers stand in the open crowns of their towers and sing the fog down into the Engine. They wear grey robes with brass chimes at the hem, and they are led by the Hollow Cantor, Ilse Marrow. The Choir is strongest on the Fourth Ring, where the Mist is closest, and it grows by taking in the mist-touched — people the fog has touched and left changed. They are not mad. They are certain.

Goals

- Open the Engine to the Deep Mist.
- Bring the mist-touched into the Choir's care.
- Silence anyone who calls the Mist a predator.

Relationships

With Other Factions
The Choir is allied with the Ratchet Crew in practice and in nothing else; the Crew wants the Cage broken, the Choir wants it opened. The Choir hates the Keywardens and preys on the Sliver Concord's caravans.
With Players
Hostile. Choir singers attack anyone who interrupts a ritual.

The Sliver Concord

The Sliver Concord is a trading league of towns, caravan-masters and salvage brokers who keep the rings fed. It has no army worth the name, only contracts, warehouses and a great many people who owe it money. Its agents wear a brass tally on a leather thong and will sell anything to anyone who pays. The Concord holds Ratchetworks and Tallymarket, and its caravans run the freight-lifts between the rings. It is neutral in the war over the Cage, and it intends to stay that way until it is profitable not to.

Goals

- Keep the freight-lifts running.
- Profit from the crisis without being blamed for it.
- Avoid choosing a side.

Relationships

With Other Factions
The Concord sells to the Keywardens, the Ratchet Crew and the Choir alike, and is trusted by none of them. It has a working arrangement with the Freefall Salvagers over Driftline charts.
With Players
Neutral. Concord agents will trade with the party at fair prices and will not fight unless their warehouses are threatened.

The Freefall Salvagers

The Freefall Salvagers are the people who go out onto the Driftline with harpoon-lines and haul back what the Mist has not yet swallowed. They are wreckers, rope-walkers and cartographers of the edge, and they know the Driftline better than anyone alive. Their captain, Rooke, keeps a camp at the edge of the Fourth Ring and a chart of every Sliver that has drifted loose in the last ten years. They are not heroes. They are the only people who will go out there, and they charge accordingly.

Goals

- Salvage what the Mist leaves.
- Keep the Driftline charted and the anchor-lines sound.
- Stay alive.

Relationships

With Other Factions
The Salvagers sell charts to the Concord, refuse to work for the Choir, and have lost people to the Ratchet Crew's engines. They respect the Keywardens and will not fight them.
With Players
Neutral. Rooke will deal with the party if they help haul a line.

Main Questline

The Lurching Ring

Given by: Marnie Tallow, the Tally-Keeper
Tallymarket lurched at dawn, and Marnie Tallow needs to know why before it happens again. The trail runs from the tally-house to the Brass Orchard, where a black iron wedge is driven into the anchor-tree, then south along the lake road to Hollowmere, where a second wedge is already half-driven into a key-bolt holding eleven houses over open fog. Behind both wedges is the Ratchet Crew, and behind the Crew is a name: the Unkeyed Warden.

Goals

- Search the Tally-House and question the townsfolk.
- Walk the orchard road and pull the wedge from the anchor-tree.
- Cross to Hollowmere's drifting half and re-seat the middle key-bolt.
- Bring the wedge and the news to the Warden Bastion of the Sixth Key.

Reward

**150 gp** from the town purse, free lodging at the Weighed Anchor for the rest of Act I, and the **Orchard-Keeper's Chime** from Corwin Ash. Marnie also adds the party's names to Tallymarket's key-ledger, which matters later.

Secrets

  • Marnie Tallow has been falsifying the town's key-ledger for a month to hide how far the Sliver has drifted.
  • The wedge in the Brass Orchard is tuned to Tallymarket's key-frequency; a second wedge would unkey the whole Sliver.
  • The town of Cinderhollow unkeyed and drifted into the Deep Mist three weeks ago, and the Keywardens have told no one.

DM Notes

Run this as three linked scenes with a road between each. The wedge is the through-line: every clue the party finds should point at the next wedge. If they dawdle, a second lurch at dusk collapses a house on Tallymarket's north lane and injures two people, which makes the town's fear real.

The Traitor of the Sixth Key

Two towns have unkeyed in a month, and both bolts were re-keyed by the Bastion's own engineer. Sela Brant wants the name before the Ring lurches again. The traitor is Enginewright Tobias Quill, brother of the Ratchet Crew's field hand, and he is not a villain — the Crew holds his daughter Lira in the Sump Gears and will unkey her Sliver if he refuses. Handled gently, he confesses and gives the party the Crew's route down to the Fourth Ring.

Goals

- Examine the Bastion's re-keying log in the key-hall.
- Identify the engineer who altered it.
- Get a confession without a killing.
- Secure a Warden's pass and a route down to the Fourth Ring.

Reward

A **Warden's Pass** granting free passage through Keywarden checkpoints, a place on the next freight-lift down to the Fourth Ring, and **Quartermaster Hulm's** confiscated Sump Lantern at a fair price.

Secrets

  • Tobias Quill has been re-keying the Sixth Ring's bolts to the Ratchet Crew's frequency for a month.
  • The Crew holds his daughter Lira Quill in the Sump Gears of Ratchetworks as a hostage.
  • Sela Brant has known for a year that the Grand Cage is failing and has been falsifying her reports to the empty seat of the Warden-Prime.

DM Notes

This is a social scene with a chase attached. Tobias flees to the gear-vault only if threatened; if the party draws steel in the key-hall, Sela Brant's guards intervene and the pass is lost. Reward patience. Hulm's gossip about the Crew's oil is the clue that makes the gear-vault search worthwhile.

The Unkeying Engine

Given by: Ratchet-Mother Grizel
Below Ratchetworks, in the flooded Sump Gears, the Ratchet Crew is building a great unkeying engine. Grizel, the undercity's crime boss, knows where the workshop is and will trade the location for the return of her stolen tithe chest. The workshop holds the engine's plans, a fragment of the Grand Cage's own Master Key, and Tobias Quill's daughter Lira in a cell behind a false gear-wall. The plans name the Driftline as the engine's test site.

Goals

- Descend to the Sump Gears and win Grizel's cooperation.
- Cross the flooded gear-pits to the third level.
- Break into the workshop behind the false gear-wall.
- Free Lira Quill and take the engine's plans.

Reward

**Grizel's guides** for one trip through the undercity, the **Sump Lantern**, and the workshop's plans, which reveal the service shaft from the Driftline down to the First Ring.

Secrets

  • The unkeying engine's core is a fragment of the Grand Cage's own Master Key, broken off by Ossian Vey.
  • The Crew did not steal Grizel's tithe; a gear-orphan took it to buy medicine, and the Crew found it afterward.
  • Lira Quill's father re-keyed the Sixth Ring's bolts only because the Crew threatened to unkey her Sliver.

DM Notes

Use the rising water as a clock: every hour below floods one more walkway. Grizel is not loyal and will sell the same information twice if she can. If the party opens her tithe ledger, they gain leverage over half the undercity and lose her as an ally for the rest of the campaign.

The Hollow Cantor's Silence

At Marrow Spire, a hollow brass tower open to the fog, Ilse Marrow is singing the Deep Mist down into the Engine. Three verses, three rounds each, and the Spire opens. Anselm Crowe, a Choir defector hiding in the undercroft, has written down every verse and knows the three chimes that anchor the ritual. Break the chimes, silence the Cantor, or destroy the mist-condensers below, and the Fourth Ring is safe. Fail, and mist-touched creatures flood the ring.

Goals

- Reach Marrow Spire and find Anselm Crowe in the undercroft.
- Identify the three chimes that anchor the ritual.
- Break the ritual before the third verse ends.
- Deal with Sister Wren Hallow and the Choir's guards.

Reward

**Anselm Crowe's notebook** of the Choir's verses, the **Cantor's Throat** taken from the ritual circle, and the Choir's surrender of Marrow Spire if Ilse Marrow is killed or turned.

Secrets

  • Ilse Marrow has heard the Deep Mist speak and believes it is a god; she has never told the Choir that the Mist also eats.
  • The Spire's crown is tuned to the same frequency as the Ratchet Crew's unkeying wedges, which is why the Choir and the Crew work so well together.
  • Lady Ysolde Marrow of Ratchetworks is Ilse's sister and has been funding the Choir for three years under a false tally.

DM Notes

Give the party a visible clock: three verses, three rounds each, three chimes. Let them choose how to interrupt. If the ritual completes, the Spire opens and the party can still close it, but the Spire's people are lost and the Fourth Ring takes a week to recover.

The Grand Cage

Given by: Sable Vey, the Last Archivist
At the centre of the World Engine, Ossian Vey is three turns from unkeying the Grand Cage. Sable Vey, his sister, has spent a year cataloguing what he has taken and will travel with the party to the heart-room. There they must stop him, free the imprisoned Warden-Prime Elowen Vane, and decide the Cage's fate: re-key it with a spoken Warden's oath, reforge it, or let it open. Vessaline Roke arrives at the end of the third turn to seize the Master Key for herself.

Goals

- Open the Threshold of Keys and enter the Cage Core.
- Search the Unkeyed Ward for the Master Key's resting place and the truth about the Cage.
- Stop Ossian Vey from completing the third turn.
- Decide whether to re-key, reforge or open the Grand Cage.

Reward

The fate of the World Engine, the **Warden-Prime's Oath-Ring**, and — if the Cage is re-keyed — a place in the new order of the Keywardens for every character who swore the oath.

Secrets

  • The Deep Mist is one mind, and it has been eating the unkeyed Slivers rather than freeing them.
  • Ossian Vey has never heard the Mist speak; he has only heard it sing, and the song is a hunting call.
  • The Cage can be re-keyed, but only by a Warden who means the oath — Elowen Vane can do it, and so can any character who took Gate-Warden Nim's oath.

DM Notes

The finale is a three-turn clock, a fight on moving machinery, and a choice. Ossian takes five rounds per turn. The party can jam the Key, fight him, or talk him down with the truth about the Mist. The Mist itself is a pressure, not a monster, and can only be held back or let in.

Side Quests in The Sixth Ring: The Tally Reaches

The Lamplighter's Round

Given by: Pell the Lamplighter
Pell the Lamplighter has been lighting Tallymarket's boundary lamps every night for two years, and since the lurch three of them have gone out and will not relight. He is convinced the lamps are the only thing keeping the town's Sliver from drifting and is too frightened to tell Marnie Tallow. He asks the party to walk the wall with him at dusk, find out why the lamps are failing, and relight them before the town notices. The truth is that the lamps draw their flame from the same key-frequency as the anchor-groves, and the Ratchet Crew's wedge has thrown the frequency off. Fixing the lamps means re-tuning them to the orchard's restored chime.

Goals

- Walk the boundary wall with Pell at dusk.
- Diagnose why three lamps have failed.
- Re-tune the lamps to the Brass Orchard's restored chime.
- Deal with the Ratchet Crew scout hiding in town.

Reward

Pell's gratitude and a **Lamplighter's Wick** (a common wondrous item: a lamp wick that burns without oil for eight hours a day). Marnie Tallow also pays 25 gp from the town purse once the lamps are lit.

Secrets

  • The lamps are not keeping the Sliver keyed; Pell's belief is superstition, but the frequency they draw from is real.
  • One of the three dead lamps was sabotaged by a Ratchet Crew scout who is still hiding in Tallymarket.
  • Pell has been sleeping on the wall because he is afraid his mother will be angry about the lamps.

DM Notes

Run this as a short dusk investigation with one combat against a single Bandit scout. The re-tuning requires a DC 13 Intelligence (tinker's tools) check at each lamp. If the party tells Marnie about Pell's fear, she quietly raises his wage, which matters to him more than the wick.

The Weighed Anchor

Given by: Dorn Fell
Dorn Fell's cellar holds Tallymarket's oldest anchor-grove: a knot of brass roots growing through the foundation of the inn. Since the lurch the roots have begun to hum at night, and Dorn's beer has started to taste of brass. He cannot close the inn — it is the only one in town — and he cannot fix the grove himself. He asks the party to go down into the cellar, find out what the roots are doing, and quiet them. The roots are not damaged; they are straining, because the Brass Orchard's wedge threw the town's key-frequency off and the cellar grove has been carrying the load alone.

Goals

- Descend into the Weighed Anchor's cellar.
- Diagnose the humming roots.
- Re-tune the cellar grove to the orchard's frequency.
- Keep Dorn's beer from tasting of brass.

Reward

Free lodging at the Weighed Anchor for the rest of the act, and a **Weighed Anchor Token** (an uncommon wondrous item: a brass token that, when dropped, tells the holder which way is 'down' relative to the Sliver's gravity).

Secrets

  • The cellar grove is older than the town and was planted by the first Wardens, not by Tallymarket's founders.
  • Dorn has been watering the roots with beer for a week because he panicked, which is why the beer tastes of brass.
  • The roots are a second anchor-grove the town's ledger does not record, which is why Marnie's tally has been wrong.

DM Notes

A quiet, character-driven quest with one DC 14 Intelligence (Arcana) check and one DC 12 Strength (Athletics) check to shift a fallen barrel. If the party tells Marnie about the unrecorded grove, she adds it to the ledger and the town's tally becomes accurate for the first time in a month.

Salvage Rights

Given by: Grenna Ost
Grenna Ost has a contract to deliver three crates of salvage to Ratchetworks, and the crates are sitting in her warehouse because the orchard road is unsafe. She offers the party a cut if they escort the crates to the Brass Orchard's north gate, where a Concord carter will take them. The crates are heavier than salvage should be, and one of them ticks. Grenna insists she does not know what is in them; she is lying, and the crates hold Ratchet Crew unkeying wedges that the Concord is moving off the ring for a buyer in the Sump Gears.

Goals

- Escort the three crates from Tallymarket to the Brass Orchard's north gate.
- Decide what to do about the ticking crate.
- Deal with the carter, who is not what he seems.

Reward

50 gp and a **Concord Tally** (an uncommon wondrous item: a brass tally that gives advantage on one Charisma check with any Concord agent, once per day).

Secrets

  • The crates hold three Ratchet Crew unkeying wedges bound for the Sump Gears.
  • Grenna is being paid by Lady Ysolde Marrow, not by the Ratchet Crew, and does not know what the wedges are for.
  • The Concord carter is a Ratchet Crew scout in disguise.

DM Notes

This quest plants the Concord's complicity and Lady Ysolde's name a full act early. If the party opens a crate, they find a wedge and can confront Grenna, who will confess and name Ysolde. If they deliver the crates unopened, the wedges reach the Sump Gears and one is used against the party in Act II.

Side Quests in The Fourth Ring: The Ratchet Marches

The Sump Tithe

Given by: Ratchet-Mother Grizel
Ratchet-Mother Grizel's tithe — a chest of Concord coin collected from every stall in the Sump Gears — was stolen from her strongroom three nights ago. She is certain the Ratchet Crew took it, and she wants it back before the undercity decides she is weak. She offers the party the workshop's location if they return the chest unopened. The chest is in the Crew's workshop on the third level, behind the false gear-wall, and it is guarded by two Crew saboteurs and a trapped floor. Grizel does not tell the party that the chest also holds a ledger of everyone in the undercity who has paid her, which is why she wants it unopened.

Goals

- Find the stolen tithe chest in the Crew's workshop.
- Return it to Grizel unopened.
- Decide what to do about the ledger inside.

Reward

The workshop's location, two of Grizel's guides for one trip, and a **Sump Lantern** (an uncommon wondrous item: a lantern that reveals invisible creatures within 20 feet when lit).

Secrets

  • The chest holds a ledger of every undercity resident who has paid Grizel protection money.
  • The Crew did not steal the tithe; a gear-orphan took it to buy medicine for the flooded pits, and the Crew found it afterward.
  • Grizel will kill the thief if she learns who it was, and Tick knows who it was.

DM Notes

This quest runs alongside the main Sump Gears scene and can be resolved in the same trip. If the party opens the ledger, they gain leverage over half the undercity and lose Grizel's trust. If they return it unopened, Grizel becomes a reliable ally for the rest of the campaign.

The Gear-Orphans' Brother

Given by: Tick
Tick's older brother, Cog, was taken by the Ratchet Crew two months ago and has not come back. Tick has asked everyone in the Sump Gears and no one will help, because helping means crossing the Crew. Tick offers the party every copper the gear-orphans have saved — eleven silver pieces and a brass gear-tooth — if they will find Cog and bring him home. Cog is alive in Marisel Quill's workshop, forced to work the unkeying engine because his hands are small enough to reach into its core. He is half-deaf from the engine's hum and will not leave without the other two children the Crew has taken.

Goals

- Find Cog in the Ratchet Crew's workshop.
- Free Cog and the two other children.
- Get them back to the Sump Gears alive.

Reward

Eleven silver pieces, a **Gear-Tooth Charm** (a common wondrous item: a brass gear-tooth on a string that hums when machinery nearby is about to fail), and the gear-orphans' loyalty for the rest of the campaign.

Secrets

  • Cog and two other children are held in the workshop and forced to work the unkeying engine.
  • The Crew took the children because adult hands cannot reach the engine's core without being crushed.
  • Tick has been lying about their age to keep from being taken too.

DM Notes

This quest gives the Sump Gears scene a moral weight beyond the tithe. The children are in the engine room, not the cell block, and freeing them means shutting down the engine for at least a minute — which warns Marisel Quill if she is still in the city.

The Crooked Cog

Given by: Foreman Dace Kettle
Foreman Dace Kettle has lost three freight-lifts to the Ratchet Crew this month, and he has finally caught the saboteur who has been cutting the lift-cables: a guild engineer named Hask Verrin, who has been selling lift schedules to the Crew for a year. Dace cannot arrest him without proof, because Hask is popular and Dace is not. He asks the party to follow Hask through Ratchetworks, catch him passing a schedule to a Crew contact, and bring back the schedule itself. Hask is careful, and the Crew contact is a Concord carter who will claim to be an innocent trader.

Goals

- Follow Hask Verrin through Ratchetworks without being seen.
- Catch him passing a lift schedule to his Crew contact.
- Bring the schedule back to Dace Kettle.

Reward

A **Ratchet Blade** (an uncommon magic longsword: +1 to attack and damage, and it can cut through a locked gear or chain in one round) from Dace's confiscated stock, plus 40 gp.

Secrets

  • Hask Verrin has been selling lift schedules to the Ratchet Crew for a year and has caused the deaths of nine lift-workers.
  • Hask's Crew contact is the same Concord carter who appears in the Salvage Rights quest in Act I.
  • Dace Kettle has known about Hask for a month and has been too afraid of the guild to act.

DM Notes

A short urban pursuit with two DC 14 Dexterity (Stealth) checks and one DC 13 Wisdom (Perception) check. If the party botches it, Hask flees into the Sump Gears and the Crew is warned, which makes the workshop harder to reach.

Side Quests in The First Ring: The Cage Core

The Last Tally

Given by: Sable Vey, the Last Archivist
Sable Vey has spent a year cataloguing what her brother has taken, and she has one page left: the names of the Slivers that have already been unkeyed and eaten. She knows three of them — Cinderhollow and two others — but she believes there are more, and she wants the party to help her find the rest before the Cage is re-keyed or opened. The names are recorded in the Hall of Keys' empty socket, in the archive's damaged ledgers, and in Curator Halden Roke's memory. Sable will not leave the Unkeyed Ward until the tally is complete, and she will not go to the Grand Cage without it.

Goals

- Search the Hall of Keys' socket for scratched names.
- Recover the damaged ledgers from the archive.
- Wake Curator Halden Roke and ask him for the first name.
- Complete Sable Vey's tally before the finale.

Reward

Sable Vey's full cooperation in the finale, and a **Sable's Archive Lens** (a rare wondrous item: a brass lens that lets the holder read any script, cipher or damaged text as if it were clear).

Secrets

  • Seven Slivers have been unkeyed and eaten in the last decade, not three; the Keywardens have suppressed the rest.
  • The names of the eaten Slivers are recorded in the Hall of Keys' socket, which Ossian Vey scratched into the brass as a memorial.
  • Curator Halden Roke remembers the first Sliver the Mist ever ate, three hundred years ago, and it was the ring the first Wardens abandoned.

DM Notes

This quest is the act's emotional core and its main clue-gathering thread. Each of the three sources takes one scene-beat and one skill check (DC 15 Investigation, DC 14 Arcana, DC 13 Persuasion). Completing the tally gives the party the argument that can turn Ossian Vey in the finale.

The Warden's Oath

Given by: Curator Halden Roke
Curator Halden Roke was the last Curator of the Unkeyed Ward before it was abandoned, and he was preserved in a stasis vault with one regret: he never returned the Warden-Prime's oath-ring to the order. The ring was taken from the Hall of Keys when the Ward was abandoned and is now somewhere in the ruined city, and Halden will not rest until it is found. He asks the party to search the Ward for the ring and, if they find it, to carry it to the Grand Cage and give it to whoever speaks the Warden's oath over the Master Key. The ring is in the stasis vault's antechamber, hidden in a hollow brick behind the Curator's own name-plate.

Goals

- Search the Unkeyed Ward for the Warden-Prime's oath-ring.
- Recover it from the stasis vault's antechamber.
- Carry it to the Grand Cage and use it to re-key the Cage.

Reward

The **Warden-Prime's Oath-Ring** (a rare wondrous item: a brass ring that grants advantage on saving throws against being charmed or frightened, and that lets its wearer speak the Warden's oath over the Master Key in the finale).

Secrets

  • The oath-ring is hidden in a hollow brick behind Halden Roke's own name-plate in the stasis vault's antechamber.
  • Halden Roke was the one who took the ring from the Hall of Keys, three hundred years ago, and he has never admitted it.
  • The ring is the only object in the Ward that Ossian Vey did not take, because he did not know it existed.

DM Notes

A short treasure hunt through three ruined locations, with one DC 15 Investigation check and one DC 14 Strength check to shift the name-plate. If the party gives the ring to Sable Vey instead of wearing it, she will use it in the finale and the party loses the option to re-key the Cage themselves.

Character Quests for Pindle Vex, the Ratchet Fingers

The Price of a Name

Tick, a gear-orphan of the Sump Gears, knows which Ratchet Crew runner keeps the tally-book of pressed children — the book that holds Pindle's own indenture and Tick's brother Cog's page beside it. Pindle must get into the Crew's safehouse on the second level of the Sump Gears, lift the tally-book from a locked strongbox, and burn her own page without Grizel or the Crew learning who did it. The book is bound in key-metal wire, so burning one page burns the binding and every name in it, including Cog's; Pindle has to choose between a clean escape and a copy. The safehouse is guarded by two Crew saboteurs, a trapped floor and a Gear-Gnaw Rat nest in the strongbox wall, and the water in the pits rises while she works.

Starting point

Meet Tick in the flooded crawlways beneath the third lift and learn where the tally-book is kept and who guards it.

Choice

Pay Tick the copper they ask for, or press them for the information for free.

Paying earns Tick's trust and a warning about the trapped floor; pressing them sours the gear-orphans against Pindle and costs her a guide later.
Mechanical Rewards
  • Pindle's indenture is destroyed or copied — she can never be sold back to the Crew, and any Ratchet Crew attempt to press her fails automatically.
  • A copied page of pressed children's names (if chosen), usable as leverage or evidence.
  • Tick's loyalty: the gear-orphans of the Sump Gears will shelter, feed, and pass messages for Pindle for the rest of the campaign.
  • 250 gp worth of coin and salvage recovered from the Crew safehouse.
Narrative Rewards
  • Pindle walks out of the Sump Gears with her name back and tells Tick she is done taking orders from anyone.
  • Ratchet-Mother Grizel either fears Pindle or owes her a grudge, depending on how quietly the job was done.

The Debts of the Drowned Walkways

Pindle owes favours to half the Sump Gears — a debt to Old Sarn the lamp-oil seller, a promise to the widow Brack in the half-flooded gear-teeth, and a marker she left with a ferryman named Dredge who now won't surface. Settling them one by one drags Pindle through every crawlway she grew up in, and each debt paid teaches her something she didn't know about the night she was indentured.

Starting point

Repay Old Sarn's debt of lamp-oil and coin, and learn from him that the tally-runner who pressed Pindle was not acting alone — someone paid for her name specifically.

Choice

Ask Sarn who paid for her name, or pay the debt and walk away without asking.

Asking drags Pindle back toward the question of who wanted her owned; walking away keeps the past buried but leaves the question open.
Mechanical Rewards
  • A network of paid debts: safehouses, ferries, and free lamp-oil across the Sump Gears.
  • Either Dredge's ferry passage or the Renegotiator's Edge ability.
  • A lead on who paid for Pindle's name — a thread that leads back to the Ratchet Crew's paymasters.
  • 150 gp in recovered and repaid coin.
Narrative Rewards
  • Pindle learns she was not pressed at random — someone wanted her owned, and that someone is still in the Sump Gears.
  • The undercity begins to say that Pindle Vex pays her debts, which is worth more than coin down there.

The Tally That Counts the Sliver

Pindle lifts a scrap of paper from a Crew runner that turns out to be a fragment of the unkeying engine's manifest — and the numbers on it match the tally-marks her mother scratched inside Pindle's first purse before she died. Someone in the Sump Gears is keeping a second tally-book, one that counts not children but key-bolt frequencies, and Pindle's mother may have been one of its keepers.

Starting point

Decipher the manifest fragment using her mother's tally-scratches as a cipher key, learning that the Ratchet Crew's frequencies were first written down by undercity keepers — including her mother.

Choice

Follow the cipher to her mother's old keeping-station under the third lift, or sell the fragment to Grizel and let someone else dig.

Following it means learning who her mother really was; selling it buys short-term safety and Grizel's fleeting favour.
Mechanical Rewards
  • Her mother's tally-slate (advantage on identifying or countering unkeying devices), or the delay of the Crew's engine calibration.
  • The buyer's name — a story-critical lead connecting Pindle's past to the Ratchet Crew's plans.
  • Either Keywarden goodwill or undercity notoriety, each with mechanical teeth.
  • 200 gp in salvage from the keeping-station.
Narrative Rewards
  • Pindle learns her mother helped keep the frequencies that the Crew is now perverting, and that her indenture was bought, not taken.
  • The keeping-station's records give the party a map of every key-bolt frequency on the Fourth Ring.

Character Quests for Halda Fenn, the Ledger-Blade

The Missing Tally

Halda must get Marnie Tallow to open the old ledger in front of witnesses, then prove what actually happened: the bolt's key-frequency was sold, not lost, and the buyer's mark is a Concord tally. The proof is in three places — the old ledger page in the Tally-House, the anchor-tree's growth rings in the Brass Orchard, and a Concord warehouse receipt held by Grenna Ost.

Starting point

Confront Marnie Tallow about the falsified key-ledger and the twelve-year-old page that blamed Orrin Fenn.

Choice

Press Marnie publicly in the market square or privately in her office.

Public confrontation forces Marnie to either confess or dig in; private confrontation risks her destroying the page.
Alternative

Show Marnie the anchor-tree's growth rings first or demand she open the old ledger first.

The growth rings are the harder proof but require a trip to the Brass Orchard; the old ledger page is easier but Marnie can claim it was misfiled.
Alternative

Trade Grenna Ost the Concord warehouse receipt for a favour or threaten her for it.

Grenna will trade the receipt for a favour or a threat; the favour could be dangerous, the threat could backfire.
Alternative

Decide whether to expose the Concord buyer's name publicly or keep it quiet for leverage.

Exposing it publicly clears her father's name but tips off the Ratchet Crew; keeping it quiet gives leverage over the Concord but leaves the town's trust in the ledger damaged.
Alternative

Decide what to do with the falsified entries Marnie has been making for a month.

The entries hide how far the Sliver has drifted; exposing them forces the town to face the truth but risks panic.
Alternative

Decide whether to pursue the road her father took immediately or finish the campaign's other threads first.

Orrin Fenn left on the north road twelve years ago and never came back; the road may lead to him, or to his fate.
Mechanical Rewards
  • The debt-roll is struck of Orrin Fenn's name, giving Halda +2 reputation with Tallymarket and the town's tally-workers.
  • Halda gains a Concord warehouse receipt as evidence, which can be used as leverage in future negotiations with the Sliver Concord.
  • Halda learns which road her father took, unlocking a personal quest thread that can be pursued in downtime or future sessions.
Narrative Rewards
  • Orrin Fenn's name is cleared in the town's records, restoring Halda's family honour.
  • Marnie Tallow tells Halda which road her father took, giving her closure or a new lead.
  • The town's tally-workers begin to respect Halda as her father's daughter, not just as a soldier.

The Twelve-Year Debt

The complaint against Orrin Fenn was signed by eleven townsfolk. Halda has their names in her notebook. She must decide whether to confront each signer, forgive them, or use their signatures as leverage.

Starting point

Track down the eleven signers and decide what to say to each.

Choice

Confront them with the truth, forgive them quietly, or demand a public retraction.

Each signer has a different story — some were pressured, some genuinely believed the tally, some profited from Orrin's exile.
Alternative

Decide whether to forgive the signers who were pressured or hold them accountable.

Some signers were pressured by Marnie Tallow or by the Keywardens; others genuinely believed the tally.
Alternative

Decide whether to use the signatures as leverage against Marnie Tallow or against the Keywardens.

The signatures prove the town's complicity in the lie; they could be used to pressure Marnie or to expose the Keywardens' role.
Alternative

Decide whether to keep the list of signers or burn it after the debt is settled.

The list is a record of the town's betrayal; keeping it means Halda never forgets, burning it means she lets go.
Alternative

Decide whether to tell her father's story to the town or keep it private.

Telling the story publicly restores Orrin's name but opens Halda to scrutiny; keeping it private protects her but leaves the town's lie intact.
Mechanical Rewards
  • Halda gains a permanent +1 on Charisma (Intimidation) or Charisma (Persuasion) checks depending on her choice.
  • Halda gains the loyalty or enmity of up to eleven townsfolk, which can be called upon in future sessions.
  • Halda gains leverage over Marnie Tallow or Warden-Commander Sela Brant, depending on how she uses the signatures.
Narrative Rewards
  • Halda confronts the people who destroyed her father's life and decides what kind of person she wants to be.
  • The town's lie is exposed or quietly buried, depending on Halda's choice.
  • Halda's notebook becomes a record of the town's debt to her family, or a page she burns to move on.

The Ledger and the Blade

Halda's tally-hammer was her father's mason's maul. She must decide whether to have it re-forged as a weapon of the Keywardens, as a tool of the Ratchet Crew, or keep it as her father's tool.

Starting point

Find a smith who can re-forge the tally-hammer and decide what it should become.

Choice

Have it re-forged by the Keywardens as a Warden's maul, by the Ratchet Crew as a saboteur's tool, or keep it as her father's mason's maul.

Each choice binds Halda to a faction and changes what the hammer means to her.
Alternative

Decide whether to tell the smith about her father or let the hammer speak for itself.

The smith's reaction to Orrin's story may open doors or close them.
Alternative

Decide whether to carry the hammer openly or conceal it.

The hammer is a symbol of her father's trade and her own; carrying it openly invites questions, concealing it invites suspicion.
Alternative

Decide whether to use the hammer to re-key a bolt or to unkey one, if the opportunity arises.

The hammer is a tool of the Engine's machinery; using it to re-key or unkey a bolt is a choice about what Halda believes the Engine should be.
Alternative

Decide whether to pass the hammer on to someone else if she finds a better weapon.

The hammer is her father's legacy; passing it on means letting go of it, keeping it means carrying his weight.
Mechanical Rewards
  • The tally-hammer becomes a +1 weapon (if re-forged by the Keywardens) or gains the ability to unkey a bolt once per day (if re-forged by the Ratchet Crew), or gains Advantage on mason's tools checks (if kept as her father's maul).
  • Halda gains a permanent +1 on Charisma (Intimidation) or Stealth checks depending on how she carries the hammer.
  • Halda gains a permanent +1 on checks to re-seat key-bolts or to plant and remove wedges, depending on how she uses the hammer.
Narrative Rewards
  • Halda's father's tool becomes her own, and she decides what it means.
  • Halda's choice binds her to a faction or keeps her independent, which shapes her relationships for the rest of the campaign.
  • The hammer becomes a symbol that others recognise, whether as a Warden's mark, a saboteur's tool, or a mason's legacy.

Character Quests for Sil Cairn, the Chime-Listener

The Silent Grove

The anchor-tree in the Brass Orchard has not chimed true since the wedge was driven into its bark, and Corwin Ash will not leave his shed until it does. Sil must go down into the root-vault beneath the anchor-tree, cut a living graft of key-metal from the Sliver's anchor-bolt, and re-graft it into the wound the wedge left — a ritual that needs three chime-notes struck from the orchard's three oldest trees in the right order. The root-vault is guarded by Chime-Root, a brass-barked root-creature grown from the anchor's own metal, and the Ratchet Crew's saboteurs left crates and a Wedge-Hound down there. Corwin can teach Sil the graft-song but will not go below; he is ashamed that he hid while the trees were hurt.

Starting point

Learn the graft-song from Corwin Ash and gather the three chime-notes from the orchard's oldest trees.

Choice

Strike the notes in the order Corwin teaches, or improvise a new order based on what Sil hears in the trees themselves.

Corwin's order is safe but incomplete — the trees respond sluggishly. Improvising risks waking Chime-Root early but produces a purer resonance that makes the graft take more easily.
Mechanical Rewards
  • Sil gains the Grafted Key-Sense: her Chime-Listener trait improves — she can now attempt the DC 12 Wisdom (Perception) check to identify keyed objects as a bonus action rather than a minute of listening, and she gains advantage on the check when the object is within 30 feet of any living chime-tree.
  • Sil's maximum hit points increase by 2, as the anchor-tree's key-metal heals the wound the wedge left in her own sense of hearing.
  • Sil gains one use per long rest of the spell Dissonant Whispers (if the wedge was re-tuned) or one use per long rest of the spell Calm Emotions (if the wedge was destroyed or kept as evidence), reflecting the orchard's restored chime.
Narrative Rewards
  • Corwin Ash comes out of his shed and teaches Sil the graft-song his own master taught him fifty years ago, completing the apprenticeship that was interrupted when Sil left to walk the rings.
  • The Brass Orchard rings even again at dusk, and the town of Tallymarket's tilt corrects by a finger's width — the first visible proof that the lurch can be undone.
  • Chime-Root, if befriended, becomes a recurring ally who can be called upon once per act to guard a location or warn of intruders in any grove.

The Graft-Song's Third Verse

Corwin Ash teaches Sil the graft-song, but he does not know the third verse — his own master died before teaching it, and the verse has been lost for fifty years. Sil hears a fragment of it in the ringing of a chime-tree in Bell Meadow, the third anchor-grove of Tallymarket, and realises the verse was not lost — it was taken. A Keywarden engineer copied it into a re-keying log forty years ago and never returned it. Sil must find the log, recover the verse, and decide whether to return it to the orchard or keep it as a weapon against whoever is unkeying the Engine.

Starting point

Listen to Bell Meadow's chime-trees and reconstruct the fragment of the third verse.

Choice

Sil can spend a full day and night in Bell Meadow listening, or she can ask Old Corwin Ash to come with her — the first time he has left his shed since the lurch.

Corwin has not left the orchard since the wedge was pulled. Getting him to Bell Meadow means facing the town that watched him hide, and it is the first step in his recovery — but it also means he will not be in the orchard if the Crew returns.
Mechanical Rewards
  • Sil learns the Third Verse of the graft-song, granting her the ability to re-tune an anchor-grove once per long rest (if sung back to the orchard), or to unkey keyed metal once per long rest (if kept written).
  • Sil's Chime-Listener trait expands: she can now hear the key-frequency of any Sliver she has spent at least an hour on, not just her own.
  • If the verse was taught to Corwin, Sil gains a permanent +1 bonus to all Wisdom (Perception) checks made to identify keyed or unkeyed objects, as the orchard's full song sharpens her ear.
Narrative Rewards
  • Sil recovers a piece of the orchard's culture that was taken by the Keywardens forty years ago, and decides its fate herself.
  • Corwin Ash, if brought to Bell Meadow and given the completed verse, begins to leave his shed — the beginning of his recovery from the shame of hiding while the trees were hurt.
  • Sil gains a complicated ally in Wendel Carn, a retired Keywarden engineer who knows more about re-keying than anyone alive and is willing to trade information for discretion.

What the Trees Remember

The chime-trees of the Brass Orchard were grown from the first Warden's key-metal, and their roots run down into the Sliver's anchor-bolt. They remember everything that has ever happened near them — but they speak in frequencies, not words, and only someone who has spent a lifetime listening can translate. Sil begins hearing fragments of the orchard's memory in her dreams during Trance: a woman with a brass hand arguing with a man in a Warden's coat, a crate being carried through the root-vault, and — most troubling — a memory of the orchard itself being planted, three hundred years ago, by someone who was not a Keywarden. Sil must decide whether to keep listening, and if so, what to do about the fact that the orchard's true origin does not match the story the Keywardens tell.

Starting point

Over three long rests, Sil's Trance fills with fragments of the orchard's memory. She can share them with the party or keep them to herself.

Choice

The memories are vivid and sometimes frightening — the woman with the brass hand is Marisel Quill, and the man in the Warden's coat is someone Sil does not recognise. Sharing them with the party might help identify the man; keeping them private protects the party from the Mist-touched nightmares that sometimes come with them.

The memories are not just Sil's — they are the orchard's, and the orchard is offering them to her because it trusts her. But the Deep Mist is also listening, and the more Sil shares, the more the Mist learns about what the orchard remembers.
Mechanical Rewards
  • Sil gains the Orchard's Memory: she can, once per long rest, ask the chime-trees of any grove she has spent at least an hour in a single yes-or-no question about something that has happened within the grove's memory (roughly the last century). The answer comes as a frequency only she can hear.
  • Depending on choices made, Sil gains either a +1 to druid spell save DCs (if she told Corwin the truth), a non-expiring Warden's Pass (if she told Sela Brant), or the ability to cast Speak with Plants once per long rest without a slot (if she told no one).
  • Sil's Chime-Listener trait can now identify not just whether an object is keyed, but which Sliver's frequency it carries — a DC 15 Wisdom (Perception) check rather than DC 12.
Narrative Rewards
  • Sil learns the true history of the Brass Orchard: it was planted by Elowen Vane, the future Warden-Prime, with key-metal taken from the Hall of Keys — a secret the Keywardens have kept for three hundred years.
  • Sil gains fragments of the orchard's memory that identify Marisel Quill and describe Ossian Vey before the party meets either of them, giving her a personal stake in both villains.
  • Sil's relationship with the barrow-wights of Hollowmere is established: they will answer her one more question, at any time, if she returns and asks it — but each answer costs a memory.

Character Quests for Perrin Voss, the Mist-Marked

What the Mist Counted

Nib, the mist-touched child of Hollowmere, hears the Deep Mist counting the town and says it counted Perrin too — twice, once going out and once coming back. Perrin must sit with Nib on the drifting northern half of Hollowmere through a full night while the Mist counts, and let Nib teach him the counting-rhyme verse by verse. Each verse Perrin answers correctly costs him a memory he did not know he had, and the last verse names what the Mist left in him. The night is not safe: the middle key-bolt is failing, the Mist sends a Fog-Breather up from the lake, and Nib will not leave the drifting half until the count is finished.

Starting point

Perrin agrees to sit with Nib on the drifting northern half of Hollowmere through the night. Nib teaches him the first three verses of the counting-rhyme, and each correct answer costs Perrin a memory he did not know he had — the smell of a kitchen he cannot name, the sound of a woman laughing, the weight of a coin purse he once stole. The middle key-bolt begins to fail.

Choice

When the first memory goes — a woman's laugh, warm and specific — Perrin can stop the verse and keep the memory, but Nib will not continue the count, and the Mist will not tell Perrin what it left in him.

Perrin keeps his memories but never learns the last verse's answer. He gains a permanent +1 to Charisma saving throws against being charmed (the Mist did not get to finish) but loses the chance to learn what the Mist left in him.
Alternative

Perrin can let the verse continue and answer honestly, losing the memory but gaining the next line of the rhyme.

Perrin loses a memory — a specific, painful, small thing — and gains the next verse. The Mist hums approval. Nib smiles for the first time all night.
Mechanical Rewards
  • New trait: 'Twice-Counted Resilience' (resistance to psychic damage) OR 'Unfinished Count' (temporary hit points when Frightened)
  • New ability: cast 'Fog Cloud' once per long rest without a spell slot (if the honest path is chosen)
  • New trait: 'Counted Twice' (once per long rest, drop to 1 hit point instead of 0 and exhale a 10-foot fog cloud) OR enhanced 'The Hum in the Bones'
  • New name: 'The Twice-Counted' (if the honest path is chosen)
Narrative Rewards
  • A deepened bond with Nib, the Fog-Child, who will follow Perrin anywhere
  • The knowledge of what the Mist left in Perrin — a keyhole-shaped hollow, waiting to be filled
  • The answer to why the Deep Mist let him walk out: because he had already been counted, and the Mist does not count the same thing twice

The Bell That Will Not Stop

Perrin's 'The Hum in the Bones' trait makes iron ring when he is frightened — but lately, the iron rings when he is not frightened too. A bell-founder in Ratchetworks named Hesper Gild has been hearing a bell that does not exist, ringing at the same frequency as Perrin's bones, and she believes the bell is trying to be cast. She needs Perrin's hum to tune it.

Starting point

Hesper Gild, a bell-founder in Ratchetworks' Foundry Quarter, has been dreaming of a bell that does not exist — a bell of grey fog and brass, ringing at a frequency that makes her teeth ache. When Perrin passes her workshop, the iron in his coat rings, and she grabs him. She believes the bell is trying to be cast through him, and she wants to help it — or to stop it, she is not sure which.

Choice

Perrin can let Hesper tune the bell to his hum, which means standing in her foundry while she pours molten brass into a mould shaped like the inside of his fear.

The bell is cast. It is small — palm-sized — and it rings with Perrin's hum when he is afraid. Hesper calls it a 'fear-bell' and tells him it will ring when something from the Deep Mist is near, whether he can see it or not.
Alternative

Perrin can refuse Hesper, telling her that the hum is not hers to tune and that some bells should not be rung. She will be disappointed but will not press — and she will remember him.

Hesper lets Perrin go, but she does not stop dreaming of the bell. She casts it anyway, alone, without his hum to tune it — and the bell that comes out of the mould is wrong. It rings by itself, at night, and it draws something up from the Sump Gears.
Mechanical Rewards
  • A 'Fear-Bell' (common wondrous item) OR a permanent +1 to Charisma
  • Suppressed 'The Hum in the Bones' while carrying the Fear-Bell
  • Optional: Nib gains the ability to cast 'Fog Cloud' once per long rest
Narrative Rewards
  • An ally in Hesper Gild, who knows the foundries of Ratchetworks and can cast or repair key-metal items
  • A deeper understanding of the hum in Perrin's bones: it is not just a symptom — it is a frequency, and frequencies can be tuned
  • A warning system against the Deep Mist that the whole party can use

The Tally of the Lost Year

Perrin has no memory of the year before he walked out of the Deep Mist — but the Mist counted him during that year, and the Mist does not count the same thing twice. Somewhere in the Tally Reaches, there is a record of what Perrin was doing during his lost year: a tally-house ledger, a Warden's log, or a Choir hymn that names him. Finding it means finding out who he was — and why the Mist let him go.

Starting point

Perrin begins searching the tally-houses and ledgers of the Tally Reaches for any record of himself during his lost year. Marnie Tallow's key-ledger in Tallymarket has a gap — a page torn out, twelve years old, the same year Perrin lost. The torn page's edge is stamped with a partial Warden's seal.

Choice

Perrin can ask Marnie Tallow directly about the torn page, trusting her with the truth about his lost year.

Marnie admits she tore the page out herself, twelve years ago, on the orders of the tally-keeper before her — a woman named Bess Hedgerow, who said the page named a man who walked out of the Mist and could not be allowed to be counted twice. Bess Hedgerow left Tallymarket the same year and never came back. Marnie gives Perrin Bess's last known address: a boarding house in Ratchetworks.
Alternative

Perrin can steal into the Tally-House at night and read the ledger himself, without telling Marnie what he is looking for.

Perrin finds the torn page's stub and reads the entry number: Entry 447. He also finds a note in Marnie's hand, written recently: 'Bess said never let them count him. I have kept the page safe. If he comes back, tell him to find her before the Crew does.' Perrin realizes Marnie has been protecting him — and that the Ratchet Crew is also looking for Entry 447.
Mechanical Rewards
  • A 'Fear-Bell' OR a 'Tally-Keeper's Token' (uncommon wondrous item)
  • Enhanced 'Mist-Touched Memory' trait (Advantage on History checks related to the Deep Mist) OR the Tally-Keeper's Token
  • A Warden's seal fragment OR Advantage on Persuasion checks with Tally Reaches locals
  • A permanent +1 to Charisma (from facing the Mist's song) OR a new personal goal (reach Elowen Vane)
Narrative Rewards
  • The truth about Perrin's lost year: he was counted by the Keywardens, taken into the Deep Mist by Warden-Prime Elowen Vane, and returned — or replaced — two winters ago
  • A lead on why the Deep Mist let him go: because he had already been counted, and the Mist does not count the same thing twice
  • Allies in Marnie Tallow and Bess Hedgerow, who have been protecting the secret of Entry 447 for twelve years

Step into your campaign

A world you can explore

Play a 3D adventure with your party: explore settlements, wilderness and dungeons, and fight in real time with pause. Best on a desktop or laptop with a mouse and keyboard.

Preparing game world
Play in browser

Encounters

The Chime-Tree Alarm

Suggested Level: 1–2

The party follows Pell the Lamplighter's directions up the orchard road. As they pass the stone wall, brass chime moths lift off the branches and ring. Two Ratchet Crew saboteurs are crouched behind the wall beside a long crate, waiting for the moths to do their work.

Creatures

Terrain Features

The orchard is a low hill of brass-barked trees with a stone wall along the road and Corwin Ash's tool shed at the edge. The trees give half cover and their leaves ring loudly enough to impose disadvantage on hearing-based Perception. The anchor-tree stands at the grove's heart with the black iron wedge driven into its bark, chest-high. A split in the trunk beside the wedge leads down into the root-vault.

Treasure

The saboteurs carry 12 gp, a ratchet-marked oilskin coat each, and a brass tally of the Crew's drop schedule. The crate holds a second unkeying wedge, packed in straw, stamped with the same ratchet-and-cog mark. Corwin Ash, once the moths are quiet, gives the party the Orchard-Keeper's Chime.

DM Notes

For a party of three, drop one Brass Chime Moth and one Bandit. For a party of six, add two more Bandits and one Brass Chime Moth, and have the saboteurs fight instead of fleeing. For a party already at 3rd level, replace the two Bandits with two Scouts and treat the encounter as Moderate.

The Root-Vault of the Anchor-Tree

Suggested Level: 2–3

The saboteurs used the root-vault to reach the anchor-tree unseen, and their crates and a guard construct are still down there. Pulling the wedge above is only half the job: if the vault is not cleared, the Crew will plant another wedge within the week.

Creatures

Terrain Features

Three descending chambers of grown brass root, connected by narrow root-stairs that sway when weight shifts. The anchor-bolt is a column of dull gold at the vault's bottom, warm to the touch and humming at the town's key-frequency. Crates of unkeying wedges are stacked in the second chamber. The roots twitch when struck and can be used for cover, but a missed attack that hits a root rings the whole vault and deafens everyone for a round.

Treasure

Three unkeying wedges in a crate, a set of Crew oilskins, 40 gp in Concord coin, and a brass key that opens the Crew's drop-cache on the lake road. The anchor-bolt itself can be touched safely; a character who does so feels the Sliver's key-frequency and gains advantage on the next check to re-seat a key-bolt.

DM Notes

For a party of three, remove one Bandit and two Brass Chime Moths. For a party of six, add a second Wedge-Hound and two more Bandits. For a party at 4th level, add a third Bandit and treat the encounter as Low.

The Screaming Bolts of Hollowmere

Suggested Level: 3–4

The Ratchet Crew's crate holds a second unkeying wedge, already half-driven into the middle key-bolt. A Bolt-Screamer clings to the bolt and screams whenever anyone comes near. Two Crew saboteurs are working the wedge from a rope platform slung under the bolt, and a Wedge-Hound waits on the northern half.

Creatures

Terrain Features

Three iron key-bolts the width of a man's arm span the gap, each slick with condensation and vibrating at a different pitch. The middle bolt is half-unkeyed and tilts. A rope platform hangs beneath it. The northern half of the town tilts a little further out each round; after three in-game hours the middle bolt fails. Captain Rusk Halloran and six guards watch from the southern square and will not cross without orders.

Treasure

The crate holds a second unkeying wedge and a Crew drop-manifest naming the Sump Gears. The saboteurs carry 30 gp, a brass ratchet-token each, and a note in Marisel Quill's hand ordering the Hollowmere test. Odile Fen will trade the town's tally of the lost for the party's help.

DM Notes

For a party of three, remove two Bandits and the Wedge-Hound. For a party of six, add a second Bolt-Screamer on the outer bolt and two more Bandits. For a party at 5th level, add a second Wedge-Hound and treat the encounter as Low.

The Barrow of the Eleven

Suggested Level: 4–5

When the northern half began to drift, the barrow's dead began to count themselves aloud, and the tally they are keeping is not complete. Odile Fen will not open the inner door. The barrow holds the town's oldest key-bolt record and the reason the first Wardens chose this shore — and something down there is still counting.

Creatures

Terrain Features

Four chambers of dry-laid stone, connected by low passages that force Medium creatures to stoop. Burial niches line the walls, each holding a brass tally-plate with a name chiselled into it. The innermost chamber holds the town's oldest key-bolt record on a stone table, and a shaft of grey light falls on it from a crack in the mound above. The Tally-Gnaws can climb the walls and drop on the party from the ceiling.

Treasure

The key-bolt record names the first Wardens' landing site and the frequency they set the shore to. The niches hold 200 gp in grave-brass, a sealed page of the barrow-book, and a brass tally-plate that, when carried, gives advantage on one check to re-seat a key-bolt. Odile Fen will copy the record into the barrow-book and give the party the sealed page.

DM Notes

For a party of three, remove one Wight and two Tally-Gnaws. For a party of six, add a third Wight and three Tally-Gnaws. For a party at 6th level, add a Wight and treat the encounter as Low.

The Traitor's Flight

Suggested Level: 4

If the party confronts Enginewright Tobias Quill with proof, he panics and flees to the Bastion's gear-vault, where a Ratchet Crew extraction team is already waiting to pull him out. The Crew would rather kill him than let him talk.

Creatures

Terrain Features

A long, low vault of iron gear-racks, hanging chains and a confiscated-weapons cage. The floor is a grid of brass plates that ring underfoot, so stealth is nearly impossible. A back stair leads up to the stores. The gear-racks give three-quarters cover but topple if struck hard, and a toppled rack blocks a five-foot square. The vault's ceiling is low enough that the Wedge-Hounds cannot rear up.

Treasure

The crate holds a confiscated Ratchet Crew unkeying wedge, a set of Crew oilskins, and a ledger of the Crew's payments to a Concord broker. The extraction team carries 60 gp, two ratchet-tokens, and a written order in Marisel Quill's hand naming the Sump Gears as the next meeting place. Quartermaster Hulm will buy the oilskins for 10 gp.

DM Notes

For a party of three, remove two Bandits and one Wedge-Hound. For a party of six, add two Bandits and one Scout. For a party at 5th level, replace the two Scouts with two Veterans and treat the encounter as Low.

The Flooded Gear-Pits

Suggested Level: 5–6

To reach the Ratchet Crew's workshop on the third level, the party must cross the flooded gear-pits on the second. The water is black and rises a finger's width every hour. Crew saboteurs hold the walkways, and something older lives in the water.

Creatures

Terrain Features

A vertical maze of flooded gear-pits connected by narrow plate walkways, rope bridges and ladder-shafts. The water is black, cold and twenty feet deep in places. Every hour the party spends below, the water rises and one more walkway floods. A lit Sump Lantern reveals the pit-eels' shadows coiling under the surface. The gear-teeth above give cover from ranged attacks but can be turned by a lever to grind anyone standing on them.

Treasure

The Crew captains carry 80 gp, two ratchet-tokens, and a key to the workshop's false gear-wall. A drowned gear-orphan's satchel holds a brass gear-tooth charm and a note naming the workshop's third-level entrance. Grizel's stolen tithe chest is not here; it is in the workshop.

DM Notes

For a party of three, remove one Bandit Captain, one Wedge-Hound and two Sump Pit-Eels. For a party of six, add one Bandit Captain and two Thugs. For a party at 7th level, add a second Wedge-Hound and treat the encounter as Low.

The False Gear-Wall

Suggested Level: 6–7

Behind a false gear-wall on the third level, the Ratchet Crew assembles its unkeying engine. Lira Quill is held in a cell behind the engine room, and two gear-orphans work the engine's core because their hands are small enough to reach inside. The Crew will not give any of it up without a fight.

Creatures

Terrain Features

A wide workshop of brass benches, tool-racks and a flooded stairwell at the back. The unkeying engine sits on a brass cradle in the centre, its core a slowly turning shard of the Master Key that hums at the same frequency as the key-bolts. A false gear-wall at the front can be jammed shut with a DC 15 Strength check. The cell block is behind the engine room, and the back stair leads up to the second level. The floor is slick with oil and water.

Treasure

Grizel's tithe chest (with her protection ledger inside), the unkeying engine's plans naming the Driftline, three unkeying wedges, 120 gp in Concord coin, and the engine's core — a fragment of the Grand Cage's own Master Key. Lira Quill carries her father's re-keying log, which names every bolt he altered.

DM Notes

For a party of three, remove one Bandit Captain, one Wedge-Hound and two Thugs. For a party of six, add one Bandit Captain and two Thugs. For a party at 8th level, add a second Wedge-Hound and treat the encounter as Low.

The Hollow Cantor's Song

Suggested Level: 9–10

Ilse Marrow is three verses from opening Marrow Spire to the Deep Mist. Each verse takes three rounds. The party can break the three brass chimes that anchor the ritual, silence the Cantor, or destroy the mist-condensers in the undercroft below. Sister Wren Hallow leads the Choir's guards and will die before she lets the ritual be broken.

Creatures

Terrain Features

A circular nave of brass pillars around a central ritual circle, open to the fog at the crown. The fog is thick enough to heavily obscure anything more than 30 feet away. Three brass chimes hang from the pillars at the circle's edge; each can be broken with a DC 15 Strength check or a successful attack against AC 15, 10 hit points. The back stair leads down to the undercroft and the Driftline. The Cantor's song imposes a DC 15 Constitution saving throw each round on anyone within 30 feet of the circle or they are charmed until the end of their next turn.

Treasure

The Cantor's Throat, taken from the ritual circle. Anselm Crowe's notebook of every verse. The Choir's votive offerings: 300 gp in brass chimes, a sealed letter from Lady Ysolde Marrow, and a chart of the Spire's back stair down to the Driftline. If Ilse Marrow is turned rather than killed, she gives the party the Choir's ritual schedule and the name of the Unkeyed Warden.

DM Notes

For a party of three, remove two Cult Fanatics and the Fog-Breather. For a party of six, add two Cult Fanatics and a second Fog-Breather. For a party at 11th level, add a Condenser Husk from the undercroft and treat the encounter as Moderate.

The Edge of the Ring

Suggested Level: 9–10

Marisel Quill is testing the unkeying engine on a small Sliver before turning it on the Fourth Ring itself. Salvage-Captain Rooke and the Freefall Salvagers are trying to anchor the drifting Sliver with harpoon-lines. The party has three rounds before the engine completes its first cycle and the drifting Sliver begins to be eaten.

Creatures

Terrain Features

A ring of harpoon-catapults, anchor-lines, rope-walks and salvage cranes on the raw edge of the ring. Beyond the edge, the Deep Mist stands up like a wall and the drifting Sliver turns slowly away. The harpoon-lines can be walked with a DC 14 Dexterity (Acrobatics) check and can be cut to drop anyone on them. The engine sits on a brass cradle at the camp's centre, its core a fragment of the Master Key. The service shaft down to the First Ring is marked on Rooke's chart-house wall.

Treasure

The unkeying engine's core — a fragment of the Grand Cage's own Master Key. Marisel Quill's brass prosthetic hand, which hides tools and a key-fragment. Rooke's Driftline chart, which marks the service shaft down to the First Ring. 200 gp in Concord coin from the Crew's pay chest, and a set of harpoon-lines the party can keep.

DM Notes

For a party of three, remove one Bandit Captain, two Thugs and the Drift-Skimmer. For a party of six, add a second Drift-Skimmer and two Thugs. For a party at 11th level, add a second Wedge-Hound and treat the encounter as Moderate.

The Threshold of Keys

Suggested Level: 10–11

Vessaline Roke has followed the party down the service shaft with a company of mercenaries. She will not attack while Gate-Warden Nim is watching, but the moment the party takes the oath or squeezes through the crack, her veterans move to take the door. A Keyhole Crawler nests in the keyhole field and strikes whoever comes closest.

Creatures

Terrain Features

A flat brass apron before a mile-wide door covered in thousands of keyholes. The keyhole field is difficult terrain and hides the Keyhole Crawler. Rocks and broken pillars give cover to the mercenaries. The crack Ossian Vey left is a person-wide gap in the door's teeth; squeezing through requires a DC 16 Dexterity (Acrobatics) check and deals 2d6 slashing damage on a failure. Gate-Warden Nim will not fight and will not be harmed; harming Nim closes the door for a year.

Treasure

The Threshold Key, given by Nim to anyone who swears the Warden's oath and means it. The mercenaries carry 150 gp, a stolen key-fragment that opens most Warden locks, and Vessaline Roke's written orders naming her informants in the Sliver Concord. Nim's turnip keys are worthless but Nim will give one to anyone who asks politely.

DM Notes

For a party of three, remove two Veterans and one Bandit Captain. For a party of six, add two Veterans and a second Keyhole Crawler. For a party at 12th level, add a Warden Gear-Husk from the Ward and treat the encounter as High.

The Dead City of the First Wardens

Suggested Level: 13–14

The Unkeyed Ward is a dead city inside the Cage Core, abandoned three hundred years ago and picked over by Ossian Vey for a year. A Warden Gear-Husk still guards the empty socket of the Hall of Keys, a Keyhole Crawler stalks the archive, and a Mist-Song Wisp drifts through the streets singing. Sable Vey will not leave until her tally is complete.

Creatures

Terrain Features

A ruined city of red brick towers, broken arcades and long straight streets with the paving stones pulled up in lines. The Hall of Keys is a vast circular hall with an empty socket in its floor where the Master Key rested; the socket's brass is scratched with seven names. The archive is a collapsed scriptorium with damaged ledgers. The stasis vault beneath the archive holds Curator Halden Roke. The Mist-Song Wisp's aura of fog heavily obscures the streets it drifts through.

Treasure

Sable Vey's Archive Lens, if the party completes her tally. The Warden-Prime's Oath-Ring, hidden in a hollow brick behind Halden Roke's name-plate in the stasis vault antechamber. The Hall of Keys' socket holds seven scratched names, including Cinderhollow. The archive holds damaged ledgers, a Warden's oath-text, and Ossian Vey's notes describing the Cage as a lid. The Gear-Husk collapses into a heap of several hundred keys, one of which opens any locked door in the Ward.

DM Notes

For a party of three, remove the Keyhole Crawler and reduce the Mist-Song Wisp's hit points by a third. For a party of six, add a second Keyhole Crawler and a second Warden Gear-Husk. For a party at 15th level, add a second Mist-Song Wisp and treat the encounter as Moderate.

The Grand Cage

Suggested Level: 15

Ossian Vey is three turns from unkeying the Grand Cage. Each turn takes five rounds. The party can stop him by fighting him, by jamming the Master Key, or by speaking the Warden's oath over it. Vessaline Roke arrives at the end of the third turn with her mercenaries and tries to seize the Key. Warden-Prime Elowen Vane is imprisoned in the Cage's lock and can be freed to re-key it.

Creatures

Terrain Features

A room the size of a sky, walled in brass, with a key the size of a tower turning in a lock at its centre. There is no floor to speak of, only gantries, gear-teeth and the slow turning of the world. The Master Key's shoulder is a moving platform; anyone on it must make a DC 12 Dexterity saving throw at the start of each round or be carried 10 feet. Cracks in the walls leak the Deep Mist, which imposes a DC 15 Constitution saving throw each round in the heart-room or the character takes 2d6 psychic damage. Warden-Prime Elowen Vane is imprisoned inside the lock and can be freed with a DC 17 Strength check or by jamming the Key for one turn.

Treasure

The Master Key itself, which can unkey or re-key the Grand Cage. The Key-Fragment of the Master Key, if the party did not take it at the Driftline. Ossian Vey's sealed records of the first Wardens, which prove the Cage was built to hold the Mist out. Vessaline Roke's key-blade and shield of locked air, if she is defeated. The Warden-Prime's Oath-Ring, if the party carries it, is the cleanest way to re-key the Cage.

DM Notes

For a party of three, remove Vessaline Roke and reduce Ossian Vey's hit points by a quarter. For a party of six, add a Mist-Song Wisp and two Veterans from Roke's company. For a party below 15th level, extend Ossian's turn clock to seven rounds per turn and let the party jam the Key with a DC 15 check instead of DC 16.

Magic Items

Lamplighter's Wick Lamplighter's Wick Completed

Lamplighter's Wick

Common
A braided brass-thread wick that fits any lantern. It burns without oil for eight hours a day, and it gutters and dims whenever a keyed bolt within a mile is failing.

Location

Act I - Tallymarket boundary wall, given by Pell the Lamplighter

Attunement

False

Weighed Anchor Token Weighed Anchor Token Completed

Weighed Anchor Token

Uncommon
A palm-sized brass token stamped with a plumb-bob. Dropped, it always falls toward the Sliver's true down, even when the ground tilts or the town lurches.

Location

Act I - the Weighed Anchor cellar grove, given by Dorn Fell

Attunement

False

Orchard-Keeper's Chime Orchard-Keeper's Chime Completed

Orchard-Keeper's Chime

Uncommon
A single brass leaf on a leather cord, cut from the anchor-tree. It rings when a keyed bolt within 60 feet is out of true, and only its wearer hears the ring.

Location

Act I - the Brass Orchard anchor-tree, given by Old Corwin Ash

Attunement

True — by a druid or ranger

Warden's Pass Warden's Pass Completed

Warden's Pass

Uncommon
A grey slate card with a brass key at the corner, stamped by the Bastion of the Sixth Key. Keywarden guards accept it as authority, and it opens any Warden lock on the Sixth Ring.

Location

Act I - the Warden Bastion of the Sixth Key, granted by Warden-Commander Sela Brant

Attunement

False

Sump Lantern Sump Lantern Completed

Sump Lantern

Uncommon
A hooded lantern of blackened brass with a key-metal shutter. Lit, it reveals invisible creatures within 20 feet as pale outlines, and it burns underwater without going out.

Location

Act II - the Sump Gears, from Ratchet-Mother Grizel or Quartermaster Hulm

Attunement

False

Ratchet Blade Ratchet Blade Completed

Ratchet Blade

Uncommon
A longsword with a ratchet-toothed spine and a brass pommel. It grants +1 to attack and damage rolls, and it saws through a locked gear, chain or iron bar in one round.

Location

Act II - Ratchetworks, from Foreman Dace Kettle's confiscated stock

Attunement

False

Cantor's Throat Cantor's Throat Completed

Cantor's Throat

Rare
A brass chime the size of a fist, warm to the touch and never quite silent. Struck, it charms one creature within 30 feet for a minute unless it saves, and it hums when the Deep Mist is near.

Location

Act II - Marrow Spire, taken from Ilse Marrow's ritual circle

Attunement

True — by a bard, cleric or paladin

Driftline Harpoon Driftline Harpoon Completed

Driftline Harpoon

Rare
A harpoon on a hundred feet of key-metal line, scored by years of fog. Thrown, it returns to the thrower's hand, and the line holds fast to anything it strikes, even in the Deep Mist.

Location

Act II - the Driftline, from Salvage-Captain Rooke's chart-house

Attunement

False

Sable's Archive Lens Sable's Archive Lens Completed

Sable's Archive Lens

Rare
A brass lens in a folding frame, ground from a Warden's reading-glass. Looking through it, any script, cipher or damaged text reads as clear common, and hidden writing glows faintly gold.

Location

Act III - the Unkeyed Ward archive, given by Sable Vey

Attunement

True — by a character proficient in Arcana

Warden-Prime's Oath-Ring Warden-Prime's Oath-Ring Completed

Warden-Prime's Oath-Ring

Rare
A plain brass ring worn smooth by three centuries in a hollow brick. It grants advantage on saving throws against being charmed or frightened, and it lets its wearer speak the Warden's oath over the Master Key.

Location

Act III - the Unkeyed Ward stasis vault antechamber, from Curator Halden Roke

Attunement

True — by a character who has sworn the Warden's oath

Threshold Key Threshold Key Completed

Threshold Key

Very Rare
A key of dull gold with no teeth and no wards, warm as a hand. It opens any door, gate or lock in the World Engine once, and after that it is an ordinary key forever.

Location

Act III - the Threshold of Keys, given by Gate-Warden Nim

Attunement

False

Key-Fragment of the Master Key Key-Fragment of the Master Key Completed

Key-Fragment of the Master Key

Legendary
A shard of the Master Key, warm and slowly turning in the hand. Held, it lets its bearer unkey or re-key one Sliver, and the Deep Mist can hear it being used.

Location

Act III - the Grand Cage, from the unkeying engine's core or from Ossian Vey

Attunement

True — by a character who has taken the Warden's oath