Hook 01
The Whispering Page
Elara Voss, a sage, hires the party to escort her and a single page of the Codex of Flayed Whispers from Ashfen to Highwatch. The page whispers secrets and the Unbound Choir will kill to reclaim it.
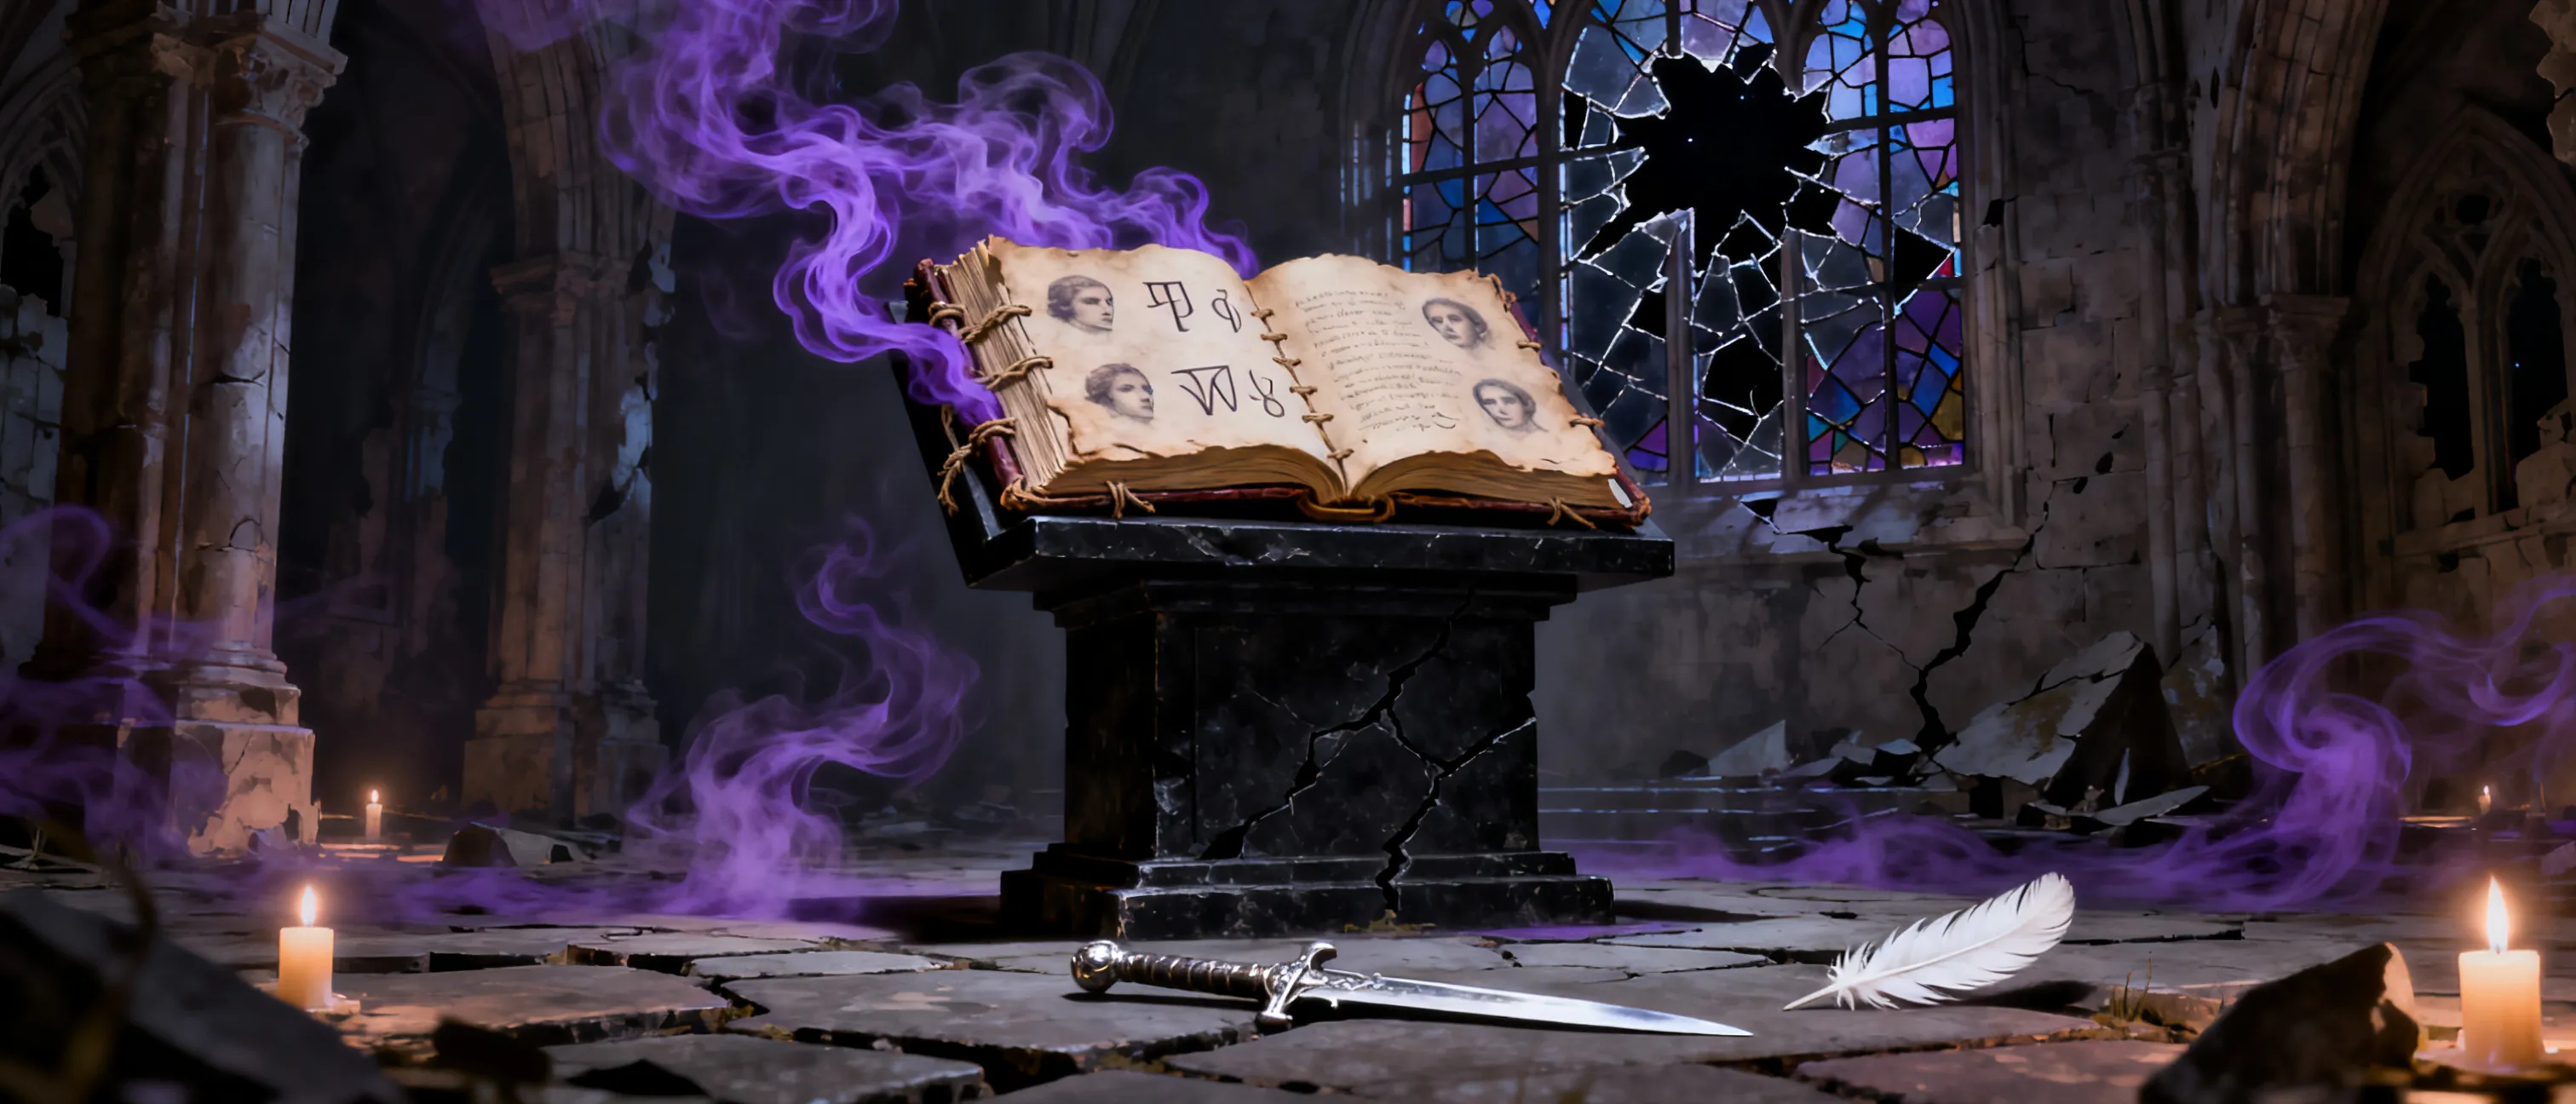
The adventure ahead
The Codex of Flayed Whispers is a chaotic evil artifact bound in the skin of Archmage Vaelthar, who tried to swallow a shard of the Void Beyond. It whispers forbidden secrets, grants occult power, and slowly consumes its bearer. The cult known as the Unbound Choir seeks to use the Codex to open a rift and crown their leader, Magister Vaelen Mor, as a living vessel of the Void. The only way to destroy the Codex is to have every page read aloud backwards by a solar, who disintegrates upon finishing the last word.
The party must race from the village of Ashfen to the cult's stronghold, gather the ritual keys, summon a solar, and make an impossible choice. This campaign is for 1st- to 11th-level characters and takes about 24 sessions.
Share with your players
You are adventurers in the borderlands of the Reach, a land of old ruins and older whispers. A sage named Elara Voss has sent for you. She carries a page of a forbidden book—the Codex of Flayed Whispers—and the cult known as the Unbound Choir will kill to get it back. The Codex is an artifact of chaotic evil, bound in the skin of a mad archmage. It whispers secrets, grants power, and devours the mind.
The only way to destroy it is to have a solar read every page backwards, a sacrifice that will unmake the solar. Elara believes you are the only ones who can gather the keys, summon the solar, and end the Codex before the Choir's leader, Magister Vaelen Mor, becomes its living vessel. The road begins in the village of Ashfen, where rain falls like a dirge and the first page is already whispering.
Behind the screen
The Codex of Flayed Whispers is a chaotic evil artifact bound in the skin of Archmage Vaelthar, who tried to swallow a shard of the Void Beyond. It whispers forbidden secrets, grants occult power, and slowly consumes its bearer. The cult known as the Unbound Choir seeks to use the Codex to open a rift and crown their leader, Magister Vaelen Mor, as a living vessel of the Void. The only way to destroy the Codex is to have every page read aloud backwards by a solar, who disintegrates upon finishing the last word.
The party must race from the village of Ashfen to the cult's stronghold, gather the ritual keys, summon a solar, and make an impossible choice. This campaign is for 1st- to 11th-level characters and takes about 24 sessions.
Hook 01
Elara Voss, a sage, hires the party to escort her and a single page of the Codex of Flayed Whispers from Ashfen to Highwatch. The page whispers secrets and the Unbound Choir will kill to reclaim it.
Hook 02
Choir agents have been seen in Ashfen wearing black feathers and gray robes. The local priest believes they are searching for something buried beneath the chapel.
Hook 03
The innkeeper of the Drowned Bell owes a debt to a cultist named Sister Nira. She calls in the debt by demanding the party hand over any strange books or relics they carry.
Hook 04
A blind astronomer in Highwatch dreams of a solar named Solarael who is trapped in a pocket dimension. He believes the solar can destroy the Codex, but only at the cost of its own existence.
Hook 05
A tattooed skin map is found on a dead Choir courier. It shows the route to the Sunken Archive and marks three ritual keys needed to open the Rift of Flayed Sky.
Hook 06
Each party member begins having the same dream: a black glass cathedral floating above a wound in the sky, and a voice reading backwards from a book bound in human skin.
The party discovers a single page of the Codex in Ashfen. The Unbound Choir attacks to reclaim it. They learn the Codex is real, the cult is hunting all pages, and a sage named Elara Voss can identify the ritual needed to destroy it. They must survive, gather clues, and reach Highwatch.
Read aloud
Rain hammers the shutters of the Drowned Bell. Inside, peat smoke and spilled ale fight for dominance. A hooded traveler sits alone, tracing a finger over a page of pale leather. When you enter, the page twitches like a trapped moth, and a whisper slides into your mind: 'Read me. Free me.'
The traveler is Elara Voss, a sage. She has the first page. She is being followed by Choir agents. She will ask the party to escort her to Highwatch. If the party examines the page, it whispers. The page is made of human skin and radiates abjuration magic. Elara is terrified but determined.
Read aloud
The chapel's stained glass depicts a solar descending in flame. But now the windows are shattered, and black feathers drift in the holy water. Three cultists in gray robes stand over the bound priest, chanting. One holds a silver dagger to the priest's throat.
Choir agents (use the cultist stat block from the SRD) are interrogating the priest about the page. If the party intervenes, a fight breaks out. The priest can give a clue about the solar ritual. The cultists carry a map to the Sunken Archive.
Read aloud
The archive lies half-drowned in a bog. Broken pillars jut from black water. A stair spirals down into a flooded vault. From below, a chorus of whispers rises, each voice reading a different page at once.
The archive contains a fragment of Vaelthar's journal and a second page. A water weird (SRD) guards the vault. The whispers are the Codex's influence. The journal reveals Vaelthar's ritual and the solar's role.
Read aloud
The road climbs through wind-bent pines. At a ford, a gallows creaks with three hanged cultists—each with a black feather in their mouth. As you approach, the water stirs, and gray-robed figures rise from the reeds.
Choir ambush led by Sister Nira, a lieutenant. She offers to trade Elara for the page. If refused, fight. Nira uses void-touched spells and tries to capture Elara. She is not the main villain; describe her tactics without assigning a monster stat block.
Milestone: Reach Highwatch and deliver the page to Elara's contact. The party advances to 4th level.
In Highwatch, the party learns the Codex can only be destroyed by a solar reading every page backwards. They must recover three ritual keys: the Solar Sigil, the Void Anchor, and the Last Page. The Choir races them. They infiltrate the Gilded Asylum, the Choir's Fane, and the Observatory of Falling Stars.
Read aloud
The asylum's marble halls are too clean. Patients sit in silent rows, their eyes stitched shut with silver thread. A matron in white glides between them, humming a lullaby that sounds like a spell.
The Solar Sigil is hidden in the asylum's basement. The matron is a Choir agent. Patients are victims of the Choir's experiments. The matron will resist the party and call for guards.
Read aloud
The fane is a natural cavern hung with flayed skins. Each skin is tattooed with a page of the Codex. At the center, a black iron anchor floats above a pit, humming with void energy. Choir members kneel in a circle, cutting their palms.
The Void Anchor is guarded by a gibbering mouther (SRD) and Choir cultists. Sister Nira is here. She will fight or flee. The anchor is key to opening the rift. The skins on the walls are copies of Codex pages.
Read aloud
The observatory's dome is cracked, and a beam of starlight falls on a brass orrery. An old astronomer, blind and muttering, turns the spheres. 'The last page is not here,' he says. 'It is in the Whisperwood, where the trees remember.'
The astronomer is a former Choir member. He can reveal the Last Page's location. A Choir strike team arrives to silence him. The astronomer will help if the party protects him.
Read aloud
The trees of Whisperwood have bark like gray skin, and their leaves murmur in reverse. A path of white stones leads to a hollow where a single page hangs from a branch, pinned by a silver dagger. As you approach, the trees sigh: 'Turn back. The last word is a death sentence.'
The Last Page is guarded by a treant (SRD) that has been corrupted by the Codex. The page is sentient and tries to tempt a spellcaster into reading it. The treant attacks if the party tries to take the page without calming it.
Milestone: Recover all three keys and survive the siege. The party advances to 8th level.
The Choir opens the Rift of Flayed Sky. Magister Vaelen Mor prepares to become the Codex's vessel. The party must infiltrate the rift, confront Mor, summon the solar Solarael, and read the Codex backwards. The solar will disintegrate upon the last word. The party must decide if the sacrifice is worth it.
Read aloud
The sky above the fortress is a wound. Violet lightning stitches the clouds, and a cathedral of black glass floats on a shard of broken earth. Choir members chant on the battlements, their voices echoing backwards. The Codex sits on an altar of bone, its pages turning by themselves.
The fortress is guarded by Choir cultists and void-touched beasts. The party must find a way in. The rift is unstable; void energy causes psychic damage to those who linger. The Codex is visible on the altar but protected by a barrier.
Read aloud
Mirrors line the hall, but they do not reflect you. They reflect versions of you who read the Codex and became monsters. In the center, Sister Nira waits, her body half-transformed into a flayed thing. 'The Magister sees all,' she gurgles. 'You are already too late.'
Nira is a lieutenant. She fights with void powers and uses the mirrors to create illusory duplicates. The mirrors can be used to trap her. She carries a key to the throne room.
Read aloud
Magister Vaelen Mor sits on a throne of flayed skin, the Codex open in his lap. His eyes are black pits, and his mouth moves in reverse. 'You are just in time,' he says, though his lips do not match. 'The Codex needs one more reader.'
Mor is the main villain. Use his generated character sheet. He fights with spells and void powers. He will try to dominate a spellcaster to read the Codex. He is arrogant and will monologue if given the chance.
Read aloud
The altar cracks open, and a pillar of sunlight pierces the rift. From it steps a solar, wings of gold and eyes of fire. 'I am Solarael,' it says. 'I have heard the Codex's whispers for centuries. I will read. But know that the last word will unmake me.' The Codex opens to the first page, and the solar begins to read backwards.
The solar reads each page backwards. Each page takes 1 round. The party must defend the solar from void creatures and Choir remnants for 13 rounds. If the solar is interrupted, it must restart. If the party fails, the Codex survives and Mor's soul enters it.
Milestone: Destroy the Codex and survive the collapse. The party advances to 11th level.
 Magister Vaelen Mor
 is a gaunt, towering figure of gray and violet silk, his flesh partially replaced by void-touched skin grafts harvested…
 Sister Nira
 is a gaunt human woman in her mid-thirties, rendered skeletal by a decade of the Void's slow feeding. Her rain-dark gray robes …
 Matron Vela
 is a tall, gaunt woman in her late forties, her gray-streaked hair pinned beneath a nurse's wimple of immaculate white. She mov…
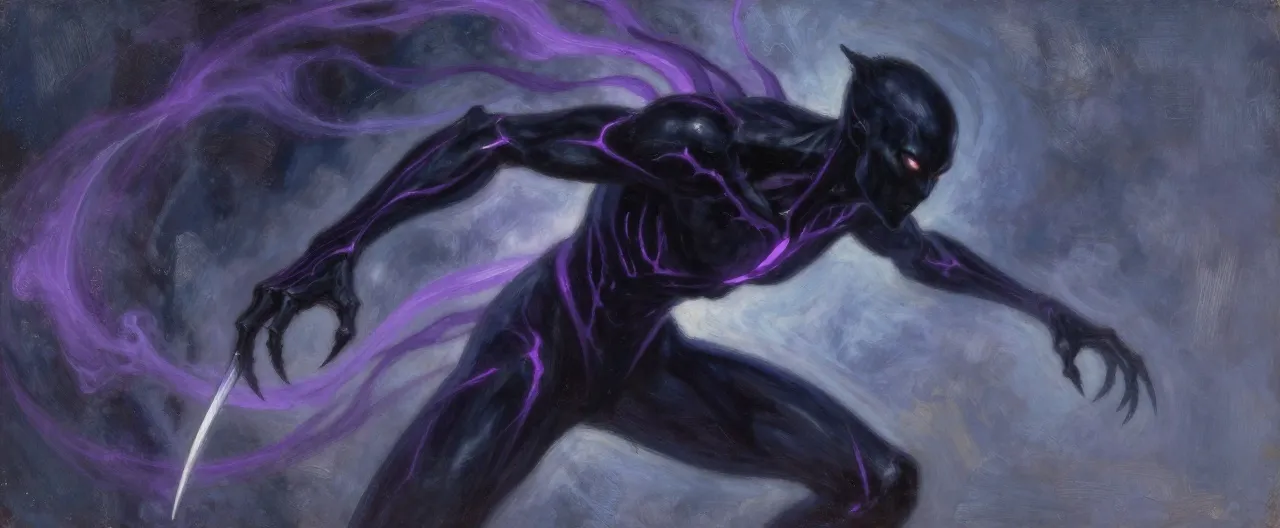 Void-Touched Stalker
Completed
· CR 3
· Aberration
The Void-Touched Stalker presents a terrifying silhouette against the dimly lit corridors of the Choir's Fane Anchor. Standing roughly six …
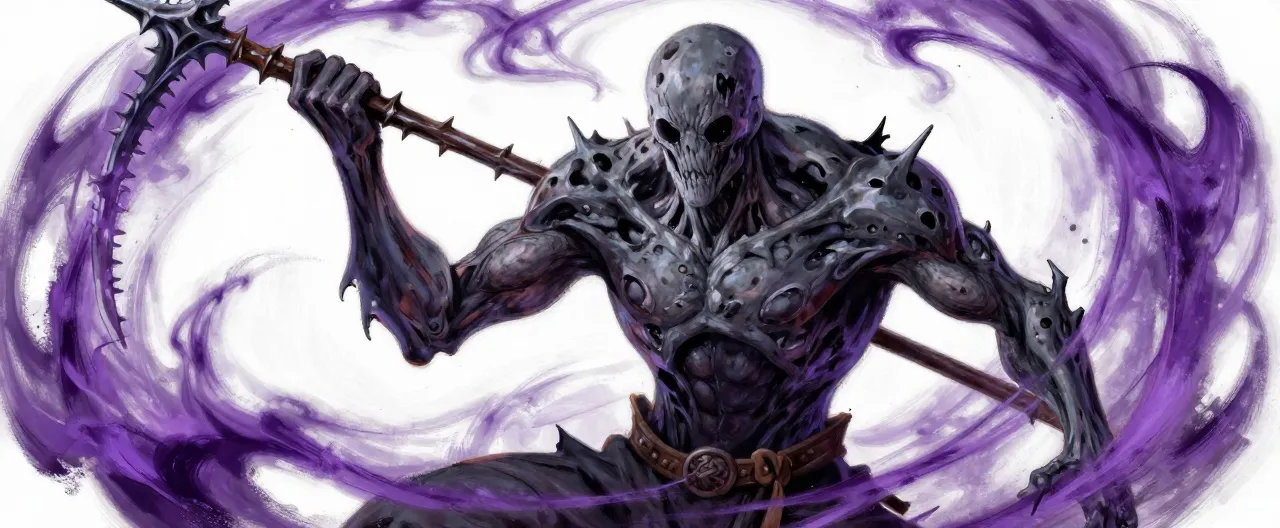 Flayed Choir Zealot
Completed
· CR 5
· Humanoid
The Flayed Choir Zealot presents a horrifying visage of corrupted devotion, standing as a testament to the grotesque rituals of the Codex. …
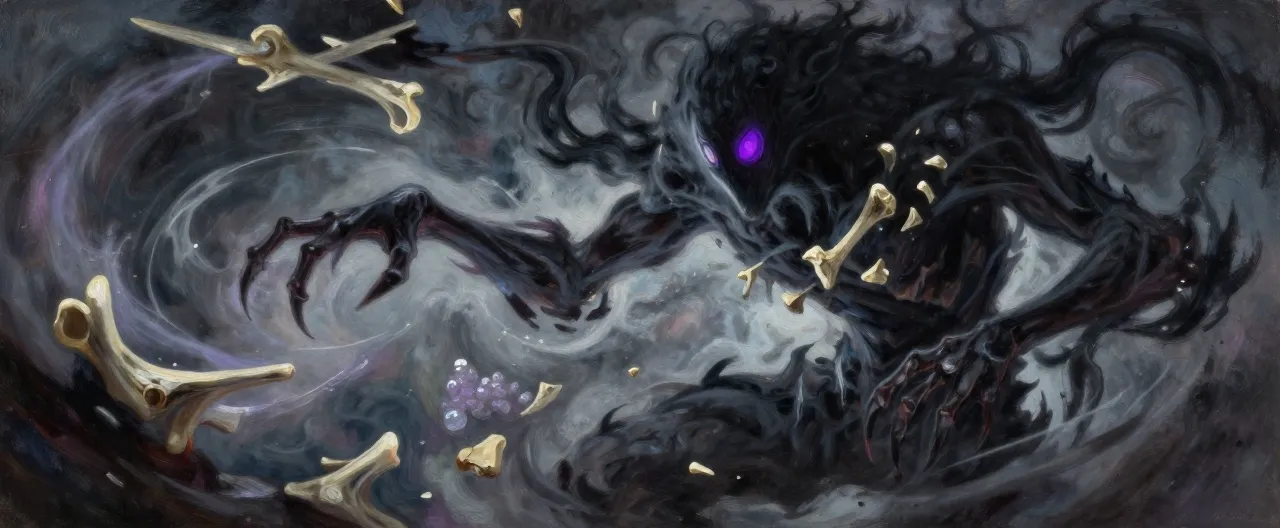 Rift Wretch
Completed
· CR 8
· Aberration
The Rift Wretch is a horrifying manifestation of spatial instability, appearing as a humanoid silhouette constructed from swirling, viscous…
Mor was once a mortal archmage who feared death. He believes the Codex can make him a living vessel of the Void Beyond, granting him immortality and godlike power. He is willing to sacrifice all of Highwatch to achieve this.
Arrogant, theatrical, and utterly convinced of his own destiny. He speaks in reverse sometimes and enjoys monologuing about the Void's beauty. He is cruel to his followers but genuinely believes he is saving them from mortality.
Mor begins combat by casting dominate person on the party's spellcaster, ordering them to read the Codex. He uses void powers to push characters toward the rift and summons flayed zealots to protect him. If reduced below half hit points, he retreats to the throne and activates the vessel ritual, forcing the party to interrupt him.
Mor cannot be redeemed. If defeated, his soul is drawn into the Codex, and he becomes a whispering voice within it. The only way to truly end him is to destroy the Codex.
Nira was saved from a flaying ritual by Mor and is fanatically loyal to him. She believes that serving the Void is the only way to avoid being consumed by it. She wants to prove herself worthy of becoming Mor's first flayed apostle.
Sadistic, patient, and utterly fearless. She speaks in a low rasp and enjoys psychological torment. She never forgets a slight and will hunt the party across the campaign.
Nira uses void-touched spells to frighten and restrain key targets. She focuses on capturing Elara or the party's spellcaster. If reduced below half hit points, she flees using misty step or a hidden passage, preferring to fight another day.
Nira is beyond redemption. If killed, her body dissolves into black feathers. If she escapes, she returns in Act III as a half-transformed flayed thing in the Hall of Mirrors.
Vela is a former physician who lost her family to a plague. She believes the Void can erase suffering by erasing individuality. She stitches eyes shut to harvest psychic energy for the Codex, hoping to create a world without pain.
Soft-spoken, maternal, and utterly detached from the horror she inflicts. She hums lullabies while performing surgeries and genuinely believes she is helping her patients.
Vela tries to charm or restrain intruders. She uses her guards as shields and calls for reinforcements if reduced below half hit points. She will not flee unless the Solar Sigil is taken, in which case she retreats to the Choir's Fane.
Vela can be redeemed if the party shows her the suffering she has caused and succeeds on a DC 18 Charisma (Persuasion) check. Otherwise, she fights to the death, whispering that the Void will forgive her.
Recommended party: Four to five characters, ideally including at least one spellcaster (wizard, sorcerer, warlock, bard, cleric, or druid) to interact with the Codex and ritual. A character with good Intelligence (Investigation) and Charisma (Persuasion) is useful. A divine caster or paladin helps with the solar. No evil-aligned characters unless the table wants a corruption arc.
Before play, discuss the campaign's themes: body horror, madness, sacrifice, and cosmic dread. Establish boundaries around flaying, eye trauma, and mind control. Create characters with ties to Ashfen or Highwatch. Ensure at least one character can cast spells and one has good Intelligence (Investigation) or Charisma (Persuasion). Decide whether the party wants a corruption arc; if not, make it clear the Codex is a temptation to resist. Explain that the solar's sacrifice is inevitable and that the campaign ends with a bittersweet victory. Provide a list of safety tools and allow players to change the tone if needed.
The campaign is designed for four to five characters from 1st to 11th level. For a larger party, add one or two minions to each encounter. For a smaller party, remove one minion or reduce a boss's hit points by 20. If the party lacks a spellcaster, Elara Voss can provide ritual support, but she will not read the Codex. If the party is struggling, allow them to find extra potions of healing in treasure parcels. If the party is steamrolling encounters, have villains use better tactics, such as focusing fire on the healer or using terrain to split the party.
Keep the Codex's whispers present but not overwhelming. Use them to tempt spellcasters with secrets and power. Portray the Choir as a genuine threat, not a faceless horde. Give villains clear motivations and let them monologue. Use the rift's psychic damage to create urgency. Track the 13 rounds of the solar's reading carefully. If the party tries to save Solarael, remind them that the ritual requires the solar's disintegration. Reward creative solutions, such as using the mirrors to trap Nira or negotiating with the water weird. Keep the pace moving; this campaign has 24 sessions, so each act should take about 8 sessions.
Spend time in a library or with Elara Voss to learn the Codex's history, properties, and the solar ritual.
Requirements: Access to a library or Elara Voss, and a successful DC 15 Intelligence (Arcana) check.
Rewards: Advantage on the next Arcana check related to the Codex or the ritual.
Time: 3 days
Location: Highwatch library or Elara's study in Ashfen.
Each additional day grants another piece of lore, up to three pieces.
Carefully remove the silver stitches from a patient's eyes without causing permanent blindness.
Requirements: A healer's kit and a successful DC 15 Wisdom (Medicine) check.
Rewards: The patient can reveal a secret about the Gilded Asylum or Matron Vela.
Time: 1 hour per patient
Location: Gilded Asylum or a safe house in Highwatch.
Failure causes the patient to lose 1d4 hit points and remain blind.
Meditate with the Solar Sigil to strengthen your connection to solar magic.
Requirements: Attunement to the Solar Sigil and a successful DC 15 Charisma (Religion) check.
Rewards: You can cast bless once per day without expending a spell slot for the next 3 days.
Time: 2 days
Location: Any consecrated altar, such as the Chapel of the Dawn.
If the check fails, you gain no benefit and must wait a week to try again.
Use the Astronomer's Star Chart to scout the Rift of Flayed Sky from a distance.
Requirements: The Astronomer's Star Chart and a successful DC 16 Wisdom (Perception) check.
Rewards: You learn the layout of the Rift fortress and the location of one hidden entrance.
Time: 1 day
Location: Mount Kael or any high vantage point.
If the check fails, you are spotted by a Choir patrol and must flee.
Help the Highwatch Council prepare defenses against the Choir's siege.
Requirements: A successful DC 14 Charisma (Persuasion) check to coordinate volunteers.
Rewards: Highwatch gains +2 to its defense rolls during the siege.
Time: 5 days
Location: Highwatch walls and gates.
This activity can be repeated, but each repetition after the first requires a higher DC.
Pray to Solarael for guidance. The solar is sleeping but can send dreams.
Requirements: A successful DC 16 Wisdom (Religion) check and a holy symbol.
Rewards: You receive a vision of the solar's prison and a clue about the Last Page.
Time: 1 night
Location: Any chapel or high place under the stars.
If the check fails, you have nightmares and gain no benefit.
A marble asylum where patients sit in silent rows with silver thread stitched through their eyelids. Matron Vela glides between them.
The Solar Sigil is hidden in the basement. The matron's ledger lists a Void Anchor delivery to the Fane.
A natural cavern beneath Highwatch hung with flayed skins tattooed with Codex pages. A black iron anchor floats above a pit.
A gibbering mouther guards the anchor. Sister Nira commands the fane.
A cracked dome on Mount Kael. A brass orrery turns under a beam of starlight. The blind astronomer Orin mutters about the Last Page.
Orin is a former Choir member. A Choir strike team arrives to silence him.
An ancient forest where bark is gray and leaves murmur in reverse. A white stone path leads to a hollow where the Last Page hangs from a branch.
A corrupted treant guards the page. The page is sentient and tempts spellcasters to read it.
Black glass walls patrolled by Choir cultists and void-touched beasts. The rift above pulses with violet light.
A teleportation circle can be stabilized with a DC 18 Arcana check. Patrols include cultists and a rift wretch.
A long hall lined with mirrors that reflect corrupted versions of the party. Sister Nira waits here, half-transformed.
The mirrors can be shattered to disrupt Nira's duplicates. Each mirror has AC 16 and 10 hit points.
A throne of flayed skin where Magister Vaelen Mor sits with the Codex open in his lap. His eyes are black pits.
Mor is the main villain with a generated character sheet. He will try to dominate a spellcaster to read the Codex.
A cracked altar in an open dome. A pillar of sunlight can pierce the rift here to summon Solarael.
The solar reads each page backwards over 13 rounds. The party must defend it from waves of void creatures.
Magister Vaelen Mor
Magister Vaelen Mor is a gaunt, towering figure of gray and violet silk, his flesh partially replaced by void-touched skin grafts harvested…
Sister Nira
Sister Nira is a gaunt human woman in her mid-thirties, rendered skeletal by a decade of the Void's slow feeding. Her rain-dark gray robes …
Matron Vela
Matron Vela is a tall, gaunt woman in her late forties, her gray-streaked hair pinned beneath a nurse's wimple of immaculate white. She mov…
Void-Touched Stalker
Completed
· CR 3
· Aberration
The Void-Touched Stalker presents a terrifying silhouette against the dimly lit corridors of the Choir's Fane Anchor. Standing roughly six …
Flayed Choir Zealot
Completed
· CR 5
· Humanoid
The Flayed Choir Zealot presents a horrifying visage of corrupted devotion, standing as a testament to the grotesque rituals of the Codex. …
Rift Wretch
Completed
· CR 8
· Aberration
The Rift Wretch is a horrifying manifestation of spatial instability, appearing as a humanoid silhouette constructed from swirling, viscous…
Mor was once a mortal archmage who feared death. He believes the Codex can make him a living vessel of the Void Beyond, granting him immortality and godlike power. He is willing to sacrifice all of Highwatch to achieve this.
Arrogant, theatrical, and utterly convinced of his own destiny. He speaks in reverse sometimes and enjoys monologuing about the Void's beauty. He is cruel to his followers but genuinely believes he is saving them from mortality.
Mor begins combat by casting dominate person on the party's spellcaster, ordering them to read the Codex. He uses void powers to push characters toward the rift and summons flayed zealots to protect him. If reduced below half hit points, he retreats to the throne and activates the vessel ritual, forcing the party to interrupt him.
Mor cannot be redeemed. If defeated, his soul is drawn into the Codex, and he becomes a whispering voice within it. The only way to truly end him is to destroy the Codex.
Nira was saved from a flaying ritual by Mor and is fanatically loyal to him. She believes that serving the Void is the only way to avoid being consumed by it. She wants to prove herself worthy of becoming Mor's first flayed apostle.
Sadistic, patient, and utterly fearless. She speaks in a low rasp and enjoys psychological torment. She never forgets a slight and will hunt the party across the campaign.
Nira uses void-touched spells to frighten and restrain key targets. She focuses on capturing Elara or the party's spellcaster. If reduced below half hit points, she flees using misty step or a hidden passage, preferring to fight another day.
Nira is beyond redemption. If killed, her body dissolves into black feathers. If she escapes, she returns in Act III as a half-transformed flayed thing in the Hall of Mirrors.
Vela is a former physician who lost her family to a plague. She believes the Void can erase suffering by erasing individuality. She stitches eyes shut to harvest psychic energy for the Codex, hoping to create a world without pain.
Soft-spoken, maternal, and utterly detached from the horror she inflicts. She hums lullabies while performing surgeries and genuinely believes she is helping her patients.
Vela tries to charm or restrain intruders. She uses her guards as shields and calls for reinforcements if reduced below half hit points. She will not flee unless the Solar Sigil is taken, in which case she retreats to the Choir's Fane.
Vela can be redeemed if the party shows her the suffering she has caused and succeeds on a DC 18 Charisma (Persuasion) check. Otherwise, she fights to the death, whispering that the Void will forgive her.
A middle-aged sage with ink-stained fingers and haunted eyes. She carries the first page of the Codex in a lead-lined scroll case.
A kindly priest of the Dawn with a broken arm and a stubborn faith.
The innkeeper of the Drowned Bell, a broad-shouldered woman with a sailor's vocabulary.
A Choir enforcer with a scarred face and a black feather braided into her hair. She is fanatically loyal to Magister Mor.
A tall woman in white robes with silver thread wound around her fingers. She speaks in a soothing lullaby.
An old man with empty eye sockets and ink-stained hands. He turns the orrery by memory.
Nira appears in the Hall of Mirrors, her body half-transformed into a flayed thing. She gurgles threats and fights with void powers.
A solar with wings of gold and eyes of fire. It has heard the Codex's whispers for centuries and will read it backwards willingly.
The leader of the Unbound Choir, a tall man with black pits for eyes and a mouth that moves in reverse. He wears the Codex like a crown.
This campaign was created before the playable adventure existed, so it can't be played as a game. Campaigns created now become a 3D adventure you play in the browser: explore settlements, wilderness and dungeons with your party.
Create a New CampaignSuggested Level: 2
Broken pews, shattered stained glass, a defaced altar, and a vestry with a locked door.
A potion of healing on the altar, a map to the Sunken Archive, and 25 gp in the collection box.
The cult fanatic carries the map. Father Alden can reveal the solar ritual's first verse if saved.
Suggested Level: 3
Flooded vault, slippery stairs, broken pillars, and a magical darkness in the lower shelves.
Vaelthar's journal, the second Codex page, and a ring of water walking.
The water weird can be negotiated with if offered a magic item. The journal reveals the solar's role.
Suggested Level: 3-4
Shallow ford, reeds for cover, a creaking gallows, and three hanged cultists.
Nira's sigil of the Unbound Choir, a potion of invisibility, and 40 gp.
Nira fights with void-touched spells and tries to capture Elara. She flees if reduced below half hit points.
Suggested Level: 4-5
Marble halls, rows of stitched patients, a locked basement door, and a surgical theater.
The Solar Sigil, Matron Vela's ledger, and 100 gp in surgical tools.
Matron Vela calls for guards if she spots the party. The ledger lists the Void Anchor delivery to the Fane.
Suggested Level: 5-6
Natural cavern, flayed skin tapestries, a black iron anchor floating over a pit, and kneeling cultists.
The Void Anchor, a flayed skin cloak, and 200 gp in ritual offerings.
The anchor is warded with a DC 17 Arcana check. If the alarm sounds, a strike team arrives in 3 rounds.
Suggested Level: 7
Gray-barked trees, murmuring leaves, a white stone path, and a hollow with a silver dagger pinning the page.
The Last Page, a bark shield, and a silver dagger.
The treant can be calmed with a DC 16 Nature check. If killed, the Last Page is destroyed and the ritual fails.
Suggested Level: 9-10
Mirrors that reflect corrupted versions of the party, a black glass floor, and a locked door to the throne.
Nira's key to the throne, a mirror of unbroken self, and 500 gp in void-touched gems.
Nira uses the mirrors to create illusory duplicates. Shattering a mirror (AC 16, 10 hp) disrupts her duplicates for 1 round.
Suggested Level: 10-11
Throne of flayed skin, black glass pillars, a void rift in the ceiling, and a spiral stair.
The Codex of Flayed Whispers, a codex-bound tome, and 1,000 gp in void pearls.
Mor tries to dominate a spellcaster to read the Codex. He monologues if given the chance. His death does not destroy the Codex.
Suggested Level: 11
Cracked altar, open dome, pillar of sunlight, and a collapsing rift.
A solar's tear, the destroyed Codex's ashes, and 1,000 gp in celestial relics.
Each page takes 1 round. If Solarael is interrupted, it must restart the current page. After the last word, the solar disintegrates and the rift collapses.
Suggested Level: 1-2
Crowded common room, overturned tables, a roaring hearth, and a rain-slick back door.
A silver dagger under the bar, 15 gp in the till, and a black feather token on a cultist.
The cultists focus on Elara. If she is reduced to 0 hit points, they grab the page and flee.
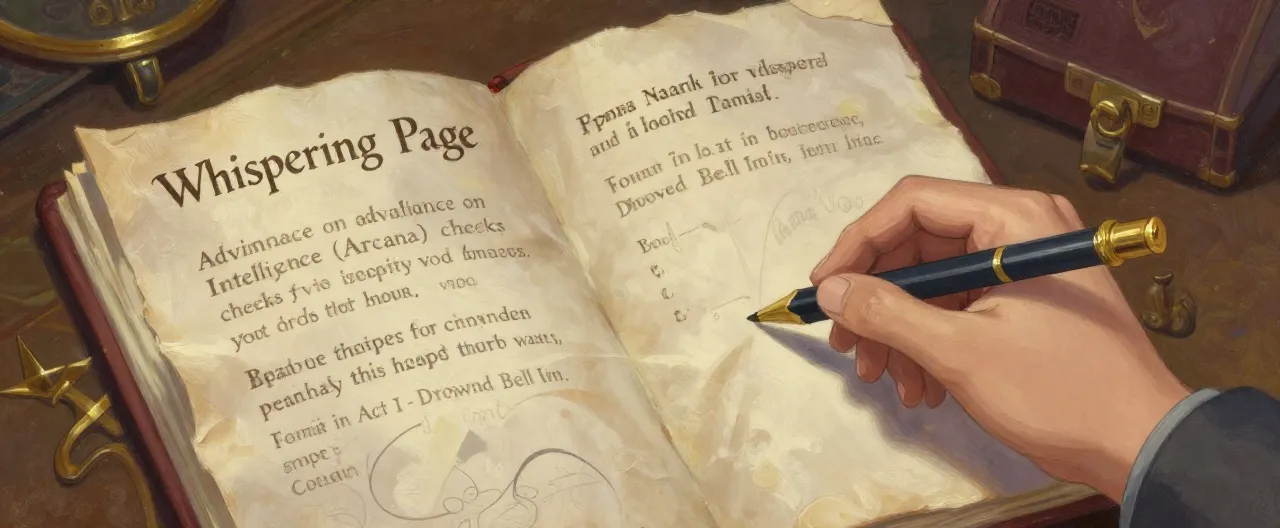 Whispering Page Fragment
Completed
Act I - Drowned Bell Inn, in Elara Voss's scroll case
none
 Dawnwarden's Silver Dagger
Completed
Act I - Chapel of the Dawn, hidden under the altar
requires attunement
 Bogwalker's Ring
Completed
Act I - Sunken Archive, in the flooded vault
requires attunement
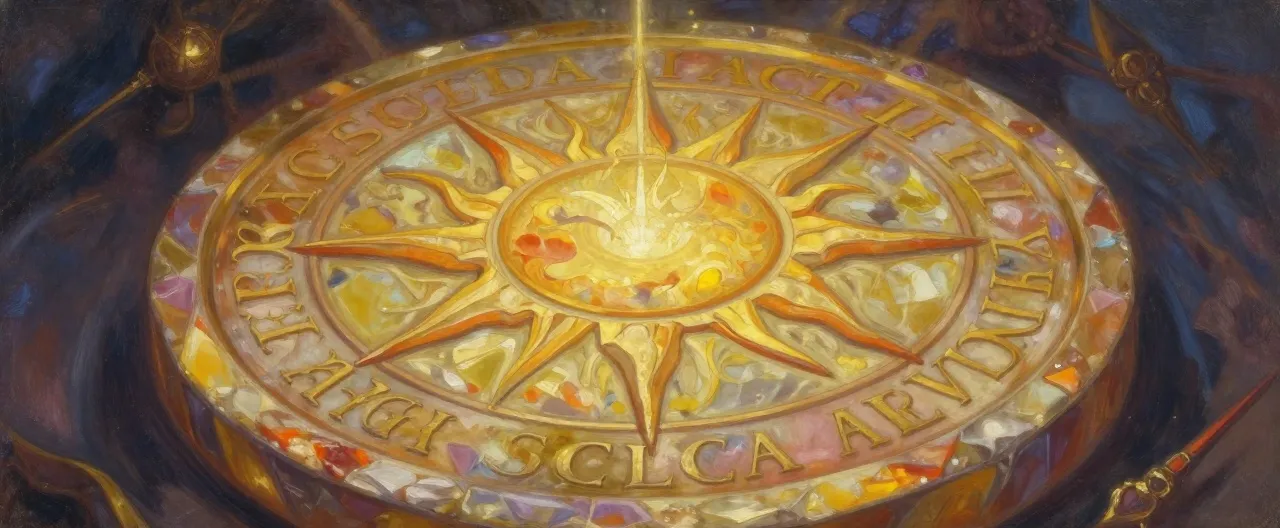 Solar Sigil
Completed
Act II - Gilded Asylum, in the basement reliquary
requires attunement by a spellcaster
 Void Anchor Shard
Completed
Act II - Choir's Fane, floating above the pit
requires attunement
 Astronomer's Star Chart
Completed
Act II - Observatory of Falling Stars, in Orin's orrery
none
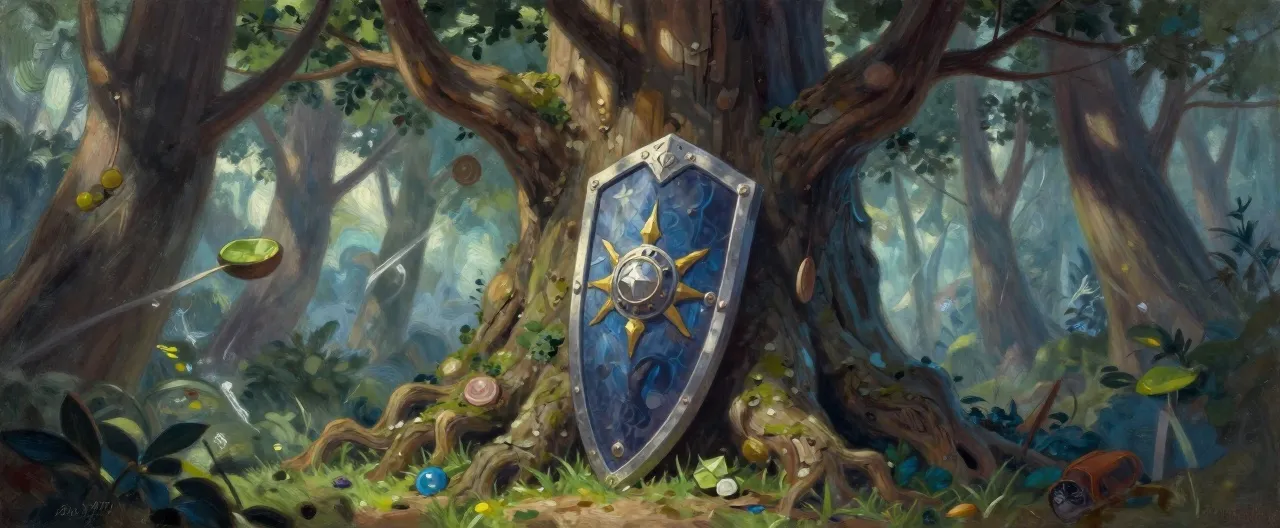 Whisperwood Bark Shield
Completed
Act II - Whisperwood, in the treant's hollow
requires attunement
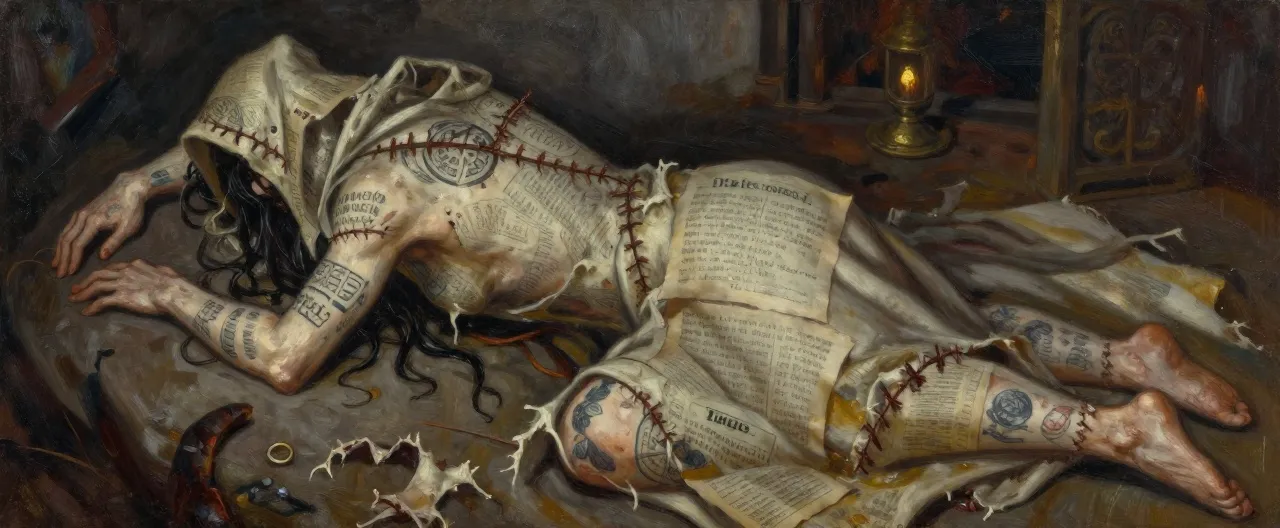 Flayed Skin Cloak
Completed
Act II - Choir's Fane, on a cult fanatic's shoulders
requires attunement
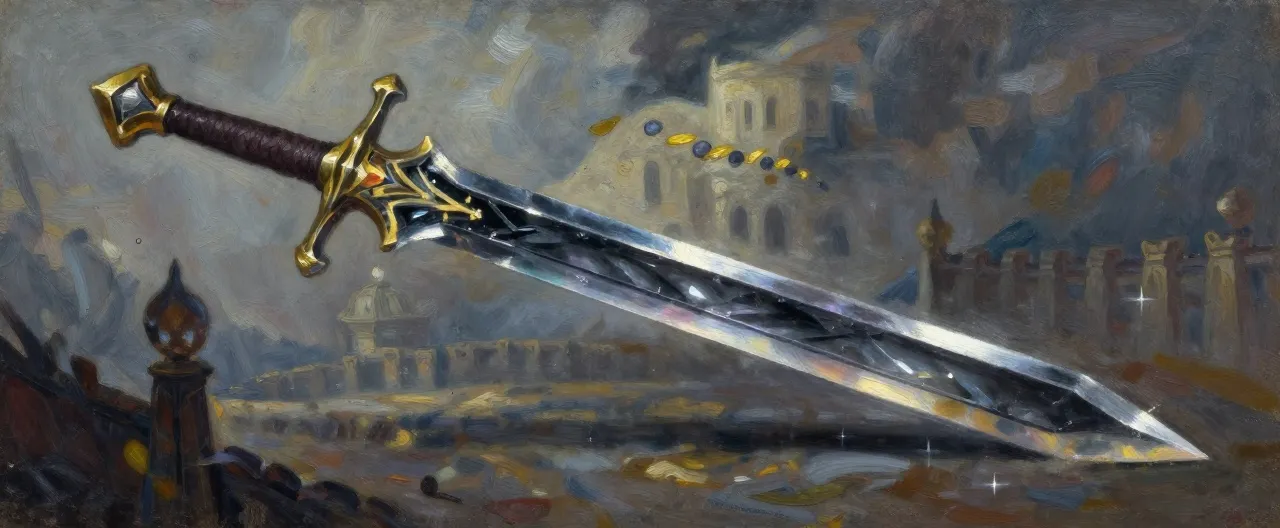 Riftglass Blade
Completed
Act III - Rift of Flayed Sky, on the battlements
requires attunement
 Mirror of Unbroken Self
Completed
Act III - Hall of Mirrors, in Nira's possession
requires attunement
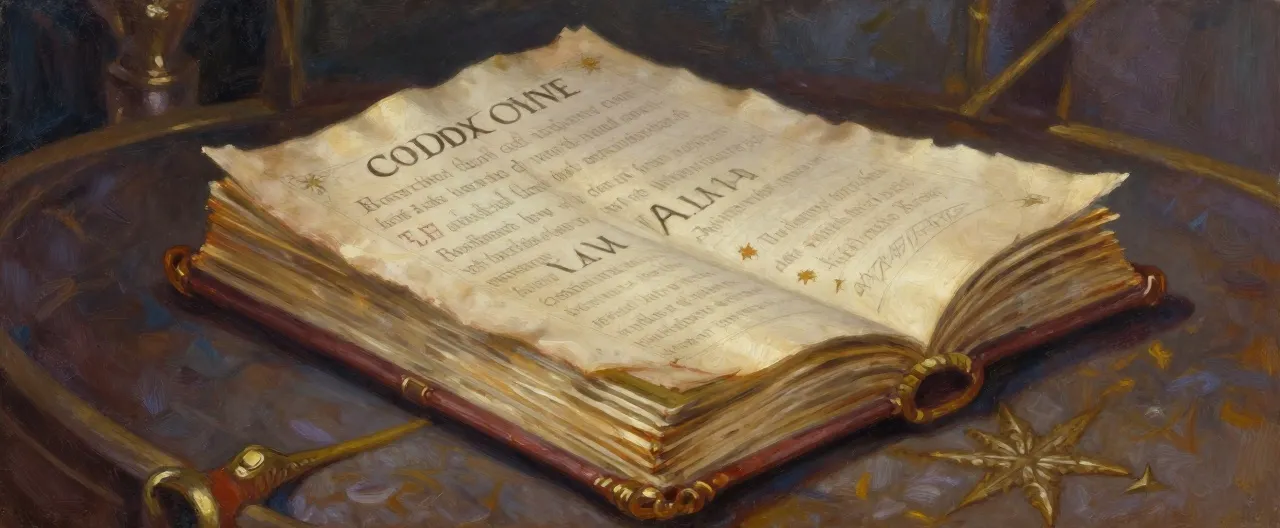 Codex-Bound Tome
Completed
Act III - Vessel's Throne, on Mor's lap
requires attunement by a spellcaster
 Solar's Tear
Completed
Act III - Solar's Sacrifice, at the Altar of the Last Word
none
You need to register to create and view player characters in this campaign.
Register Now