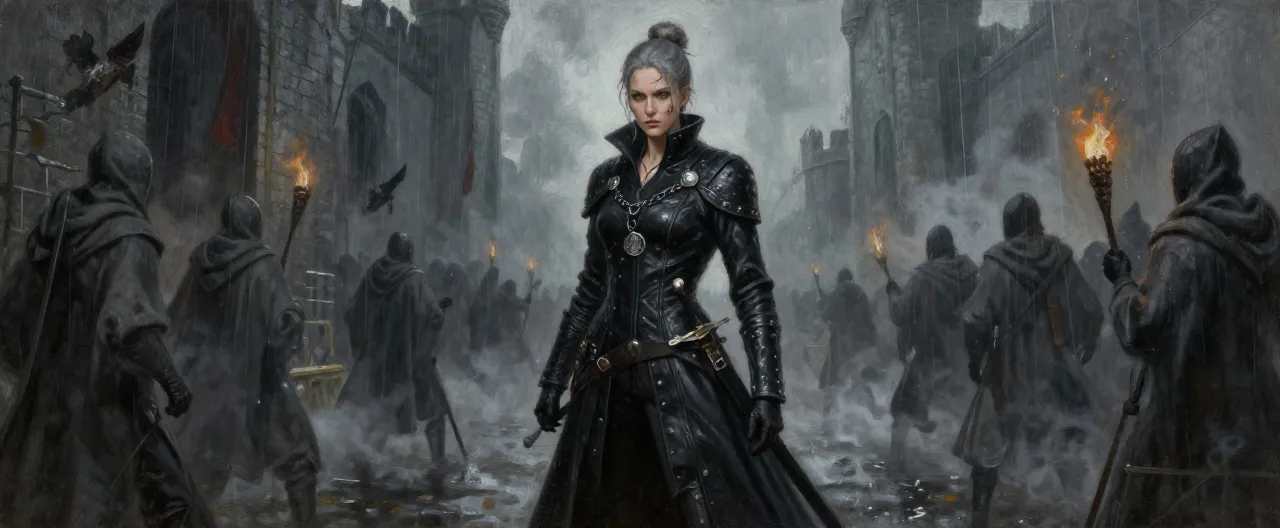
The adventure ahead

Campaign Overview

The Plague Ship of Nostramus

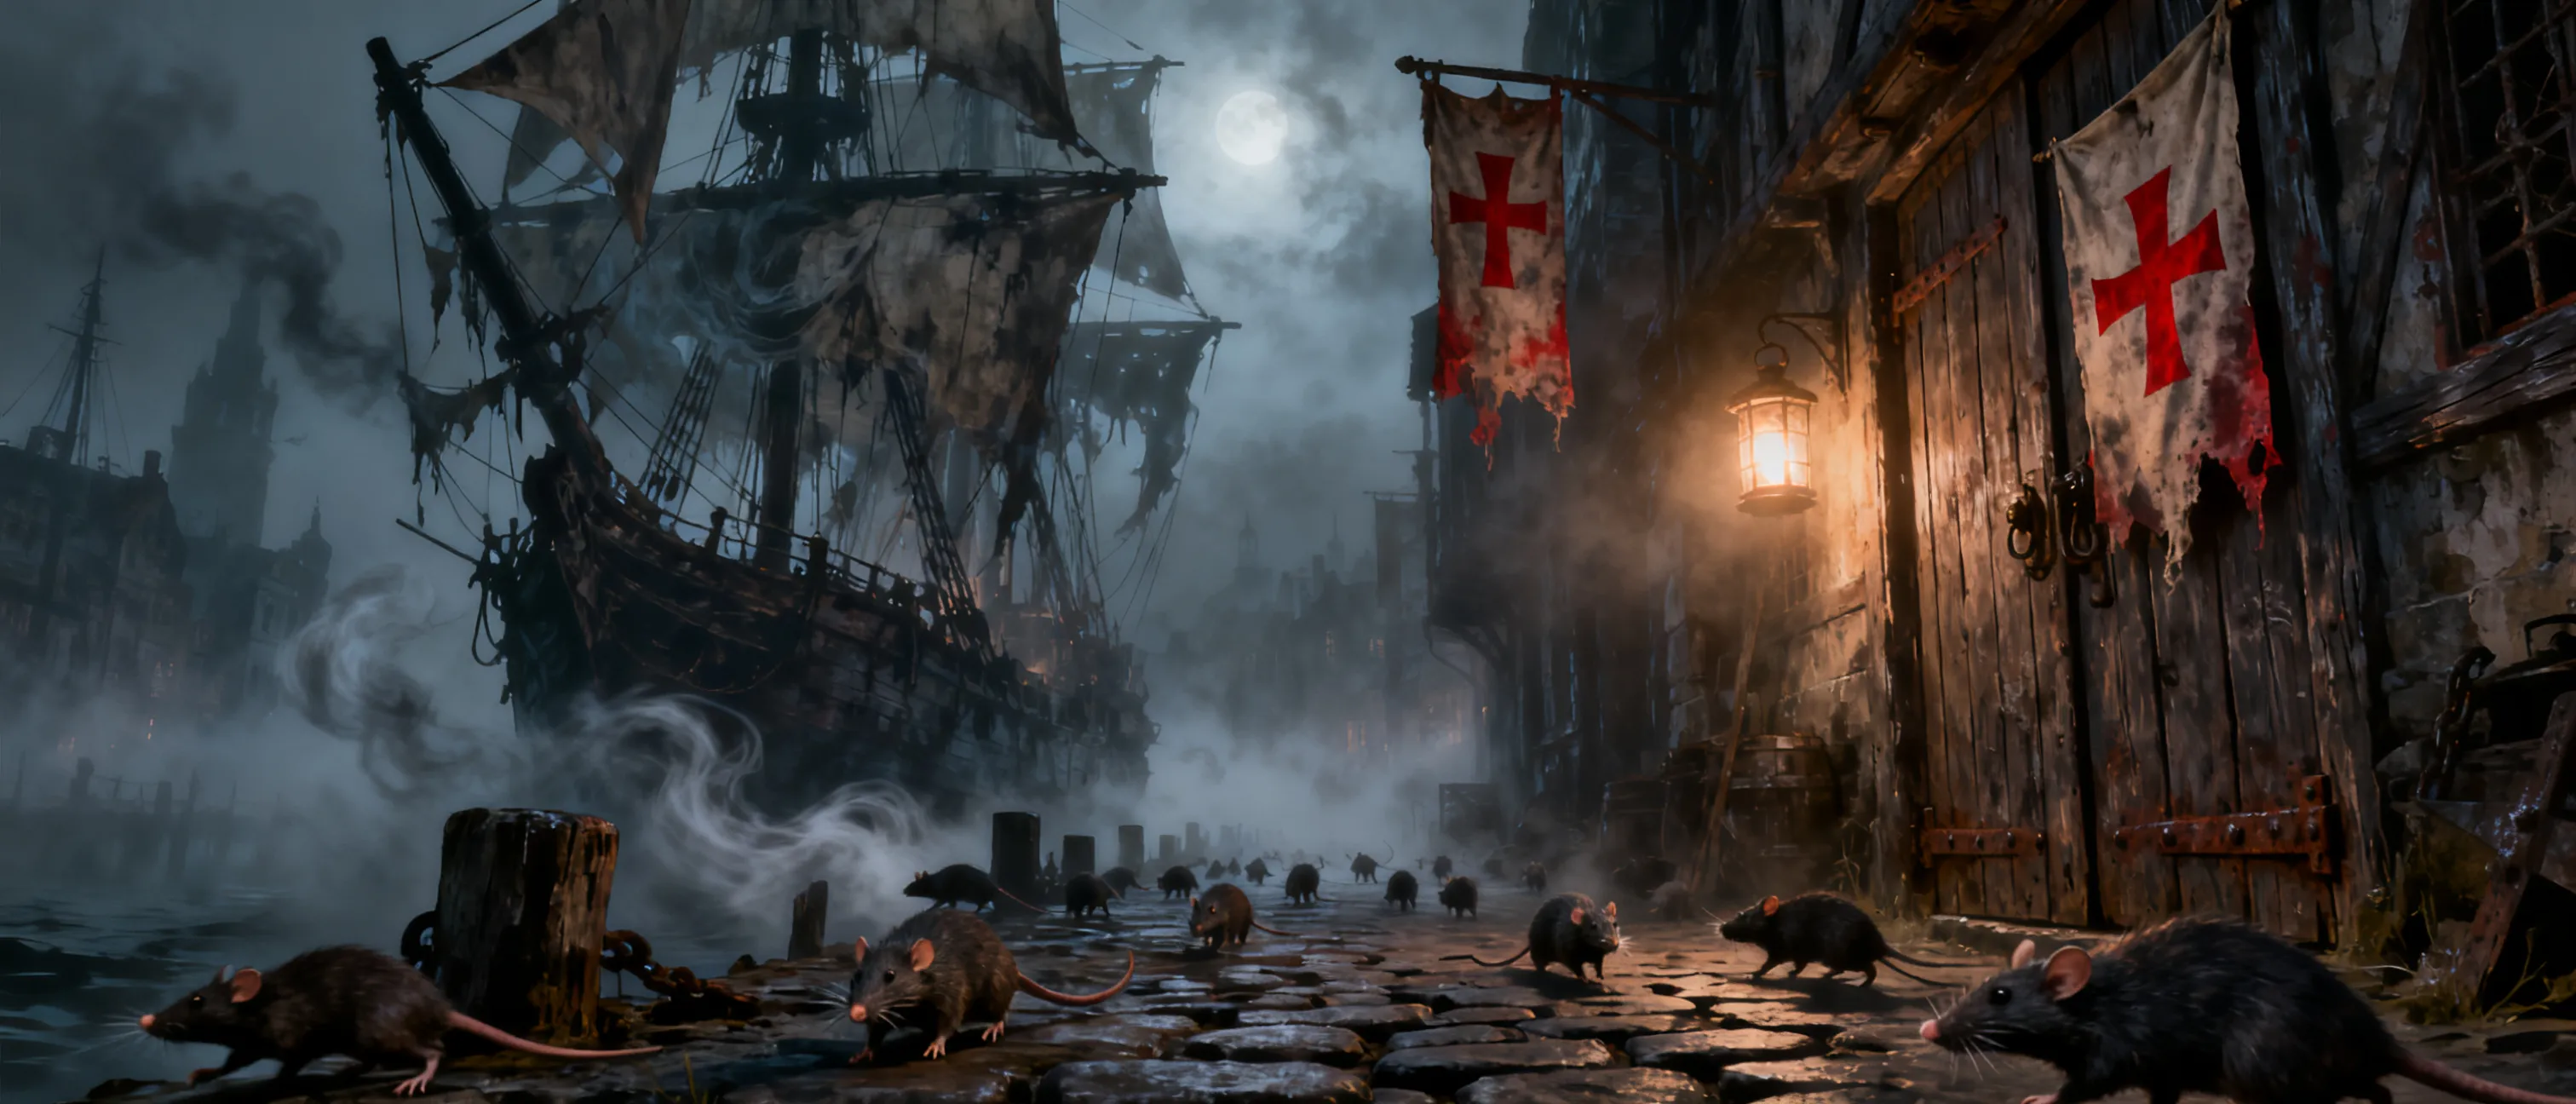
Nostramus is a proud harbor city, now a prison. Two weeks ago a ghost ship drifted into the harbor, crewless but crawling with rats. Within days a plague spread through the streets, killing rich and poor alike. The king has sealed the city: anyone who tries to leave is killed on sight. The air itself feels wrong, thick with an unnatural evil.

You are inside the quarantine. The Ash Watch guards the walls, the temples overflow with the dying, and the docks are silent except for the scratching of rats. Something brought that ship here, and something is still spreading the plague. You must find the source, survive the quarantine, and break the curse before Nostramus becomes a city of the dead.

This campaign takes you from the plague-ridden streets to the undercity catacombs and finally to the ghost ship itself. Expect investigation, horror, and desperate fights against a cult that worships pestilence.

Share with your players

Player Handout

Player Handout

Setup: You are in Nostramus when the quarantine begins. You have been here for days, maybe weeks. The plague started after the ghost ship arrived. You have seen neighbors die, heard the screams at night, and watched the Ash Watch kill a family trying to flee.

Tone: Dark fantasy horror. The city is dying. Trust is scarce. Every cough could be plague. The rats are watching.

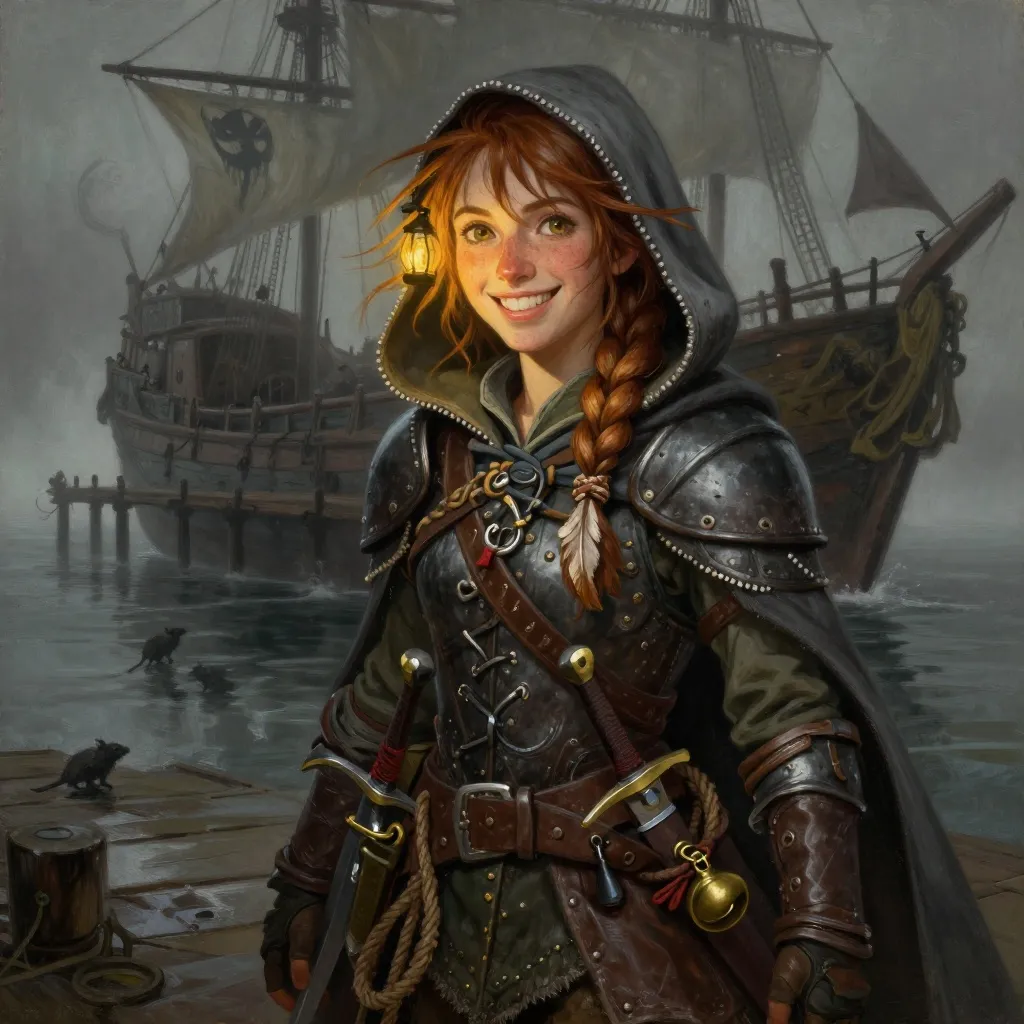
Starting Hook: You are in the market square when a young rat-catcher named Mira Salt grabs your arm. She is terrified. She says she saw something in the sewers: a man in a rat mask, chanting. She thinks the plague is not natural. She begs you to help her find proof. Captain Vey of the Ash Watch is nearby and will listen if you bring her evidence.

Your Goal: Survive, investigate, and stop the plague. The city is counting on you.

Playable Module
Levels 1 12 Sessions 12-16 sessions of 3-4 hours each

The Plague Ship of Nostramus

Behind the screen

DM Overview

The Truth: The ghost ship *Weeping Sister* was sent by the Ratbound Choir, a cult led by Corvane Ashgrove. They unleashed a magical plague carried by rats to weaken Nostramus for a takeover. The king's quarantine is playing into their hands, trapping victims inside. Corvane seeks to become the Ratbound Bishop, ruling a city of the faithful and the dead.

Villain Plans: Corvane operates from the ghost ship, directing lieutenants Mirelle Vantt (harbor smuggler) and Doctor Orlan Fesk (plague spreader). Sera Quill, the King's Inquisitor, enforces the quarantine brutally, unaware she is a pawn. The cult's goal: complete a ritual in the sunken shrine beneath the city, then rise to claim Nostramus.

Clue Flow: The party finds rat-carved tokens, a ship's log, and testimony from survivors. Each scene reveals a piece: the ship's origin, the cult's hideout, the ritual's location. The final clues point to the ghost ship and the lighthouse cave.

Failure States: If the party ignores the plague, the city falls in 10 days. If they alert the Inquisitor too early, she arrests them. If they fail to stop the ritual, the plague becomes airborne and kills everyone. If they kill Corvane without destroying the ritual focus, the plague persists.

Pacing: Act I (levels 1-4) is investigation in the city. Act II (5-8) is the undercity. Act III (9-12) is the harbor and ship. Each act has 3-4 key locations with one main scene each. Side quests add depth.

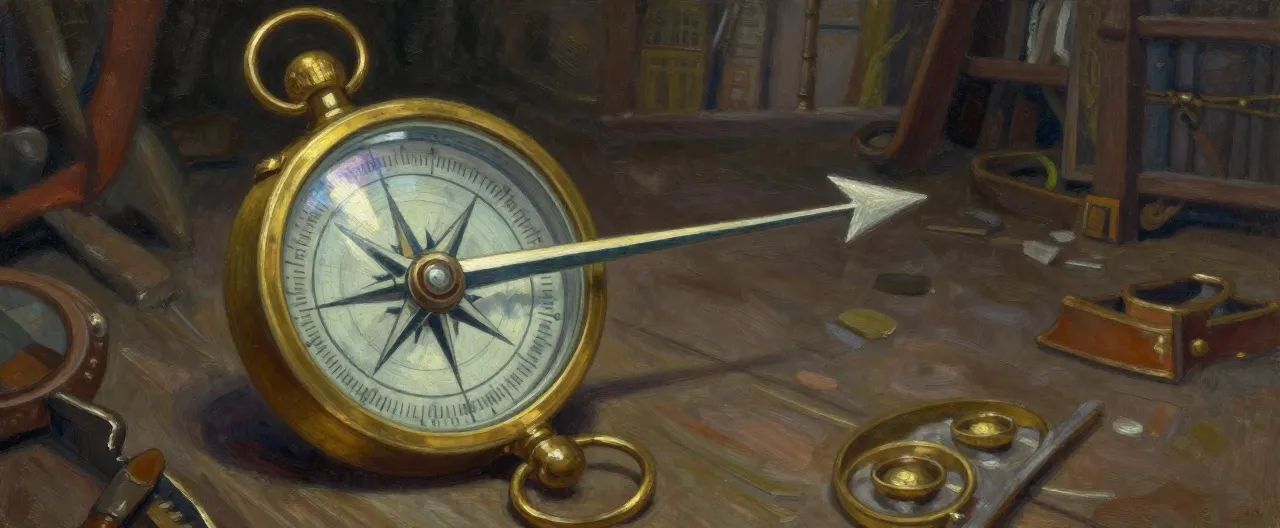
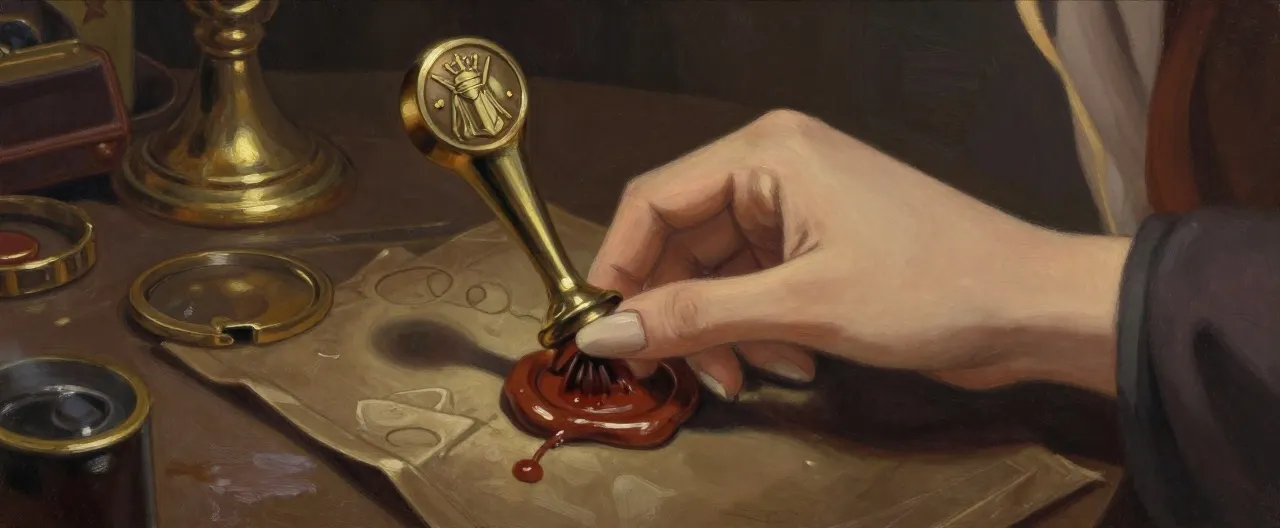
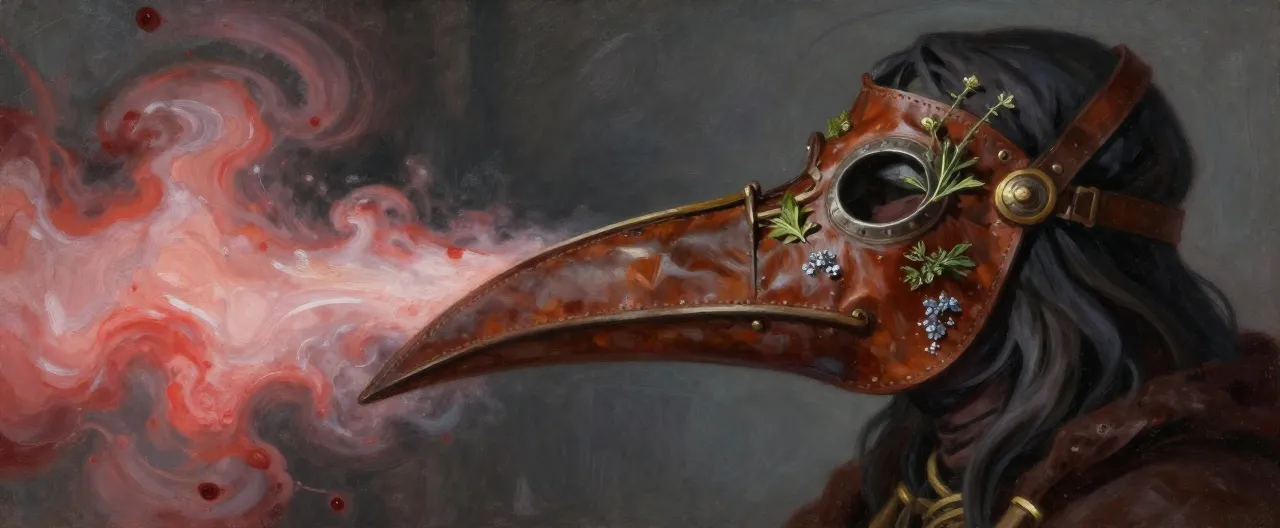
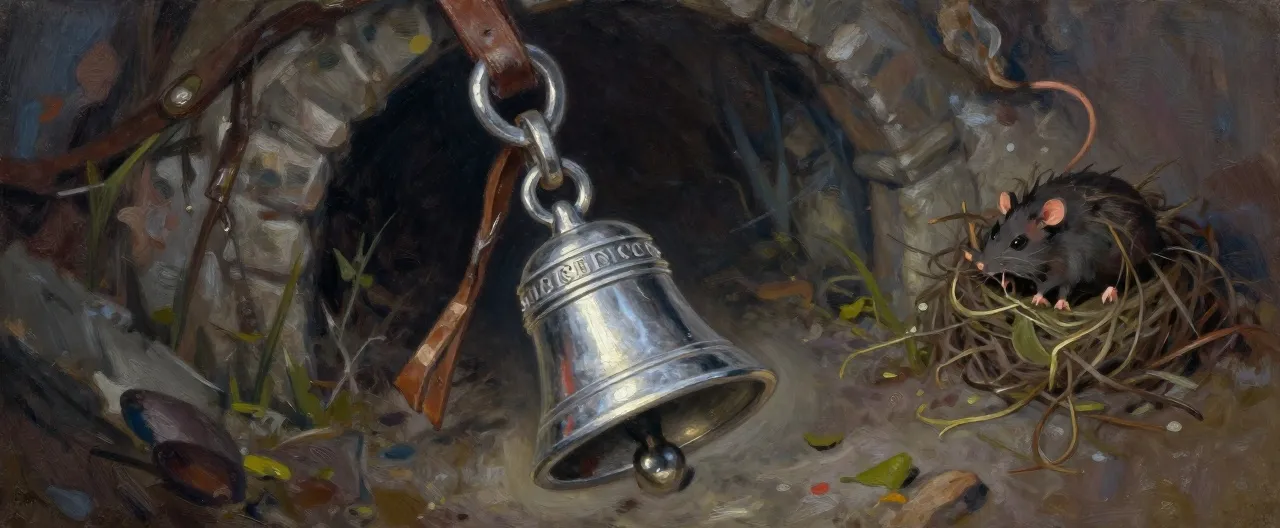
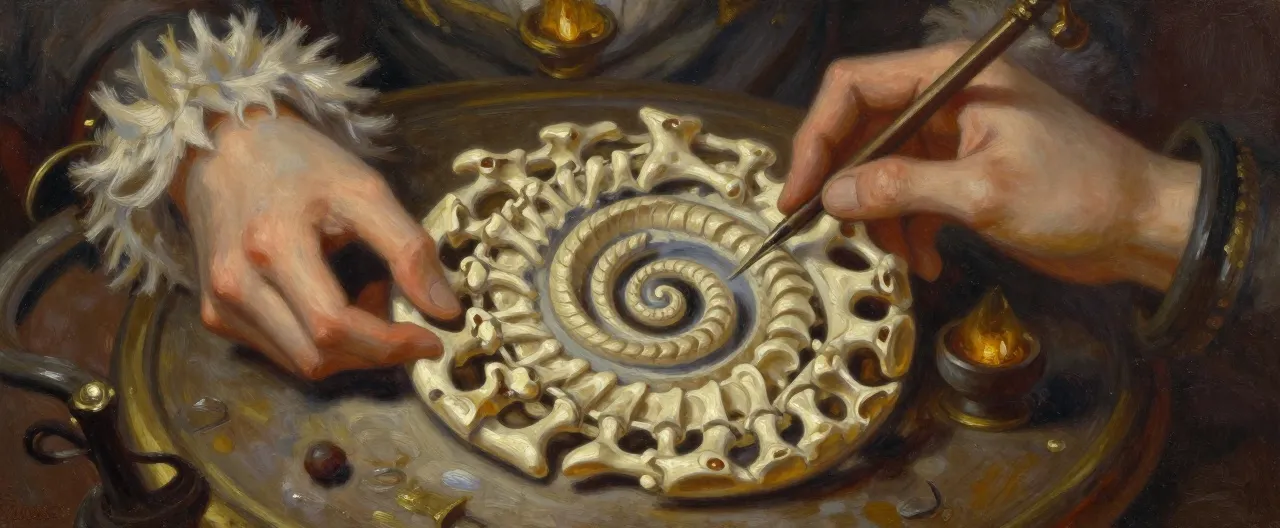
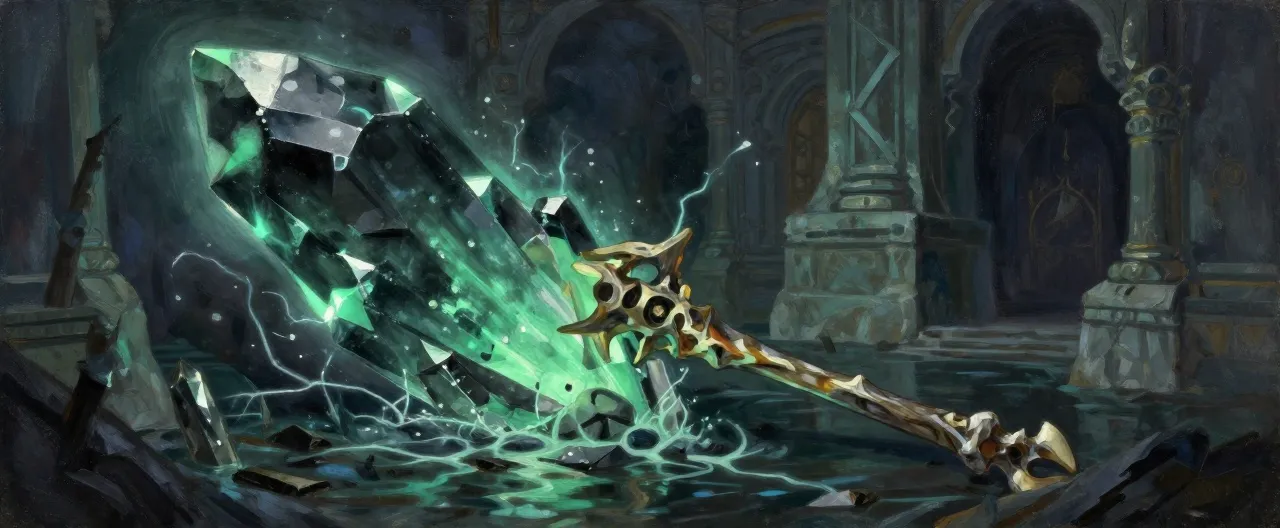
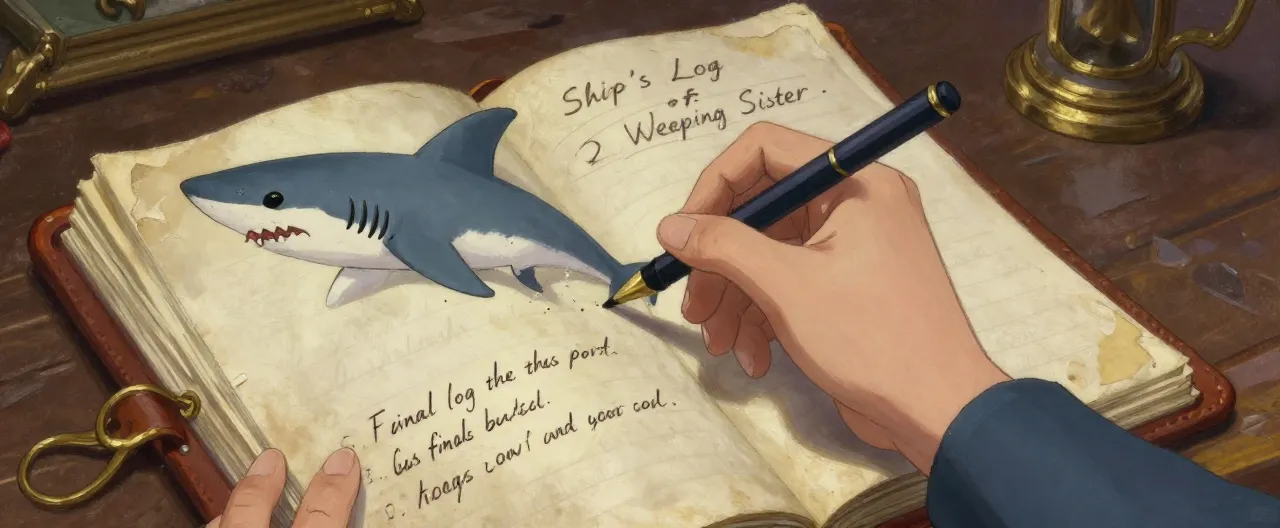
Magic Items (9): *Rat-Bane Amulet* (uncommon, advantage vs disease), *Cloak of the Harbor* (uncommon, water breathing), *Plague Doctor's Mask* (rare, immunity to disease), *Ship's Log of the Weeping Sister* (rare, reveals cult plans), *Corvane's Ratbone Staff* (very rare, +2 spell focus), *Mirelle's Smuggler's Compass* (uncommon, finds hidden routes), *Fesk's Scalpel* (rare, +1 dagger, poison), *Quill's Seal of Office* (uncommon, advantage on Intimidation), *Lighthouse Flame* (very rare, casts *daylight* and *protection from evil and good*).

Main Quest Line: 1. Investigate the plague. 2. Find the cult's undercity lair. 3. Disrupt the ritual. 4. Board the ghost ship. 5. Defeat Corvane and destroy the plague focus.

Encounters: Use SRD monsters: rats, giant rats, swarms of rats, cultists, guards, scouts, veterans, priests, knights. Villains use character sheets.
Adventure Hooks

Hook 01

The Rat-Catcher's Plea

Mira Salt, a sixteen-year-old rat-catcher, grabs your sleeve in the market square of Nostramus. She saw a man in a rat mask chanting in the sewers near the temple row, and her little brother is already coughing. She has no coin and no standing, only a rat-carved token she picked up in the muck. She begs you to follow her to the sewer gate and bring back proof, because nobody in the Ash Watch will listen to a rat-catcher.

Hook 02

The Watch Needs Proof

Captain Vey of the Ash Watch has buried forty citizens this week and has no answer for the king. She cannot act on a hunch, and the Inquisitor is watching her. If you bring her hard evidence that the weeping plague is deliberate, she will open the sewers, hand you a writ of passage, and turn a blind eye to whatever you do next. Without proof, she is bound to arrest you for breaking quarantine.

Hook 03

The Ledger of the Dead

Sister Neris keeps the only complete record of who died in Nostramus and where. Three victims on one street died in the same night, none of them near the docks, and all three were patients of the same physician. She needs someone to walk those three houses in the temple row and follow the thread down into the crypt beneath the Temple of Mercy, where a healer is killing the people he swore to save.

Hook 04

The Missing Manifest

Dockmaster Crane kept a copy of the Weeping Sister's manifest folded inside the hollow of his wooden leg, and the original was stolen out from under him. The copy names the ship's last port of call and the cargo it carried into the harbor. The Harbor Kin have started burning the Ratwharf warehouses to hide what they moved, and Crane needs the copy out of his office before the fire reaches it.

Act Structure

Act I: The City of the Dying

Recommended level: 1-4

The party arrives in Nostramus as the quarantine tightens. They must investigate the plague, gain the trust of the Ash Watch, and discover the cult's presence in the city. They will explore the docks, the temple row, and the keep, gathering clues that point to the undercity.

Objectives

  • Investigate the ghost ship and the plague's origin.
  • Gain the trust of Captain Vey and the Ash Watch.
  • Discover the Ratbound Choir's presence in the city.
  • Find a way into the undercity.

The Quarantine Begins

The market square, near the Ash Watch checkpoint

Read aloud

The market square is empty except for a cart of covered bodies. Ash Watch guards stand at a barricade, torches hissing in the drizzle. A young rat-catcher, Mira Salt, tugs at your sleeve. 'Please,' she whispers, 'I saw something in the sewers. A man in a rat mask. The plague isn't natural. You have to believe me.' Captain Vey approaches, her hand on her sword. 'State your business. The city is under quarantine.'

Running this scene

Vey is skeptical but desperate. She will listen if the party presents evidence. Mira can provide a rat-carved token she found. If the party mentions the rat-masked man, Vey admits she has heard similar reports. She asks the party to investigate the docks and report back. This scene sets the investigation in motion.

Checks
  • DC 12 Charisma (Persuasion) to convince Vey to listen.
  • DC 14 Wisdom (Insight) to see Vey is hiding worry about her son.
  • DC 10 Intelligence (Investigation) to notice the rat-carved token Mira dropped.
Clues
  • Mira saw a rat-masked figure in the sewers near the temple row.
  • Vey mentions the ghost ship arrived two weeks ago and was crewless.
  • The plague started in the docks and spread inward.
Where next
  • Vey suggests the party start at the docks, where the ghost ship is moored.
  • Mira offers to guide them to the sewer entrance if they help her first.

The Ghost Ship

The far pier, within sight of the Weeping Sister

Read aloud

The *Weeping Sister* looms at the end of the pier, its hull black with rot. Rats stream down its mooring lines, unafraid. Dockmaster Crane stands nearby, his wooden leg tapping the boards. 'That ship came in two weeks ago,' he says. 'No crew. Just rats. And then the plague. You want to know more? The manifest is missing. Stolen. I'd bet my other leg the Harbor Kin took it.'

Running this scene

Crane will trade information for coin or a favor. He points the party to Liss Vell, Mirelle's second. Liss can be found in a nearby tavern. She is conflicted and can be persuaded to reveal the hidden tunnel. If the party tries to board the ship, cultists attack.

Checks
  • DC 13 Charisma (Persuasion) to convince Crane to share what he knows.
  • DC 15 Dexterity (Stealth) to sneak close to the ship without alerting cultists.
  • DC 12 Wisdom (Perception) to spot the hidden tunnel entrance under a pier.
Clues
  • The ship arrived crewless, carrying only rats.
  • The manifest was stolen by the Harbor Kin.
  • Liss Vell knows about a hidden tunnel to the undercity.
Where next
  • Liss Vell can lead the party to the sewer gate.
  • Crane mentions that the temple row has been hit hardest by the plague.

The Kindly Knife

The Temple of Mercy, plague ward

Read aloud

The Temple of Mercy is a hall of coughing and prayers. Rows of cots fill the nave. Sister Neris moves among them, her habit stained with blood. She stops when she sees you. 'You're not sick,' she says. 'Good. I need help. People are dying faster than they should. The plague is being spread deliberately. I've seen a man in a doctor's mask, but he's not one of us. He goes down to the crypt. I'm afraid to follow.'

Running this scene

Neris gives the party her ledger, which shows the plague's spread pattern. If they investigate the crypt, they find Doctor Fesk's laboratory. Fesk is a villain; use his character sheet. He has two cultist assistants. The laboratory contains plague vials and notes.

Checks
  • DC 14 Intelligence (Investigation) to decipher Neris's ledger.
  • DC 15 Wisdom (Perception) to spot Fesk's hidden door in the crypt.
  • DC 13 Dexterity (Stealth) to sneak into the laboratory.
Clues
  • The plague started at the docks and spread along trade routes.
  • Doctor Fesk is deliberately infecting patients.
  • Fesk's notes mention a 'sunken shrine' and a 'ratbone staff'.
Where next
  • Fesk's notes point to the undercity and the sunken shrine.
  • Neris asks the party to take her ledger to Captain Vey as proof.

The Quarantine's Cost

The keep's courtyard, during a prisoner transfer

Read aloud

The courtyard is cold and wet. Sergeant Holt stands before a line of prisoners, their hands bound. 'Trying to leave the city,' he says. 'The king's orders are clear.' He looks at you. 'You're the ones who've been poking around. Captain Vey says you're helping. I hope she's right. We're losing this city. If you have a plan, now's the time.'

Running this scene

Holt is sympathetic but bound by duty. If the party shows him proof of the cult (Fesk's notes or a cultist's mask), he will arrange for them to access the sewers. He also asks them to check on his sister in the temple row. Captain Vey can be found in the chapel and will officially sanction the party's mission.

Checks
  • DC 14 Charisma (Persuasion) to convince Holt to help.
  • DC 12 Wisdom (Insight) to see Holt is worried about his sister.
  • DC 10 Intelligence (Investigation) to notice a spy watching from the shadows.
Clues
  • The Watch is running low on supplies.
  • The Inquisitor has spies in the keep.
  • Holt's sister is in the temple row.
Where next
  • Holt gives the party a map to the sewer gate.
  • Captain Vey provides a writ of passage and a small supply of potions.

Milestone: The party reaches level 4 after discovering the cult's undercity entrance and defeating Doctor Fesk or his agents.

Act II: The UnderCity

Recommended level: 5-8

The party descends into the undercity to find the Ratbound Choir's lair. They must navigate the sewers, explore the catacombs, and discover the sunken shrine where the cult plans to complete their ritual. Along the way, they rescue prisoners and gather information about Corvane's plans.

Objectives

  • Navigate the sewers and catacombs.
  • Find the Ratbound Choir's stronghold.
  • Rescue Elen Voss and learn about the ritual.
  • Disrupt the ritual in the sunken shrine.

Descent into Darkness

The sewer gate and the first tunnel

Read aloud

The grate groans as it opens. A wave of foul air hits you. Tunnel Jack crouches nearby, his eyes wide. 'You're going down there? The rat-men will eat you alive. But if you're going, follow the left fork. That's where they took the girl. She was screaming.' He shudders. 'I'll wait here. If you're not back in a day, I'm gone.'

Running this scene

Jack provides basic directions. The left fork leads to the catacombs. The right fork leads to a dead end with a rat swarm. The party can find a cultist patrol (2 cultists) after 10 minutes of walking. The cultists have a map showing the route to the plague vault.

Checks
  • DC 12 Dexterity (Stealth) to move quietly through the tunnels.
  • DC 14 Wisdom (Perception) to spot a cultist ambush.
  • DC 10 Intelligence (Investigation) to find the hidden supply cache.
Clues
  • Cultists took a prisoner (Elen Voss) through the left fork.
  • The cult has a map of the undercity.
  • The tunnels connect to the catacombs beneath the temple.
Where next
  • The left fork leads to the Catacomb Hall.
  • The cultist map marks the Plague Vault and the Sunken Shrine.

The Archivist's Secret

Mora's camp in the Catacomb Hall

Read aloud

A candle flickers in the darkness. Archivist Mora looks up from a pile of scrolls, her spectacles glinting. 'You're not cultists,' she says. 'Good. I've been hiding here for days. I know what they're planning. They want to awaken something in the sunken shrine. An old god of pestilence. If they succeed, the plague will never end. I have a map, but I need protection to get out of here.'

Running this scene

Mora provides the map to the sunken shrine and explains the ritual. She knows the ritual requires a ratbone staff and a sacrifice. She also knows the counter-words, but only Father Theron can speak them. She asks the party to escort her to safety, but she will settle for a promise to stop the cult.

Checks
  • DC 13 Intelligence (Arcana) to understand the ritual's nature.
  • DC 15 Wisdom (Perception) to notice a hidden compartment in a sarcophagus.
  • DC 12 Charisma (Persuasion) to convince Mora to share her map.
Clues
  • The sunken shrine is beneath the harbor.
  • The ritual requires a ratbone staff and a living sacrifice.
  • Father Theron knows the counter-words.
Where next
  • Mora's map shows the route to the Plague Vault and the Sunken Shrine.
  • Mora mentions that Elen Voss was taken to the Plague Vault.

The Plague Vault

The Plague Vault, before the cauldron

Read aloud

The chamber reeks of disease. A cauldron bubbles with green sludge, and cultists chant around it. In a hanging cage, a young woman grips the bars. 'Please!' she cries. 'They're going to sacrifice me! The staff—they keep it in the shrine! You have to stop them!' The cultists turn, drawing curved knives.

Running this scene

This is a combat scene. Use 4 cultists and 1 priest. The cauldron can be destroyed with a DC 15 Strength check or by dealing 20 damage to it. Destroying it releases a cloud of plague; everyone in the room must make a DC 13 Constitution saving throw or be poisoned for 1 hour. Elen Voss is freed after the fight. She tells the party about the ratbone staff and the ritual.

Checks
  • DC 15 Strength to tip the cauldron.
  • DC 13 Constitution saving throw to resist plague cloud.
  • DC 12 Dexterity (Acrobatics) to climb the cage and free Elen.
Clues
  • The ratbone staff is in the sunken shrine.
  • The ritual will be completed at midnight.
  • Corvane Ashgrove leads the cult from the ghost ship.
Where next
  • Elen leads the party to the hidden tunnel to the sunken shrine.
  • Elen asks to be escorted to safety, but will guide them if they promise to stop the ritual.

The Ritual of Rats

The Sunken Shrine, before the altar

Read aloud

The shrine is lit by green flames. Cultists chant in a circle around the altar, where a ratbone staff pulses with sickly light. Mirelle Vantt stands above them, a curved knife in hand. In the shadows, an old man whispers, 'The words... I know the words...' Father Theron clutches a tattered scroll. 'Speak them with me! Break the circle!'

Running this scene

This is a major combat and puzzle scene. Mirelle Vantt (villain) leads 6 cultists and 2 priests. The ritual takes 10 rounds to complete. The party can disrupt it by speaking the counter-words (requires Theron's help, DC 15 Charisma check) or by destroying the staff (AC 15, 30 HP). If the ritual completes, the plague becomes airborne and the city is doomed. Mirelle fights to protect the ritual but flees if the staff is destroyed.

Checks
  • DC 15 Charisma to speak the counter-words with Theron.
  • DC 14 Intelligence (Arcana) to identify the staff's weak point.
  • DC 13 Dexterity (Acrobatics) to cross the flooded floor without falling.
Clues
  • The staff is the focus of the plague.
  • Corvane is on the ghost ship, directing the cult.
  • Mirelle Vantt is a lieutenant who can be interrogated.
Where next
  • If the ritual is disrupted, the cult's power weakens, and the party learns Corvane's location.
  • Theron gives the party a protective charm against the plague.

Milestone: The party reaches level 8 after disrupting the ritual and learning that Corvane is on the ghost ship.

Act III: The Black Tide

Recommended level: 9-12

The party must reach the ghost ship, navigate its haunted decks, and defeat Corvane Ashgrove. They will need to lower the harbor chain, find a way through the sea cave, and confront the BBEG in a final showdown. The fate of Nostramus hangs in the balance.

Objectives

  • Lower the harbor chain to reach the ghost ship.
  • Navigate the sea cave and board the ship.
  • Rescue Odessa Marr and learn Corvane's weakness.
  • Defeat Corvane and destroy the plague focus.

The Chain That Binds

The top of the Harbor Chain Tower

Read aloud

The tower reeks of rat droppings. Chain Captain Rook stands at the winch, his peg leg planted. 'The chain's stuck,' he growls. 'Rats chewed through the ropes. And there's something in the basement. I can hear it scratching. If you clear them out, I'll lower the chain. But be careful—the cult wants this chain up. They've been sneaking around at night.'

Running this scene

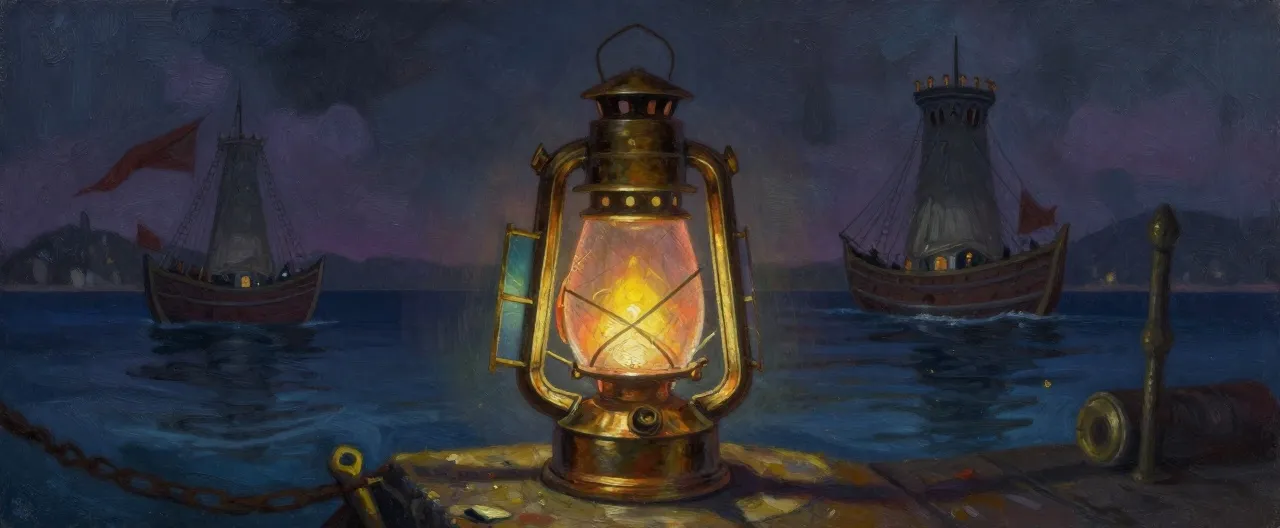
The basement contains 2 swarms of rats and 1 giant rat. After clearing it, Rook can repair the winch. He also mentions the sea cave beneath the lighthouse, which he believes leads to the ship's hull. He gives the party a signal lantern that can be used once to blind enemies.

Checks
  • DC 14 Strength to repair the winch.
  • DC 13 Wisdom (Perception) to spot the sabotage.
  • DC 12 Dexterity (Stealth) to avoid the rat swarm in the basement.
Clues
  • The cult sabotaged the chain to keep the ship in port.
  • A sea cave beneath the lighthouse leads to the ship.
  • Rook has seen Corvane on the ship's deck at night.
Where next
  • Rook lowers the chain, allowing the party to take a boat to the lighthouse.
  • Rook gives the party the signal lantern.

The Light in the Dark

The Lighthouse Cave, at the water's edge

Read aloud

Keeper Sable holds a lantern, its light reflecting off the wet cave walls. 'The ship is just above us,' she whispers. 'I've seen things on that deck. A man in a rat mask. He's been sacrificing people. I can't stop him alone. But I can show you the way in. Through the bilge. It's dark, but it's safe.' She points to a narrow tunnel. 'Follow the water. It leads to the hold.'

Running this scene

Sable guides the party through the cave. The tunnel is narrow; the party must move single file. A DC 12 Dexterity (Acrobatics) check is needed to avoid slipping. At the end, they find a ladder leading up into the ship's hold. Sable gives them a *Lighthouse Flame* (magic item) if they promise to return it. She waits in the cave.

Checks
  • DC 12 Dexterity (Acrobatics) to navigate the slippery tunnel.
  • DC 14 Wisdom (Perception) to hear cultists above.
  • DC 10 Intelligence (Investigation) to find the hidden potion cache.
Clues
  • Corvane is on the ship's deck, performing a ritual.
  • The ship's hold is full of rats and cultists.
  • Odessa Marr is imprisoned in the captain's quarters.
Where next
  • The ladder leads to the ship's hold (next scene).
  • Sable offers to keep the cave exit open for a retreat.

The Ratbound Bishop

The captain's quarters of the Weeping Sister

Read aloud

The captain's quarters are lit by green candles. Corvane Ashgrove stands before an altar, a ratbone staff in his hand. Odessa Marr is chained to the wall, her eyes wide. 'You're too late,' Corvane says softly. 'The plague is already in the air. But you can still join me. Or die.' He raises the staff, and rats pour from the shadows.

Running this scene

This is the final battle. Corvane uses his character sheet (CR 12). He is accompanied by 4 cultists and 2 rat swarms. Odessa Marr can be freed with a DC 15 Dexterity check; she knows that destroying the staff (AC 17, 50 HP) will end the plague. Corvane fights to the death. If the staff is destroyed, the plague begins to fade, and Corvane loses his powers.

Checks
  • DC 15 Dexterity to free Odessa.
  • DC 16 Intelligence (Arcana) to identify the staff's weak point.
  • DC 14 Constitution saving throw to resist Corvane's plague aura.
Clues
  • Corvane's power comes from the staff.
  • Destroying the staff ends the plague.
  • Odessa knows the ship's self-destruct mechanism.
Where next
  • After defeating Corvane, the party can escape via the sea cave.
  • The plague ends, and the city is saved.

Milestone: The party reaches level 12 after defeating Corvane and ending the plague.

Monsters & Enemies

Bilge-Tide Rat Swarm Bilge-Tide Rat Swarm Completed · CR 2 · Beast

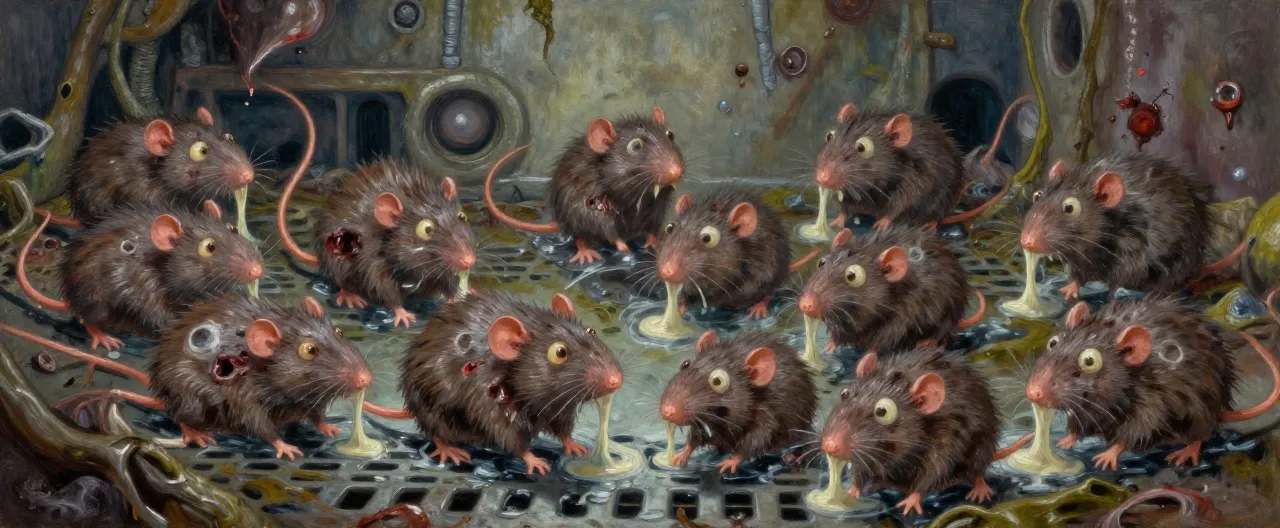
Boiling carpet of wet-furred rats with milky eyes and matted weeping sores pouring from sewer grates and ship bilges. Dark, grimy aesthetic…

Plague-Masked Chanter Plague-Masked Chanter Completed · CR 3 · Humanoid

Gaunt humanoid in tattered robes wearing a stitched rat mask. Holds a bone crook. Surrounded by faint green miasma and skittering rats. Dar…

Crypt Wretch Crypt Wretch Completed · CR 2 · Undead

A gaunt undead humanoid wearing a stained, tattered hospital shift. Skin is pale green with dark veins. Mouth hangs open revealing blackene…

Ratbone Marionette Ratbone Marionette Completed · CR 5 · Construct

A Large humanoid construct assembled from thousands of lashed rat bones, animated by green ley-line magic. It holds a skeletal tail and jag…

Drowned Keelhand Drowned Keelhand Completed · CR 4 · Undead

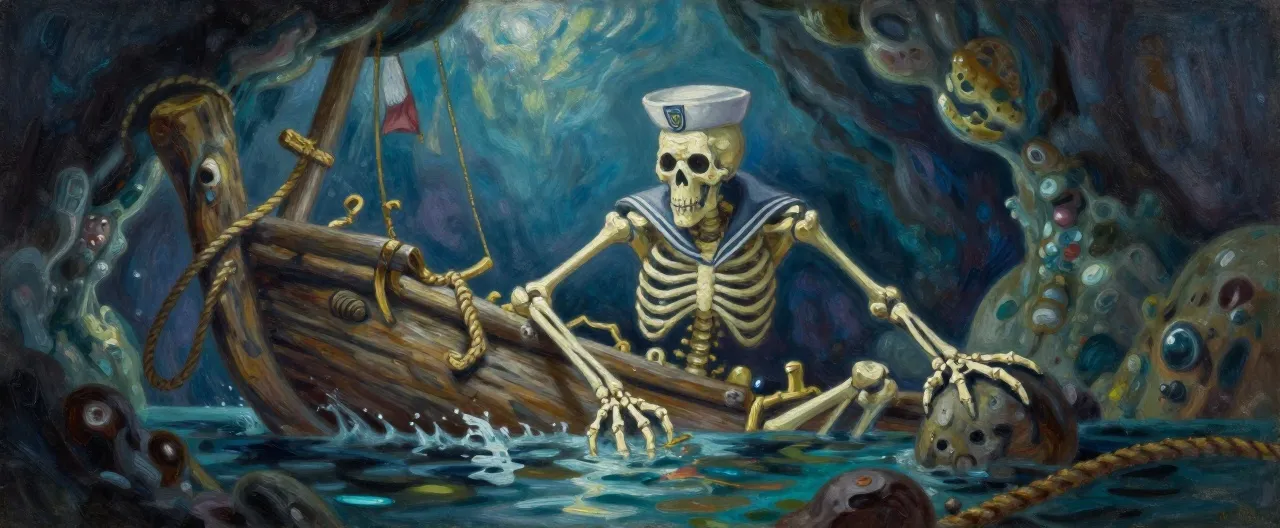
A skeletal sailor fused with barnacled ship timber, trailing rotted rope hands, lurking beneath black water in a flooded cave chamber.

Miasma Stalker Miasma Stalker Completed · CR 3 · Aberration

Gaunt, long-limbed shape of grey vapor and wet cloth, resolving into a clawed form mid-strike. Eyes are hollow voids. Background: foggy pie…

Scalpel Leech Scalpel Leech Completed · CR 1/2 · Beast

A wet, black ribbon-like leech with tiny bone barbs along its body, leaving clean surgical cuts. It clings to skin with a predatory grip, r…

Winch Gnawer Winch Gnawer Completed · CR 1 · Beast

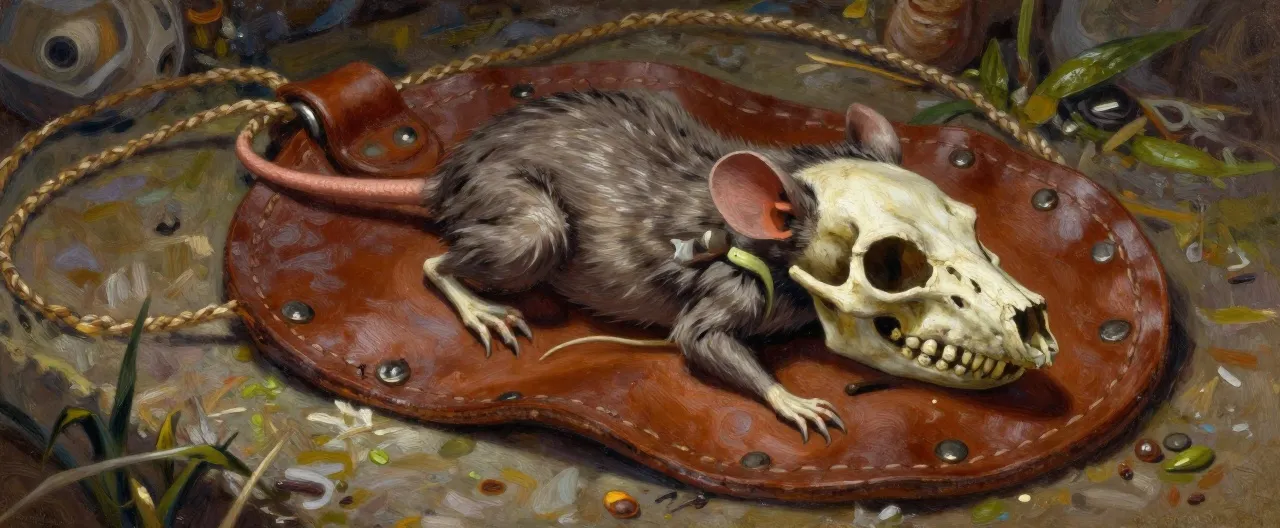
Oversized rat with iron-grey fur, massive yellow incisors, and grease-stained paws. It crouches near a frayed winch cable in a dim harbor t…

Ley-Sludge Ooze Ley-Sludge Ooze Completed · CR 6 · Ooze

Large black gelatinous mass glowing faintly green from within, spreading across wet stone floor with pseudopods extended.

Villain Plans

Corvane Ashgrove, the Ratbound Bishop Character Sheet

BBEG

Motivation

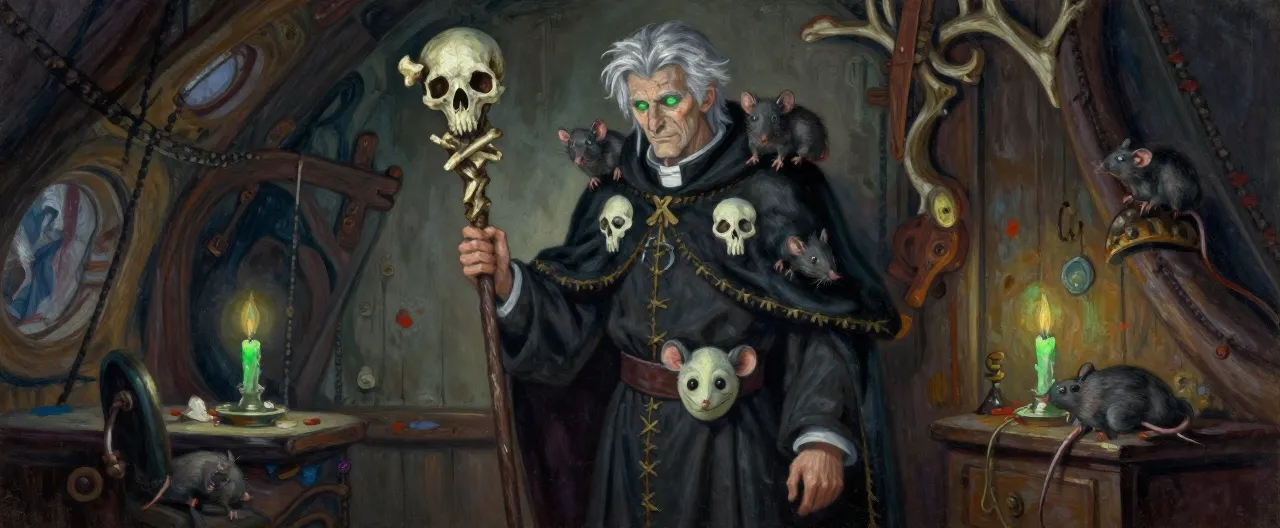
Corvane believes the plague is a divine gift. He wants to cleanse Nostramus of its corrupt nobility and build a kingdom where the faithful rule. He seeks immortality through the plague ritual.

Personality

Soft-spoken, paternal, utterly convinced of his righteousness. He speaks of pestilence as a blessing and rats as holy messengers. He never raises his voice.

Resources

  • The ghost ship Weeping Sister
  • The Ratbound Choir cultists
  • Plague magic
  • Rat swarms
  • Hidden undercity lair

Battle Plan

Corvane begins by summoning rat swarms and casting plague spells from a distance. He uses the ship's narrow corridors to split the party. If cornered, he drinks a potion of invisibility and tries to escape to the lighthouse cave. He fights to the death if the ritual focus is threatened.

Defeat or Redemption

Defeated, he curses the party with his dying breath, but the plague can still be stopped if the focus is destroyed. Redemption is impossible; he is too far gone.

Mirelle Vantt, the Harbor Whisper Character Sheet

Lieutenant

Motivation

Mirelle wants power and wealth. She allied with Corvane to control the harbor after the plague. She regrets the deal but sees no way out.

Personality

Charming, ruthless, always calculating. She smiles while threatening. She never fights fair.

Resources

  • Smuggler network
  • Hidden docks
  • Poison
  • Bribed guards
  • The ghost ship's manifest

Battle Plan

Mirelle uses smoke bombs and poisoned daggers. She tries to escape via the water. She will surrender if clearly outmatched, offering information in exchange for her life.

Defeat or Redemption

She can be redeemed if the party offers her a way out of the cult. Otherwise, she dies a smuggler's death.

Doctor Orlan Fesk, the Kindly Knife Character Sheet

Lieutenant

Motivation

Fesk is a former physician who lost his family to a plague. He believes the only cure is to cull the weak. He spreads the plague deliberately to 'purify' the city.

Personality

Calm, clinical, utterly without empathy. He speaks of death as a medical procedure. He keeps detailed notes.

Resources

  • Plague vials
  • Medical knowledge
  • Cultist assistants
  • Hidden laboratory in the temple row

Battle Plan

Fesk throws plague vials and uses a poisoned scalpel. He has cultist bodyguards. He tries to infect the party rather than kill them outright.

Defeat or Redemption

He cannot be redeemed. His notes can be used to create a cure if captured alive.

Sera Quill, the King's Inquisitor Character Sheet

Rival Antagonist

Motivation

Quill believes the quarantine is the only way to save the kingdom. She is loyal to the king and will sacrifice anyone to contain the plague.

Personality

Cold, efficient, unyielding. She sees the party as potential plague carriers. She is not evil, just merciless.

Resources

  • Inquisitorial guards
  • King's authority
  • Seals of office
  • Spies in the Ash Watch

Battle Plan

Quill fights with a rapier and crossbow, directing guards. She uses smoke and fire to flush out enemies. She will retreat if the party proves innocent.

Defeat or Redemption

She can be convinced to help if the party brings proof of the cult. Otherwise, she becomes a recurring obstacle.

Running Notes

Recommended party: 4-5 characters, levels 1-12. A mix of martial and spellcasting classes is recommended. A cleric or paladin for healing and disease resistance, a rogue for investigation, a wizard for lore, and a fighter or barbarian for combat.

Session Zero

Before play, hold a session zero and be explicit about the tone: this is dark fantasy horror with a plague, mass death, quarantine violence, body horror involving rats and disease, and a city guard that kills civilians at the walls. Use a safety tool such as the X-card, the lines-and-veils checklist, or an anonymous note system, and agree on which subjects are off the table. Confirm that everyone is comfortable with disease imagery, child endangerment in the background, and the moral pressure of choosing who to save. Establish that the party already knows each other and has been trapped in Nostramus for at least a week, so no one needs a reason to trust the others. Ask each player to name one person in the city their character cares about, because those names become the stakes of the campaign. Explain the rules you will use for disease, exhaustion and quarantine checkpoints, and tell the players up front that the campaign has two hard gates: the ritual in the Sunken Shrine and the plague focus aboard the Weeping Sister. Finally, agree on a table convention for when a scene becomes too intense, and remind everyone that the villains are fictional and the rats are not real.

Scaling Guidance

This module is written for four characters of levels 1 through 12, and every encounter packet lists a suggested level range and a Low, Moderate or High difficulty rating. For a party of three, remove one creature of the lowest challenge rating in the roster or reduce the boss's hit points by 25 percent. For a party of five or six, add one or two creatures of the roster's lowest challenge rating, or add a second wave after the first round. If the party is one level below the suggested range, treat the encounter as one difficulty step higher and let them retreat, negotiate or use terrain. If the party is two or more levels above, add a custom monster from the same act and increase the boss's damage output rather than its hit points, so fights stay short and tense. Never scale a villain by swapping in a monster stat block; adjust the villain's own character sheet instead. The ritual in the Sunken Shrine and the plague focus aboard the Weeping Sister are the two hard gates of the campaign: if the party is underleveled, let them fail forward by breaking the ritual but not the focus, which buys them time and a harder Act III rather than a total loss.

DM Advice

Run the campaign as three escalating pressure cookers. In Act I, the city is the dungeon: every district has a checkpoint, every NPC has a reason to lie, and the clock is measured in corpse carts. Give the party one clear lead at a time and let them choose the order, but always have Captain Vey, Sister Neris or Dockmaster Crane push them toward the next clue. In Act II, the undercity is the dungeon: the cult is close, the tunnels are dark, and the party should feel that they are being watched. Use the plague-masked chanters as recurring faces so the cult has a personality before Corvane appears. In Act III, the harbor is the dungeon: the fog, the chain, the cave and the ship should feel like a single long descent. Keep the villain pressure visible. Corvane never appears in person until the finale, but his letters, his sigil and his lieutenants should be in every act. Mirelle Vantt should be met, bargained with and possibly spared before the ritual. Doctor Fesk should be a name the party hears in Act I before they ever see his mask. Sera Quill should be a genuine obstacle who can become an ally, not a cartoon. Clue flow: the rat token leads to the sewers, the sewers lead to the crypt, the crypt leads to the undercity, the undercity leads to the shrine, the shrine leads to the ship. If the party misses a clue, move it to the next scene rather than stalling. Pacing: aim for one major scene per session in Act I, two per session in Act II, and one long set piece per session in Act III. Rest often enough that the party can use their resources, but make every long rest in the city cost something, such as a district falling or an NPC dying.

Failure States

  • If the party never gathers proof for Captain Vey, the Ash Watch treats them as quarantine breakers, the Inquisitor arrests them at the keep, and Act II begins with the party escaping the keep prison rather than descending into the undercity on their own terms.
  • If the party ignores the plague for ten in-game days, the weeping plague kills a third of Nostramus, the temple row is burned as a mass grave, and every remaining NPC in the city is hostile, desperate or dead.
  • If the party alerts Inquisitor Sera Quill before they have hard evidence, she arrests them, seizes their findings, and burns the temple row to contain the outbreak, killing Brother Aldous and Sister Neris and destroying the ledger.
  • If the party fails to disrupt the ritual in the Sunken Shrine, the plague becomes airborne, the quarantine fails, and Act III begins with the party racing to the ghost ship while the city dies around them; every encounter in Act III gains one extra creature and the final fight is fought at High difficulty with no rest.
  • If the party kills Corvane Ashgrove without destroying the plague focus in the ship's bilge, the plague continues, the city still dies, and the party must return to the wreck to finish the job against a rising tide of rats and drowned dead.
  • If the party destroys the ratbone staff but leaves the plague focus intact, the cult loses its magic but the plague keeps spreading at half speed, giving the party three more days to reach the ship before the city is lost.
  • If the party abandons Archivist Mora in the catacombs, she is captured by a cult patrol, the shrine map is lost, and the party must find the Sunken Shrine by trial and error, arriving after the ritual has begun.

Secrets & Clues

  • The weeping plague is magical, not natural, and it was carried into Nostramus by rats that came off the ghost ship Weeping Sister.
  • The Ratbound Choir is a cult that worships pestilence as a cleansing force, and it operates from the undercity and the ghost ship.
  • Doctor Orlan Fesk is deliberately infecting patients in the Temple of Mercy and keeping a coded ledger that names the sunken shrine and the ratbone staff.
  • The plague's magical focus is a ratbone staff kept on the altar of the Sunken Shrine, and the ritual to make the plague airborne must be completed at midnight.
  • Corvane Ashgrove, the Ratbound Bishop, directs the cult from the captain's quarters of the Weeping Sister and plans to sacrifice Odessa Marr to complete his transformation.
  • The ghost ship's hull is enchanted to resist fire, so the only way to end the plague is to destroy the plague focus in the bilge.
  • Captain Vey's son is infected and hidden in the temple row, which is why she cannot risk a public investigation or defy the Inquisitor openly.
  • Inquisitor Sera Quill is not a cultist; she is a loyal officer enforcing a quarantine that is playing directly into the cult's hands.
  • Mirelle Vantt, the Harbor Kin's leader, secretly serves the Ratbound Choir and stole the ship's manifest to hide the cargo it carried.
  • The sunken shrine is built on a ley line older than Nostramus, and Father Theron's counter-words can break the ritual circle without destroying the staff.

Appendix

Downtime

Tend the Plague Wards

The character spends days in the Temple of Mercy carrying water, changing linens, and sitting with the dying. Each day of work lets them make a DC 13 Wisdom (Medicine) check to ease one patient's suffering and learn that patient's story.

Requirements: Access to the Temple of Mercy and a willingness to risk infection. A character wearing the Plague Doctor's Mask or under the effect of a disease-warding spell has advantage on the check.

Rewards: On a success, the character learns one rumor from the appendix and gains the trust of Sister Neris and Brother Aldous. Three successes earn a free potion of healing from the temple stores.

Time: One day per check, up to five days between sessions.

Location: Temple Row, where the plague hits hardest and where the party's first real clues about deliberate infection are found.

Complications: a patient dies mid-shift and the character must make a DC 12 Constitution saving throw or contract the weeping plague. If the party has already exposed Doctor Fesk, the ward is calmer and the DC drops to 10.

Work the Docks

The character takes shifts on the Ratwharf piers, hauling cargo and listening to dockworkers. Each day of work lets them make a DC 14 Charisma (Persuasion) or Dexterity (Sleight of Hand) check to pick up waterfront gossip or lift a small item unnoticed.

Requirements: A character willing to be seen in Ratwharf and not obviously aligned with the Ash Watch. Harbor Kin contacts help.

Rewards: On a success, the character learns one Harbor Kin secret, gains a contact among the dockworkers, and earns 5 gp in wages. Two successes reveal the hidden tunnel under the docks.

Time: One day per check, up to four days.

Location: Ratwharf, where the ghost ship is moored and where the Harbor Kin control every crate and bribe.

Complications: a cultist disguised as a dockworker may recognize the character and follow them. If the party has already angered Mirelle Vantt, the DC rises to 16 and a fight may break out on the pier.

Study the Shrine Records

The character works through Archivist Mora's scrolls and the catacomb archive, cross-referencing the shrine's name in three dead languages. Each day of study lets them make a DC 15 Intelligence (Arcana or History) check to piece together the ritual's structure.

Requirements: Access to the Catacomb Hall and Mora's protection, or a copy of her notes. A character with the sage background or proficiency in Arcana has advantage.

Rewards: On a success, the character learns one secret about the ritual, the ley line, or the counter-words. Three successes let the party attempt the ritual disruption with advantage.

Time: One day per check, up to five days.

Location: The Catacomb Hall beneath the city, where the oldest records of Nostramus are kept and where Mora has barricaded herself.

Complications: cult patrols sweep the catacombs every few hours. Roll a d6 each day; on a 1, a patrol of two cultists and a priest finds the camp and must be driven off.

Drill the Volunteers

The character trains the market square volunteers and off-duty guards in shield work and barricade fighting. Each day of drilling lets them make a DC 13 Strength (Athletics) or Charisma (Intimidation) check to improve the militia's readiness.

Requirements: A martial character or anyone with the soldier background, plus permission from Captain Vey or Sergeant Holt.

Rewards: On a success, the militia holds one barricade without the party's help during the next city event. Three successes earn the party a squad of four Guards as allies for one encounter.

Time: One day per check, up to four days.

Location: The market square and the Ash Watch Keep courtyard, where the Watch is stretched too thin to hold every gate.

Complications: Inquisitor Quill's spies report the drilling as sedition. If the party has not yet dealt with Quill, she may shut the drills down and arrest the volunteers.

Chart the Sea Cave

The character works with Keeper Sable to map the sea cave's tunnels, tide times and hidden ledges. Each day of charting lets them make a DC 14 Wisdom (Survival) or Intelligence (Investigation) check to record a safe route.

Requirements: Access to the Lighthouse Cave and Sable's cooperation. A character with water breathing or a swim speed has advantage.

Rewards: On a success, the party gains a safe route through the cave that avoids one hazard and grants advantage on the first Stealth check aboard the ship. Two successes reveal the cache of potions on the ledge.

Time: One day per check, up to three days.

Location: The Lighthouse Cave beneath the lighthouse outcrop, the only quiet route to the ghost ship's bilge.

Complications: the tide floods the cave twice a day. If the character is caught by the tide, they must make a DC 13 Strength saving throw or be swept out to the harbor and take 7 (2d6) bludgeoning damage.

Rumors

  • A dockworker swears the ghost ship's rats came ashore in a line, like they were marching to orders.
  • Brother Aldous says the plague resists every prayer of healing he knows, which means it is a curse, not a sickness.
  • Quartermaster Bree will tell anyone with coin that the Watch is down to nine days of food and three of medicine.
  • A drunk in a Ratwharf tavern claims the Harbor Kin are moving people out of the city for fifty gold a head.
  • Sister Neris says three people died on the same street in the same night, and none of them had been near the docks.
  • A market volunteer says the rats in the temple row are bold enough to sit on the cots of the dying and wait.
  • Tunnel Jack whispers that he saw cultists carry a screaming woman through the sewer gate three nights ago.
  • A Watch guard says Captain Vey has not slept in her own quarters for a week and prays in the keep chapel every dawn.
  • An old sailor claims the Weeping Sister was a real merchant ship that sailed out of Nostramus a year ago and never came back.
  • A temple nurse says the man in the doctor's mask goes down to the crypt every night and comes up with clean hands.

Random Events

  • A corpse cart overturns in a narrow street, spilling bodies and drawing a swarm of rats; the party must clear the street or lose an hour and take a DC 12 Constitution saving throw against infection.
  • An Ash Watch patrol stops the party at a checkpoint and demands papers; a DC 13 Charisma (Persuasion) check, a bribe of 10 gp, or the writ of passage gets them through.
  • A child runs up to the party and asks them to help her mother, who is coughing blood in a doorway two streets away.
  • A building collapses in the temple row, trapping two nurses under a beam; a DC 14 Strength (Athletics) check frees them before the fire spreads.
  • A rat swarm pours out of a grain store and blocks the street, forcing the party to detour through an alley where a miasma stalker waits.
  • A Harbor Kin smuggler offers the party a boat out of the city for 200 gp, no questions asked, and will not take no for an answer twice.
  • A bell rings from the Temple of Mercy, signaling a mass burial; the party can attend to gather rumors or avoid it to keep moving.
  • A cultist disguised as a plague nurse tries to slip a vial of plague into the party's waterskin; a DC 15 Wisdom (Perception) check spots the switch.
  • The fog rolls in off the harbor and a miasma stalker shadows the party for a full street before it attacks.
  • A Watch deserter begs the party to hide him, offering a map of the undercity in exchange; if they refuse, he is executed at the wall within the hour.

Treasure Parcels

  • Parcel A (Act I, market square): 10 gp, a writ of passage, a rat-carved token, and a silver ring worth 5 gp.
  • Parcel B (Act I, Ratwharf warehouse): the Smuggler's Compass, 40 gp in Harbor Kin coin, three crates of grain worth 30 gp, and a torn manifest page.
  • Parcel C (Act I, Crypt of Mercy): the Plague Doctor's Mask, Fesk's Scalpel, 120 gp in stolen temple alms, a silver reliquary worth 75 gp, and six plague samples.
  • Parcel D (Act II, Catacomb Hall): the Cloak of the Harbor, 60 gp in old grave goods, a scroll of cure wounds, and Mora's research notes.
  • Parcel E (Act II, Plague Vault): the Ratbone Token of the Choir, 200 gp in cult offerings, three plague reagents worth 50 gp each, and a hidden tunnel map.
  • Parcel F (Act II, Sunken Shrine lower level): the Ley-Line Shard, 150 gp in rat-idol gold, a watertight scroll case, and two potions of healing.
  • Parcel G (Act II, Sunken Shrine altar): the Harbor Whisper Ring, 300 gp in cult offerings, Corvane's sealed letter, and Father Theron's protective charm.
  • Parcel H (Act III, Harbor Chain Tower): the Signal Lantern of the Chain Tower, 80 gp in cult purses, a sabotage order, and a repaired winch.
  • Parcel I (Act III, Lighthouse Cave): the Lighthouse Flame, two potions of healing, a waterlogged journal, and a spare Cloak of the Harbor.
  • Parcel J (Act III, Weeping Sister): the Ship's Log of the Weeping Sister, Corvane's Ratbone Staff, 500 gp in pay chests, and barnacled ship's silver worth 200 gp.

Spare Names

  • Marrowgate (a sealed city gate on the north wall)
  • The Salt Chapel (a small shrine in Ratwharf)
  • Old Pell (a one-eyed ferryman who works the harbor at night)
  • Nessa Crane (Dockmaster Crane's niece, a runner for the Harbor Kin)
  • Brother Ivo (a young priest who replaced Aldous in the ward)
  • The Tallow Yard (a candle-makers' district now used as a corpse staging ground)
  • Hessa Vane (a Watch scout who patrols the wall at night)
  • The Drowned Bell (a sunken ship visible at low tide)
  • Corporal Munt (a Watch guard who can be bribed with food)
  • The Rat's Rest (a Ratwharf tavern with a hidden cellar)
  • Sister Aline (a temple nurse who keeps her own private list of the dead)
  • The Grey Stair (a collapsed stair in the catacombs that leads to a sealed ossuary)

Starting Location

The Quarantined City

Nostramus is a city of grey stone and red brick, built on a natural harbor. Its streets are narrow and winding, its squares once bustling now empty. The plague has turned it into a graveyard. Doors are marked with red crosses. Bodies are stacked in carts. The Ash Watch patrols with torches and swords, enforcing the quarantine. The air smells of smoke, rot, and something worse: a sweet, unnatural stench that clings to the back of the throat. Rats are everywhere, bold and unafraid. The city is divided into districts: the merchant quarter, the temple row, the docks, and the keep. Each has its own horrors.

Secrets

  • The plague is magical, spread by rats from the ghost ship.
  • Captain Vey's son is infected and hidden in the temple row.
  • The Harbor Kin are smuggling people out of the city for exorbitant fees.

Key Locations

Nostramus

Nostramus is a city of red brick and grey stone, its steep roofs and pointed windows now shadowed by plague banners. The streets are empty save for patrols and corpse carts. The market square, once loud, is silent. The city is divided by walls and gates, each district sealed off from the next. The air is thick with smoke and the sweet stench of disease. Rats scurry openly, unafraid of humans. The Ash Watch stands at every corner, their torches casting long shadows. The city feels like a held breath, waiting to exhale.

Additional Notes

Use the city as a hub. The party can move between districts but must pass checkpoints. The Ash Watch demands papers; bribery or stealth works.

Ratwharf

Ratwharf is the dock district of Nostramus, a maze of warehouses, taverns, and rotting piers. The ghost ship *Weeping Sister* is moored at the far end, its hull barnacled and its sails torn. No one goes near it. The docks are quiet, but not empty: smugglers and dockworkers move in shadows, and rats swarm the grain stores. The Harbor Kin controls this area, and they do not welcome strangers. The air smells of salt, fish, and the sweet rot of the plague.

Additional Notes

The ghost ship is guarded by cultists disguised as dockworkers. The party can scout it but cannot board until Act III. Dockmaster Crane knows the ship's manifest is missing.

Temple Row

Temple Row is a wide street lined with shrines and temples, now converted into plague wards. The Temple of Mercy is the largest, its halls filled with the dying. Priests and nurses move among them, their faces hidden behind masks. The air is thick with incense and the moans of the sick. Red crosses mark every door. The plague has hit this district hardest, and the dead are carried out in carts every hour. Brother Aldous tends the sick, but his faith is failing.

Additional Notes

Doctor Fesk operates a hidden laboratory beneath the Temple of Mercy. The party can find it by following the rats or interrogating a cultist.

Ash Watch Keep

The Ash Watch Keep is a squat fortress of grey stone, its walls thick and its windows narrow. It serves as barracks, armory, and prison. The Watch is stretched thin, and the keep is crowded with guards and refugees. Sergeant Holt drills recruits in the courtyard. Quartermaster Bree controls the supplies. The keep is the safest place in the city, but it is also a place of grim duty. The quarantine is enforced from here, and the orders are clear: no one leaves.

Additional Notes

The keep has a small chapel where Captain Vey prays. She can be found there when not on duty. The prison holds several people arrested for trying to flee.

The Undercity

Beneath Nostramus lies a labyrinth of sewers, catacombs, and ancient tunnels. The undercity is dark, wet, and infested with rats. The walls are covered in slime and strange fungal growths. The air is thick with the smell of decay. The Ratbound Choir has made its lair here, in the sunken shrine of a forgotten god. The tunnels are treacherous, and the cult has set traps and guards. The party must navigate the darkness, find the cult's stronghold, and disrupt their ritual before it is too late.

Secrets

  • The sunken shrine is older than Nostramus itself.
  • The ritual requires a ratbone staff and a living sacrifice.
  • Father Theron knows the ritual's counter-words.

Key Locations

Sewer Gate

The Sewer Gate is a rusted iron grate set into the base of the city wall, half-hidden by weeds and refuse. Beyond it, a brick tunnel slopes down into darkness. The air is damp and foul. Rats scurry in the shadows. This is the main entrance to the undercity, used by scavengers and cultists alike. Tunnel Jack, an old scavenger, lives just inside, eking out a living in the filth. He knows the tunnels but is terrified of the cult.

Additional Notes

The gate is locked (DC 15 Dexterity with thieves' tools). Tunnel Jack can open it for a price. The tunnel beyond is dark; the party needs light.

Catacomb Hall

The Catacomb Hall is a vast underground chamber lined with stone sarcophagi. The walls are carved with the names of the dead, many dating back centuries. The air is dry and dusty, a relief from the sewers. Archivist Mora has made her camp here, surrounded by scrolls and books. She has been hiding from the cult, who use the catacombs as a thoroughfare. The hall is quiet, but the shadows are deep, and the cult's presence is never far.

Additional Notes

Mora has barricaded herself in a side chamber. She will share her research if the party protects her. The cult patrols the catacombs every few hours.

Plague Vault

The Plague Vault is a circular chamber of black stone, its walls covered in rat carvings. A iron cage hangs from the ceiling, holding prisoners. The floor is slick with filth. Cultists in rat masks chant around a bubbling cauldron of plague. The air is thick with disease. This is where the cult breeds its plague and holds its sacrifices. Elen Voss is imprisoned here, along with other captives.

Additional Notes

The vault is guarded by 4 cultists and 1 priest. The cauldron is a plague source; destroying it weakens the cult. Elen Voss is in the cage.

Sunken Shrine

The Sunken Shrine is a vast cavern beneath the harbor, half-flooded with black water. Ancient stone pillars rise from the pool, carved with images of rats and disease. At the center, a stone altar holds a ratbone staff. The air hums with dark energy. This is where the Ratbound Choir plans to complete their ritual. Father Theron, a half-mad hermit, lives in a side alcove, muttering prayers to the rats. He knows the counter-words that can disrupt the ritual.

Additional Notes

The shrine is the site of the Act II climax. The cult will attempt the ritual at midnight. The party can disrupt it by using the counter-words (from Theron) or by destroying the staff. Corvane is not present; he sends a lieutenant (Mirelle Vantt) to oversee.

The Black Tide

The final act takes place in the harbor and on the ghost ship *Weeping Sister*. The harbor is a dark, foggy expanse of water, dotted with the masts of sunken ships. The chain tower guards the entrance, and the lighthouse casts a pale beam over the waves. The ghost ship sits at anchor, its hull rotting, its decks swarming with rats. The air is cold and heavy with evil. This is where Corvane Ashgrove waits, ready to complete his transformation into the Ratbound Bishop. The party must board the ship, fight through the cult, and confront the BBEG in a final battle.

Secrets

  • The ghost ship is powered by a bound water elemental.
  • Corvane plans to sacrifice Odessa Marr to complete his transformation.
  • The lighthouse flame can be used to destroy the ship's plague focus.

Key Locations

Harbor Chain Tower

The Harbor Chain Tower is a stone tower at the mouth of the harbor, housing the massive chain that can block entry to the port. The tower is manned by a small garrison of sailors loyal to Chain Captain Rook. The chain is currently raised, keeping the ghost ship trapped inside. Rook is a weathered veteran who has seen too much. The tower is infested with rats, and the garrison is on edge. From the top, you can see the ghost ship clearly.

Additional Notes

Rook will lower the chain if the party clears the rats from the tower. The tower has 3 floors and a basement. The basement is flooded and contains a rat swarm.

Lighthouse Cave

The Lighthouse Cave is a sea cave beneath the lighthouse on a rocky outcrop. The cave is dark and wet, its walls slick with algae. At high tide, the cave floods, but now it is passable. Keeper Sable, the lighthouse keeper, has mapped the cave and knows it leads to the ghost ship's hull. The cave is home to bats and a few giant crabs. The air is cold and salty. From here, you can hear the creaking of the ghost ship above.

Additional Notes

Sable will guide the party through the cave if they promise to stop the plague. The cave has a hidden entrance to the ship's lower hold. The party can also find a cache of healing potions left by a previous expedition.

The Ghost Ship Weeping Sister

The *Weeping Sister* is a three-masted merchant ship, now a rotting hulk. Its sails are tattered, its deck slick with slime. Rats swarm everywhere, and the air is thick with the stench of death. The ship is crewed by cultists and undead rats. Corvane Ashgrove has made his lair in the captain's quarters, where he performs his rituals. The ship is the source of the plague, and its destruction is the only way to save Nostramus.

Additional Notes

The ship has three levels: hold, main deck, and captain's quarters. The party must fight through cultists and rats. Odessa Marr is imprisoned in the captain's quarters. Corvane is the final boss.

Monsters & Enemies

Bilge-Tide Rat Swarm Bilge-Tide Rat Swarm Completed · CR 2 · Beast

Boiling carpet of wet-furred rats with milky eyes and matted weeping sores pouring from sewer grates and ship bilges. Dark, grimy aesthetic…

Plague-Masked Chanter Plague-Masked Chanter Completed · CR 3 · Humanoid

Gaunt humanoid in tattered robes wearing a stitched rat mask. Holds a bone crook. Surrounded by faint green miasma and skittering rats. Dar…

Crypt Wretch Crypt Wretch Completed · CR 2 · Undead

A gaunt undead humanoid wearing a stained, tattered hospital shift. Skin is pale green with dark veins. Mouth hangs open revealing blackene…

Ratbone Marionette Ratbone Marionette Completed · CR 5 · Construct

A Large humanoid construct assembled from thousands of lashed rat bones, animated by green ley-line magic. It holds a skeletal tail and jag…

Drowned Keelhand Drowned Keelhand Completed · CR 4 · Undead

A skeletal sailor fused with barnacled ship timber, trailing rotted rope hands, lurking beneath black water in a flooded cave chamber.

Miasma Stalker Miasma Stalker Completed · CR 3 · Aberration

Gaunt, long-limbed shape of grey vapor and wet cloth, resolving into a clawed form mid-strike. Eyes are hollow voids. Background: foggy pie…

Scalpel Leech Scalpel Leech Completed · CR 1/2 · Beast

A wet, black ribbon-like leech with tiny bone barbs along its body, leaving clean surgical cuts. It clings to skin with a predatory grip, r…

Winch Gnawer Winch Gnawer Completed · CR 1 · Beast

Oversized rat with iron-grey fur, massive yellow incisors, and grease-stained paws. It crouches near a frayed winch cable in a dim harbor t…

Ley-Sludge Ooze Ley-Sludge Ooze Completed · CR 6 · Ooze

Large black gelatinous mass glowing faintly green from within, spreading across wet stone floor with pseudopods extended.

Villain Plans

Corvane Ashgrove, the Ratbound Bishop Character Sheet

BBEG

Motivation

Corvane believes the plague is a divine gift. He wants to cleanse Nostramus of its corrupt nobility and build a kingdom where the faithful rule. He seeks immortality through the plague ritual.

Personality

Soft-spoken, paternal, utterly convinced of his righteousness. He speaks of pestilence as a blessing and rats as holy messengers. He never raises his voice.

Resources

  • The ghost ship Weeping Sister
  • The Ratbound Choir cultists
  • Plague magic
  • Rat swarms
  • Hidden undercity lair

Battle Plan

Corvane begins by summoning rat swarms and casting plague spells from a distance. He uses the ship's narrow corridors to split the party. If cornered, he drinks a potion of invisibility and tries to escape to the lighthouse cave. He fights to the death if the ritual focus is threatened.

Defeat or Redemption

Defeated, he curses the party with his dying breath, but the plague can still be stopped if the focus is destroyed. Redemption is impossible; he is too far gone.

Mirelle Vantt, the Harbor Whisper Character Sheet

Lieutenant

Motivation

Mirelle wants power and wealth. She allied with Corvane to control the harbor after the plague. She regrets the deal but sees no way out.

Personality

Charming, ruthless, always calculating. She smiles while threatening. She never fights fair.

Resources

  • Smuggler network
  • Hidden docks
  • Poison
  • Bribed guards
  • The ghost ship's manifest

Battle Plan

Mirelle uses smoke bombs and poisoned daggers. She tries to escape via the water. She will surrender if clearly outmatched, offering information in exchange for her life.

Defeat or Redemption

She can be redeemed if the party offers her a way out of the cult. Otherwise, she dies a smuggler's death.

Doctor Orlan Fesk, the Kindly Knife Character Sheet

Lieutenant

Motivation

Fesk is a former physician who lost his family to a plague. He believes the only cure is to cull the weak. He spreads the plague deliberately to 'purify' the city.

Personality

Calm, clinical, utterly without empathy. He speaks of death as a medical procedure. He keeps detailed notes.

Resources

  • Plague vials
  • Medical knowledge
  • Cultist assistants
  • Hidden laboratory in the temple row

Battle Plan

Fesk throws plague vials and uses a poisoned scalpel. He has cultist bodyguards. He tries to infect the party rather than kill them outright.

Defeat or Redemption

He cannot be redeemed. His notes can be used to create a cure if captured alive.

Sera Quill, the King's Inquisitor Character Sheet

Rival Antagonist

Motivation

Quill believes the quarantine is the only way to save the kingdom. She is loyal to the king and will sacrifice anyone to contain the plague.

Personality

Cold, efficient, unyielding. She sees the party as potential plague carriers. She is not evil, just merciless.

Resources

  • Inquisitorial guards
  • King's authority
  • Seals of office
  • Spies in the Ash Watch

Battle Plan

Quill fights with a rapier and crossbow, directing guards. She uses smoke and fire to flush out enemies. She will retreat if the party proves innocent.

Defeat or Redemption

She can be convinced to help if the party brings proof of the cult. Otherwise, she becomes a recurring obstacle.

NPCs in The Quarantined City

Mira Salt

A wiry girl of sixteen with quick hands and a quicker tongue. She wears a leather apron and carries a sling. She knows every alley and sewer entrance.

Role: Rat-catcher, quest giver

Other Details: Mira saw a rat-masked figure in the sewers. She is terrified but determined. She will guide the party to the sewer gate if they help her.

Dockmaster Crane

A stout, bearded man with a wooden leg. He has run the docks for forty years. He knows every ship and every smuggler.

Role: Dockmaster, information broker

Other Details: Crane is neutral. He will trade information for coin or favors. He knows the ghost ship's manifest is missing and suspects the Harbor Kin.

Brother Aldous

A frail old man with kind eyes and trembling hands. He has tended the sick for weeks without rest. He is losing his faith.

Role: Priest of the Temple of Mercy

Other Details: Aldous has seen the plague resist all magical healing. He believes a curse is at work. He will help the party if they bring him a sample of the plague.

Sister Neris

A young woman in a blood-stained habit. She is exhausted but relentless. She keeps a ledger of every victim.

Role: Plague nurse, quest giver

Other Details: Neris has noticed that the plague spreads from the docks. She suspects the rats. She will give the party her ledger if they promise to find a cure.

Quartermaster Bree

A stocky woman with a ledger always in hand. She controls the Watch's supplies. She is pragmatic and profit-minded.

Role: Quartermaster, merchant

Other Details: Bree will sell equipment to the party at a markup. She knows the Watch's weaknesses and will share them for a price.

Captain Vey

Open Character Sheet

A tall woman with grey-streaked hair and tired eyes. She wears the ash-grey cloak of the Watch. She is stern but fair, and she cares for her city.

Role: Ash Watch Captain, quest giver

Other Details: Vey is torn between duty and compassion. She suspects the plague is unnatural but lacks proof. She will help the party if they bring evidence. She has a son in the temple row, sick with plague.

Liss Vell

Open Character Sheet

A lean woman with a scar across her cheek. She wears a sailor's coat and carries a curved knife. She is loyal to Mirelle but doubts the cult.

Role: Smuggler, Mirelle's second

Other Details: Liss can be turned against Mirelle if the party shows her proof of the cult's true goals. She knows the hidden entrance to the undercity.

Sergeant Holt

Open Character Sheet

A broad-shouldered man with a broken nose and a permanent scowl. He enforces the quarantine without question. He is not cruel, just obedient.

Role: Ash Watch sergeant

Other Details: Holt follows orders but hates them. He will look the other way if the party helps his sister, who is trapped in the temple row.

NPCs in The Undercity

Tunnel Jack

A hunched man covered in grime. He has lived in the sewers for years. He speaks in whispers and never looks anyone in the eye.

Role: Scavenger, guide

Other Details: Jack knows the undercity better than anyone. He will guide the party for food and a promise of safety. He is terrified of the Ratbound Choir.

Archivist Mora

A thin woman with spectacles and ink-stained fingers. She has been hiding in the catacombs since the quarantine began. She guards the city's oldest records.

Role: Historian, quest giver

Other Details: Mora has found references to a sunken shrine beneath Nostramus. She believes the cult is trying to complete an ancient ritual there. She will share her research if protected.

Elen Voss

A young woman in torn robes, chained to a wall. She is weak but defiant. She was captured while researching the plague.

Role: Captured scholar, prisoner

Other Details: Elen knows the cult's ritual requires a focus: a ratbone staff. She will tell the party where it is kept if they free her.

Father Theron

A wild-eyed old man with a long white beard. He lives in the sunken shrine, half-mad from isolation. He speaks in riddles.

Role: Hermit, quest giver

Other Details: Theron was once a priest of the shrine. He knows the ritual's words and can disrupt it if the party protects him. He believes the rats speak to him.

NPCs in The Black Tide

Keeper Sable

A quiet woman with salt-crusted hair. She has kept the lighthouse burning through the quarantine. She rarely speaks but sees everything.

Role: Lighthouse keeper, quest giver

Other Details: Sable has seen lights on the ghost ship at night. She knows a sea cave that leads to the ship's hull. She will guide the party if they promise to stop the plague.

Chain Captain Rook

Open Character Sheet

A weathered sailor with a peg leg and a tricorn hat. He commands the chain tower that blocks the harbor. He is loyal to the city, not the king.

Role: Harbor chain captain, quest giver

Other Details: Rook can lower the chain to let the party reach the ghost ship. He will do so if they help him clear the rats from the tower. He knows Mirelle's smuggling routes.

Odessa Marr

Open Character Sheet

A gaunt woman in tattered sailor's clothes. She was the ship's navigator, the only crew member left alive. She is half-starved and terrified.

Role: Survivor, prisoner on the ship

Other Details: Odessa knows Corvane's plan and the ship's layout. She will help the party if they promise to get her off the ship. She carries the ship's log.

Factions

The Ash Watch

The Ash Watch is Nostramus's city guard, named for the ash-grey cloaks they wear. They enforce the king's quarantine with brutal efficiency. Once respected, they are now feared. Their captain, Vey, is torn between duty and the growing horror of the plague. They hold the walls, the gates, and the keep.

Goals

Enforce the quarantine, maintain order, and find a cure. They want to protect the city but are losing hope.

Relationships

With Other Factions
They distrust the Harbor Kin and hunt the Ratbound Choir. They are unaware of the cult's infiltration.
With Players
Wary. They will not attack unless provoked, but they demand obedience. They can become friendly if the party brings proof of the cult.

The Ratbound Choir

A secret cult that worships pestilence as a cleansing force. They believe the plague will remake the city into a paradise for the faithful. They operate from the undercity and the ghost ship, wearing rat masks and spreading disease. Their leader is Corvane Ashgrove.

Goals

Spread the plague, complete the ritual in the sunken shrine, and overthrow the king. They want to rule Nostramus as a theocracy of rats.

Relationships

With Other Factions
They are hostile to the Ash Watch and manipulate the Harbor Kin. They see the Inquisitor as a useful fool.
With Players
Hostile. They attack on sight if discovered.

The Harbor Kin

A loose network of smugglers, dockworkers, and sailors who control the waterfront. They are neutral to the quarantine, more interested in profit. Their leader, Mirelle Vantt, secretly works for the Ratbound Choir, but most members are unaware. They know the hidden routes in and out of the city.

Goals

Survive the quarantine, keep their smuggling routes open, and profit from the chaos.

Relationships

With Other Factions
They bribe the Ash Watch and avoid the Ratbound Choir. They are suspicious of outsiders.
With Players
Neutral. They will trade for the right price. They can become friendly if the party helps them.

Main Questline

The Unnatural Plague

Given by: Captain Vey
Captain Vey cannot act on rumor. She needs proof that the weeping plague is not a natural sickness before she will defy the quarantine orders. The party must work the market square, the docks and the temple row, gather rat-carved tokens, a stolen manifest and a physician's coded ledger, and bring them back to the keep. Every piece of evidence they collect buys them a little more of the Watch's trust and a little more freedom to move through the sealed districts.

Goals

- Gather three pieces of hard evidence that the plague is deliberate.
- Earn Captain Vey's trust without alerting Inquisitor Sera Quill.
- Secure a route into the undercity beneath the city.

Reward

**Reward:** A writ of passage signed by Captain Vey (free movement through Ash Watch checkpoints), 50 gp from the Watch's dwindling stores, and the *Quill's Seal of Office* taken from the Inquisitor's satchel at the keep.

Secrets

  • The plague is magical and was carried into the harbor by the ghost ship Weeping Sister.
  • Captain Vey's son is infected and hidden in the temple row, which is why she cannot afford a public investigation.
  • The Inquisitor has spies inside the Ash Watch Keep reporting on Vey's every order.

DM Notes

Run this as the spine of Act I. Vey is the party's anchor; every other Act I NPC feeds her. If the party brings her the ledger and the manifest together, she grants the writ immediately. If they bring nothing, she stalls and the Inquisitor's spies report them.

The Kindly Knife

Given by: Sister Neris
Sister Neris has noticed that the plague kills faster in the temple row than it should, and that three victims on one street died in the same night far from the docks. All three were patients of a physician who still walks the wards in a doctor's mask. Neris wants the party to walk those three houses, find the connection, and follow it down into the crypt beneath the Temple of Mercy, where Doctor Orlan Fesk breeds the plague by hand and infects the dying one at a time.

Goals

- Investigate the three plague houses in the temple row.
- Find the hidden door in the Temple of Mercy crypt.
- Confront Doctor Orlan Fesk and seize his notes and ledger.

Reward

**Reward:** The *Plague Doctor's Mask* (rare, immunity to disease while worn), the *Fesk's Scalpel* (rare, +1 dagger), Neris's ledger as evidence for Captain Vey, and free healing at the Temple of Mercy for the rest of the campaign.

Secrets

  • Doctor Fesk lost his own family to a plague years ago and now believes culling the weak is a cure.
  • Fesk's coded ledger names the sunken shrine and the ratbone staff.
  • The crypt connects by a hidden stair to the catacombs beneath the city.

DM Notes

Fesk is a villain and fights with his own character sheet, not a monster stat block. He opens with plague vials and a poisoned scalpel, keeps two cultist assistants between himself and the party, and tries to infect rather than kill. If captured alive, his notes let the party craft a partial cure.

Beneath the City

Given by: Archivist Mora
Archivist Mora has hidden in the catacombs since the quarantine sealed the gates above her. She has found references to a sunken shrine beneath Nostramus, older than the city itself, built on a ley line that feeds plague magic. The Ratbound Choir is trying to finish a ritual there. Mora has a map, but a cultist who was once her student stole the original, and she needs the party to escort her, recover the map, and find the shrine before midnight.

Goals

- Reach the Catacomb Hall and protect Archivist Mora.
- Recover the stolen shrine map from the Plague Vault.
- Locate the hidden tunnel from the Plague Vault to the Sunken Shrine.

Reward

**Reward:** The *Cloak of the Harbor* (uncommon, water breathing), Mora's research notes, and a complete map of the undercity showing the route to the Plague Vault and the Sunken Shrine.

Secrets

  • The sunken shrine is built on a ley line that amplifies plague magic.
  • The stolen map's margin carries a cure ritual written in the shrine's own dead tongue.
  • The cultist who stole the map is hiding among the prisoners in the Plague Vault.

DM Notes

Mora is the party's lore anchor in Act II. She will not leave the catacombs until the map is recovered. If the party abandons her, she is captured by a cult patrol within a day and the map is lost until Act III.

The Ritual of Rats

Given by: Father Theron
Father Theron was once the high priest of the sunken shrine and now lives half-mad in a side alcove, muttering prayers to the rats. He remembers the counter-words that can break the ritual circle, but his memory fails without his silver chime. The Ratbound Choir will complete the ritual at midnight, and if they do, the plague becomes airborne and every living thing in Nostramus dies. The party must retrieve the chime, learn the words, and disrupt the circle.

Goals

- Retrieve Father Theron's silver chime from the rat-infested side tunnel.
- Learn the counter-words and reach the Sunken Shrine before midnight.
- Break the ritual circle or destroy the ratbone staff.

Reward

**Reward:** The *Silver Chime of the Gnawing Choir* (uncommon, casts *bless* once per day), the *Ley-Line Shard* (rare), and Theron's protective charm against the plague.

Secrets

  • The ritual requires the ratbone staff and a living sacrifice to complete.
  • Mirelle Vantt oversees the ritual in Corvane's place and flees if the staff is destroyed.
  • The shrine's flooded lower level hides a ley-sludge ooze and a ratbone marionette.

DM Notes

The ritual takes ten rounds. The party can break it with the counter-words (DC 15 Charisma with Theron's help) or by destroying the staff (AC 15, 30 HP). If the ritual completes, the plague becomes airborne and the campaign moves to a hard-mode Act III.

The Ratbound Bishop

Given by: Odessa Marr
Odessa Marr was the Weeping Sister's navigator and the only crew member left alive. She is chained in the captain's quarters while Corvane Ashgrove works his rituals above her. She knows the ship's layout, the bound water elemental in the bilge, and the plague focus that keeps the sickness alive. She will guide the party through the ship if they promise to get her off it, and she knows that destroying the focus is the only way to end the plague for good.

Goals

- Lower the harbor chain and reach the ghost ship.
- Board the Weeping Sister through the sea cave and fight up from the hold.
- Free Odessa Marr, destroy the plague focus, and defeat Corvane Ashgrove.

Reward

**Reward:** The *Ship's Log of the Weeping Sister* (rare), the *Lighthouse Flame* (very rare), *Corvane's Ratbone Staff* (very rare) if seized intact, and the end of the plague in Nostramus.

Secrets

  • The ship's hull is enchanted to resist fire, so burning it will not work.
  • Corvane's power is tied to the ratbone staff; destroying it strips his magic.
  • The plague focus in the bilge is chained to a bound water elemental that must be destroyed or freed.

DM Notes

Corvane is a villain and uses his own character sheet. He fights to the death if the plague focus is threatened and drinks a potion of invisibility to escape if reduced below a quarter of his hit points. Killing him without destroying the focus leaves the plague running.

Side Quests in The Quarantined City

Rats in the Walls

Given by: Mira Salt
Mira Salt is terrified. She saw a rat-masked man in the sewers, and now she hears scratching in the walls of her family's home. Her little brother is sick. She believes the rats are spreading the plague and wants you to find and destroy their nest. She can guide you to the sewer entrance near the temple row, but she won't go in. She asks you to bring back proof: a rat-carved token or a cultist's mask.

Goals

Find the rat nest in the sewers, destroy it, and bring proof to Mira.

Reward

**Reward:** Mira's gratitude, a *Rat-Bane Amulet* (uncommon, advantage on saving throws against disease), and a safe route through the sewers.

Secrets

  • The rats are being controlled by the Ratbound Choir.
  • Mira's brother is infected but can be saved with a cure.
  • The nest is actually a cultist hideout.

DM Notes

This quest introduces the sewers and the cult. The nest is a small chamber with 4 giant rats and 1 cultist. The cultist carries a rat-carved token. If the party clears the nest, Mira's family is safe for now.

The Doctor's Ledger

Given by: Sister Neris
Sister Neris has compiled a ledger of every plague victim in the temple row. She has noticed a pattern: the plague spreads from the docks, but some victims were infected in their homes, far from the docks. She suspects a second source. She asks you to investigate the homes of three victims who died in the same night, all in the same street. She gives you their names and addresses. She believes someone is deliberately spreading the plague.

Goals

Investigate the three homes, find the connection, and report back to Neris.

Reward

**Reward:** Neris's favor, a *Plague Doctor's Mask* (rare, immunity to disease while worn), and access to the temple's healing supplies.

Secrets

  • The three victims were all patients of Doctor Fesk.
  • Fesk's laboratory is beneath the temple.
  • The ledger contains a coded message from Fesk to Corvane.

DM Notes

The homes are empty but show signs of forced entry. A DC 13 Investigation check finds a vial of plague in one home. The vial has Fesk's mark. This leads to the temple crypt and Fesk's laboratory.

Side Quests in The Undercity

Lost Archives

Given by: Archivist Mora
Archivist Mora has lost a crucial scroll: the original map of the sunken shrine, which includes a hidden entrance from the harbor. She believes it was stolen by a cultist who infiltrated her camp. She asks you to track down the cultist and retrieve the scroll. The cultist was seen heading toward the Plague Vault. Mora will reward you with a magic item from her collection.

Goals

Find the cultist, retrieve the scroll, and return it to Mora.

Reward

**Reward:** A *Cloak of the Harbor* (uncommon, water breathing) and Mora's research notes.

Secrets

  • The scroll shows a hidden sea cave entrance to the shrine.
  • The cultist is a former student of Mora's.
  • The scroll also contains a ritual to cure the plague.

DM Notes

The cultist is in the Plague Vault, disguised as a prisoner. A DC 14 Insight check reveals his deception. He fights if cornered. The scroll is on his person.

The Hermit's Bell

Given by: Father Theron
Father Theron has lost his bell, a silver chime that he uses to focus his prayers. Without it, he cannot remember the counter-words clearly. He believes the bell was stolen by a rat swarm and taken to a side tunnel. He asks you to retrieve it. The tunnel is infested with rats and a giant rat. Theron promises to teach you a protective prayer in return.

Goals

Retrieve the silver bell from the rat-infested tunnel.

Reward

**Reward:** A *Silver Chime* (uncommon, can cast *bless* once per day) and Theron's gratitude.

Secrets

  • The bell is actually a magic item that wards off disease.
  • The rat swarm is controlled by a cultist.
  • Theron's memory is failing; the bell helps him focus.

DM Notes

The tunnel has 3 swarms of rats and 1 giant rat. The bell is in a nest. If the party returns it, Theron teaches them the counter-words, giving them advantage on the ritual disruption check.

Side Quests in The Black Tide

The Chain That Binds

Given by: Chain Captain Rook
Chain Captain Rook has a problem: the harbor chain is not just stuck, it's been deliberately sabotaged. He suspects a cultist among his garrison. He asks you to find the traitor and bring them to justice. The traitor is a young sailor named Finn, who was seen talking to a rat-masked stranger. Rook wants proof before he acts. He will reward you with a magic item from the tower's armory.

Goals

Investigate the sabotage, identify the traitor, and decide their fate.

Reward

**Reward:** A *Signal Lantern* (uncommon, can cast *faerie fire* once per day) and Rook's trust.

Secrets

  • Finn is being blackmailed by the cult.
  • The sabotage is a rune carved into the winch.
  • Finn's sister is a cultist.

DM Notes

Finn is terrified and will confess if confronted gently. He can be turned into an ally. If the party kills him, Rook is displeased but not hostile. The rune can be removed with a DC 13 Arcana check.

The Lighthouse Flame

Given by: Keeper Sable
Keeper Sable has kept the lighthouse burning for years, but now the flame is dying. The oil is running out, and the cult has stolen the reserve. She asks you to retrieve the oil from a cultist stash in the sea cave. Without the light, ships will crash on the rocks, and the ghost ship will be hidden in darkness. She gives you a map of the cave and a promise of a magic item.

Goals

Retrieve the stolen oil from the sea cave and relight the lighthouse.

Reward

**Reward:** A *Lighthouse Flame* (very rare, casts *daylight* and *protection from evil and good* once per day).

Secrets

  • The oil is guarded by a giant crab.
  • The cult plans to use the darkness to escape.
  • The lighthouse flame can be used to destroy the ghost ship's plague focus.

DM Notes

The stash is in a side chamber of the cave, guarded by 1 giant crab. The oil is in a heavy barrel. Returning it to Sable earns her gratitude and the magic item. The lighthouse flame can be used in the final battle to weaken Corvane.

Character Quests for Corin Thale, the Ink-Stained

The Map Beneath the City

Archivist Mora's original map of the sunken shrine was stolen by a cultist who was once her student, and it now lies in the Plague Vault among the prisoners. The map's margin carries a cure ritual in the shrine's own dead tongue, and Corin is one of the few people alive who can read it. He must recover the map, copy the ritual into his own spellbook before the ink runs or the page rots, and deliver the counter-words to the shrine before midnight.

Starting point

Descend through the Sewer Gate with the party and reach the Catacomb Hall, where Mora barricades herself against cult patrols. Corin must earn her trust by proving he can read the shrine's dead tongue, translating a fragment she offers as a test.

Choice

Corin may either share his full translation of the shrine's oldest name with Mora or withhold the passage that implicates the city's founders in the shrine's original worship.

Sharing it wins Mora's complete trust and her research notes; withholding it preserves a secret that could later protect Corin from the Inquisitor.
Mechanical Rewards
  • The cure ritual recorded in the spellbook, usable as a weekly ritual to remove the weeping plague from one creature.
  • Permanent proficiency bonus advantage on Intelligence (Arcana) checks concerning the Sunken Shrine.
  • Mora's lifelong gratitude: free access to any archive she controls after the quarantine lifts.
Narrative Rewards
  • Corin's name entered in the city's restored record as the man who preserved the shrine's tongue.
  • A personal reckoning with the question that has haunted him: whether writing things down is enough, or whether he must finally act on what he knows.

The Unread Shelf

Before the quarantine, Corin catalogued a sealed ossuary shelf in the catacombs whose ledgers predate Nostramus itself. One ledger, the Grey Stair codex, contains a first-hand account of the last time the shrine woke, written by an archivist who went mad mid-sentence. Corin has avoided reading the final pages for two hundred years. Now the plague matches the codex's descriptions exactly, and he must finish what another scholar could not.

Starting point

Locate the collapsed Grey Stair in the catacombs and clear the passage to the sealed ossuary, avoiding the cult's patrols and the wretches that nest in the collapse.

Choice

Corin can blast the collapse open with a prepared spell, alerting every cultist in the catacombs, or spend two days digging quietly while the plague kills more people above.

The loud route brings a confrontation that could be avoided; the quiet route costs the city lives but preserves secrecy.
Mechanical Rewards
  • Knowledge of the shrine's ley line: advantage on the DC 14 Arcana check to identify the ratbone staff's weak point.
  • A new ritual: Read Madness, allowing Corin to read cursed or maddened texts safely once per long rest.
  • Permanent immunity to the shrine's fear aura after surviving the codex reading.
Narrative Rewards
  • Corin finishes a dead man's work and lays his own two-hundred-year avoidance to rest.
  • The party learns why the plague feels familiar to the city's oldest stones.

Ink and Ash

Corin's old mentor, Archivist Pellon Dray, catalogued the catacombs with him for forty years before choosing the Ratbound Choir's path. Dray is the cultist who stole Mora's map, and Corin knows his handwriting on the theft note. Corin must decide whether to redeem, expose, or destroy the only person who ever taught him anything, and Dray has left a message: a page of Corin's own early notes, annotated in Dray's hand, asking to meet in the Tallow Yard.

Starting point

Corin follows the annotated page to the Tallow Yard, the corpse-staging district, where Dray waits among the shrouded dead in his rat mask, removed and folded politely in his lap.

Choice

Corin may go to the meeting alone, as Dray demands, or bring the party hidden among the corpse carts.

Alone, the conversation is honest; with the party, it is an ambush waiting to happen.
Mechanical Rewards
  • Dray's cipher key or the restored map margin, depending on the ending chosen.
  • A new cantrip slot reflecting Corin's sharpened purpose (player's choice of a divination cantrip).
  • Permanent advantage on Insight checks against members of the Ratbound Choir.
Narrative Rewards
  • Corin closes the book on the only mentor he ever had, and learns which of Dray's lessons he keeps and which he burns.
  • The party gains an inside view of the Choir's structure no other source provides.

Character Quests for Ysolde Bram, the Lantern of Mercy

The Ledger of the Dead

Sister Neris has found a pattern in her ledger of plague victims: three dead on one street in a single night, none near the docks. Ysolde must help finish the ledger, walk the three houses in temple row, and follow the thread down into the crypt beneath her own temple, where Doctor Fesk kills the people he swore to save. The ledger is the only proof the city will accept, and Neris trusts no one else to carry it.

Starting point

Complete the ledger with Neris and identify the three plague houses.

Choice

Report the deaths to the Ash Watch immediately or keep the pattern quiet until proof is complete.

Reporting early brings Inquisitor Quill's attention and endangers Neris; staying quiet costs more lives but preserves the investigation.
Mechanical Rewards
  • The Plague Doctor's Mask (rare, immunity to disease)
  • Permanent +1 Wisdom after reading every name in the ledger aloud
  • Neris's blessing: once per day, reroll a failed Medicine check
Narrative Rewards
  • Neris swears the dead will be counted for a reason, restoring Ysolde's conviction
  • The temple's healing supplies open permanently to the party

The Lantern That Must Not Go Out

The Temple of Mercy's doorway lantern has burned every night for thirty years, and Ysolde swore it would never go out. Now the temple's oil is gone, the tallow yard is a corpse staging ground, and refugees whisper that a dark lantern means the temple has closed and no one need knock again. Ysolde must find oil, wick and hands to keep the flame alive through the worst nights of the plague, while deciding how many dying strangers she can shelter before the doors cannot hold them all.

Starting point

Secure oil and supplies from Quartermaster Bree, the tallow yard, or the Harbor Kin.

Choice

Buy oil at Bree's markup, trade favors with the Harbor Kin, or raid the corpse-staging tallow yard.

Bree demands favors that compromise the temple's neutrality; the Harbor Kin's price is a blind eye to smuggling; the tallow yard is crawling with rats and the dead.
Mechanical Rewards
  • The Lantern of Mercy: Ysolde's holy symbol becomes a focus that sheds 10 feet of warm light; allies within it have advantage on saves against fear
  • Once per long rest, Channel Divinity recharges on a short rest while the lantern burns
Narrative Rewards
  • The temple becomes a known safe haven, drawing refugees, rumors and allies to the party
  • Brother Aldous regains his faith and becomes a reliable healer at the temple

The Grave She Digs for Herself

Ysolde has buried three generations of parishioners, and she keeps a private list of graves she dug with her own hands. Among the names is her own: thirty years ago she arrived in Nostramus carrying a sickness she never named, and she has quietly dosed herself with temple remedies ever since, certain the weeping plague will one day finish what started in her lungs. Now her old cough has returned. She must find out what she has been carrying all these years, whether it is connected to the plague, and whether she has unknowingly been a carrier in temple row.

Starting point

Consult Brother Aldous and Archivist Mora's records about the sickness Ysolde brought to the city thirty years ago.

Choice

Tell the party the truth about her old sickness or hide it until she knows more.

Confession risks quarantine and Aldous's judgment; concealment risks infecting an ally at the worst moment.
Mechanical Rewards
  • Old Scar Tissue: Ysolde gains permanent resistance to necrotic damage as her body's long war leaves her hardened
  • Learn the 'Grey Remedy': a partial cure recipe, giving the party's alchemist a head start on a true cure
Narrative Rewards
  • Ysolde learns whether her arrival thirty years ago was coincidence or the first move of the Ratbound Choir
  • Her old sickness, understood, becomes a key to reading the plague's true nature

Character Quests for Tilda Fenn, the Wharf Rat

The Missing Manifest

Dockmaster Crane kept a copy of the Weeping Sister's manifest folded inside the hollow of his wooden leg, and the original was stolen by Mirelle Vantt. The copy names the ship's last port of call and the cargo it carried into Nostramus, and the Harbor Kin have already started burning the Ratwharf warehouses to hide what they moved. Tilda must get the copy out of Crane's office before the fire reaches it, decide whether to hand it to the Ash Watch or sell it to the highest bidder, and keep her family's tenement from going up with the rest of the district.

Starting point

Reach Crane's office through the burning Ratwharf before the warehouse fires spread to the fishmarket tenements.

Mechanical Rewards
  • Permanent +2 to Charisma (Persuasion) checks made against Ash Watch members if the manifest is delivered to Captain Vey
  • The Smuggler's Compass from Liss Vell's cache if sold to the Harbor Kin
  • Dockmaster Crane as a permanent contact who will forge harbor documents
Narrative Rewards
  • Crane tells Tilda she has finally earned her place on the docks instead of under them
  • The manifest's last line reveals the ship's last port and the true nature of its cargo
  • Tilda's family's tenement is spared or lost depending on her choices

The Kin's Ledger

Tilda spent her childhood running cargo for the Harbor Kin, and she knows their book of debts and favors is hidden in the Rat's Rest tavern's cellar. With Mirelle Vantt serving the Ratbound Choir, that ledger now contains the names of every smuggler who unknowingly moved cult supplies into the city. Tilda must slip into the Rat's Rest while Mirelle's enforcers drink above, copy or steal the ledger, and decide whether to expose the names or protect the smugglers who once fed her family. The ledger also records a debt owed to Tilda's dead father, and collecting it could change everything.

Starting point

Infiltrate the Rat's Rest cellar through the hidden trapdoor behind the tap barrels.

Mechanical Rewards
  • A permanent contact network of three smugglers who will hide Tilda and her allies from the Ash Watch
  • 200 gp collected from her father's debt
  • Advantage on all Charisma (Deception) checks made against Harbor Kin members for the rest of the campaign
Narrative Rewards
  • Tilda learns her father's debt was incurred moving cult cargo, tying her family to the plague's arrival
  • The smugglers whose names she protects become loyal allies in Act III

A Door Out of the City

Tilda's driving goal is to get her family out of the quarantine alive, and she has spent weeks mapping every gap in the harbor wall without finding a route that works. Old Pell, the one-eyed ferryman, claims he once ran a night route through the Drowned Bell at low tide, before the chain went up and the water went wrong. Tilda must win Pell's trust, chart the drowned passage at low tide, and decide whether to use the route to smuggle her family out alone or share it with the desperate families of the fishmarket. The route passes close beneath the Weeping Sister's hull, where the rats are not the only things watching.

Starting point

Earn Old Pell's trust by retrieving his lost ferry token from the Tallow Yard.

Mechanical Rewards
  • Permanent knowledge of a hidden route from the fishmarket to the harbor, granting advantage on all Stealth checks made in Ratwharf
  • A swim speed of 30 feet from learning to navigate the drowned passage
  • Old Pell as a boat pilot who will ferry the party at night
Narrative Rewards
  • Tilda's family is moved to safety or remains trapped depending on her choice
  • The route passes beneath the Weeping Sister, revealing the ship's flooded bilge and the bound elemental within

Character Quests for Halvard Sten, the Unsworn

The Cloak He Gave Back

Captain Vey never filed Halvard's desertion; his folded ash-grey cloak is still in her quarters at the keep. She will only hand it back when he brings her proof that the plague is deliberate rather than divine. She also needs something she cannot ask for openly: her son is hidden in the temple row, sick, and the Inquisitor's spies are counting the sick. Halvard must walk the barricades of Nostramus, gather the evidence that clears his name, and decide whether a restored rank is worth more than a boy's life.

Starting point

Bring Captain Vey hard evidence that the plague is unnatural (Fesk's ledger, rat tokens, the manifest).

Mechanical Rewards
  • Ash-grey cloak restored: advantage on Charisma (Intimidation) and Persuasion checks against Ash Watch guards
  • If cloak refused: permanent +2 hit points maximum and Heroic Inspiration at every dawn
Narrative Rewards
  • Vey either pins the cloak back on his shoulders before the assembled Watch or watches him walk out with her son on his back — either way she stops calling him a deserter
  • The Watch's unofficial obedience to the Unsworn becomes open loyalty

The Wall That Wasn't Held

The family Halvard saved at the north wall — a tanner, his wife, and two children — survived by hiding in the Salt Chapel in Ratwharf. But Corporal Munt, the guard who saw Halvard let them go, has been blackmailing him quietly for weeks, and now Munt wants more than coin: he wants Halvard to help the Harbor Kin move plague-tainted cargo past the barricades, or he names him a traitor to Inquisitor Quill. Halvard must confront the man who holds his secret, protect the family he saved, and decide how far he will let a bad soldier's greed dictate a good soldier's silence.

Starting point

Locate the tanner's family in the Salt Chapel and confirm they are alive and hidden.

Mechanical Rewards
  • Munt's patrol roster: advantage on checks to bypass Ash Watch checkpoints for the rest of Act I
  • The tanners' gratitude: a reinforced shield (buckler of boiled hide over oak, +1 AC against rat swarm bites)
Narrative Rewards
  • The family Halvard saved becomes his eyes in Ratwharf, reporting Harbor Kin and cult movements
  • Munt, if spared and shamed, becomes a reluctant inside man at the keep

Nine Years of Ash

Halvard drilled beside Sergeant Holt for nine years, and Holt's sister is trapped behind a plague-marked door in the temple row, too sick to move and too afraid of the Watch to open for them. Halvard owes Holt a debt from the flood year — Holt carried a drowning child through waist-deep water while Halvard held the barricade — and now the debt comes due. Halvard must get the sister to the Temple of Mercy past Fesk's disguised collectors, who are quietly taking the sickest patients 'for treatment' and never bringing them back.

Starting point

Reach Holt's sister's tenement before Fesk's collectors make their nightly round.

Mechanical Rewards
  • Sergeant Holt as a permanent ally: he will unlock the sewer gate and share the Watch's undercity map
  • Holt's spare shield strap and whetstone: once per long rest, Halvard may repair his shield or weapon mid-rest instead of requiring downtime
Narrative Rewards
  • Holt stops treating Halvard as a deserter and starts treating him as a sergeant again
  • The disappearing-patients pattern becomes the party's first hard lead to Doctor Fesk

Step into your campaign

A world you can explore

Play a 3D adventure with your party: explore settlements, wilderness and dungeons, and fight in real time with pause. Best on a desktop or laptop with a mouse and keyboard.

Play in browser

Encounters

Rats at the Barricade

Suggested Level: 1-2

The party is in the market square when a grain cart tips at the Ash Watch barricade and splits open. The rats inside the sacks do not scatter; they come out in a grey wave, and one of them is the size of a dog. A guard drops his torch and shouts for help.

Creatures

Terrain Features

Wet cobblestones form a 10-foot band of difficult terrain. The overturned cart gives half cover. A lit brazier can be kicked over to create a 5-foot patch of fire. The barricade blocks movement but can be climbed with a DC 10 Strength (Athletics) check.

Treasure

A rat-carved wooden token lies in the spilled grain, the first sign of the Ratbound Choir. A grateful guard offers 10 gp and a writ of passage. One giant rat has a silver ring worth 5 gp tangled in its nest fur.

DM Notes

For three characters, use Giant Rat x4 and Rat x3. For six characters, add Giant Rat x2 and Rat x4. For a level 2 party, add one Swarm of Rats.

The Fog on the Pier

Suggested Level: 3-4

The party walks the far pier at dusk to scout the ghost ship. The fog rolls in thick and fast, and the sound of the harbor drops away. Something long-limbed and grey is walking the boards behind them, and it only becomes solid when it strikes.

Creatures

Terrain Features

Thick fog gives the stalker concealment and lets it hide as a bonus action. The pier is 15 feet wide with open water on both sides. Mooring posts and stacked crates give half cover. A single brazier at the pier head is the only bright light.

Treasure

The stalker's body dissolves into wet cloth, leaving a brass ship's whistle and a torn Harbor Kin manifest page naming three warehouses. Dockmaster Crane pays 25 gp for the manifest page.

DM Notes

For a level 2 party, reduce the stalker to 40 hit points and remove its Breath of the Dying Ward recharge. For a level 5 party, add a second Miasma Stalker on the opposite side of the pier.

The Crypt of Mercy

Suggested Level: 4-5

The party follows the rats and the coded ledger down the crypt stair. Below the graves of long-dead priests, Doctor Orlan Fesk works by lamplight among vials and caged test subjects. He does not run. He turns, sets down his scalpel, and welcomes them as new patients.

Creatures

Terrain Features

The laboratory is 40 feet by 30 feet with a long stone table (half cover), shelves of breakable vials, and a barred ossuary door. Breaking a shelf of plague vials creates a 10-foot cloud; any creature inside must succeed on a DC 13 Constitution saving throw or be poisoned for 1 hour. The stair behind the party is the only clean exit.

Treasure

Fesk's coded ledger (the proof Captain Vey needs), the *Plague Doctor's Mask*, the *Fesk's Scalpel*, six vials of plague sample, 120 gp in stolen temple alms, and a silver reliquary worth 75 gp.

DM Notes

For a level 4 party, remove one Crypt Wretch and two Scalpel Leeches. For a level 6 party, add a third Crypt Wretch and a Priest. Fesk should always be run from his own character sheet, never as a monster.

The Sewer Gate Swarm

Suggested Level: 5-6

Tunnel Jack points the party down the left fork and refuses to go further. Ten minutes in, the tunnel widens and the floor becomes ankle-deep water. The water starts moving against the current, and then it stands up.

Creatures

Terrain Features

Ankle-deep water is difficult terrain for Medium creatures. Two side drains are large enough for a Tiny rat but not a person. A rusted iron grate at the far end can be forced with a DC 13 Strength check. The ceiling is low; Large creatures have disadvantage on attack rolls.

Treasure

A cultist's dropped satchel in the drain holds a hand-drawn map of the undercity marking the Plague Vault and the Sunken Shrine, 30 gp in mixed coin, and a rat-carved token. A hidden supply cache behind a loose brick holds two potions of healing.

DM Notes

For a level 4 party, use three swarms and one giant rat. For a level 7 party, use six swarms and add a Plague-Masked Chanter at the far arch.

The Cauldron of the Choir

Suggested Level: 6-7

The party reaches the Plague Vault and finds the cauldron bubbling over a fire of rat bones. Masked chanters circle it, and a bloated shape shifts in the sludge beneath the grate. Elen Voss hangs in a cage above the fire, shouting a warning.

Creatures

Terrain Features

The cauldron is a 5-foot-diameter hazard. Any creature that enters it or starts its turn in it takes 10 (3d6) poison damage and must succeed on a DC 13 Constitution saving throw or be poisoned for 1 hour. The iron cage hangs 15 feet up and can be climbed with a DC 12 Dexterity (Acrobatics) check. The floor is slick; a DC 10 Dexterity saving throw prevents falling prone when dashing.

Treasure

Elen Voss (freed prisoner), the *Ratbone Token of the Choir*, three vials of plague reagent worth 50 gp each to an alchemist, 200 gp in cult offerings, and a hidden tunnel mouth behind the cauldron leading to the Sunken Shrine.

DM Notes

For a level 5 party, remove one Plague-Masked Chanter and two Cultists. For a level 8 party, add a second Otyugh and a third Plague-Masked Chanter.

The Flooded Altar Approach

Suggested Level: 7-8

The hidden tunnel from the Plague Vault drops the party into the shrine's flooded lower level. Black water reaches their waists, green light pulses from below the surface, and a figure of lashed rat bones stands between them and the stair to the altar.

Creatures

Terrain Features

Waist-deep black water is difficult terrain and gives the ooze and the marionette cover against ranged attacks from the tunnel mouth. The green ley light gives dim illumination in a 20-foot radius. Broken pillars give half cover. The stair to the altar is dry and narrow, only 5 feet wide.

Treasure

A drowned offering cache under a fallen pillar holds the *Ley-Line Shard*, 150 gp in ancient rat-idol gold, and a watertight scroll case with a fragment of the shrine's original liturgy.

DM Notes

For a level 6 party, remove the Plague-Masked Chanter and reduce the ooze to 80 hit points. For a level 9 party, add a second Ratbone Marionette and a second Plague-Masked Chanter.

The Ritual of Rats

Suggested Level: 8-9

The party reaches the altar circle as the ritual begins. Mirelle Vantt stands above the chanting cultists with a curved knife, and the ratbone staff pulses with sickly light on the stone altar. Father Theron whispers the counter-words from a side alcove, but he cannot speak them alone.

Creatures

Terrain Features

The altar sits on a raised stone dais 5 feet above the flooded floor, reached by slick steps (DC 13 Dexterity (Acrobatics) to cross without falling). Green ritual flames give bright light in a 30-foot radius. Four stone pillars give three-quarters cover. The ritual circle is a 20-foot ring of chalk and bone; entering it without the counter-words deals 7 (2d6) necrotic damage per round.

Treasure

The *Ratbone Staff* (if seized intact), Mirelle's *Harbor Whisper Ring*, 300 gp in cult offerings, a sealed letter from Corvane naming the ghost ship as his seat, and Father Theron's protective charm against the plague.

DM Notes

For a level 7 party, remove one Plague-Masked Chanter and three Cultists. For a level 10 party, add a Ratbone Marionette and a third Plague-Masked Chanter. Mirelle always uses her own character sheet.

The Inquisitor's Purge

Suggested Level: 8-9

The party returns to the keep with evidence and finds Inquisitor Sera Quill waiting in the courtyard. She has arrested Sergeant Holt for aiding them and intends to seal the keep and burn the temple row to contain the plague. She gives the party one chance to surrender their evidence.

Creatures

Terrain Features

The courtyard is 60 feet square with a well (half cover), a training rack of spears, two braziers, and a gate that can be barred with a DC 15 Strength check. Rain makes the flagstones slick. The keep door is reinforced and takes 30 damage to break.

Treasure

Quill's *Seal of Office* (if taken), a writ of authority, 100 gp in Inquisitorial funds, and Sergeant Holt's release if the party wins or talks her down.

DM Notes

For a level 7 party, remove the Knight and two Guards. For a level 10 party, add two Veterans and a Priest. Quill always uses her own character sheet and should be played as a negotiator first.

The Chain Tower Sabotage

Suggested Level: 9-10

Chain Captain Rook cannot lower the chain because the winch ropes have been chewed through and something is scratching in the flooded basement. When the party descends, they find a cult sabotage team waiting with a pack of winch gnawers.

Creatures

Terrain Features

Knee-deep water is difficult terrain. The winch post is a 5-foot-wide pillar with a carved rune that can be removed with a DC 13 Intelligence (Arcana) check. Two rope coils give half cover. The basement ceiling is low; Large creatures have disadvantage. A flooded side chamber holds the rat nest.

Treasure

The *Signal Lantern of the Chain Tower* in Rook's armory above, 80 gp in the cult team's purses, a sabotage order signed with a rat sigil, and the repaired winch that lets the party lower the harbor chain.

DM Notes

For a level 8 party, remove one Knight and one Priest. For a level 11 party, add two Knights and a second wave of four Swarms of Rats from the side chamber.

The Light in the Dark

Suggested Level: 10-11

Keeper Sable leads the party into the sea cave and stops at the water's edge. The tide is rising, the tunnel ahead is flooded to the chest, and something in the water is moving against the current. Sable will not go further; she points to the ladder into the ship's bilge and retreats to the cave mouth.

Creatures

Terrain Features

Chest-deep water is difficult terrain and gives the keelhands advantage on Stealth. The tunnel is 10 feet wide and 8 feet high, forcing single file. A narrow ledge along the left wall allows dry movement at half speed with a DC 12 Dexterity (Acrobatics) check. The ladder to the bilge is 20 feet tall and slick.

Treasure

A previous expedition's cache on the ledge holds two potions of healing, a *Cloak of the Harbor*, and a waterlogged journal naming the ship's bound elemental. Sable gives the *Lighthouse Flame* if the party promises to return it.

DM Notes

For a level 9 party, use one Water Elemental and two Drowned Keelhands. For a level 12 party, add a third Water Elemental and two more Drowned Keelhands.

The Ratbound Bishop

Suggested Level: 12

The party fights up from the hold to the captain's quarters. Corvane Ashgrove stands before an altar of rat bones with the plague focus pulsing in the bilge below. Odessa Marr is chained to the wall. Corvane does not run; he offers the party a place in his new kingdom.

Creatures

Terrain Features

The captain's quarters are 30 feet by 20 feet with a chart table (half cover), a shattered stern window, and a stair down to the flooded bilge. The bilge is waist-deep water with the plague focus chained to the keel; the focus has AC 17 and 50 hit points and deals 10 (3d6) poison damage per round to any creature within 10 feet of it. The hull is enchanted against fire.

Treasure

The *Ship's Log of the Weeping Sister*, *Corvane's Ratbone Staff* (if seized intact), 500 gp in drowned sailors' pay chests, barnacled ship's silver worth 200 gp, and Odessa Marr's freedom.

DM Notes

For a level 11 party, remove one Water Elemental and two Bilge-Tide Rat Swarms. For a level 13 party, add a third Water Elemental, a Ratbone Marionette, and two Plague-Masked Chanters. Corvane always uses his own character sheet.

Magic Items

Rat-Bane Amulet Rat-Bane Amulet Completed

Rat-Bane Amulet

Uncommon
A disc of boiled leather stamped with a rat skull and strung on braided sinew. It was made by rat-catchers to ward off the fleas and fevers of the wharf, and it still smells faintly of tar.

Location

Act I - rat nest in the sewers beneath Temple Row, given as Mira Salt's reward

Attunement

True — by any creature

Smuggler's Compass Smuggler's Compass Completed

Smuggler's Compass

Uncommon
A brass compass whose needle points not north but toward the nearest unguarded exit from a building or district. Its glass is scratched with the Harbor Kin's private marks, and it clicks softly when a patrol is near.

Location

Act I - Liss Vell's cache in a Ratwharf warehouse

Attunement

False

Quill's Seal of Office Quill's Seal of Office Completed

Quill's Seal of Office

Uncommon
A heavy signet ring bearing the king's mark, worn by Inquisitor Sera Quill. Pressed into wax, it opens gates, requisitions supplies, and makes Ash Watch guards stand a little straighter.

Location

Act I - the Inquisitor's satchel at the Ash Watch Keep

Attunement

True — by a creature proficient in Intimidation or Persuasion

Fesk's Scalpel Fesk's Scalpel Completed

Fesk's Scalpel

Rare
A slender surgical blade of blackened steel, still wet with something that is not water. Doctor Fesk used it to open plague sores and to open throats, and it never needed sharpening.

Location

Act I - Doctor Fesk's laboratory in the Crypt of Mercy

Attunement

True — by any creature

Plague Doctor's Mask Plague Doctor's Mask Completed

Plague Doctor's Mask

Rare
A long-beaked leather mask packed with herbs and silver filings. It was made for the temple wards, and it filters the sweet rot out of the air so the wearer can work among the dying without fear.

Location

Act I - the Crypt of Mercy, or Sister Neris's reward for the doctor's ledger

Attunement

True — by any creature

Cloak of the Harbor Cloak of the Harbor Completed

Cloak of the Harbor

Uncommon
An oiled grey cloak that never soaks through and lets the wearer breathe water as easily as air. Harbor Kin divers wore these to move cargo under the piers without surfacing for a watchman.

Location

Act II - a hidden compartment in a sarcophagus in the Catacomb Hall

Attunement

True — by any creature

Silver Chime of the Gnawing Choir Silver Chime of the Gnawing Choir Completed

Silver Chime of the Gnawing Choir

Uncommon
A small silver bell on a leather thong, its tone so clear it cuts through chanting. Father Theron used it to focus his prayers, and its ring steadies the hands and hearts of those who hear it.

Location

Act II - a rat nest in the side tunnel off the Sunken Shrine

Attunement

True — by a cleric or paladin

Ratbone Token of the Choir Ratbone Token of the Choir Completed

Ratbone Token of the Choir

Rare
A palm-sized disc of fused rat vertebrae carved with a spiral. Cult chanters wear it against the skin, and it hums faintly when plague magic is worked within a hundred paces.

Location

Act II - the Plague Vault, taken from the cauldron altar

Attunement

True — by a spellcaster

Ley-Line Shard Ley-Line Shard Completed

Ley-Line Shard

Rare
A jagged crystal of green-black stone pulled from the shrine's flooded floor. It pulses in time with the ley line beneath the city and grows warm when the ratbone staff is near.

Location

Act II - a drowned offering cache in the flooded lower level of the Sunken Shrine

Attunement

True — by a spellcaster

Harbor Whisper Ring Harbor Whisper Ring Completed

Harbor Whisper Ring

Rare
A slim silver ring set with a chip of harbor glass. Mirelle Vantt used it to hear conversations through closed doors, and it still carries a faint smell of smoke bombs and salt.

Location

Act III - taken from Mirelle Vantt when she is defeated in the Sunken Shrine

Attunement

True — by a rogue or bard

Signal Lantern of the Chain Tower Signal Lantern of the Chain Tower Completed

Signal Lantern of the Chain Tower

Uncommon
A hooded brass lantern with three colored shutters, used to signal ships at the harbor mouth. Its light clings to whatever it touches, outlining shapes in the dark for a short while.

Location

Act III - the armory of the Harbor Chain Tower, given by Chain Captain Rook

Attunement

False

Ship's Log of the Weeping Sister Ship's Log of the Weeping Sister Completed

Ship's Log of the Weeping Sister

Rare
A water-stained logbook bound in shark leather, its last entries written in a steady hand that grows less steady by the page. It records the ship's final port, its cargo, and the bargain struck aboard.

Location

Act III - Odessa Marr's possession aboard the Weeping Sister

Attunement

True — by any creature

Lighthouse Flame Lighthouse Flame Completed

Lighthouse Flame

Very Rare
A shard of the lighthouse's eternal flame sealed in a glass globe. It burns without oil and casts a light that the dead and the diseased find hard to look at.

Location

Act III - the Lighthouse Cave, given by Keeper Sable

Attunement

True — by a cleric, paladin or druid

Corvane's Ratbone Staff Corvane's Ratbone Staff Completed

Corvane's Ratbone Staff

Very Rare
A staff of lashed rat bones crowned with a rat skull, warm to the touch and faintly wet. Corvane channeled the weeping plague through it, and it still whispers when held near the dying.

Location

Act III - the altar in the captain's quarters of the Weeping Sister

Attunement

True — by a spellcaster