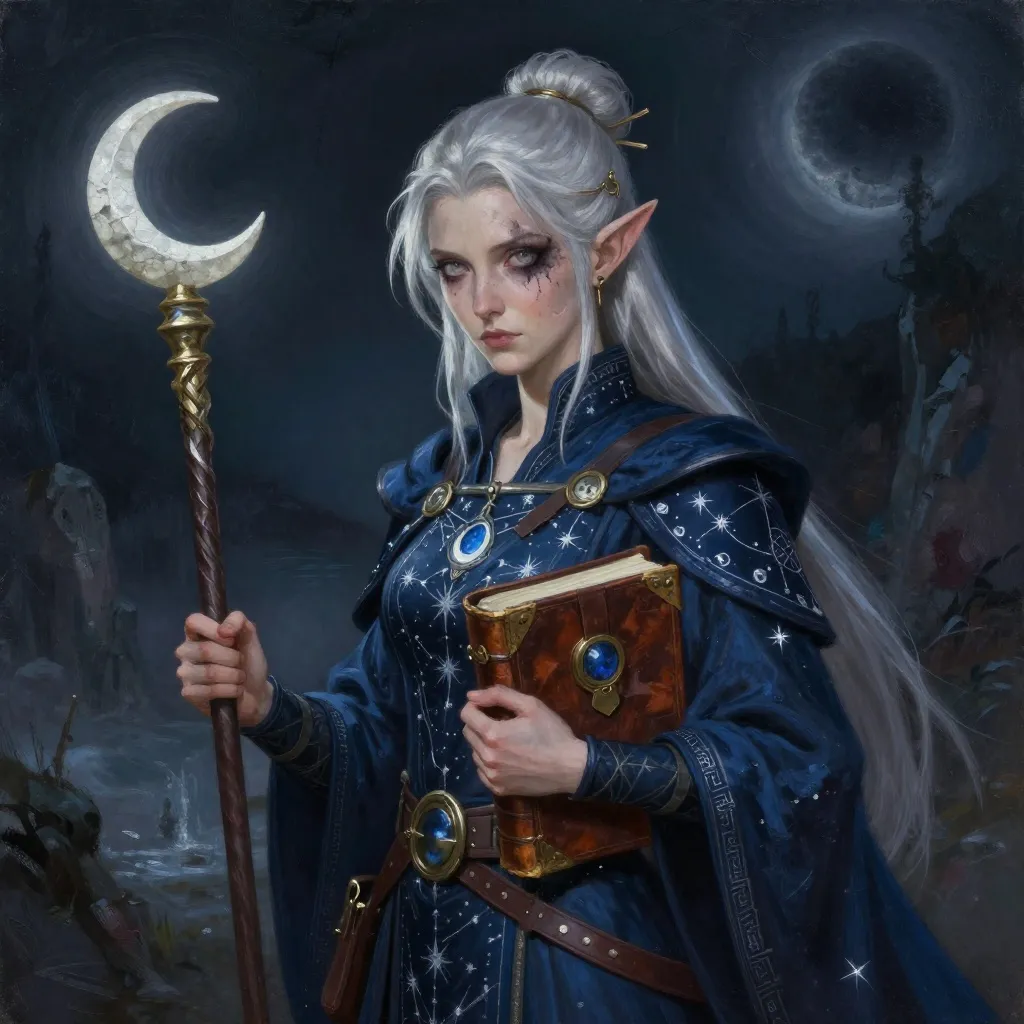
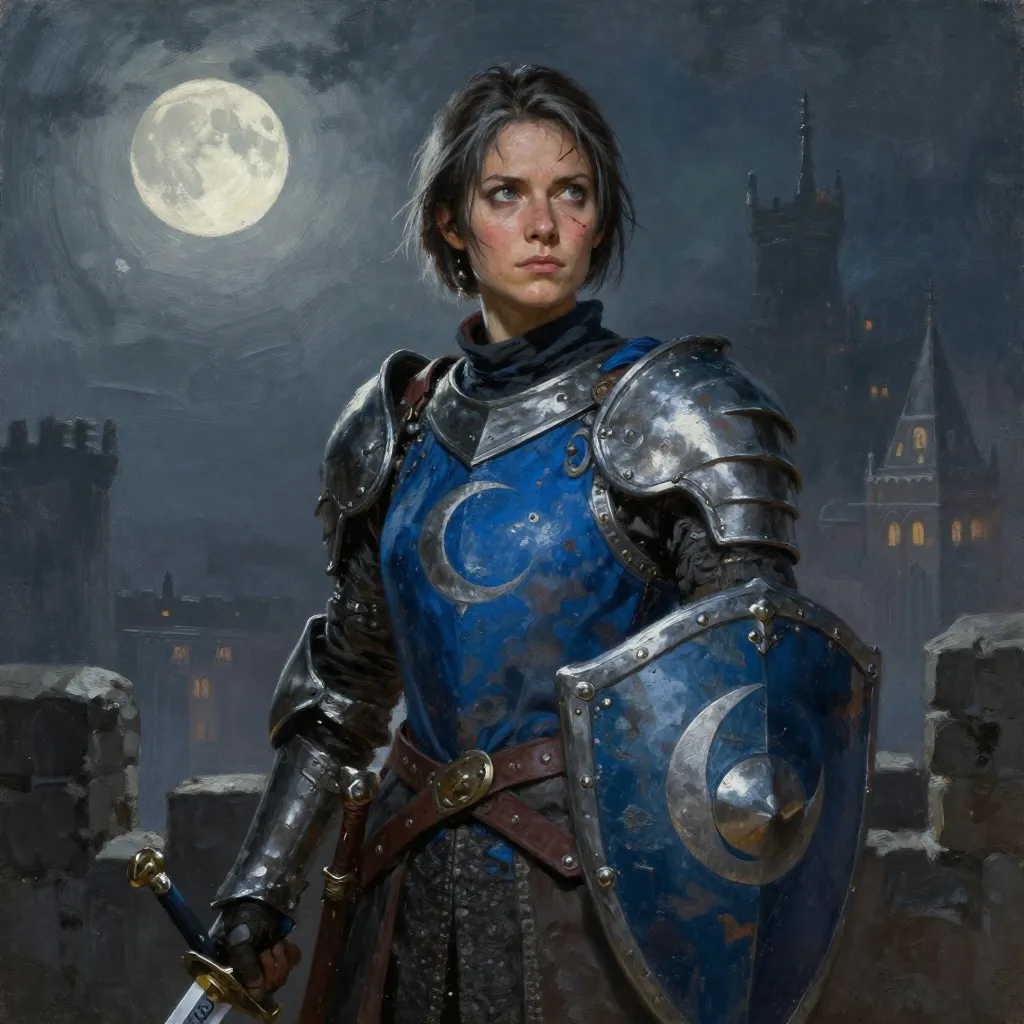
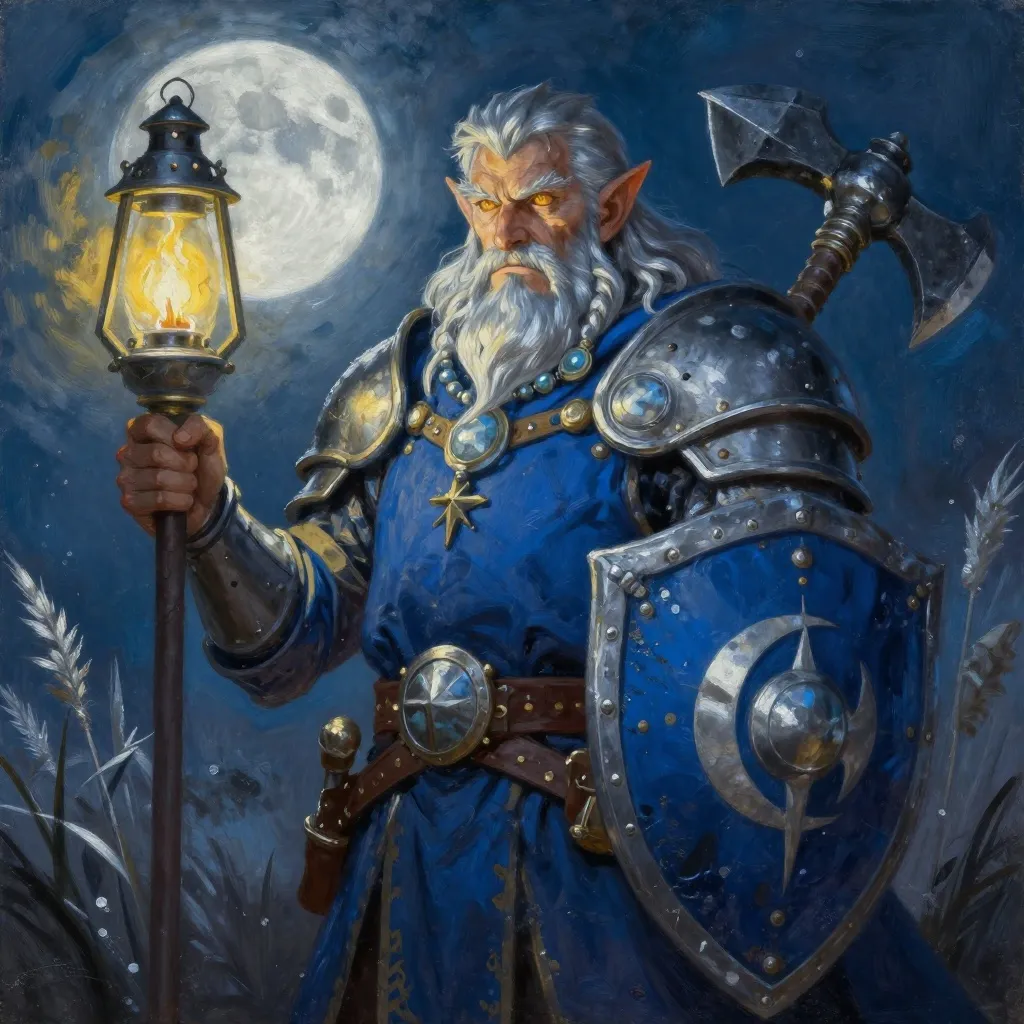
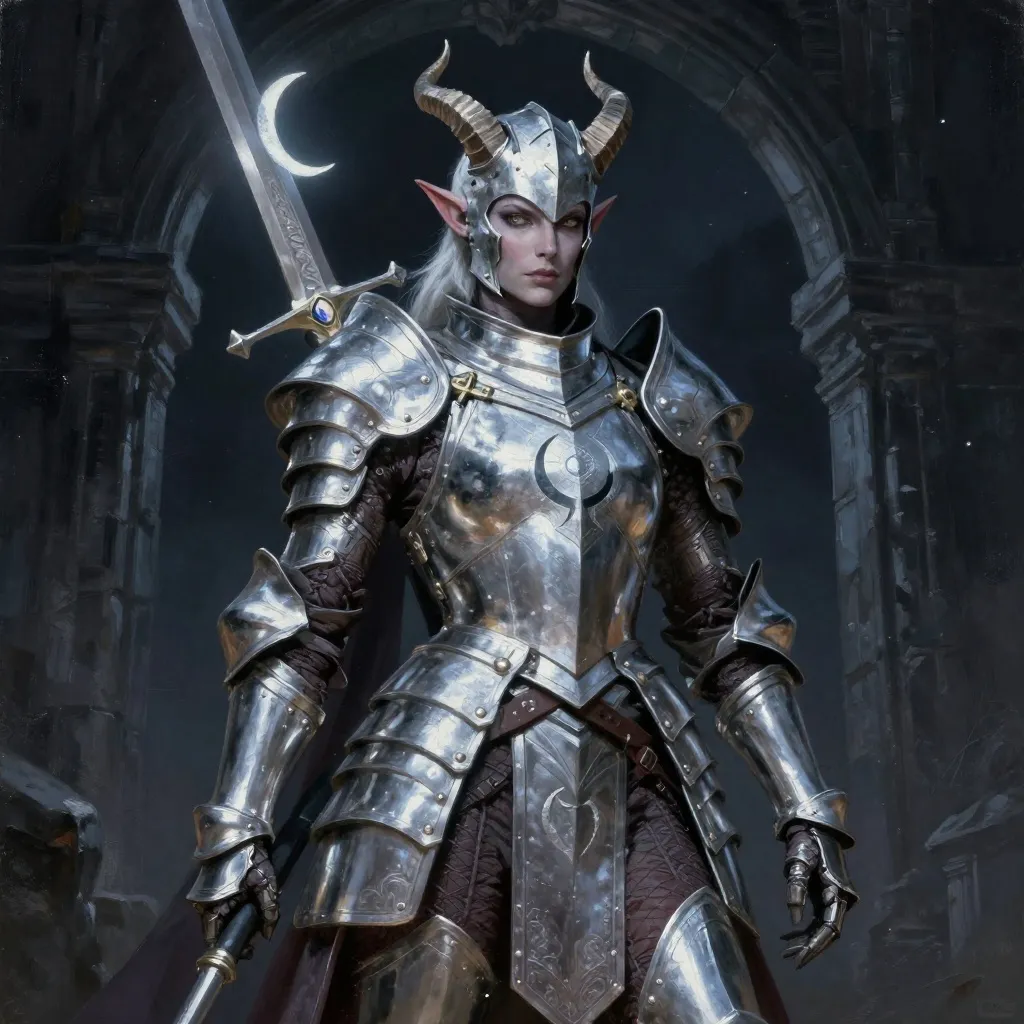
Hook 01
The Stolen Moon
Lady Seren, acting ruler of Silvercourt, summons you to the Grand Hall. Princess Lumina has been kidnapped by the Umbral Court, and an eternal eclipse looms. You are the city's last hope.
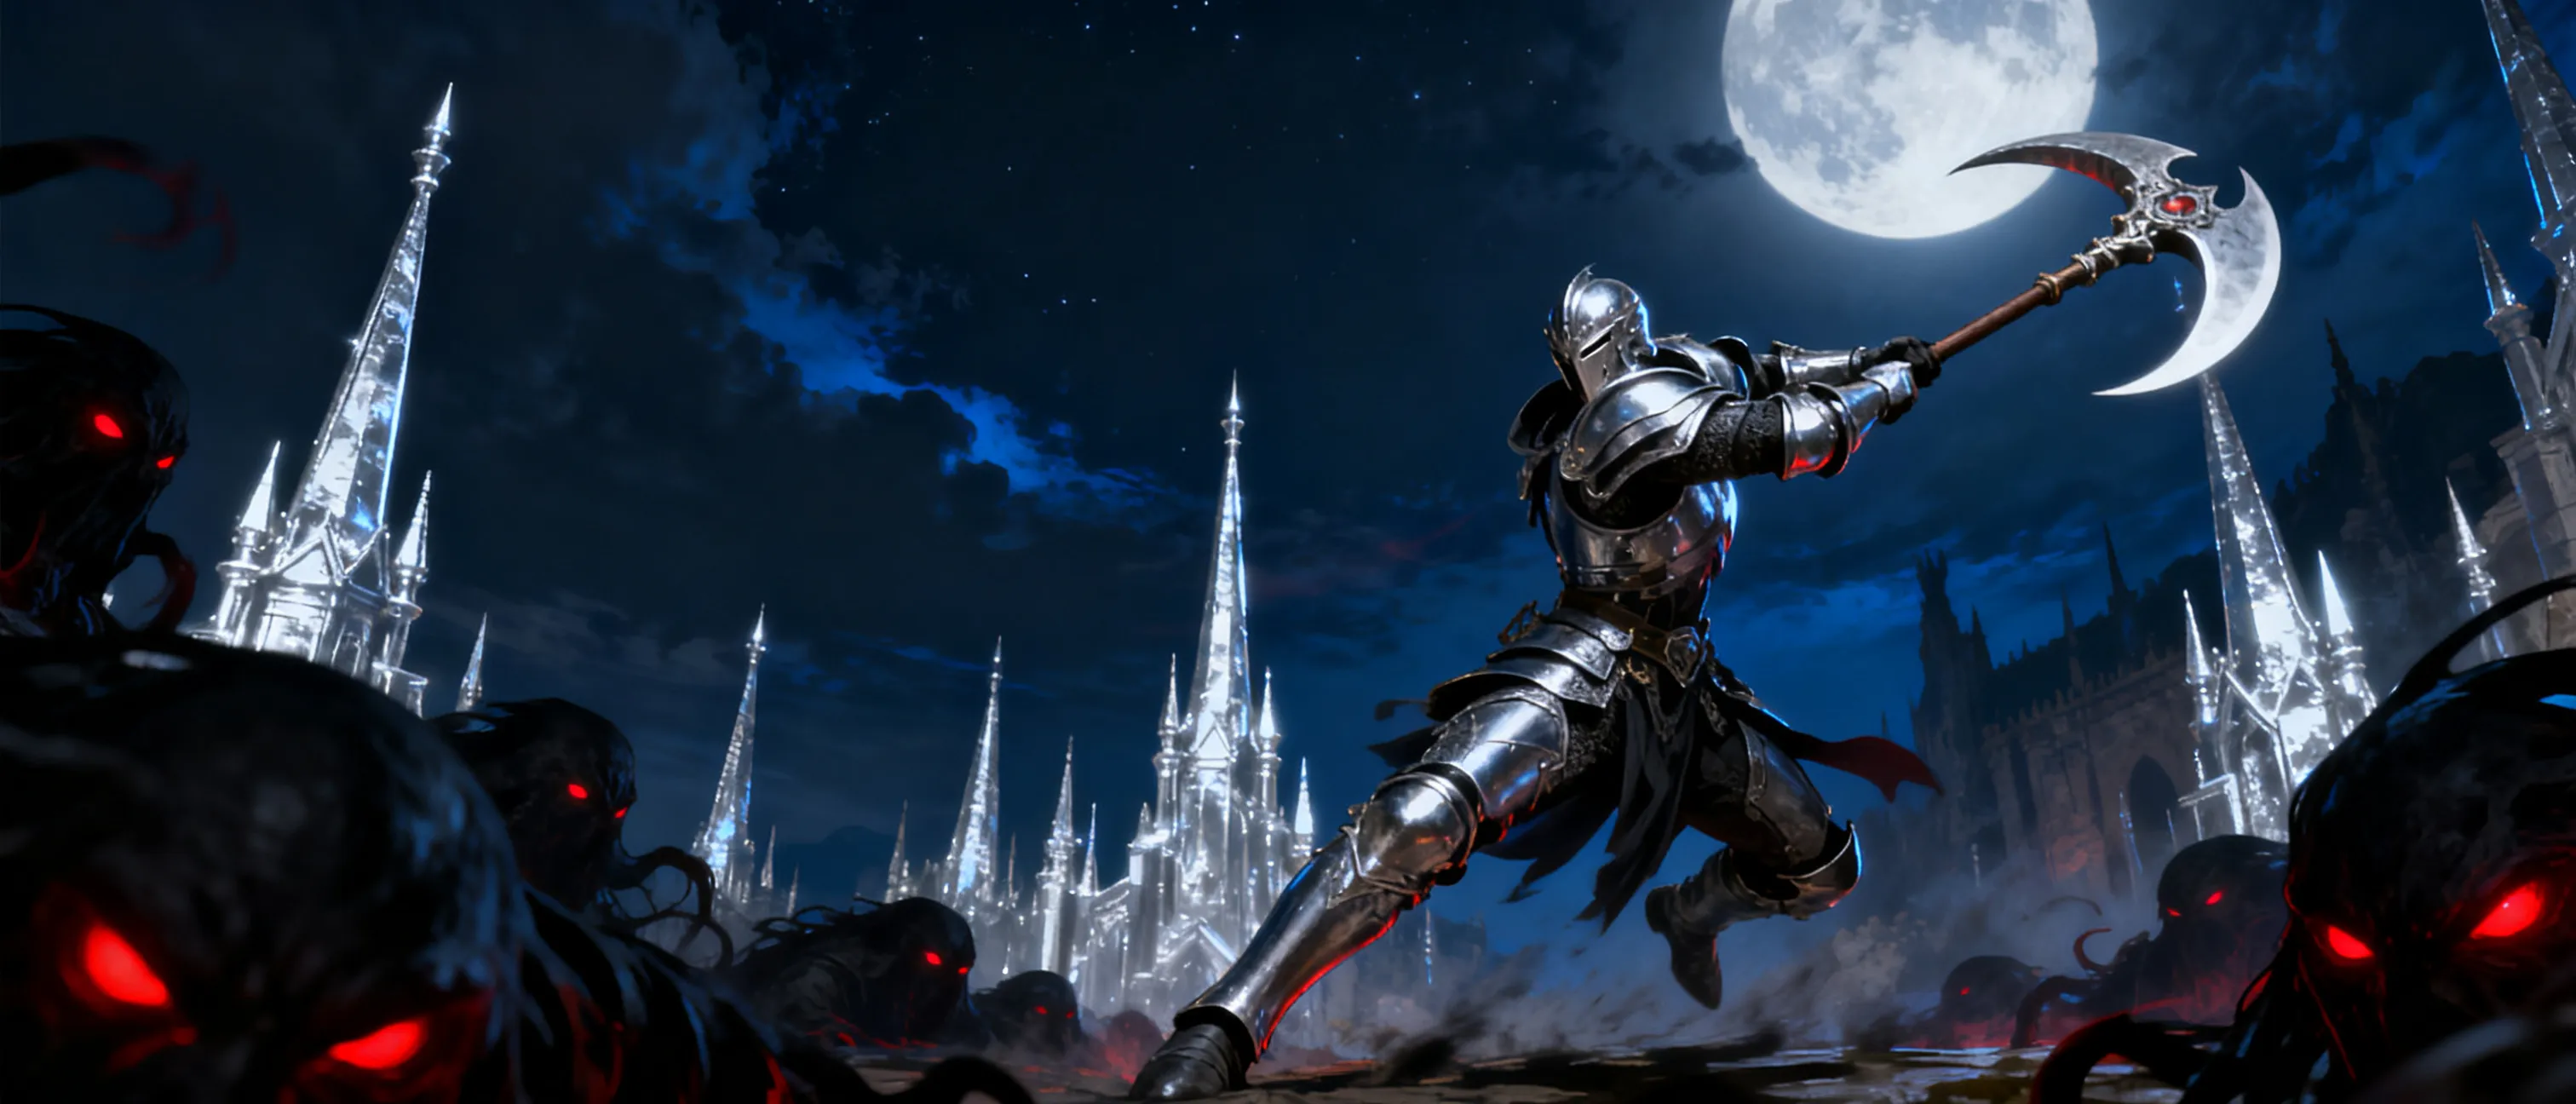
The adventure ahead
You are a Guardian of the Lunar Concord, a champion of light in a world threatened by the Umbral Court. The moon princess has been kidnapped, and an eternal eclipse looms. Journey from the silver city of Silvercourt through the Ashen Wilds to the Umbral Depths, defeat the Shrouds, and confront Queen Nyxara. A level 10 one-shot for a single player.
Share with your players
Setup: You are a Guardian of the Lunar Concord, a sworn protector of the moon princess and the light. The princess has been kidnapped by the Umbral Court, a shadowy organization led by Queen Nyxara, the Devouring Dark. An eternal eclipse threatens to consume the world.
Tone: Heroic, magical, and slightly dark. You are a beacon of hope in a world of shadows. Expect dramatic battles, mysterious magic, and a race against time.
Starting Hook: You are summoned to the Grand Hall of Silvercourt by Lady Seren, the princess's aunt. She tells you that Princess Lumina was taken from her chambers last night. The only clue is a trail of shadow leading to the Moonwell Glade. You must find her before the eclipse begins.
Behind the screen
This module is a level 10 one-shot for a single player, designed to be played in one 4-6 hour session or two 3-hour sessions. The player takes on the role of a Guardian of the Lunar Concord, tasked with rescuing Princess Lumina from Queen Nyxara and her Umbral Court. The adventure is divided into three acts across three regions: the Silvercourt Reach (Act I), the Ashen Wilds (Act II), and the Umbral Depths (Act III).
Each act contains three key locations, each with a scene that advances the main story. The player will face three lieutenants (the Shrouds of Ash, Mirrors, and Echoes) before confronting Queen Nyxara herself. The module includes side quests, factions, and NPCs to enrich the experience. The tone is heroic fantasy with a dark, magical girl anime inspiration. The player should start at level 10 and end at level 11.
Hook 01
Lady Seren, acting ruler of Silvercourt, summons you to the Grand Hall. Princess Lumina has been kidnapped by the Umbral Court, and an eternal eclipse looms. You are the city's last hope.
Hook 02
The Moonwell Glade, source of Silvercourt's lunar magic, is poisoned. Thalia the Hermit believes the Moonstone at the bottom of the pool can purify it and reveal the princess's location.
Hook 03
Vex the Merchant at the Night Bazaar knows the location of the Shadowed Gate and the password to enter the Umbral Depths. Information has a price, and Vex is afraid of Queen Nyxara.
The adventure begins in Silvercourt, where Princess Lumina has been kidnapped by the Umbral Court. The player must investigate the city, purify the Moonwell, and gather information from the Veiled Market to find the path to the Umbral Depths.
Read aloud
You stand in the Grand Hall of Silvercourt, its silver spires gleaming under the light of the moon. Lady Seren, her face pale with worry, approaches you. 'Guardian, the princess has been taken! The Moonwell is corrupted, and a dark eclipse approaches. You must find her before it is too late.'
Lady Seren explains that Princess Lumina was kidnapped from her chambers last night. The only clue is a trail of shadow leading to the Moonwell Glade. She asks the player to investigate. The city is on edge, and Captain Theron suspects the Veiled Market. The player can question NPCs, search the princess's chambers, or head to the Moonwell Glade.
Read aloud
The Moonwell Glade is a serene clearing, but the pool at its center is dark and murky. An old woman, Thalia, stands by the water, her hands raised in prayer. 'The Moonwell is dying,' she says. 'The Umbral Court has poisoned it. You must retrieve the Moonstone from the bottom of the pool before it is too late.'
Thalia explains that the Moonstone is a powerful artifact that can purify the Moonwell. However, the pool is guarded by a shadow creature sent by the Umbral Court. The player must dive into the pool, fight the creature, and retrieve the Moonstone. Thalia can provide a potion of water breathing.
Read aloud
The Night Bazaar appears as if from nowhere, a maze of tents and stalls lit by flickering lanterns. Vex the Merchant sits behind a counter, their face hidden. 'Ah, a Guardian. You seek the Shadowed Gate, yes? Information has a price.'
Vex will trade information for a magic item or a favor. They know the location of the Shadowed Gate and the password to enter the Umbral Depths. They also warn that the Shroud of Ash is hunting the player. The player can negotiate, intimidate, or pay.
Milestone: The player learns the location of the Shadowed Gate and gains the Moonstone, reaching level 11 at the end of the act.
The player must track down and defeat the three Shrouds to claim the sigils needed to open the Shadowed Gate. Each Shroud guards a sigil and a piece of the puzzle. The player will face fire, illusion, and sound in the Ashen Wilds.
Read aloud
The Ashen Grove is a charred wasteland, the trees blackened and smoking. Kestrel the Ranger meets you, his eyes burning with hatred. 'The Shroud of Ash is here. He burned my village. Help me kill him, and I will guide you to the Shadowed Gate.'
The Shroud of Ash is a powerful pyromancer. He has set traps and has a gang of bandits. The player can sneak up, fight directly, or use the environment. Kestrel will fight alongside the player. The Ember Sigil is on the Shroud's body.
Read aloud
The Mirror Lake is perfectly still, reflecting the sky like glass. Oracle Mira, blind but seeing, stands at the shore. 'The Shroud of Mirrors hides in the reflections. You must see through her lies to defeat her.'
The Shroud of Mirrors uses illusions to confuse. She creates duplicates of herself and the player's allies. The player must use true seeing or clever tactics to find the real one. Mira can provide a potion of true seeing. The Mirror Sigil is hidden in the lake.
Read aloud
The Echoing Caves are dark and filled with strange whispers. Bram the Miner, trembling, leads you through. 'The Shroud of Echoes is here. He took my friends. Please, help them.'
The Shroud of Echoes uses sound to attack and hide. He has cultists guarding the miners. The player must navigate the caves, avoid sonic traps, and defeat the Shroud. The Echo Sigil is in his possession.
Milestone: The player collects all three sigils and learns the location of the Shadowed Gate, reaching level 11 at the end of the act.
The player enters the Umbral Depths, rescues Princess Lumina from the Obsidian Spire, and confronts Queen Nyxara in the Throne of Night. The final battle will determine the fate of the world.
Read aloud
The Shadowed Gate looms before you, a massive arch of black stone. Guardian Selene stands before it, her silver armor dulled. 'You have the three sigils. The fourth is the key. Speak the password, and the gate will open.'
Selene explains that the fourth sigil is the password 'Eclipse'. She will help the player fight off the gate's guardians. Once the gate is open, the player enters the Umbral Depths. Selene cannot go further; she must guard the gate.
Read aloud
The Obsidian Spire is a towering black structure, its halls filled with shadows. You find Princess Lumina in a cell, weak but alive. 'You came,' she whispers. 'Nyxara is in the Throne of Night. We must stop her.'
The player must navigate the spire, avoiding or fighting cultists and dark knights. Princess Lumina is weak but can provide magical support. She knows the way to the Throne of Night. The player can rest and prepare before the final battle.
Read aloud
The Throne of Night is a vast chamber of black stone, lit by a dying red sun. Queen Nyxara sits on her throne, her eyes like voids. 'You are too late, Guardian. The eclipse is eternal.' Princess Lumina steps forward. 'No, Nyxara. Your darkness ends now.'
This is the final battle. Queen Nyxara uses shadow magic and the Eclipse Engine. The player and Princess Lumina must work together. If the player speaks Nyxara's true name and shows her compassion, she can be redeemed. Otherwise, they must destroy her. The Eclipse Engine can be destroyed to weaken her.
Milestone: The player defeats Queen Nyxara, restores the light, and reaches level 11 (or ends the campaign at level 11).
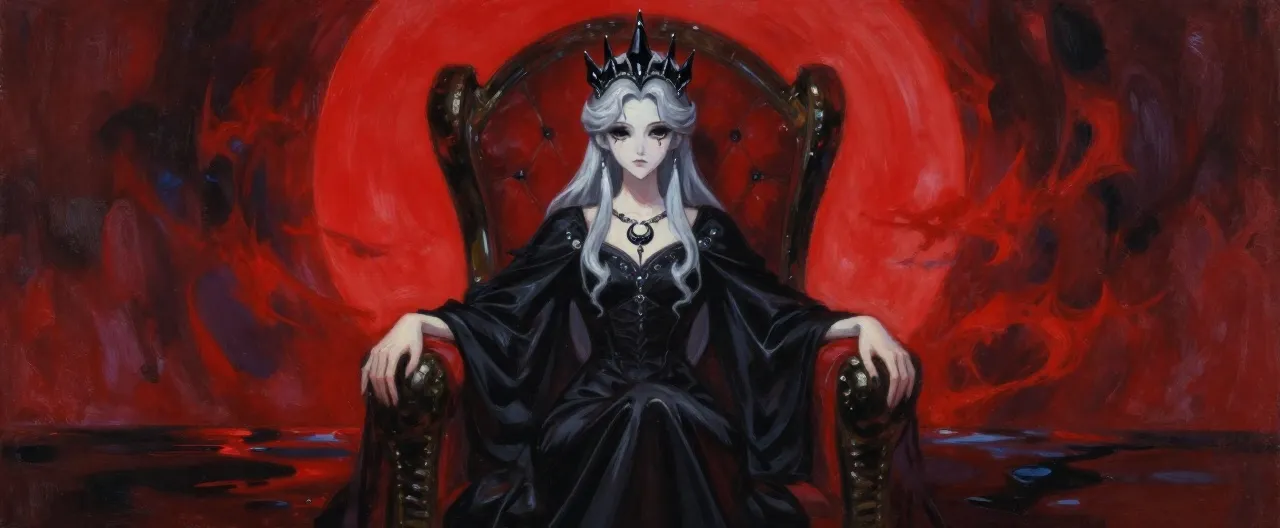 Queen Nyxara, the Devouring Dark
, is the sovereign of the Umbral Court and the architect of the coming eternal eclipse. Once a guardian of …
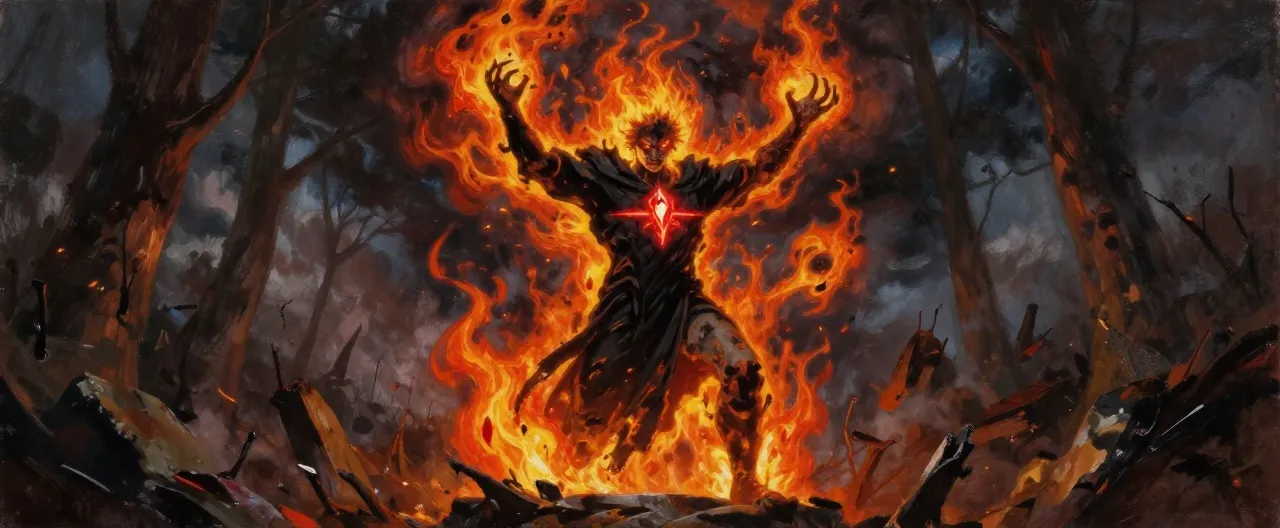 Shroud of Ash
The Shroud of Ash is a gaunt, wild-eyed man in scorched black robes, wreathed in a heat shimmer that makes the air around him ripple like a…
 Shroud of Mirrors (Vessa Thaliad)
Beneath the polished silver mask, the Shroud of Mirrors is a woman who has spent twenty years rehearsing the person she pretends to be. Ves…
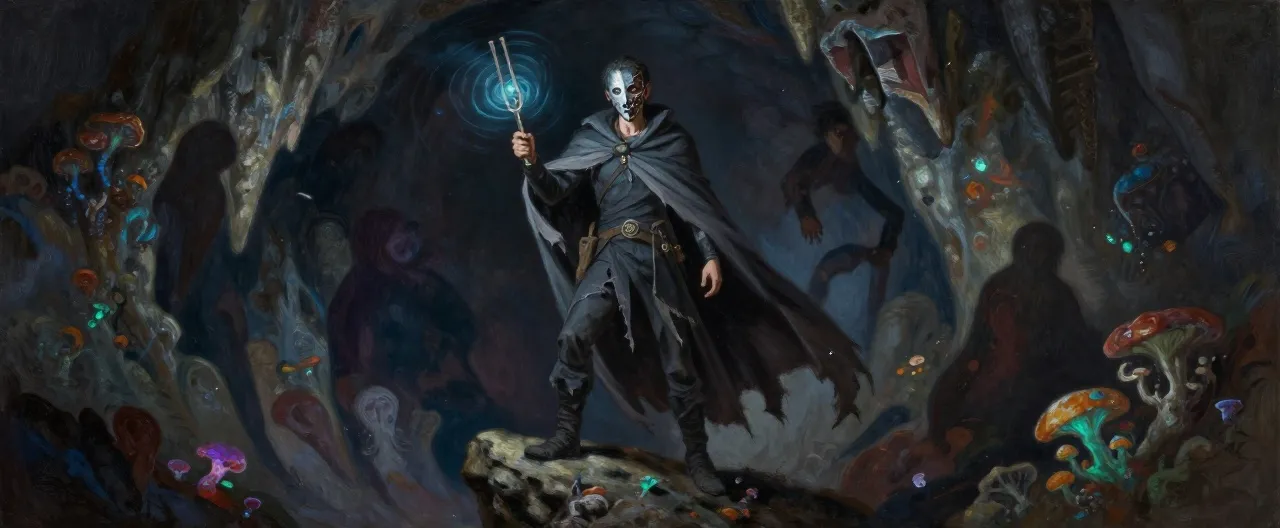 Shroud of Echoes
, once the bard Vellichor, is a gaunt man in his thirties whose presence arrives before he does — as a wrongness in the aco…
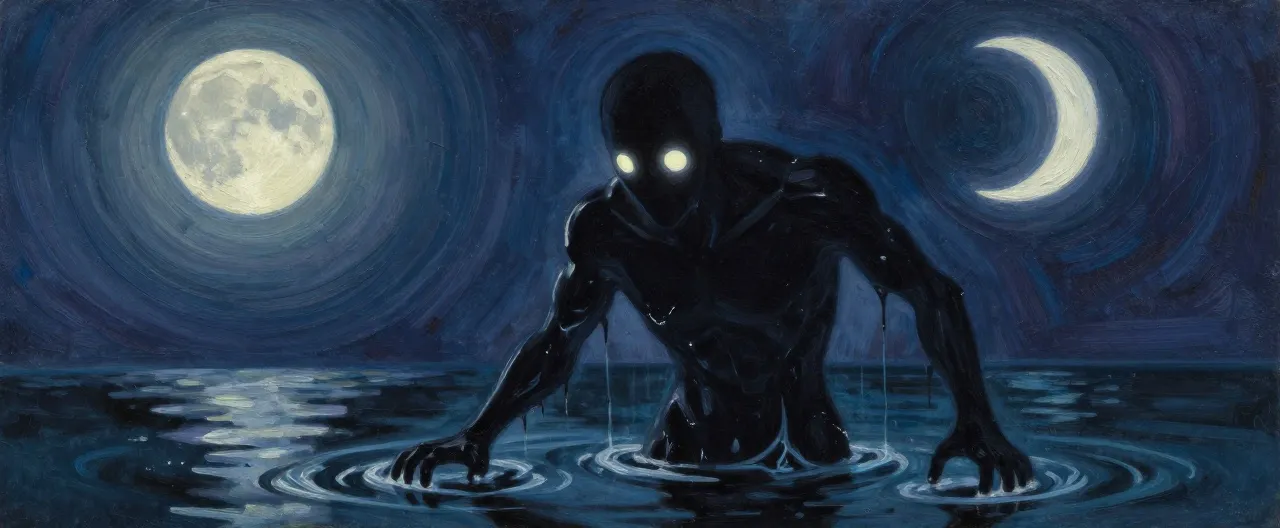 Gloom Husk
Completed
· CR 3
· Aberration
A humanoid silhouette made of dripping black water and tattered moonlight, featuring two pale crescent eyes and clawed hands, lurking in a …
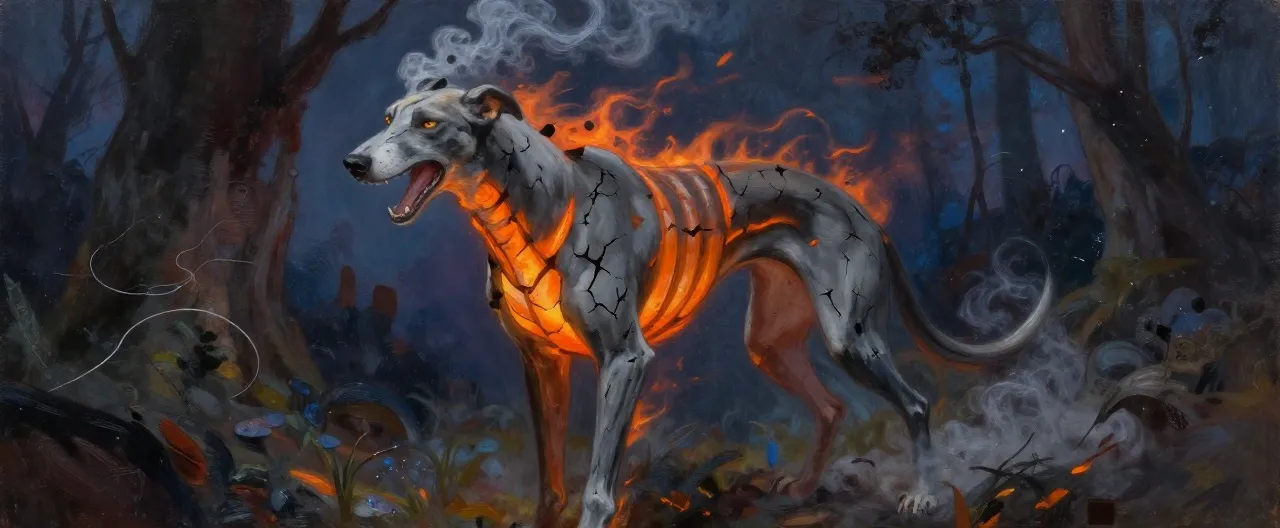 Cinderhound
Completed
· CR 4
· Elemental
A lean greyhound made of cracked charcoal with glowing orange ribcage, smoke mane, and trailing embers from its jaws. Stance is alert and p…
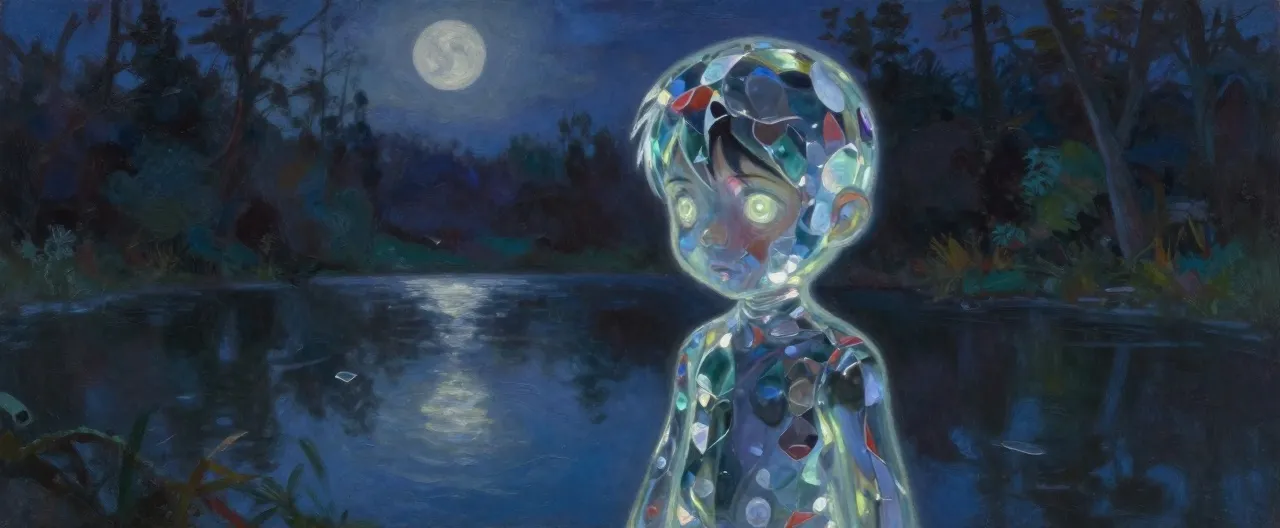 Mirrorling
Completed
· CR 3
· Fey
A child-sized figure made of polished glass and rippling reflections. Its surface shows a distorted copy of whoever looks at it. It hovers …
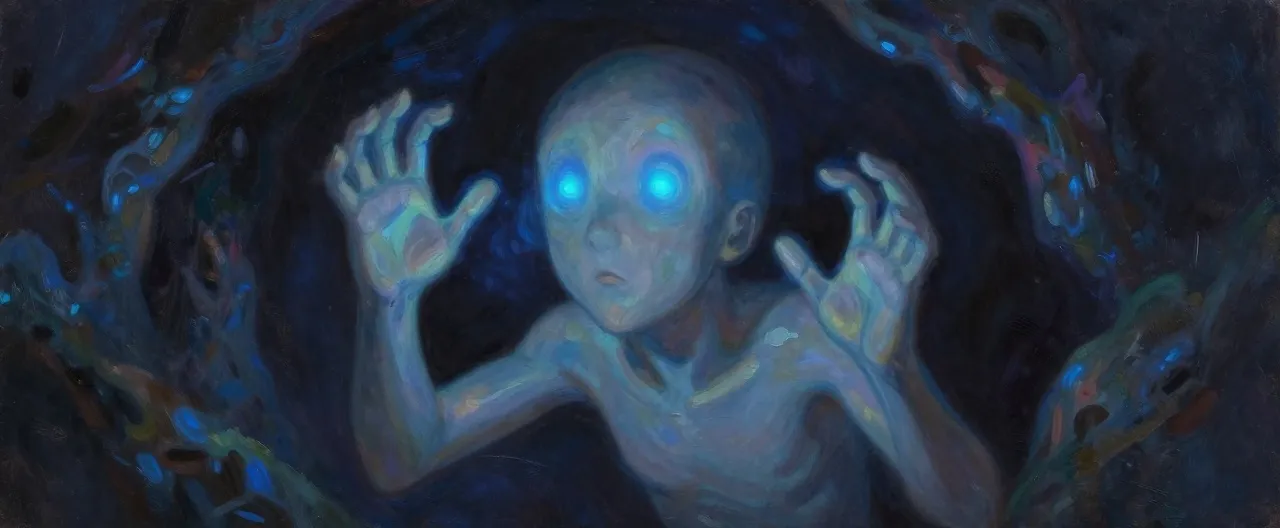 Whispergloom
Completed
· CR 5
· Aberration
Gaunt grey membrane aberration, eyeless, long fingers, vibrating air, dark cave background, eerie blue light refractions, no mouth, unsettl…
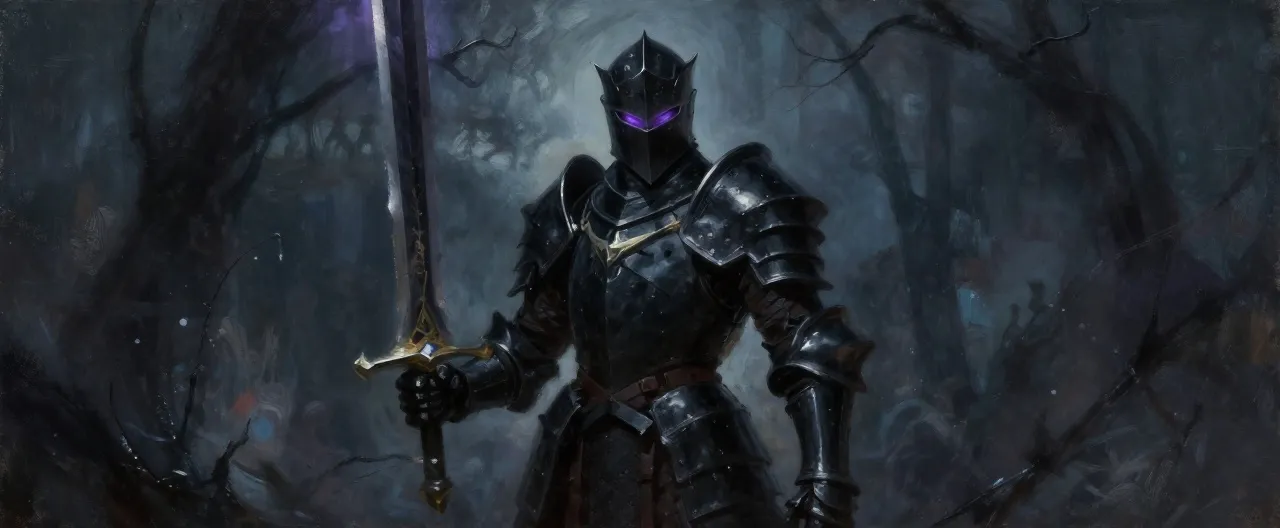 Duskward Knight
Completed
· CR 6
· Humanoid
A humanoid knight in blackened plate armor with a downward-crescent helm, wielding a greatsword made of solidified shadow. Eyes glow faint …
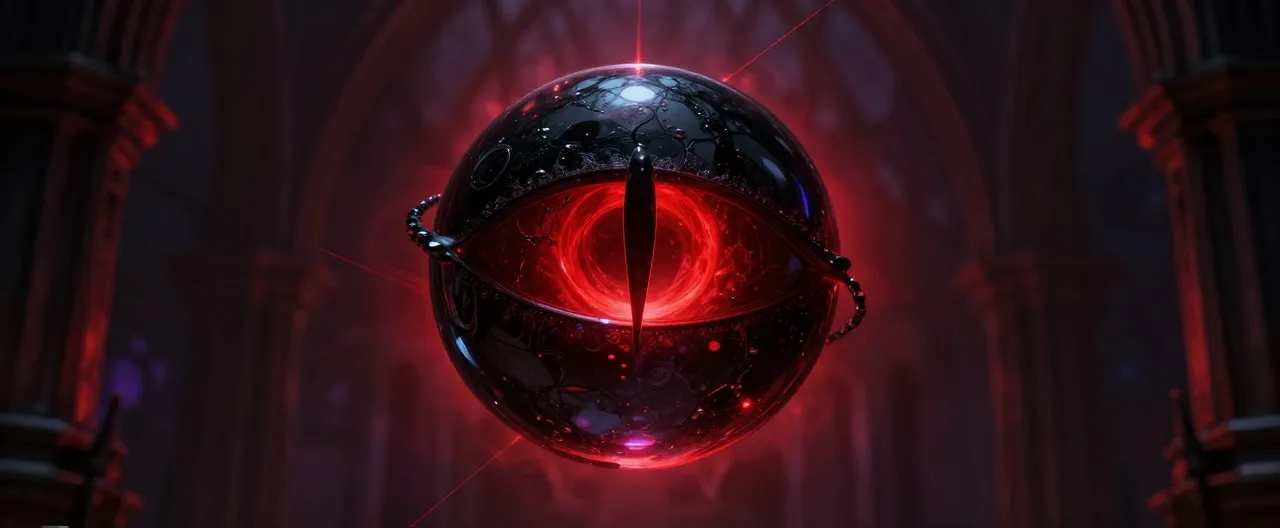 Eclipse Mote
Completed
· CR 4
· Construct
Floating sphere of black glass, head-sized, ringed by dying red corona, vertical slit eye opening, hovering in dark spire halls, eerie ligh…
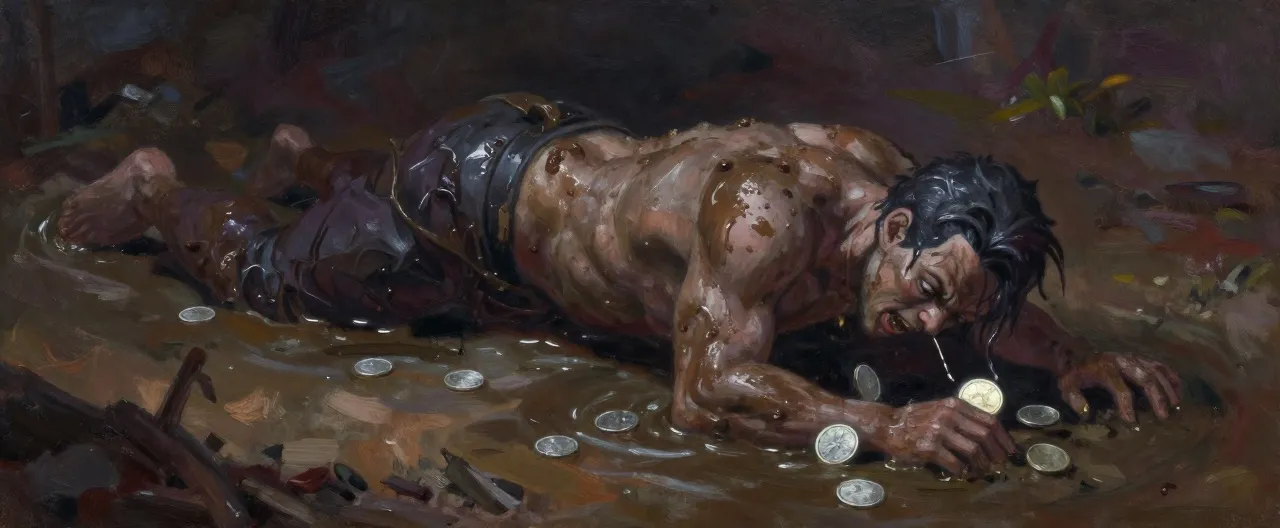 Bonewretch Crawler
Completed
· CR 2
· Undead
Bloated waterlogged corpse moving on all fours, spine bent backward, jaw unhinged, trailing grave-mud and silver coins. Dark, wet textures …
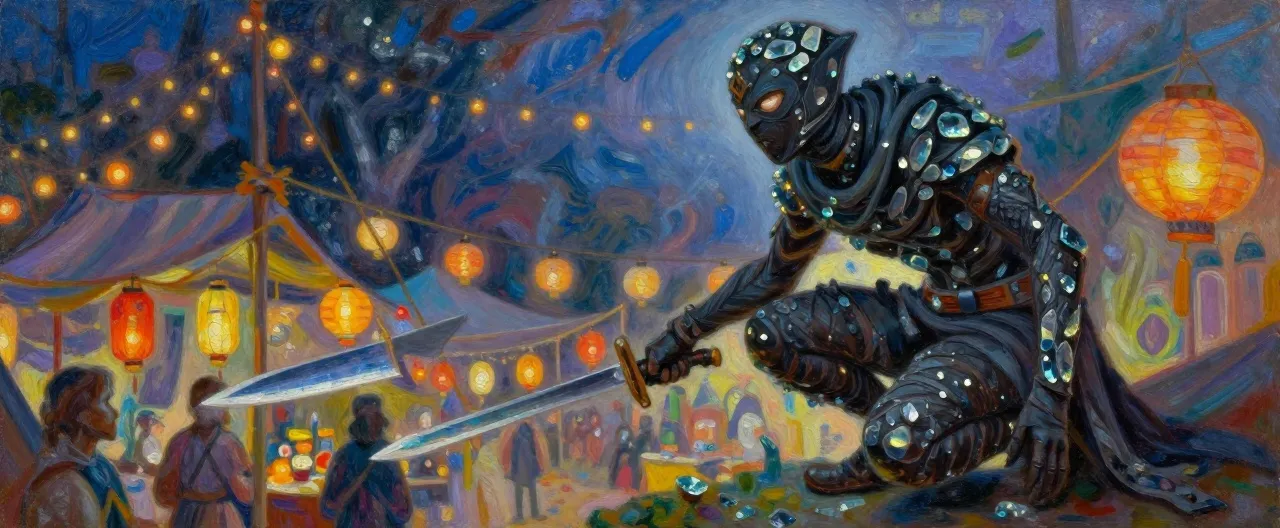 Lantern Thief
Completed
· CR 3
· Humanoid
A wiry, face-wrapped humanoid in layered dark cloth covered in glittering glass shards, holding twin daggers and crouching on a tent pole a…
Nyxara was once a guardian of the moon who was cast into the void. She seeks to consume all light and remake the world in her image, believing that darkness is the only truth.
Cold, regal, and utterly convinced of her righteousness. She speaks in a soft, hypnotic voice and rarely shows anger, preferring to let her minions do the dirty work.
Nyxara begins by summoning shadows and using her Eclipse Engine to weaken the player. She uses mind-affecting magic to turn the player's allies against them. If reduced to half hit points, she retreats into the shadows and heals, then returns with reinforcements. She fights to the death if cornered.
She can be destroyed, her essence scattered into the void. Alternatively, if the player discovers her true name and the tragedy of her fall, they can redeem her, restoring her to her former self as a guardian of the moon.
Ash was a pyromancer who burned his own village. He seeks to prove his worth to Nyxara by burning the Lunar Concord to the ground.
Hot-tempered, cruel, and enjoys causing pain. He taunts his enemies and laughs at their suffering.
Ash starts by setting the battlefield on fire, using area-of-effect fire spells. He summons fire elementals and uses hit-and-run tactics. He flees if reduced to 10 hit points, but will fight to the death if cornered.
He can be killed, his fire extinguished forever. There is no redemption for him; he is too far gone.
Mirrors was a spy who betrayed the Lunar Concord. She seeks to shatter the Concord's trust and sow chaos.
Deceptive, charming, and always wears a mask. She speaks in riddles and half-truths.
Mirrors uses illusions to confuse and misdirect. She creates duplicates of herself and the player's allies. She prefers to let her minions fight while she attacks from range. She flees if her illusions are broken.
She can be killed, her mirrors shattered. If the player can show her the truth of her betrayal, she might be redeemed, but it is unlikely.
Echoes was a bard who lost his voice. He seeks to silence the world and make everyone feel his pain.
Quiet, brooding, and speaks in whispers. He uses sound to manipulate and destroy.
Echoes uses sonic attacks and deafening blasts. He hides in the echoes of the caves, making it hard to pinpoint him. He uses hit-and-run tactics and tries to separate the player from their allies.
He can be killed, his voice silenced forever. He might be redeemed if the player helps him find a new purpose, but he is consumed by bitterness.
Recommended party: One player character of 10th level, with a sidekick or NPC ally to balance action economy. A mix of martial and magical abilities is ideal. The sidekick can be a warrior, expert, or spellcaster from the SRD sidekick rules.
This module is a heroic fantasy with dark themes of loss, corruption, and redemption. It includes kidnapping, mind control, and the threat of eternal darkness. Before play, discuss boundaries with the player. The single player should be comfortable with intense combat and moral choices. The sidekick is an NPC ally; decide together who controls them. Use safety tools like the X-card. The tone is dramatic but hopeful, inspired by magical girl anime.
Adjust the number of minions and the villain's hit points. For a single player without a sidekick, reduce all minion quantities by half and lower villain hit points by 20. For a party of three or more, add one extra minion per encounter and increase villain hit points by 20. The XP budgets assume two level 10 characters; scale accordingly.
Pace the three acts across 4-6 hours. Act I is investigation and exploration; Act II is three boss fights with exploration between; Act III is a dungeon crawl and final battle. Seed clues early: the diary, Theron's betrayal, Thalia's locket. Keep pressure on with the eclipse countdown. Villains should taunt and retreat, not just stand and fight. Use the side quests to add depth. The final battle has multiple solutions; reward creativity.
You sit by a moonwell and attune to its lunar magic, seeking visions or peace.
Requirements: Access to a moonwell (Moonwell Glade or Silvercourt's moonwell).
Rewards: You gain 10 temporary hit points and a cryptic vision of the princess's location.
Time: 1 hour
Location: The Moonwell Glade is the most powerful site; Silvercourt's moonwell is weaker.
A DC 13 Wisdom (Insight) check reveals one true clue about the Umbral Court. If the moonwell is corrupted, the meditation deals 1d6 psychic damage instead.
You haggle with the merchants of the Night Bazaar for information or discounts.
Requirements: At least 50 gp and a willingness to deal with shady folk.
Rewards: You reduce the price of one item by 20% or gain a useful rumor.
Time: 1 hour
Location: The Night Bazaar appears only at night in a hidden cove.
A DC 15 Charisma (Persuasion) check improves the discount to 30%. Vex may ask for a favor instead of gold.
You study the archives of the Lunar Concord in Silvercourt, researching the sigils and the Umbral Court.
Requirements: Access to Silvercourt's archives and a successful DC 14 Intelligence (Arcana) check.
Rewards: You gain advantage on your next Arcana check related to the sigils or the Eclipse Engine.
Time: 4 hours
Location: Silvercourt's Grand Hall contains a hidden archive.
The research reveals the legend of the four sigils and the true name of Queen Nyxara (Selene). A failed check wastes the time.
The Ashen Grove is a charred forest clearing, the trees blackened and still smoking. The ground is covered in ash, and the air is hot and acrid. In the center stands a ruined stone altar, now used by the Shroud of Ash as a focus for his fire magic. The grove is patrolled by bandits and fire elementals. The Ember Sigil is hidden in the altar.
The Shroud of Ash is here with his bandit gang. Kestrel the Ranger will guide the player and fight alongside them.
The Mirror Lake is a perfectly still body of water in the middle of a marsh. Its surface reflects the sky like a mirror, but the reflections are not always true. The Shroud of Mirrors uses the lake to create illusions and hide her lair. The area is surrounded by reeds and mist, and the air is thick with magic. The Mirror Sigil is hidden at the bottom of the lake.
The Shroud of Mirrors is here with her spies. Oracle Mira lives in a hut by the lake and can provide a potion of true seeing.
The Echoing Caves are a labyrinth of tunnels and caverns in the mountains. The walls are damp and covered in glowing fungi. Every sound echoes endlessly, making it hard to tell where danger lurks. The Shroud of Echoes uses the acoustics to his advantage, hiding and attacking from the shadows. The Echo Sigil is in his possession, and he holds captured miners in the depths.
The Shroud of Echoes is here with his cultists. Bram the Miner can guide the player through the tunnels.
The Shadowed Gate is a massive arch of black stone, standing alone in a rocky wasteland. It is the only entrance to the Umbral Depths. The gate is guarded by dark knights and shadow creatures. To open it, the player must place the three sigils in the recesses and speak the password 'Eclipse'. Guardian Selene stands before the gate, the last of her order, ready to help.
The gate is heavily guarded. The player must fight or sneak past the guards. Selene will aid in the fight.
The Obsidian Spire is a towering black fortress, its walls smooth and reflective like glass. It is the seat of Queen Nyxara's power and the heart of the Umbral Court. Inside, the halls are dark and twisting, filled with cultists and dark knights. Princess Lumina is held in a cell at the top of the spire. The Eclipse Engine is in the Throne of Night, beyond the spire.
The spire is heavily guarded. The player must navigate the halls, avoid traps, and rescue the princess. Princess Lumina can provide magical support once freed.
The Throne of Night is a vast chamber of black stone, at the very heart of the Umbral Depths. A dying red sun hangs in the sky, casting everything in a bloody glow. In the center sits a throne of obsidian, and behind it, the Eclipse Engine, a massive machine of shadow and light. Queen Nyxara sits on the throne, waiting. This is the final battleground.
The final battle takes place here. The player and Princess Lumina must work together to defeat or redeem Nyxara. The Eclipse Engine can be destroyed to weaken her.
Queen Nyxara, the Devouring Dark
Queen Nyxara, the Devouring Dark, is the sovereign of the Umbral Court and the architect of the coming eternal eclipse. Once a guardian of …
Shroud of Ash
The Shroud of Ash is a gaunt, wild-eyed man in scorched black robes, wreathed in a heat shimmer that makes the air around him ripple like a…
Shroud of Mirrors (Vessa Thaliad)
Beneath the polished silver mask, the Shroud of Mirrors is a woman who has spent twenty years rehearsing the person she pretends to be. Ves…
Shroud of Echoes
Shroud of Echoes, once the bard Vellichor, is a gaunt man in his thirties whose presence arrives before he does — as a wrongness in the aco…
Gloom Husk
Completed
· CR 3
· Aberration
A humanoid silhouette made of dripping black water and tattered moonlight, featuring two pale crescent eyes and clawed hands, lurking in a …
Cinderhound
Completed
· CR 4
· Elemental
A lean greyhound made of cracked charcoal with glowing orange ribcage, smoke mane, and trailing embers from its jaws. Stance is alert and p…
Mirrorling
Completed
· CR 3
· Fey
A child-sized figure made of polished glass and rippling reflections. Its surface shows a distorted copy of whoever looks at it. It hovers …
Whispergloom
Completed
· CR 5
· Aberration
Gaunt grey membrane aberration, eyeless, long fingers, vibrating air, dark cave background, eerie blue light refractions, no mouth, unsettl…
Duskward Knight
Completed
· CR 6
· Humanoid
A humanoid knight in blackened plate armor with a downward-crescent helm, wielding a greatsword made of solidified shadow. Eyes glow faint …
Eclipse Mote
Completed
· CR 4
· Construct
Floating sphere of black glass, head-sized, ringed by dying red corona, vertical slit eye opening, hovering in dark spire halls, eerie ligh…
Bonewretch Crawler
Completed
· CR 2
· Undead
Bloated waterlogged corpse moving on all fours, spine bent backward, jaw unhinged, trailing grave-mud and silver coins. Dark, wet textures …
Lantern Thief
Completed
· CR 3
· Humanoid
A wiry, face-wrapped humanoid in layered dark cloth covered in glittering glass shards, holding twin daggers and crouching on a tent pole a…
Nyxara was once a guardian of the moon who was cast into the void. She seeks to consume all light and remake the world in her image, believing that darkness is the only truth.
Cold, regal, and utterly convinced of her righteousness. She speaks in a soft, hypnotic voice and rarely shows anger, preferring to let her minions do the dirty work.
Nyxara begins by summoning shadows and using her Eclipse Engine to weaken the player. She uses mind-affecting magic to turn the player's allies against them. If reduced to half hit points, she retreats into the shadows and heals, then returns with reinforcements. She fights to the death if cornered.
She can be destroyed, her essence scattered into the void. Alternatively, if the player discovers her true name and the tragedy of her fall, they can redeem her, restoring her to her former self as a guardian of the moon.
Ash was a pyromancer who burned his own village. He seeks to prove his worth to Nyxara by burning the Lunar Concord to the ground.
Hot-tempered, cruel, and enjoys causing pain. He taunts his enemies and laughs at their suffering.
Ash starts by setting the battlefield on fire, using area-of-effect fire spells. He summons fire elementals and uses hit-and-run tactics. He flees if reduced to 10 hit points, but will fight to the death if cornered.
He can be killed, his fire extinguished forever. There is no redemption for him; he is too far gone.
Mirrors was a spy who betrayed the Lunar Concord. She seeks to shatter the Concord's trust and sow chaos.
Deceptive, charming, and always wears a mask. She speaks in riddles and half-truths.
Mirrors uses illusions to confuse and misdirect. She creates duplicates of herself and the player's allies. She prefers to let her minions fight while she attacks from range. She flees if her illusions are broken.
She can be killed, her mirrors shattered. If the player can show her the truth of her betrayal, she might be redeemed, but it is unlikely.
Echoes was a bard who lost his voice. He seeks to silence the world and make everyone feel his pain.
Quiet, brooding, and speaks in whispers. He uses sound to manipulate and destroy.
Echoes uses sonic attacks and deafening blasts. He hides in the echoes of the caves, making it hard to pinpoint him. He uses hit-and-run tactics and tries to separate the player from their allies.
He can be killed, his voice silenced forever. He might be redeemed if the player helps him find a new purpose, but he is consumed by bitterness.
Theron is a grizzled veteran with a scar over one eye. He commands the city guard and is loyal to the Concord.
Lady Seren is a tall, elegant woman with silver hair and sad eyes. She is the acting ruler of Silvercourt in the princess's absence.
June is a cheerful young woman with a knack for potions. She runs a small shop in Silvercourt.
Thalia is an old woman who lives by the Moonwell. She is wise in the ways of the moon.
Vex is a slender figure in dark robes, face hidden behind a veil. They speak in a soft, sibilant voice.
Kestrel is a lean, weathered man in leather armor. He knows the Ashen Wilds like the back of his hand.
Mira is a blind woman with milky eyes. She sees the future in the waters of Mirror Lake.
Bram is a stout man covered in soot. He was captured by the Shroud of Echoes and barely escaped.
Selene is a warrior in silver armor, bearing the crescent moon symbol. She guards the Shadowed Gate.
Lumina is a young woman with silver hair and a gentle face. She is the moon princess, held captive by Queen Nyxara.
Thalia taught Ysolde that every moonwell answers to a true name spoken in the old tongue, lost when the Concord burned its own archives. At the Moonwell Glade, Ysolde can wade the pool, read the drowned inscriptions on the rim, and descend into the grotto behind the waterfall where the naming stone lies beneath the shadow demon's watch. Speaking the name over the water makes the corruption recoil, the pool clears, and Thalia weeps for the first time in years.
Read the drowned inscriptions on the pool's rim and decode the old-tongue syllables using Ysolde's forty years of chart-memory.
Decode the inscriptions slowly and safely, or dive immediately before the eclipse tide erases the final glyph.
The Concord burned its own lunar archives decades ago, and Ysolde believes fragments survived in the Sunken Ossuary beneath Silvercourt, where the drowned dead of the old archive-scribes were laid. She must recover three surviving folios from the flooded crypt before the Bonewretch Crawlers and the Gravebound Warden destroy the last records of the moonwell network.
Locate the archive-scribes' burial alcove in the Sunken Ossuary using Ysolde's Moonwell Chart-Memory.
Bargain with the restless dead of the scribes (they remember their work) or fight through the Bonewretch Crawlers.
Ysolde discovers that the Shroud of Mirrors is Thalia's corrupted daughter—and that the woman in the locket was once Ysolde's childhood friend at the Concord's academy, before the mirrors took her. Ysolde must decide whether to destroy her, redeem her with the locket and the true name, or bargain with her for the Moon Sigil fragment.
Recover the Locket of the Lost Daughter from the Moonwell Grotto and identify the portrait.
Tell Thalia the truth about her daughter immediately, or wait until Ysolde has a plan to redeem her.
Oracle Mira's visions are killing her: each prophecy burns a little more of her sight, and the Umbral Court has been feeding her questions through poisoned dreams to speed the process. Halvard must gather the silvermarsh moonpetal that grows only in the deepest reeds of Mirror Lake, brew it into a tincture at Mira's own hearth, and keep her alive through the night while the Shroud of Mirrors sends mirrorlings to finish the job.
Wade the deepest reeds at moonrise to harvest the moonpetal, evading mirrorlings that wear the faces of the drowned.
Harvest quickly and risk a damaged petal, or slowly and risk Mira's dreams worsening.
Brew the tincture at Mira's hearth while defending her through the night.
Decide whether to give Mira the tincture fully or ration it to spare her pain.
The fever that emptied Halvard's crypt congregation was no natural plague: the Umbral Court poisoned the cliff crypts to silence the old families whose bloodlines anchor the lunar wards of the Silvercourt Reach. Halvard discovers that three of the dead were buried with moonstone grave-beads that still hold warding light, and that a Bonewretch Crawler nest in the Sunken Ossuary has been gnawing at the ward-anchors.
Descend into the Sunken Ossuary and recover the three moonstone grave-beads from the flooded graves of the families he once served.
Bless and reclaim the beads for the wards, or leave them in peace with the dead he tended.
The Everburning Lantern was lit from the Moonwell's flame by Halvard's mentor, the crypt-priestess Aldra Crane, who vanished into the Umbral Depths forty years ago chasing rumors of a guardian who fell from the moon. The lantern's silver corona has begun to gutter since the eclipse began, and it whispers in Aldra's voice when Halvard sleeps.
Follow the lantern's whispers through the Echoing Caves, where sound carries Aldra's voice further, to find the record of her last expedition.
Trust the whispers as his mentor's voice, or treat them as an Umbral lure.
The ward on the Shadowed Gate is fed by the names of every guardian who died keeping it, and the Umbral Court has spent years scratching those names off the boundary cairns scattered across the wasteland. At the Shadowed Gate, Neris can walk the cairn line with Selene, fight off the duskward knights sent to finish the erasure, and re-carve each name from memory and from the fragments left in the stone. Every name restored strengthens the gate's ward and weakens the guards who hold it; if Neris restores all seven, Selene can leave her post for the first time in decades and fight beside the hero in the Umbral Depths. If she restores fewer than four, the gate opens anyway but the ward collapses behind them, and no one can follow.
Locate the seven defaced boundary cairns along the wasteland with Selene's guidance.
Restore the cairns openly and draw the duskward knights into open battle, or carve in secret while the knights erase names elsewhere.
Three years ago, Neris carried word of the Umbral Court's first probing of the Shadowed Gate to Silvercourt, and the Concord's archivists dismissed her as a tiefling soldier with an overactive imagination. Now the eclipse proves her right, but the record of her warning was never entered into the Grand Hall archive — erased at someone's order. Neris must find who buried her report and why: was it incompetence, or was Captain Theron already feeding the Umbral Court, and did her silenced warning cost the princess her freedom? Walking the barracks, the archive, and Theron's old duty rosters, Neris reconstructs the night her warning died.
Search the Grand Hall archive and the barracks for the original report and its suppression order.
Confront the archivist who buried the report privately, or accuse her publicly before Lady Seren.
The Vale family kept the boundary stones for four generations without thanks, and the family cairn-book — a ledger of every stone, every name, and every repair — was lost the night the Umbral Court first tested the gate. Neris's younger brother Tam, who inherited the warden's duty when she took the Concord's oath, vanished into the Ashen Wilds chasing the cairn-book and hasn't been heard from since. Following his trail through the Wilds, Neris must decide what her family's legacy means: a duty she abandoned for a shiny oath, or a promise she can still keep.
Track Tam's path through the Ashen Wilds using warden's marks only a Vale would recognize.
Follow the marks alone and quietly, or bring the party through territory the Shroud of Ash patrols.
Step into your campaign
Play a 3D adventure with your party: explore settlements, wilderness and dungeons, and fight in real time with pause. Best on a desktop or laptop with a mouse and keyboard.
Suggested Level: 10
Flooded chambers with murky water (difficult terrain, waist-deep in places), stone altars (cover), and narrow passages. The water is 3 ft. deep in the main chamber, 5 ft. in the side alcoves.
The Wight carries a moonstone ring (worth 50 gp) and a key to the cultist's shrine. The shrine contains a potion of greater healing and a scroll of protection from evil and good.
For a weaker party, replace the Wight with a Ghoul and remove one Bonewretch Crawler. For a stronger party, add a second Wight or two more Bonewretch Crawlers.
Suggested Level: 10
The Grand Hall has silver pillars (cover), a polished marble floor (difficult terrain if slick with blood), and tall windows letting in moonlight (dim light). The hall is 60 ft. by 40 ft.
The Veteran carries a silver badge of the city guard (worth 25 gp) and a coded note from the Shroud of Mirrors. The Cultists have 2 potions of healing and 15 gp each.
For a weaker party, remove one Shadow and one Cultist. For a stronger party, add a second Veteran or two more Shadows.
Suggested Level: 10
A circular chamber with a central stone altar (cover, difficult terrain around it), freezing water (1 ft. deep, difficult terrain), and glowing runes on the walls (dim light). The altar radiates necrotic energy; any creature starting its turn within 5 ft. of the altar takes 1d6 necrotic damage.
The altar holds a +1 longsword (the cultist's weapon) and a pouch with 100 gp and three black pearls (worth 100 gp each). A hidden compartment contains a scroll of revivify.
For a weaker party, remove one Shadow and reduce the Wraith's hit points by 20. For a stronger party, add a second Wraith or two Specters.
Suggested Level: 10
A flooded grotto with dark water (5 ft. deep, heavily obscured), a rocky ledge (cover), and a waterfall (loud, imposing disadvantage on Perception checks based on hearing). The water is cold; creatures in it have disadvantage on Constitution saves against cold.
Thalia's silver locket (contains a portrait of her daughter, the Shroud of Mirrors) and a fragment of the Moon Sigil (a smooth white stone that glows faintly). The Shadow Demon has a pouch with 50 gp and a potion of water breathing.
For a weaker party, replace the Shadow Demon with a Shadow and remove the Gloom Husk. For a stronger party, add a second Gloom Husk or a Water Elemental.
Suggested Level: 10-11
Charred trees (cover, but flammable), smoldering ground (difficult terrain, 1d4 fire damage if you start your turn in a burning square), and the stone altar (cover, 10 ft. high). The grove is 80 ft. by 60 ft.
The Shroud carries the Ember Sigil (a red-hot crystal) and a flame tongue shortsword. The Veteran has a ring of fire resistance and 200 gp. A hidden cache under a burnt tree contains two potions of greater healing and a scroll of fireball.
For a weaker party, remove one Cinderhound and the Veteran. For a stronger party, add a second Veteran and two more Cinderhounds.
Suggested Level: 10-11
The lake is 10 ft. deep, with a rocky shore (cover) and reeds (difficult terrain, lightly obscured). The water reflects perfectly; any creature looking into it has disadvantage on Perception checks against illusions. The Shroud can use the reflections to teleport 30 ft. as a bonus action.
The Shroud carries the Mirror Sigil (a polished silver shard) and a cloak of elvenkind. The Scout has a potion of true seeing and 150 gp. A hidden cave beneath the lake contains a pearl of power and a mirror of the past.
For a weaker party, remove one Mirrorling and the Scout. For a stronger party, add two more Mirrorlings and a second Scout.
Suggested Level: 10-11
A natural amphitheater with a 20-ft.-high ledge (cover, difficult to climb), stalactites (cover), and echoing walls (any sound-based attack has its range doubled, but also alerts all enemies). The floor is uneven (difficult terrain in patches).
The Shroud carries the Echo Sigil (a tuning fork) and a gem of brightness. The Cultists have 50 gp each and a potion of healing. The miners' belongings include a +1 warhammer and a miner's pick (worth 10 gp).
For a weaker party, remove one Cultist and reduce the Whispergloom's hit points by 20. For a stronger party, add a second Whispergloom and two more Cultists.
Suggested Level: 11
A rocky wasteland with boulders (cover), a 30-ft.-high ledge above the gate (stealthy approach), and the gate itself (a 20-ft.-tall arch, solid stone). The ground is uneven (difficult terrain in patches).
The Duskward Knight carries a +1 greatsword and a suit of adamantine armor. The Veteran has a potion of greater healing and 100 gp. Selene gives the player a potion of healing after the fight.
For a weaker party, remove the Veteran and one Shadow. For a stronger party, add a second Duskward Knight and two more Shadows.
Suggested Level: 11
Narrow halls with black glass walls (cover, but reflective), a high ceiling (30 ft.), and no natural light (magical darkness in some areas). The halls are 15 ft. wide, 60 ft. long.
Each Mote drops a shard of black glass (worth 50 gp) and a mote of eclipse essence (can be used as a spell component). A hidden alcove contains a potion of superior healing and a scroll of dimension door.
For a weaker party, use one Eclipse Mote. For a stronger party, add a third Eclipse Mote and a Duskward Knight.
Suggested Level: 11
A vast chamber with a black stone floor, a 10-ft.-high obsidian throne (cover), and the Eclipse Engine (a 20-ft.-tall machine of shadow and light, cover, can be attacked). The dying red sun provides dim light. The Engine has AC 18, 100 hit points, and can be disabled with a DC 16 Arcana check or destroyed.
Nyxara carries the Crown of the Moon Princess (legendary) and a rod of absorption. The Eclipse Engine contains a sphere of annihilation (if destroyed, it collapses into a sphere of annihilation that must be contained). The throne room has 1,000 gp in gems and a scroll of wish (one use).
For a weaker party, remove one Eclipse Mote and one Shadow, and reduce Nyxara's hit points by 20. For a stronger party, add a second Duskward Knight and two more Shadows.
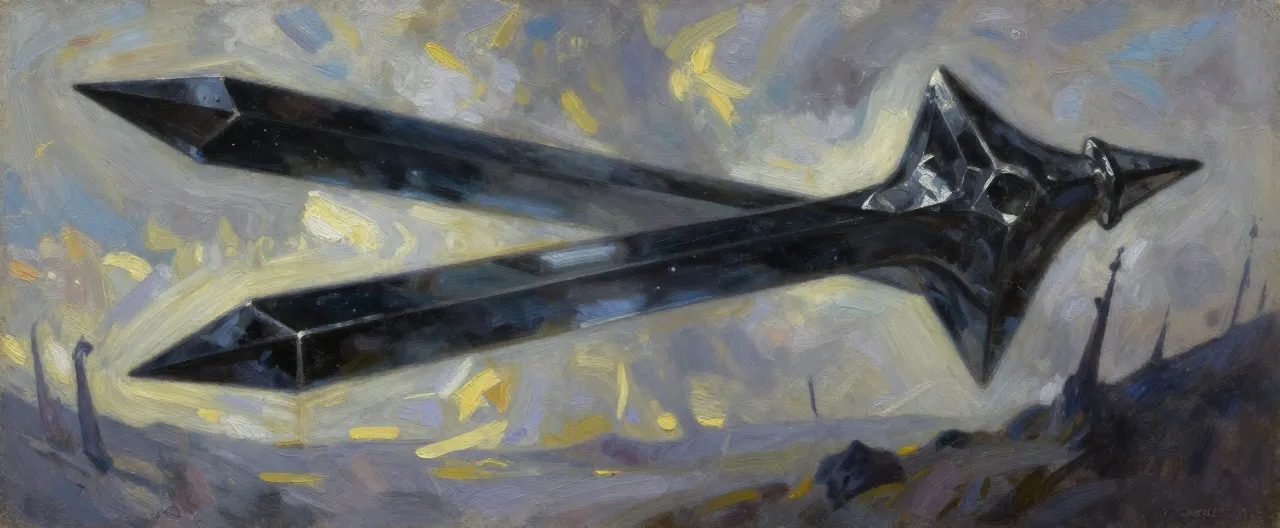 Eclipse Shard
Completed
Act III - Obsidian Spire, in Nyxara's study
True — by a spellcaster
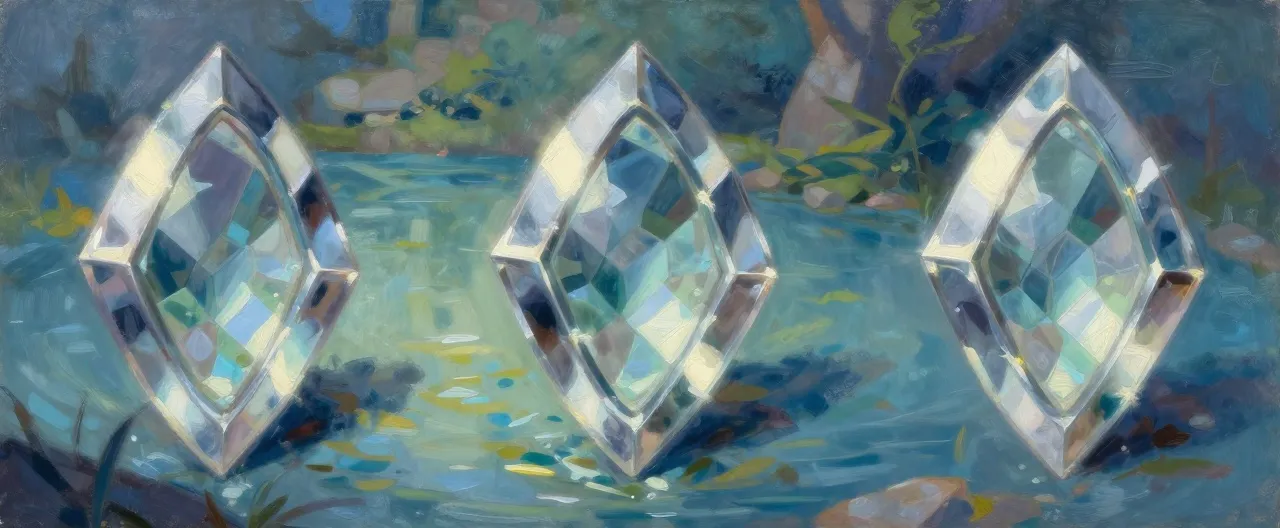 Mirror Sigil
Completed
Act II - Mirror Lake, at the bottom
True
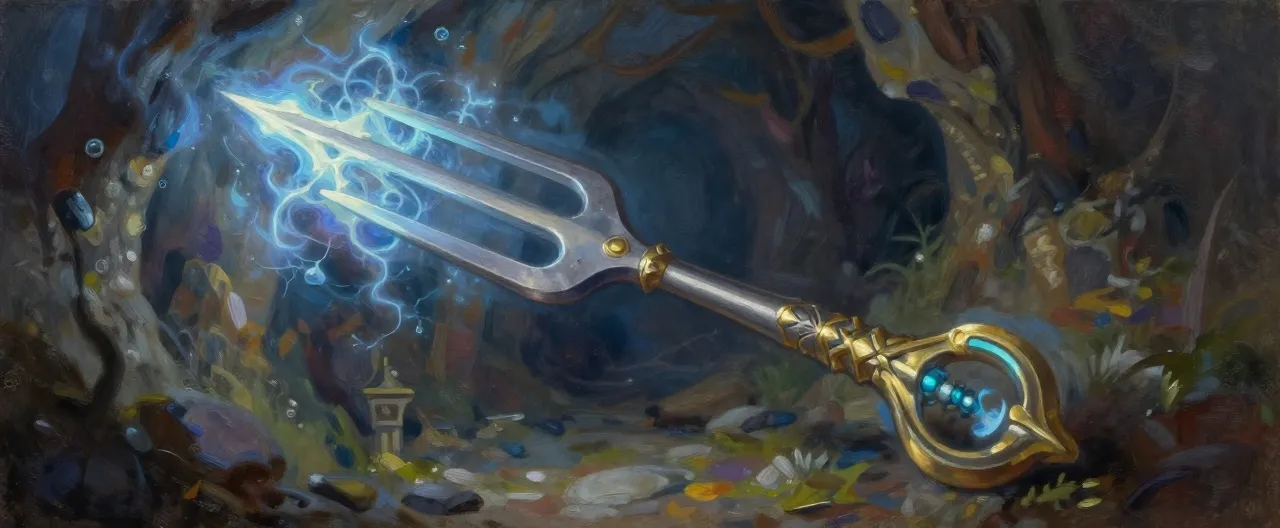 Echo Sigil
Completed
Act II - Echoing Caves, in the Shroud's possession
True
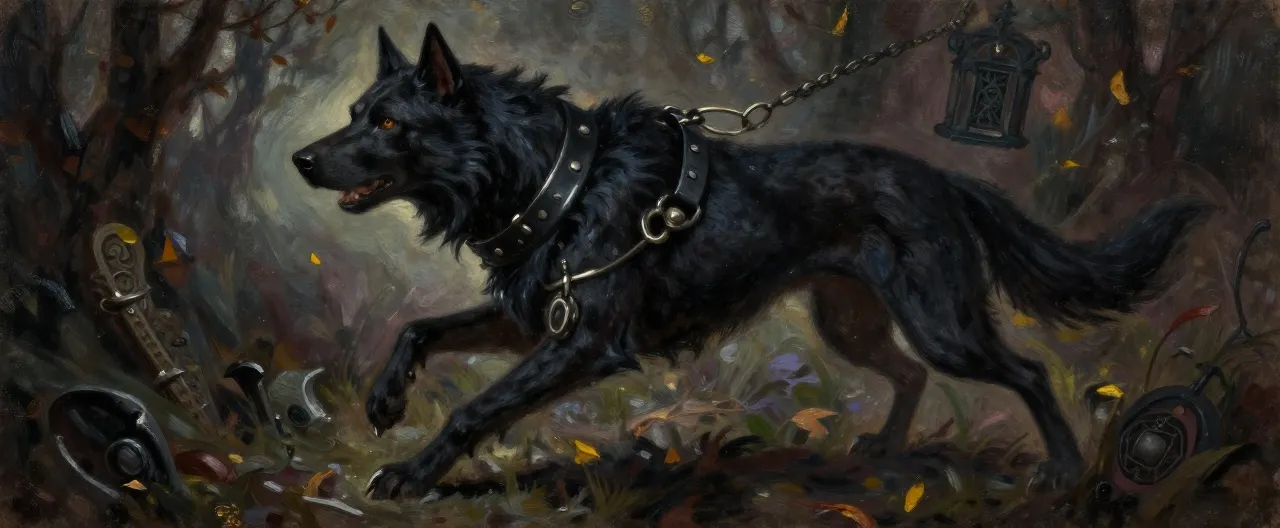 Cinderhound Collar
Completed
Act II - Ashen Grove Crypt, in the Ember Crypt
True
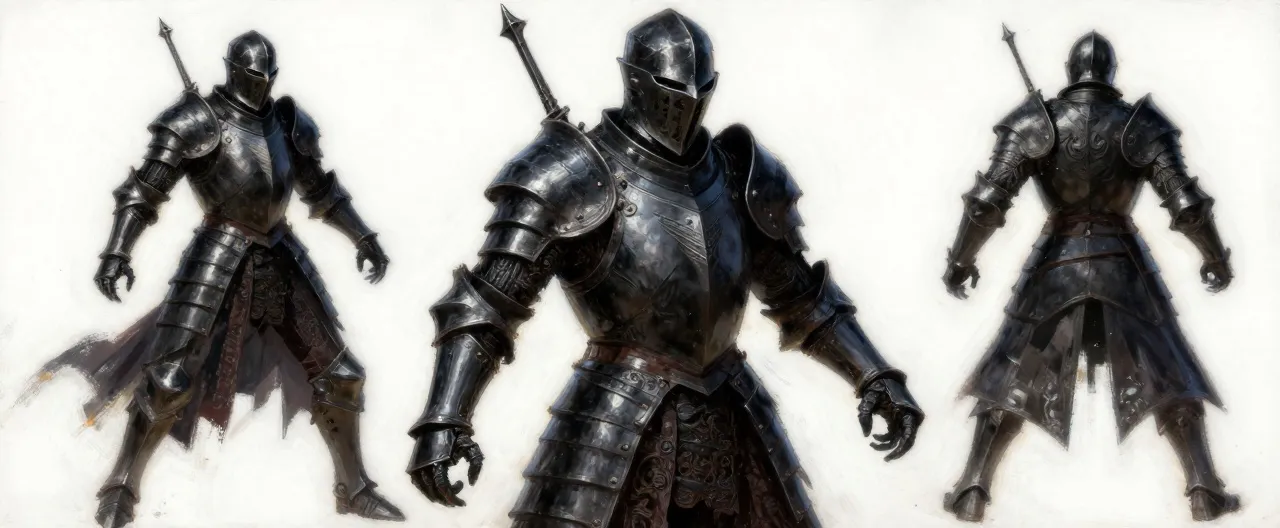 Duskward Plate
Completed
Act III - Shadowed Gate, on a Duskward Knight
True
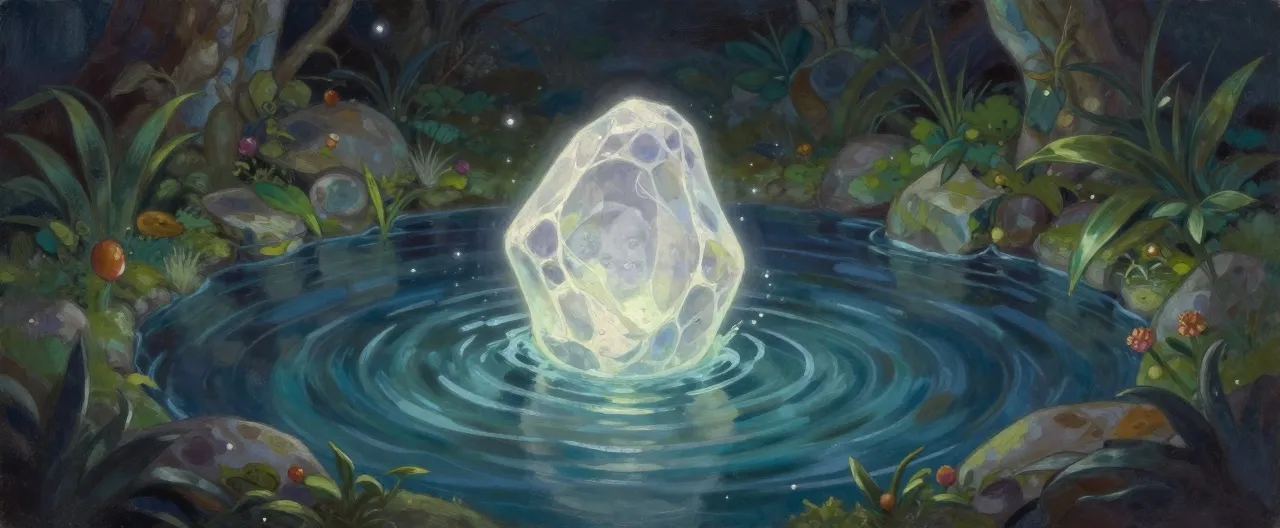 Moonstone of the Glade
Completed
Act I - Moonwell Glade, at the bottom of the pool
False
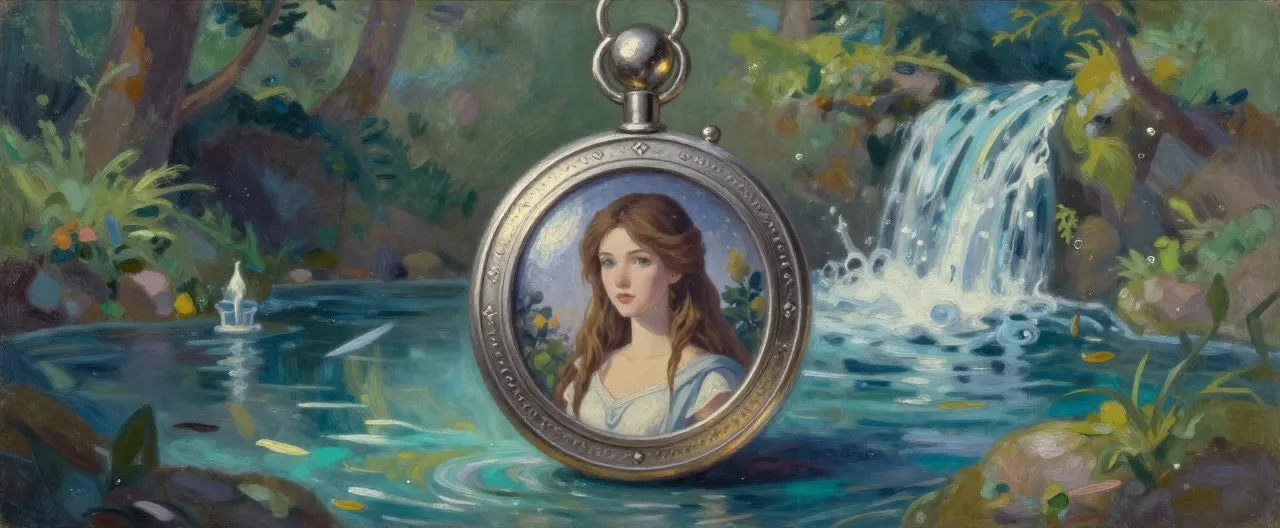 Locket of the Lost Daughter
Completed
Act I - Moonwell Grotto, behind the waterfall
True — by a creature with a living mother
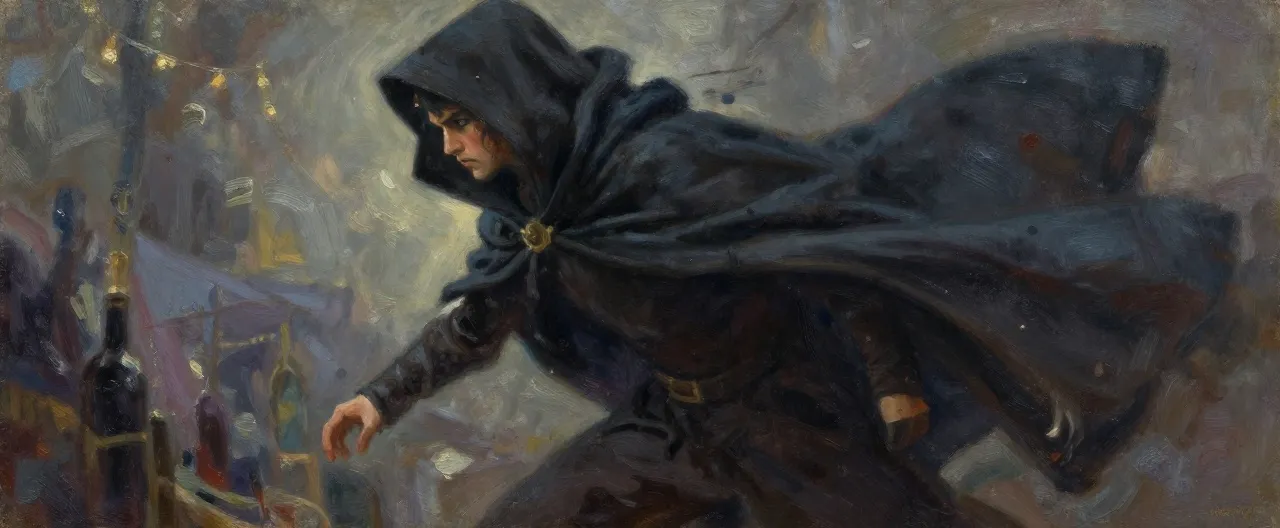 Cloak of the Veiled Market
Completed
Act I - Night Bazaar, bought from Vex
True
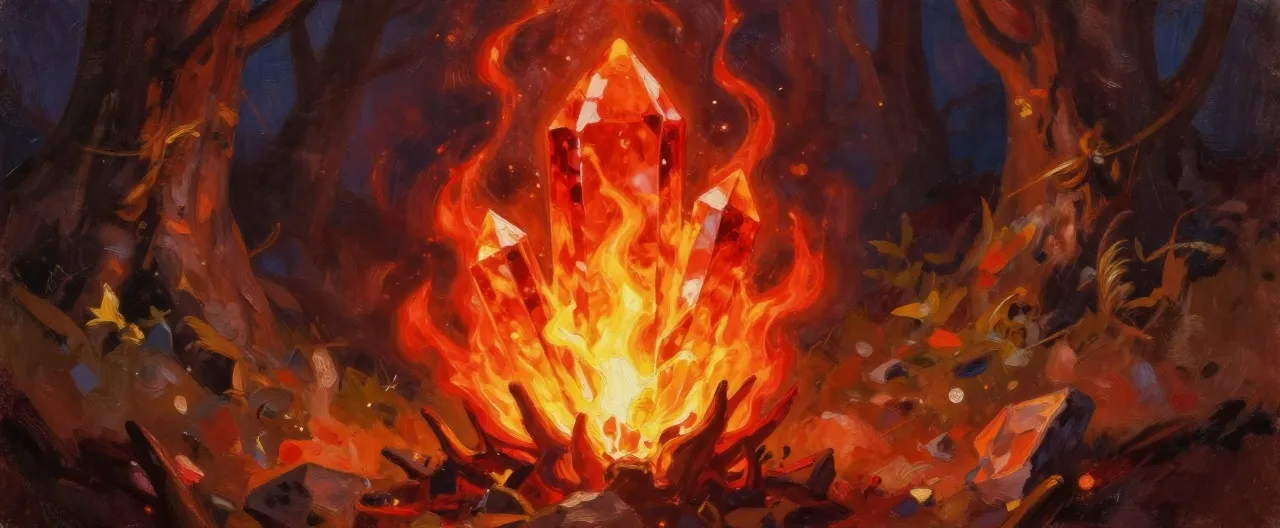 Ember Sigil
Completed
Act II - Ashen Grove, on the Shroud of Ash
True — by a spellcaster
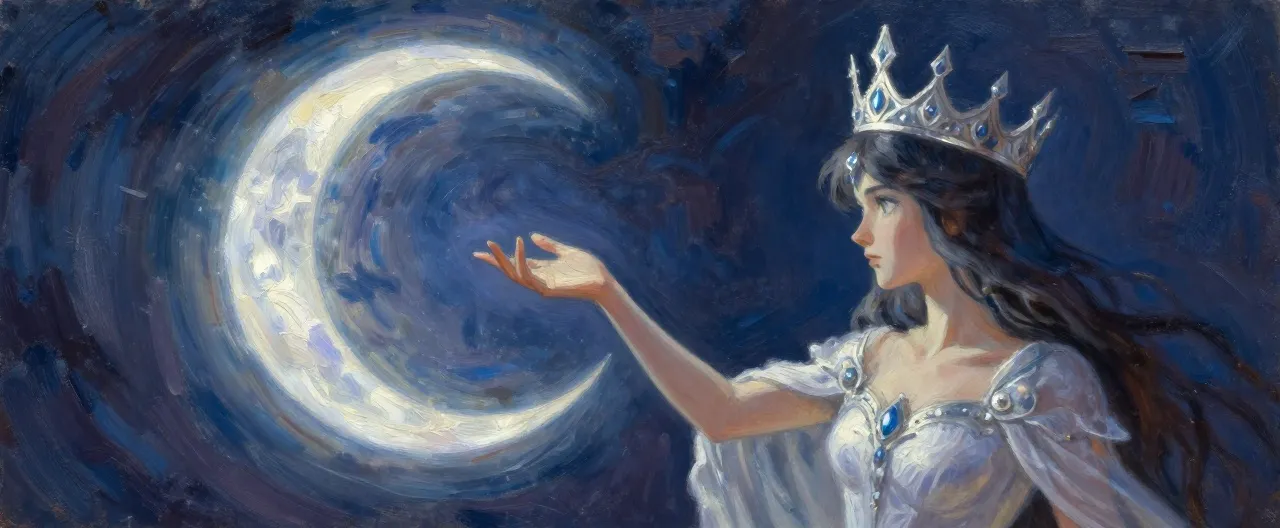 Crown of the Moon Princess
Completed
Act III - Throne of Night, after defeating Nyxara
True — by a creature of good alignment