The adventure ahead

Campaign Overview

The Ashen Road: Ironjaw to the Deadvein Deep

A frontier campaign for levels 1 to 11.

The Ashen Reach is a hard land of red mesas, salt flats and iron. At its heart stands Ironjaw Hold, a hillfort city of dark brick where the orcish clans keep the old roads open and the caravan masters pay in iron and silver. East of it the Ashen Road runs down through the Skullgate Bazaar and the Redstone Draw to Saltmarch Landing, where the salt flats meet a grey sea. Beyond the water lies Moonharbor, a warm arcaded city of shipwrights and merchants, and beyond that the Deadvein Highlands, where a mountain full of old mines looks down on the coast.

For three seasons the caravans have been burning. Raiders in red sashes strike the Ashen Road, take the iron, and vanish. The Ironjaw Wardens cannot spare the fighters to chase them, and the Moonharbor Council insists nothing is wrong. It is wrong. Somewhere between the hillfort and the mountain, a brotherhood is arming itself with stolen iron and something far worse dug out of the dark.

What the party does

  • Escort, investigate and fight along a road that runs from an orcish hillfort to a haunted mine.
  • Trace stolen iron through a bazaar, a burned canyon, a salt port, a harbor city and a pirate cay.
  • Choose between the Wardens, the Moonharbor Council, the smugglers and the miners — and live with the choices.
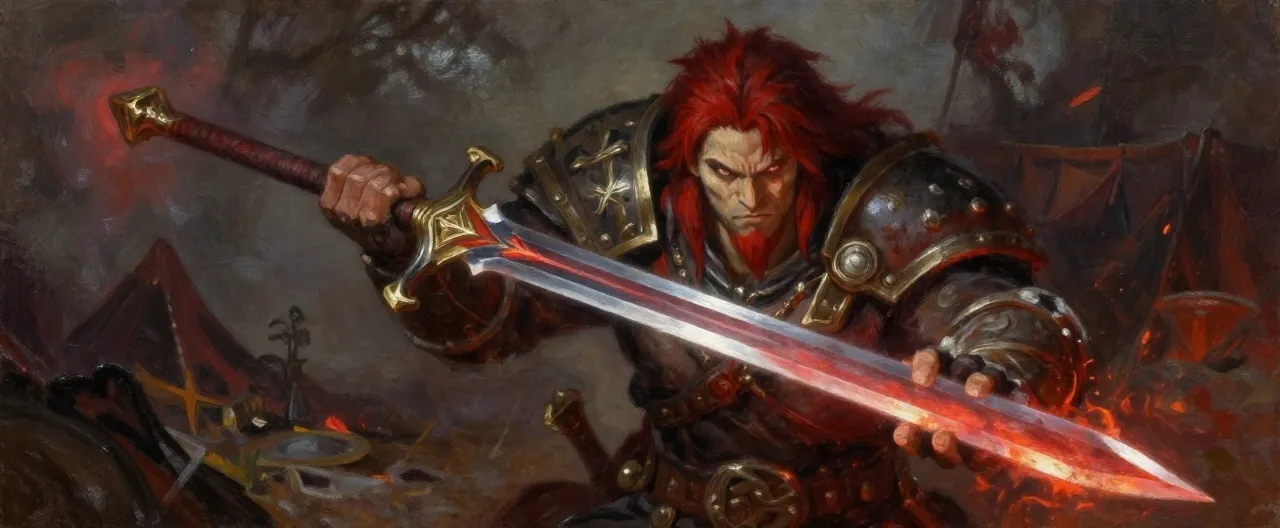
  • End it in the Deadvein Deep, where a man named Edric Vane is forging an army out of blackfire ore.

Tone

Gritty frontier adventure with a warm, loud, crowded middle act. Orcish hospitality, harbor politics, sea caves and mine shafts. The villains are patient, courteous and utterly ruthless.

Share with your players

Player Handout

The Ashen Road — Player Handout

The setup

You are in Ironjaw Hold, a hillfort city of dark brick and iron banners on the edge of the Ashen Reach. The clans here keep the caravan roads open, and lately the roads have been eating caravans whole. Three in a month, burned on the Ashen Road, cargo gone, drivers dead or missing. The Ironjaw Wardens have posted a call for sell-swords, scouts and anyone else who can ride east and come back with answers.

Your hook

Warden Gruma Ashfang is paying good iron for a company of four. She has a burned wagon in her yard, three survivors who will not look her in the eye, and no wardens to spare. She wants the raiders found, the stolen iron traced, and the name of whoever is paying them.

Tone and content

  • Gritty frontier, warm people. Orcish hospitality, crowded bazaars, salt wind, harbor politics, mine shafts and black water.
  • Investigation matters as much as fighting. Every act has a trail to follow; the fights come when you find what is at the end of it.
  • Your choices stick. The Wardens, the Moonharbor Council, the smugglers and the miners all remember what you do.

What you know about the Reach

  • Ironjaw Hold — the hillfort city. Orcish Wardens, iron, and the last honest road in the Reach.
  • The Skullgate Bazaar — where stolen things go to become legal.
  • Saltmarch Landing — the salt port. Everything that leaves the Reach by sea leaves from here.
  • Moonharbor — the arcaded city across the water. Shipwrights, merchants, and a Council that says nothing is wrong.
  • The Deadvein Highlands — old mines, a mountain that has been dug for three hundred years, and a village called Cinderfall that nobody has heard from in a while.

Bring

A character with a reason to be in a frontier city and a reason to care what happens to a road. A healer, a front-liner, someone who can talk, and someone who can pick a lock will all be useful.

Playable Module
Levels 1 11 Sessions 22–26 sessions of 3–4 hours each (Act I: 6–7, Act II: 8–9, Act III: 7–9).

The Ashen Road: Ironjaw to the Deadvein Deep

Behind the screen

DM Overview — The Ashen Road

Levels 1–11, four characters, 22–26 sessions of 3–4 hours.

The shape of the campaign

Three regions, three acts, eleven key locations, eleven scenes. The party crosses the Ashen Reach (Act I, levels 1–4), the Verdigris Coast (Act II, levels 5–8) and the Deadvein Highlands (Act III, levels 9–11). Each act ends with a milestone level-up.

What is really happening

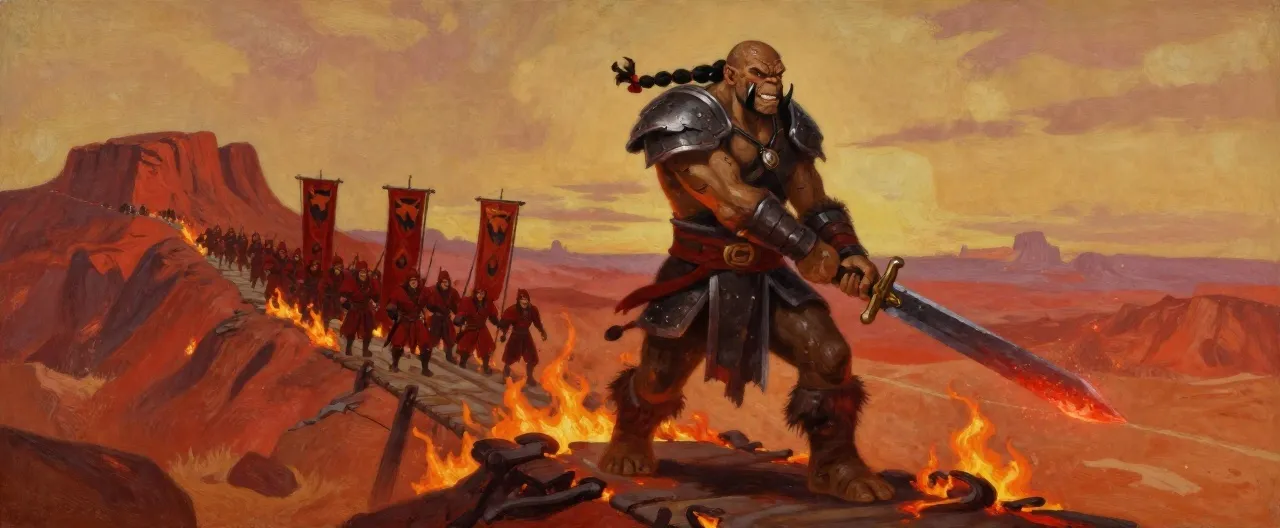
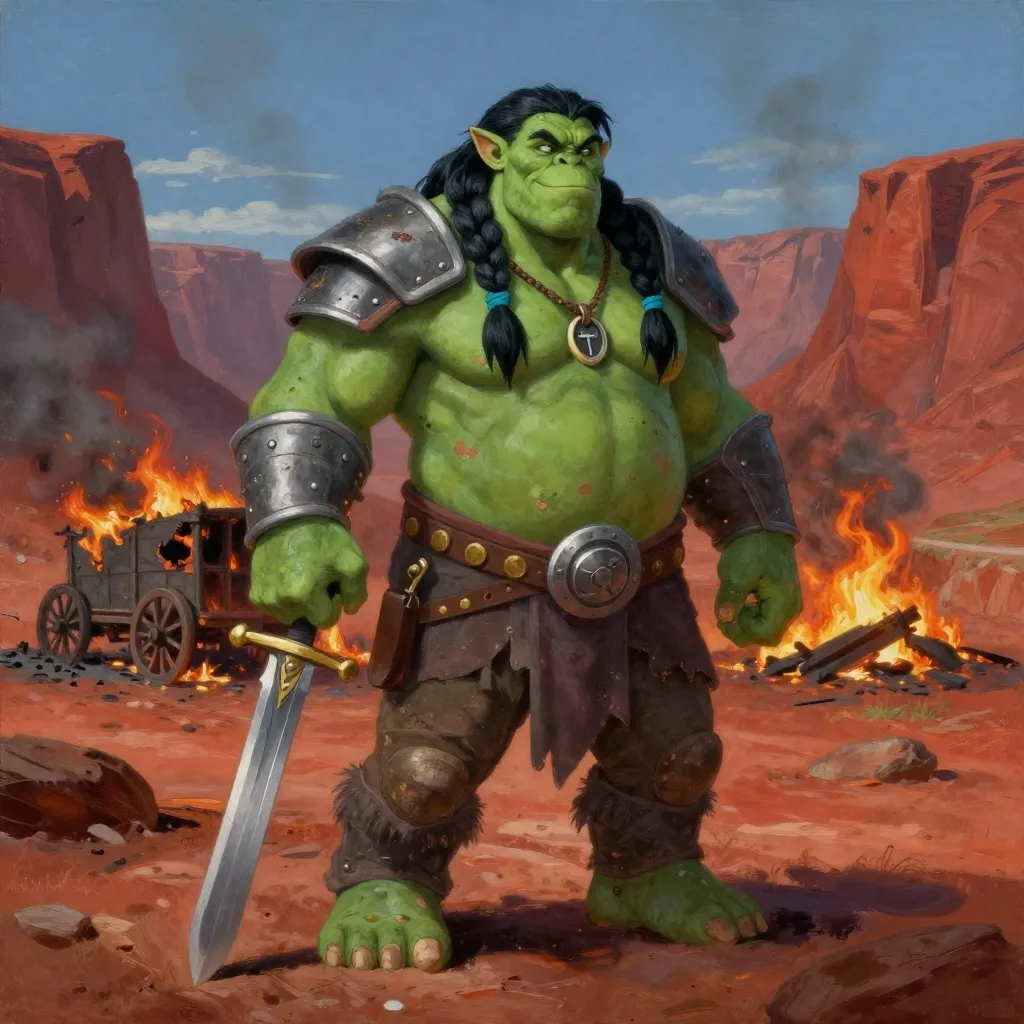
Edric Vane, the Red Hand was a Moonharbor shipping clerk whose family was ruined by the Council's tariffs. He spent ten years building the Redband Brotherhood out of every man the Reach threw away. Two years ago his agents found blackfire — an ore that burns without smoke and forges a blade that never dulls — in the abandoned Deadvein Deep. Vane's plan is simple and nearly complete: dig the seam with slave labor, refine it under Mother Sallow, arm three thousand men, and take Moonharbor by seizing the harbor chain. Gorek Blacktusk, an orc exiled from Ironjaw Hold, commands the field companies and burns the caravans to keep the Reach's eyes on the road instead of the mountain.

Clue flow (never let it stall)

  1. Burned caravan → red sashes, black-tusked orc, iron consigned to a Moonharbor chandlery (Ironjaw Hold).
  2. Fence and coded manifest → Saltmarch Landing, the Salt Ledger (Skullgate Bazaar).
  3. Raider camp orders signed G.B. → shipment before the new moon, prisoners for 'the deep works' (Redstone Draw).
  4. Salt Ledger office → Tace & Sons Shipwrights, Moonharbor; a foreman named Kael Dross (Saltmarch Landing).
  5. Guild double ledgers → the Deadvein Deep; Orrin Tace's son held by Mother Sallow (Moonharbor).
  6. Warehouse maps and Vane's letter → blackfire seam, Wrecker's Cay relay (Moonharbor Docks).
  7. Sea-cave codebook and prisoners → the mountain road, Thornwatch militia (Wrecker's Cay).
  8. Captured scout → Vane at the mine, Sallow refining (Thornwatch Camp).
  9. Gate stores of blackfire ingots → the deep works run day and night (Deadvein Gate).
  10. Poisoned well → blackfire as a weapon; Gran Odda's gallery (Cinderfall Hamlet).
  11. Kael Dross → the seam supports and the collapse (Deadvein Deep).

Failure states

  • The party ignores the road: Blacktusk burns Saltmarch Landing's warehouses; the Salt Ledger's cargo escapes and Act II starts with the party arriving in Moonharbor as unknown strangers, costing them the Council's help.
  • The party loses the Moonharbor ledgers: Orrin Tace is murdered by Redband agents and the mine maps must be taken from Wrecker's Cay instead.
  • Thornwatch falls: the militia is broken, the coast road is closed, and the party must reach the Deadvein Gate by Halden Grist's goat track with no allies — Act III becomes a stealth campaign.
  • Cinderfall's well is not cleansed: the miners will not guide the party; the deep must be entered through the gate's adit, straight into the Redband garrison.
  • The seam is not collapsed: the epilogue is a losing one — Vane's blackfire blades reach the coast and Moonharbor burns. The campaign can continue at level 12.

Pacing notes

Act I is a chase: three locations, fast, with one fight per location. Act II slows down — Moonharbor is a social act and should breathe; give the party a full session in the city before the docks. Act III is a war march: the gate, the village, the mine, each bigger than the last. Do not run two dungeon-style locations back to back; Cinderfall Hamlet exists to give the party a village to save between the gate and the deep.

Villain use

Blacktusk is the face the party meets first and should survive until the Deadvein Deep if possible. Sallow is heard of long before she is seen. Vane should not appear in person until the finale — his letters do the work. Nessa Crowe is a wildcard who can be bought, betrayed or allied with.

Adventure Hooks

Hook 01

Iron for Answers

Warden Gruma Ashfang of Ironjaw Hold is hiring sell-swords to find who burned three caravans on the Ashen Road. She pays in iron, offers a road token, and asks only that the party keep its word. This is the default opening hook and leads straight into the Warden's Hall scene.

Hook 02

The Missing Brother

Pell, a dock urchin in Saltmarch Landing, saw an older brother dragged off by red-sashed press-gangs. Brakka Thorn, a scout in the Redstone Draw, lost a brother the same way. Either can hire the party to follow the raiders east and find out where the taken are being sent.

Hook 03

A Debt in the Bazaar

Madri Voss, a fence in the Skullgate Bazaar, sold stolen iron to a Redband recruiter and now cannot sleep. She offers information and coin to anyone who will get her out of the bazaar alive, which puts the party on the Brotherhood's trail from the first hour of play.

Hook 04

The Book of the Drowned

Father Cadoc of Saltmarch Landing keeps a book of every ship that never came back. Nineteen of them were wrecked on Wreckers' Cay by a darkened lighthouse. He will pay in blessings and buried silver for someone to prove who darkened the light.

Hook 05

The Survey That Stopped

A scholar named Corvel went up the coast road two years ago to survey the old Deadvein workings and sent one letter home. His last line read: the ore here burns without smoke, and it should not. Anyone who wants to finish that survey can start by asking in Moonharbor.

Act Structure

Act I — Smoke Over Ironjaw

Recommended level: Levels 1–4

A burned caravan in Ironjaw Hold's yard starts a chase east. The party traces stolen iron through the Skullgate Bazaar, breaks a raider camp in the Redstone Draw, and follows the cargo to Saltmarch Landing, where they learn the iron is being shipped across the water to Moonharbor under a false consignment. The act ends with the party at sea, carrying proof that the Redband Brotherhood is arming itself with the Reach's own iron.

Objectives

  • Find out who burned the Warden's caravan and where the stolen iron went.
  • Trace the iron through the Skullgate Bazaar and identify its buyer.
  • Break the raider camp in the Redstone Draw and take its orders.
  • Stop or follow the Redband's shipment out of Saltmarch Landing.

The Burned Caravan

The Warden's Hall, a smoke-blackened longhouse above Ironjaw Hold's lower gate

Read aloud

The Warden's Hall smells of woodsmoke and wet leather. A burned wagon wheel leans against the wall, its spokes charred down to stubs. Gruma Ashfang stands over a table of maps with three survivors behind her, and none of the three will meet your eye. 'Three caravans this month,' she says. 'Three. I have two hundred wardens and four hundred miles of road. Sit down. I will pay in iron.'

Running this scene

Gruma Ashfang hires the party to trace the raiders. The survivors are a driver, a guard and a cook; the driver sold the caravan's route and is terrified of being found out. The raiders wore red sashes and were led by an orc with black tusks — Gorek Blacktusk, exiled from Ironjaw Hold three winters ago. The stolen cargo was iron ingots consigned to a Moonharbor chandlery. Gruma cannot spare wardens, so the party goes.

Checks
  • DC 12 Wisdom (Insight) on the driver reveals he is hiding something about the caravan's route.
  • DC 13 Charisma (Intimidation or Persuasion) gets the driver to admit he sold the route to a man in a red sash.
  • DC 14 Intelligence (Investigation) on the burned wagons finds a stamped crate-lid bearing a Moonharbor chandlery mark.
  • DC 10 Wisdom (Survival) on the road outside reads the raiders' trail heading east toward the Skullgate Bazaar.
Clues
  • The raiders wore red sashes and answered to an orc with black tusks.
  • The stolen cargo was iron ingots consigned to a Moonharbor chandlery.
  • The caravan's route was sold, not guessed — someone in Ironjaw Hold is talking to the raiders.
Where next
  • Gruma Ashfang points the party to the Skullgate Bazaar, where stolen iron is fenced.
  • Razzik Cogwhistle offers to guide them down through the bazaar's lower gate for a fee.

The Skullgate Ledger

Madri Voss's stall of salvaged locks, under the awnings of the Skullgate Bazaar's middle street

Read aloud

Madri Voss does not look up from the lock she is picking. 'I sell hinges,' she says. 'Sometimes a hinge is attached to a door. Sometimes a door is attached to a warehouse. I do not ask which.' Behind her, three streets of awnings and shouting climb toward the hillfort wall, and somewhere in the east row a man in a red sash is offering coin to a crowd.

Running this scene

Madri Voss fences goods but is not Brotherhood. She sold the ingots to Corvin Sash, a Redband recruiter, and is frightened of the consequences. Tessa Quill has a coded manifest and will help decode it if the party offers her an exit from the bazaar. The east row press-gang is three bandits and a scout; breaking it up earns the stallholders' goodwill and a discount on everything.

Checks
  • DC 15 Charisma (Persuasion), or DC 13 with a bribe of 50 gp, gets Madri Voss to name her buyer.
  • DC 14 Dexterity (Sleight of Hand) or DC 15 Intelligence (Investigation) lifts the coded manifest from the recruiter's satchel.
  • DC 15 Intelligence (Investigation) with Tessa Quill's help decodes the manifest: crates to Saltmarch Landing, consigned to the Salt Ledger.
  • DC 13 Charisma (Intimidation) scatters the press-gang without a fight; failure means three bandits and a scout attack.
Clues
  • The buyer signed as 'C. Sash' and paid in Moonharbor silver.
  • The manifest lists Saltmarch Landing as the transshipment port.
  • A Redband recruiter is offering coin to any dockhand who will sail south before the new moon.
Where next
  • The manifest's route runs east along the Redstone Draw toward Saltmarch Landing.
  • Hurgan Coalhand's caravan leaves at dawn and will take the party on as guards for free.

Redstone Draw

The dry canyon floor where the caravan burned, under the red mesa walls

Read aloud

Brakka Thorn crouches by a burned axle and does not look up. 'Four days old,' she says. 'Eight horses, two wagons, forty men. They went up into the rock.' She points at a cave mouth above the road, screened by scrub, and then at the ground. 'There is a boy in there. I have heard him.' The canyon walls hold the heat like an oven.

Running this scene

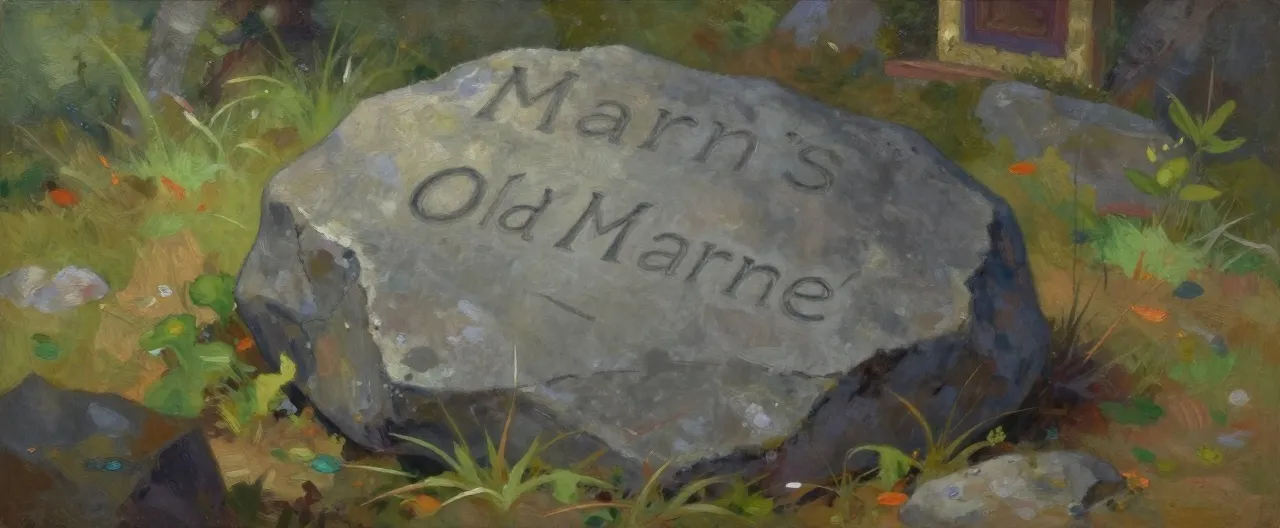
Brakka Thorn has tracked the raiders to the cave camp and wants the party's help taking it. The camp holds eight bandits, two scouts and a wounded prisoner — Pell's brother — who can be saved. Old Marn's shrine holds a cache of Redband orders signed 'G.B.' If the party approaches openly, the camp fights; if they use the hidden back exit, they can catch the raiders between two forces.

Checks
  • DC 13 Wisdom (Survival) follows the wagon ruts to the cave camp.
  • DC 15 Dexterity (Stealth) lets the party approach the camp unseen; failure means the bandits are ready.
  • DC 14 Wisdom (Medicine) stabilizes the wounded prisoner; DC 12 Charisma (Persuasion) gets him to talk.
  • DC 14 Intelligence (Investigation) finds the hidden back exit behind the camp's supply crates.
Clues
  • The orders are signed 'G.B.' and speak of a shipment due at Saltmarch Landing before the new moon.
  • The wounded prisoner says the black-tusked orc is Gorek Blacktusk, cast out of Ironjaw Hold three winters ago.
  • A tally-stick in the camp counts prisoners taken for 'the deep works'.
Where next
  • The orders name Saltmarch Landing; the party can ride the wagon road east.
  • Brakka Thorn will guide them to the coast if the camp is cleared, and Hurgan Coalhand's caravan is waiting at the canyon's mouth.

The Saltmarch Tide

The long stone quay of Saltmarch Landing, where the salt flats meet the sea

Read aloud

The tide is out and the salt flats shine like frost under a low moon. At the end of the quay, lanterns move around a warehouse with no name on it, and a ship with dark sails is taking on crates. Captain Ilsa Ren hands you a brass telescope without a word. 'That is the third loading this month,' she says. 'I have nine watchmen and two boats. Give me something I can take to the Council.'

Running this scene

The Salt Ledger loads at midnight onto Nessa Crowe's privateer. The party can seize the warehouse, stow away aboard the ship, or buy passage from Ilsa Ren. The warehouse office holds the Moonharbor consignee — Tace & Sons Shipwrights — and a letter mentioning 'the deep works' and a foreman named Kael Dross. Nessa Crowe is aboard and will not fight to the death over a cargo.

Checks
  • DC 14 Charisma (Persuasion) convinces Ilsa Ren to lend a harbor boat and two guards.
  • DC 15 Dexterity (Stealth) gets the party aboard the privateer unseen; DC 13 Strength (Athletics) to climb the anchor chain.
  • DC 16 Intelligence (Investigation) in the Salt Ledger's office finds the Moonharbor consignee and the letter naming Kael Dross.
  • DC 13 Dexterity (Thieves' Tools) opens the warehouse's seaward door without alerting the dock crew.
Clues
  • The Salt Ledger is a front; its clerk answers to a woman called Nessa Crowe.
  • The cargo is bound for the Tace & Sons shipyard in Moonharbor.
  • A letter in the office mentions 'the deep works' and a foreman named Kael Dross.
Where next
  • The privateer sails for Moonharbor; the party arrives in the city's harbor.
  • Ilsa Ren sends word ahead to Magistra Selene Dorn, giving the party an introduction in Moonharbor.

Milestone: The party reaches level 5 when they leave Saltmarch Landing with proof of the Redband's shipping route — whether they seized the Salt Ledger's cargo, stowed away on Nessa Crowe's privateer, or bought passage with Ilsa Ren's help.

Act II — The Redband Tide

Recommended level: Levels 5–8

In Moonharbor the party finds a city that has been quietly arming its own enemy. They expose the Redband's agent inside the shipwrights' guild, raid a warehouse on the north mole for the mine maps, break the Brotherhood's coastal relay at Wrecker's Cay, and hold Thornwatch Camp against Gorek Blacktusk's counterattack. The act ends with the coast closed to the Redband and the militia marching on the Deadvein Gate.

Objectives

  • Expose the Redband's agent inside the Moonharbor shipwrights' guild.
  • Seize the warehouse ledgers and the mine maps from the north mole.
  • Free the prisoners held in the sea-cave at Wrecker's Cay and take the signal codes.
  • Hold Thornwatch Camp against the Redband counterattack and win the militia's march.

The Mask of Moonharbor

The council chamber of Moonharbor's arcaded hall, above the harbor

Read aloud

The council chamber is cool and full of light, and nine magistrates are arguing about tariffs. Magistra Selene Dorn listens to all of it with her hands folded, and when the room empties she does not get up. 'You came from Saltmarch,' she says. 'So you already know. I have three colleagues who are lying to me and one guildmaster who cannot look at me. Tell me what you found, and I will tell you what I can do about it.'

Running this scene

Selene Dorn is honest and needs proof, not accusations. Orrin Tace is being blackmailed — his son is held by Mother Sallow — and will break if pressed with evidence. Councilor Halvern is bought outright and will try to have the party discredited. Lira Fen treated a Redband courier's blackfire burn and can identify the residue. The scene is a social investigation with a hard deadline: the Council votes on the harbor chain in three days.

Checks
  • DC 15 Wisdom (Insight) catches Orrin Tace lying about the manifests.
  • DC 16 Intelligence (Investigation) in the guild's counting-house finds the double ledgers.
  • DC 14 Charisma (Persuasion) with Lira Fen gets her to admit she treated a Redband courier's wound.
  • DC 15 Charisma (Deception) or DC 16 Intelligence (Investigation) exposes Councilor Halvern's payments in front of the Council.
Clues
  • The double ledgers show iron shipped to a place called the Deadvein Deep.
  • Orrin Tace's son was taken by a woman the Redband calls Mother Sallow.
  • Councilor Halvern has been paid in Moonharbor silver that came from the city's own tax chest.
Where next
  • The ledgers point to the Moonharbor Docks and a warehouse on the north mole.
  • Bram Holt, the dockmaster, knows which warehouse was leased last month and will meet the party at the mole.

Night on the North Mole

The north mole warehouse row, under the harbor's arcade lamps

Read aloud

The north mole at midnight is a row of lanterns and black water. The warehouse at the end has a crane on its roof and a tide-gate under it, and there are men on the loading dock who are not dockworkers. Bram Holt hands you a chained ledger without being asked. 'Number nineteen,' he says. 'Paid a year in advance. I should have asked.'

Running this scene

The warehouse is guarded by six bandits, two scouts and a Redband veteran. Kessa Tide can get the party in through the tide-gate at low tide; Bram Holt can get them the lease and the crane schedule. The office holds the mine maps and a letter from Edric Vane naming the blackfire seam and ordering the coast road held. If the alarm is raised, the mole's Guard arrives in ten rounds — and the Guard has been told the warehouse is legitimate.

Checks
  • DC 15 Dexterity (Stealth) to cross the mole unseen; the guards are alert after the Saltmarch news.
  • DC 14 Strength (Athletics) to force the tide-gate; DC 16 Dexterity (Thieves' Tools) to pick it quietly.
  • DC 15 Intelligence (Investigation) in the warehouse office finds the mine maps and Vane's letter.
  • DC 13 Charisma (Deception) with the mole's Guard convinces them the party is acting on Council authority.
Clues
  • The maps mark a seam of blackfire ore beneath the Deadvein Deep.
  • Vane's letter calls the mine 'the anvil of the Reach' and orders the coast road held at any cost.
  • A shipping note lists prisoners sent to the mine from Wrecker's Cay.
Where next
  • The letter names Wrecker's Cay as the Brotherhood's coastal relay.
  • Kessa Tide will sail the party there if the warehouse is taken and her cut is paid.

The Wreckers' Light

The shingle beach and sea-cave beneath Wrecker's Cay's leaning lighthouse

Read aloud

Neddy Lamp meets you on the shingle with a lantern he does not light. 'I am supposed to darken it,' he says. 'When the light goes out, the ships come in and the rocks take them, and the men in red take whoever washes up.' He points at the western beach, where a cave mouth opens in the rock. 'There are eleven of them in there. I have counted every night. I am sorry.'

Running this scene

The cave holds eleven prisoners and a garrison of eight bandits, two scouts and a cultist of Sallow's. Mira Shoal knows the eastern mouth and will guide the party through it at low tide for lamp oil and news of her sister. The prisoners will not flee without a leader — one of them, a Thornwatch fisherman, can be rallied with a DC 13 Charisma check. The office holds the signal codebook.

Checks
  • DC 14 Wisdom (Perception) spots the cave's eastern mouth at low tide.
  • DC 15 Charisma (Intimidation) or a fight breaks the garrison; the prisoners will not flee without a leader.
  • DC 13 Charisma (Persuasion) rallies the prisoners behind the Thornwatch fisherman.
  • DC 13 Intelligence (Investigation) finds the signal codebook in the cave's office.
Clues
  • The codebook lets the party pass Redband signals on the coast road and at the Deadvein Gate.
  • A prisoner says Mother Sallow takes the strongest captives up to the deep works.
  • Neddy Lamp saw a black-tusked orc land at the cay a month ago with forty fighters.
Where next
  • The freed prisoners know the mountain road to the Deadvein Gate.
  • Sergeant Dara Vint's militia camp at Thornwatch is a day's march inland and will take the party in.

The Stand at Thornwatch

The palisade and watchtower of Thornwatch Camp, on the last coastal ridge

Read aloud

Sergeant Dara Vint does not offer you a seat. 'You came from the cay,' she says. 'That means the Brotherhood knows where my camp is, and that means they are coming tonight.' She taps the palisade with her knuckles. 'Forty farmers. Three crossbows. One bell. If you have a better plan than dying on this ridge, I would like to hear it now.'

Running this scene

Gorek Blacktusk leads the assault personally with a company of bandits and scouts, in three waves. The party must hold the palisade. If they have the signal codebook from Wrecker's Cay, they can turn one wave aside with a DC 13 Intelligence (Investigation) check. Healer Om can keep the militia standing between waves. Blacktusk withdraws if his company breaks; he does not want to die on a ridge.

Checks
  • DC 14 Charisma (Persuasion) rallies the militia; DC 16 if the party has not freed the cay's prisoners.
  • DC 13 Intelligence (Investigation) with the codebook turns a Redband scout company away.
  • DC 15 Strength (Athletics) or DC 14 Dexterity (Acrobatics) to hold the breach in the palisade.
  • DC 14 Wisdom (Medicine) with Healer Om keeps a fallen militiaman alive between waves.
Clues
  • Gorek Blacktusk fights with a blackfire-forged blade that burns without smoke.
  • A captured scout says Vane is at the mine and Sallow is refining the ore.
  • The militia will march on the Deadvein Gate if Thornwatch holds.
Where next
  • With the coast held, the militia marches on the Deadvein Gate.
  • The signal codes let the party approach the gate unchallenged.

Milestone: The party reaches level 9 when Thornwatch holds and the militia marches on the Deadvein Gate — or, if Thornwatch falls, when they reach the Deadvein Gate by Halden Grist's goat track with the coast lost behind them.

Act III — The Deadvein Deep

Recommended level: Levels 9–11

The party breaks the Deadvein Gate with the Ironjaw Wardens, saves Cinderfall Hamlet from Mother Sallow's poisoned well, and descends through Gran Odda's old gallery into the deep works. There they face Edric Vane, Gorek Blacktusk and Mother Sallow on the refining floor and collapse the blackfire seam before it can be forged into an army's worth of blades.

Objectives

  • Break the Redband pickets at the Deadvein Gate and open the pass for the militia.
  • Cleanse Cinderfall Hamlet's well and rally the miners.
  • Descend through the old gallery into the deep works.
  • Defeat Edric Vane and his lieutenants and collapse the blackfire seam.

The Deadvein Gate

The switchback pass and iron gate above the treeline, where the Deadvein's upper adit opens

Read aloud

Warden Skarn stands at the last bend before the gate with twenty wardens behind him and the wind pulling at his iron coat. Above you the watchpost squats on its shoulder of rock, and the gate below it is three inches of iron on oak. 'I can take the gate,' Skarn says. 'I cannot take it and hold the pass. That is your work.' Somewhere below, a bell is ringing in Cinderfall Hamlet.

Running this scene

The gate is held by eight Redband veterans, four scouts and a captain. Warden Skarn's wardens will assault the gate frontally while the party takes the watchpost. Halden Grist knows the goat track around the eastern shoulder. If the party has the signal codebook, they can open the gate from within with a DC 14 Charisma (Deception) check. The gate's stores hold blackfire ingots stamped for Moonharbor — evidence that ties the whole campaign together.

Checks
  • DC 15 Wisdom (Survival) finds Halden Grist's goat track around the gate.
  • DC 14 Charisma (Persuasion) or the signal codebook gets the gate opened from within.
  • DC 16 Strength (Athletics) to force the gate's winch; DC 15 Dexterity (Thieves' Tools) to jam it open.
  • DC 14 Dexterity (Stealth) to take the watchpost from behind before the alarm is raised.
Clues
  • The gate's stores are full of blackfire ingots stamped for Moonharbor.
  • A dying Redband veteran says the deep works run day and night.
  • The goat track leads down to Cinderfall Hamlet.
Where next
  • The pass opens onto Cinderfall Hamlet, the mining village below the mine.
  • Warden Skarn's wardens will hold the gate while the party goes down.

The Water of Cinderfall

The village well and the flooded lower gallery of Cinderfall Hamlet

Read aloud

The well in the middle of Cinderfall is covered with boards and a warning rope. Mayor Essa Crane stands beside it with a ledger under her arm and a bell rope in her hand. 'Three children this week,' she says. 'The water tastes of metal and the ones who drink it get slow. We have hauled water from the upper stream for a month and the stream is going bad too.' She looks at the mountain. 'They are poisoning us to make us leave. I will not leave.'

Running this scene

Sallow has poisoned the well with blackfire residue to break the village. Bim Sprocket can build a filter with a pump, charcoal and copper — the copper can be salvaged from the burned houses. Gran Odda knows the old gallery that reaches the deep works and will draw it for the party. Redband press-gangs are collecting miners from the upper galleries; a fight there is a chance to free several villagers. If the well is cleansed, the miners will follow the party into the deep.

Checks
  • DC 15 Intelligence (Arcana or Alchemist's Supplies) with Bim Sprocket neutralizes the blackfire residue.
  • DC 14 Wisdom (Medicine) treats the poisoned villagers; each success saves a family.
  • DC 13 Charisma (Persuasion) with Gran Odda gets the old gallery's map.
  • DC 14 Wisdom (Perception) spots the press-gang's approach before it reaches the village.
Clues
  • The poison is blackfire dissolved in water — Sallow is testing it as a weapon.
  • Gran Odda's gallery comes out behind the deep works' refining floor.
  • The press-gangs answer to Mother Sallow, not to Vane.
Where next
  • Gran Odda's gallery leads down into the Deadvein Deep.
  • The miners will follow the party if the well is cleansed.

The Deadvein Deep

The refining floor and the blackfire seam at the bottom of the Deadvein Deep

Read aloud

The refining floor is a red-lit cavern of iron rails and timber props, and the seam runs through the far wall like a wound that will not close. Edric Vane stands at the edge of it with a sword in his hand and no expression at all. 'You have come a long way,' he says, 'for a road.' Behind him, Mother Sallow is pouring something into a channel, and Gorek Blacktusk is smiling with his black tusks bared. Kael Dross, chalk still tied to his wrist, whispers: 'Four supports. The fourth one brings the roof down.'

Running this scene

Vane fights beside Blacktusk and Sallow. Blacktusk charges the strongest fighter; Sallow uses the refining channels, fire and fumes to split the party; Vane duels whoever is left and retreats toward the seam at half hit points, threatening to fire the charges himself. Kael Dross knows the four supports — setting and lighting charges takes a DC 15 Dexterity (Thieves' Tools) or Strength (Athletics) check per support, under fire. If the party frees the slave pens first, the prisoners can carry charges and the checks are made with advantage.

Checks
  • DC 16 Intelligence (Investigation) or Wisdom (Perception) finds the four seam supports.
  • DC 15 Dexterity (Thieves' Tools) or Strength (Athletics) sets and lights each charge under fire.
  • DC 17 Charisma (Intimidation) can break the nerve of Vane's Redband guard, costing him his screen.
  • DC 15 Constitution saving throws against Sallow's alchemical fumes and blackfire heat.
Clues
  • Vane's plan is to forge blackfire blades for an army and take Moonharbor by the harbor chain.
  • Sallow's notes show the blackfire is unstable and will consume the mountain if the seam is not collapsed.
  • Kael Dross knows a fourth support that will bring the whole refining floor down.
Where next
  • The campaign ends with the seam collapsed and the survivors climbing out through Gran Odda's gallery.
  • If Vane escapes, the epilogue seeds a return in the Ashen Reach.

Milestone: The party reaches level 11 when they enter the Deadvein Deep's refining floor. The campaign ends when the seam collapses.

Monsters & Enemies

Cinder Ash-Hound Cinder Ash-Hound Completed · CR 1/2 · Beast

Lean ash-grey jackal-like hound with ember-red eyes and a cinder-flecked coat, throat glowing faintly as it growls, prowling a red rock can…

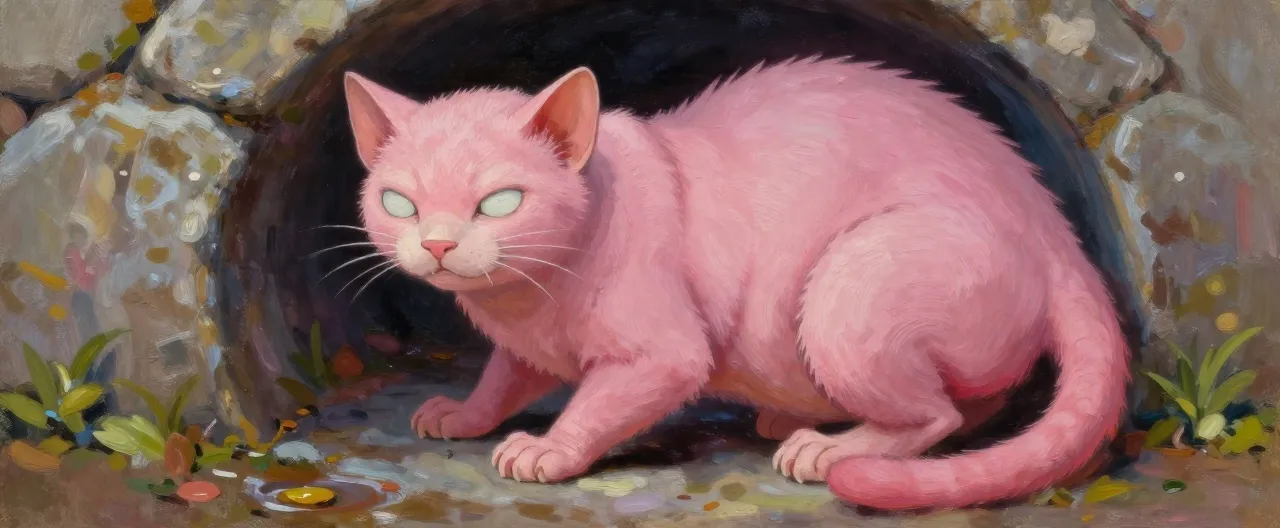
Drain Gnaw Drain Gnaw Completed · CR 1/4 · Monstrosity

A cat-sized hairless pink-grey burrower with milky blind eyes, chisel teeth, and long clawed forelimbs, crouched in a damp stone drain.

Gallows Gull Gallows Gull Completed · CR 1/4 · Beast

An enormous salt-crusted gull with a hooked yellow beak, ragged grey-white wings wider than a person is tall, and a screaming, rusty-hinged…

Generated monster placeholder Salt Husk Completed · CR 1 · Undead

A drowned sailor crusted white with salt crystals, clothes stiff as board, empty eye sockets, mouth packed with salt, shambling from a floo…

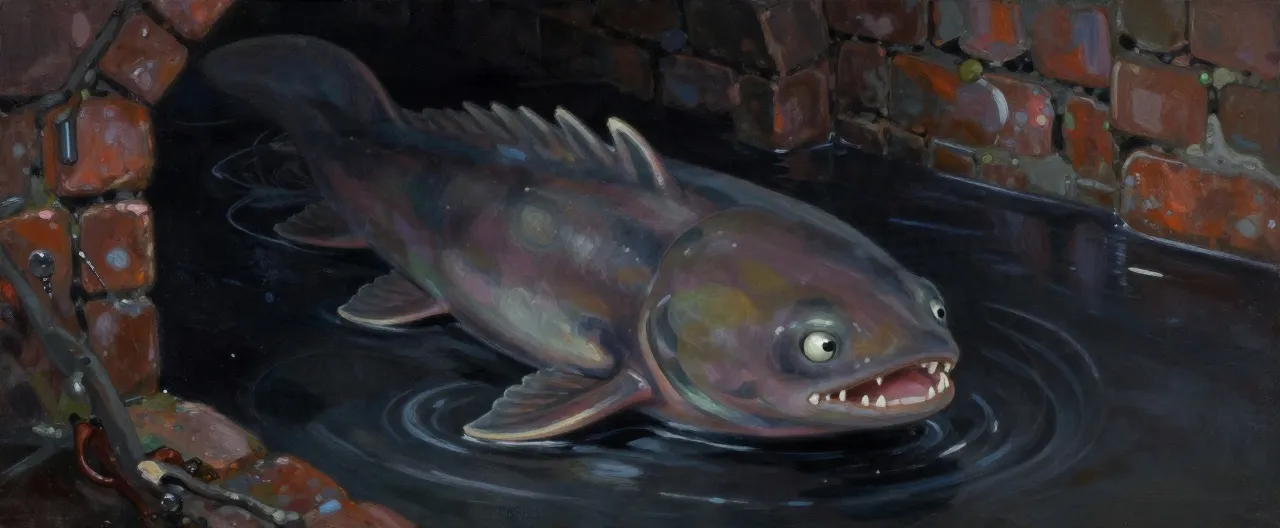
Brine Lurker Brine Lurker Completed · CR 2 · Aberration

Pale eyeless eel-bodied predator with a round lamprey mouth and six hooked fins, lurking beneath black water in a flooded brick cellar, onl…

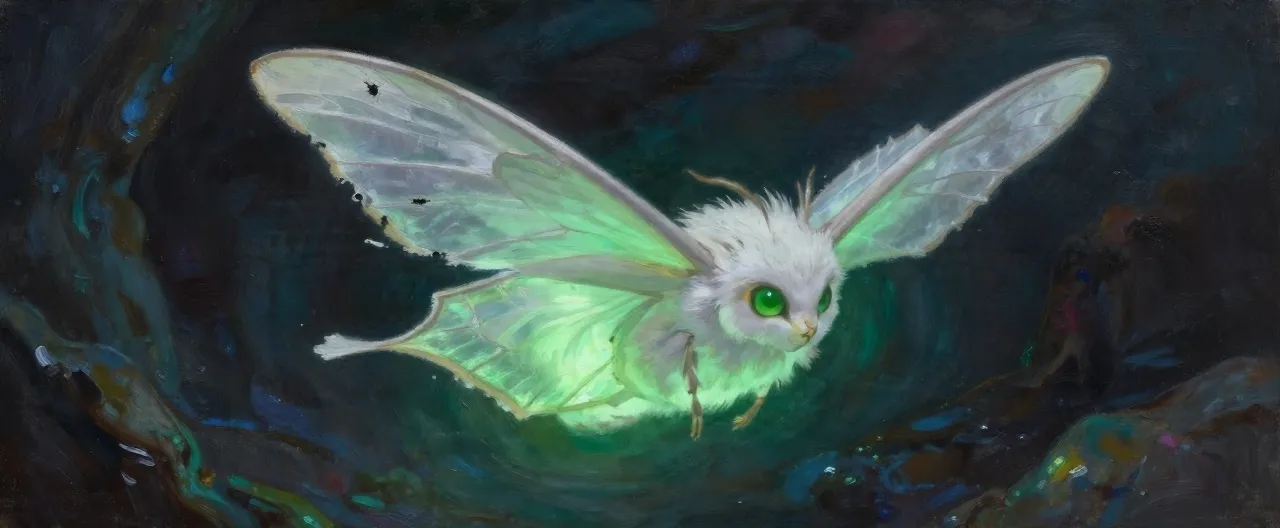
Wrecklight Moth Wrecklight Moth Completed · CR 1 · Monstrosity

A pale, cat-sized moth with ragged white wings and a lantern-like abdomen glowing sickly green-white, hovering in a dark sea cave above wet…

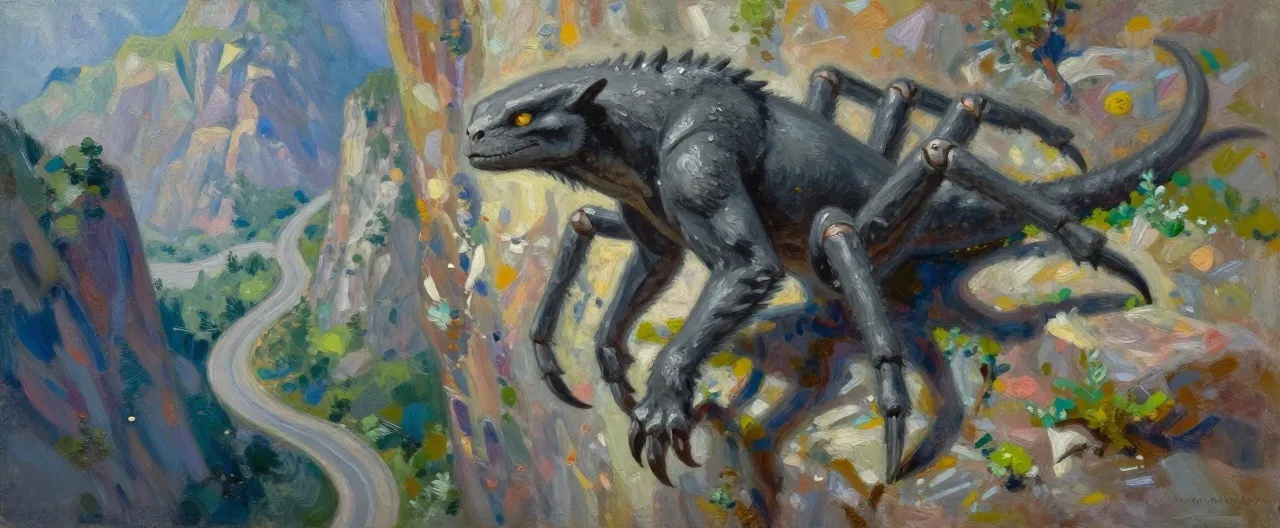
Scree Stalker Scree Stalker Completed · CR 3 · Beast

A slate-grey, six-legged mountain predator with a flat wedge-shaped head, piton-like claws, and hide the exact colour of wet rock, clinging…

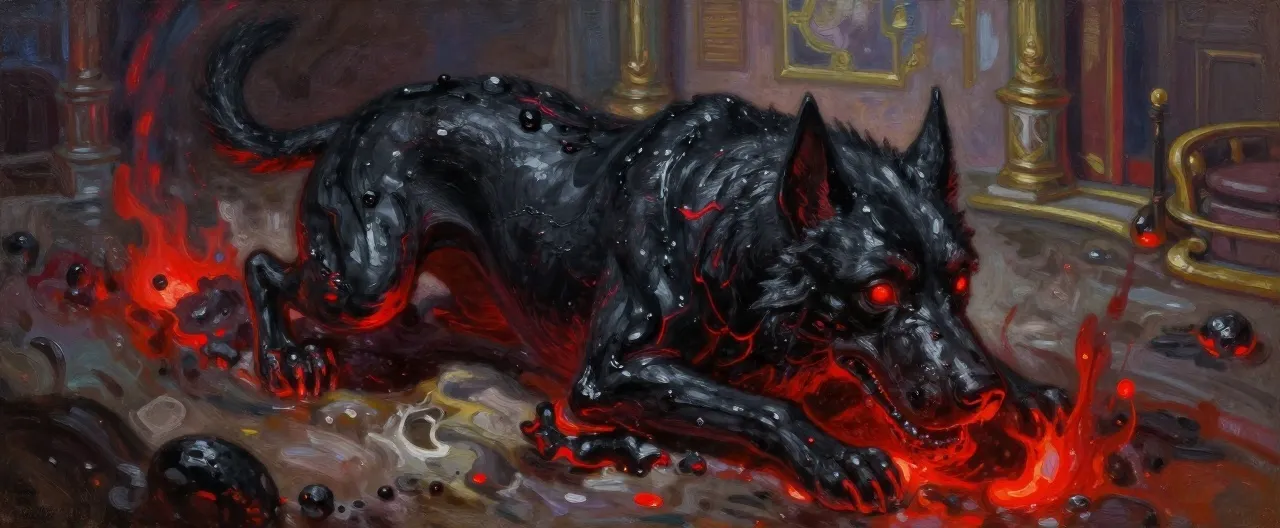
Blackfire Slagling Blackfire Slagling Completed · CR 3 · Elemental

A dog-sized crawling clot of black ore and cooling slag veined with red light, hissing faintly atop a trail of hot cinders in a flooded, so…

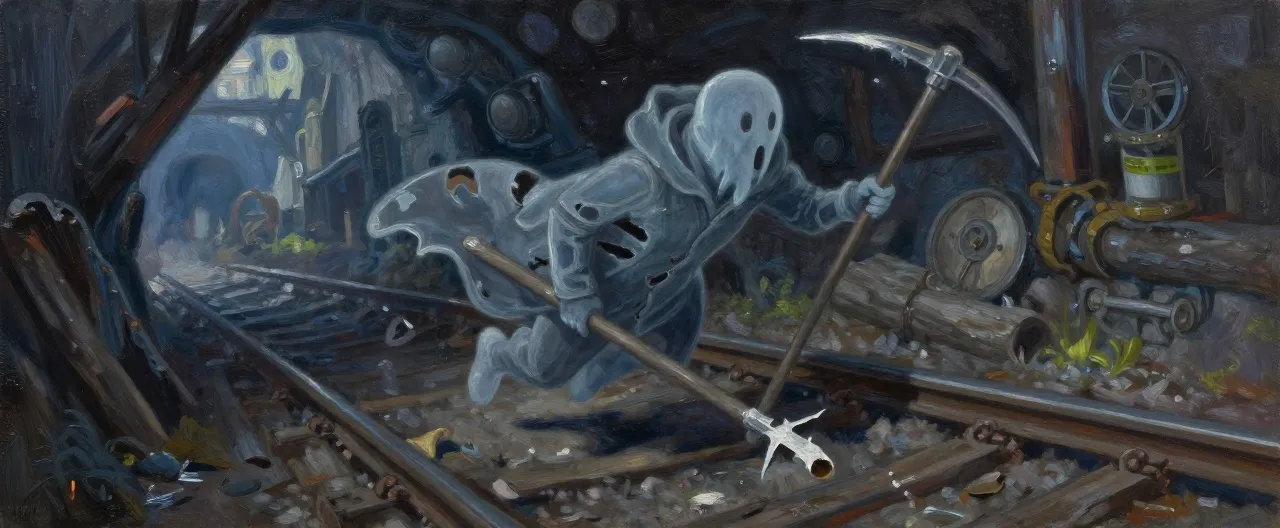
Tramway Shade Tramway Shade Completed · CR 4 · Undead

Translucent grey-blue miner ghost in a rotted coat, drifting above old tram rails with a broken pick, moaning amid damp dark mine timbers.

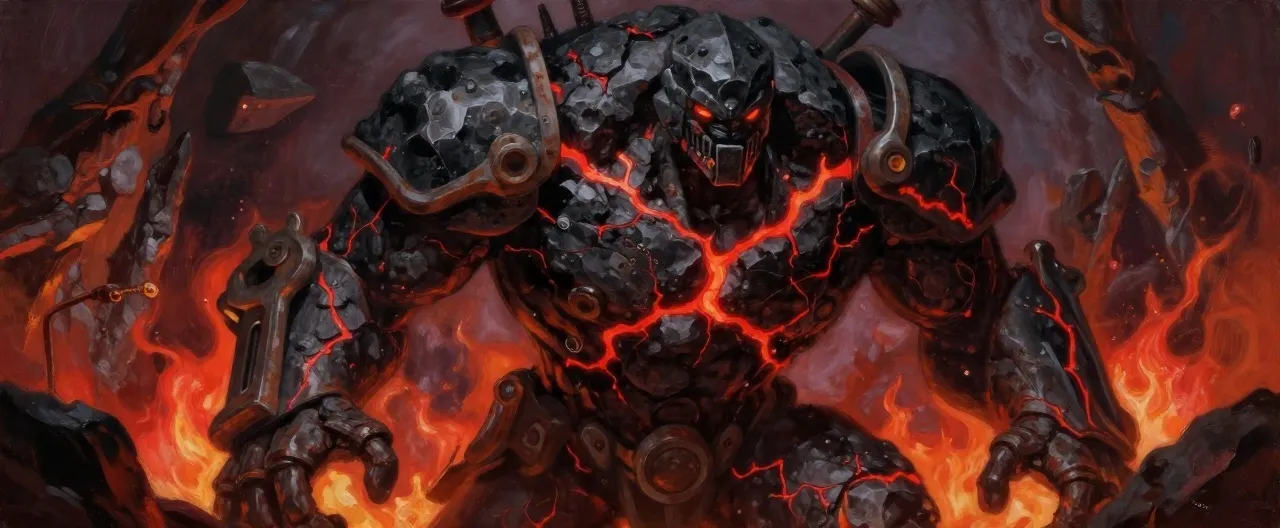
Seam Vein Wretch Seam Vein Wretch Completed · CR 6 · Elemental

A hulking humanoid mass of blackfire ore, fused rock, and rusted miner tools, with glowing red cracks and a forge-stoked glow, standing in …

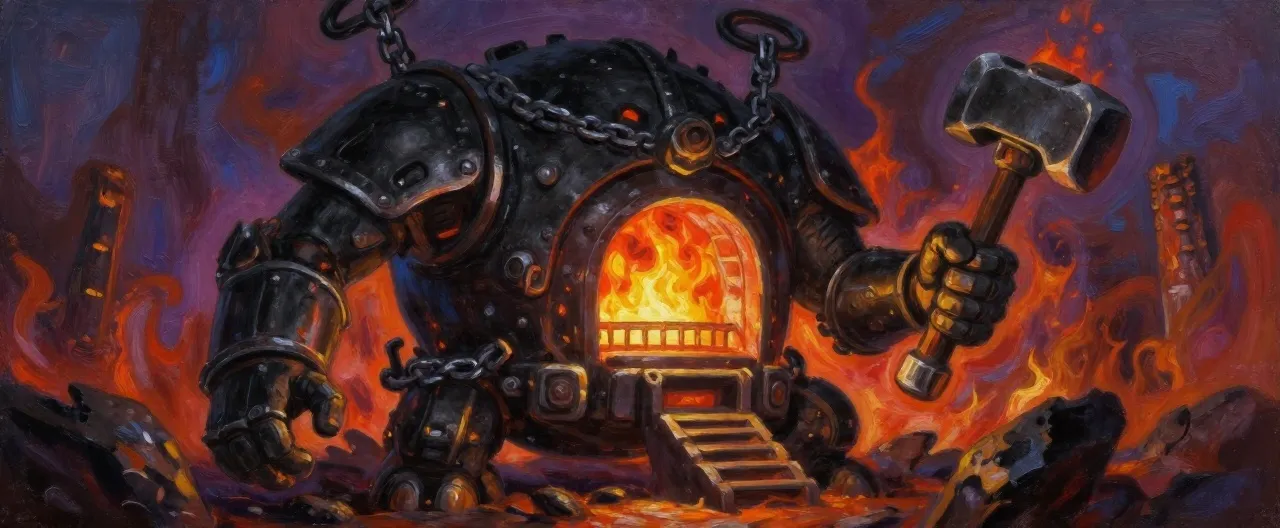
Slagbound Sentinel Slagbound Sentinel Completed · CR 7 · Construct

A squat four-armed construct of blackfire ingots, chain, and cooled slag, with a glowing furnace grate for a chest and a hammer-head fist, …

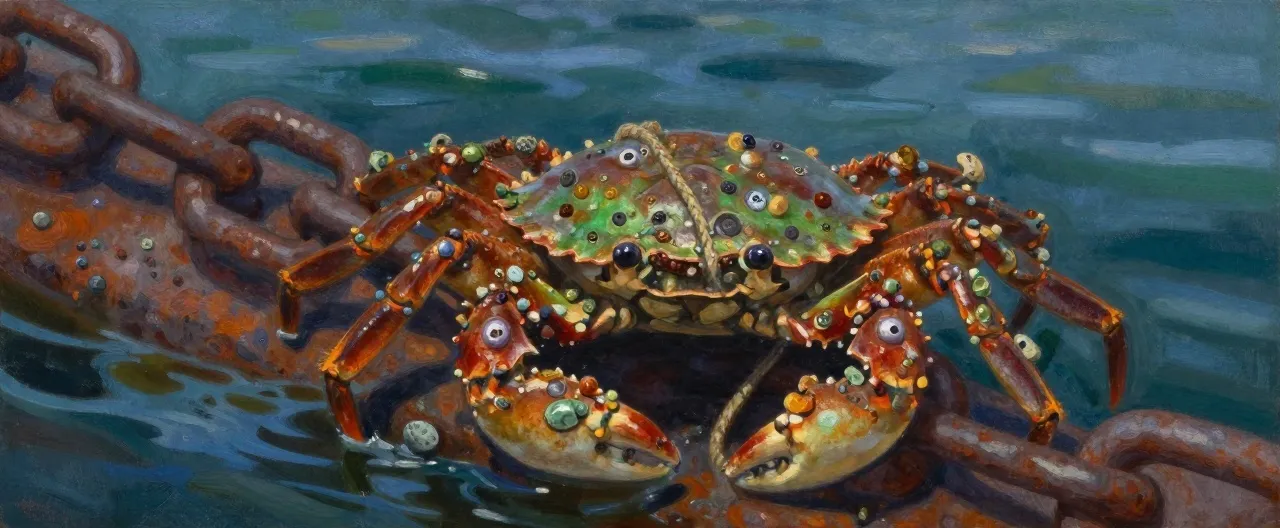
Chainline Crab Chainline Crab Completed · CR 1/2 · Beast

A hound-sized crab encrusted with barnacles, green copper and old rope on its shell, clinging to a rusted harbor chain above dark water.

Villain Plans

Edric Vane, the Red Hand Character Sheet

BBEG — founder and master of the Redband Brotherhood

Motivation

Vane's father was a Moonharbor shipping clerk who was ruined by a Council tariff and died in a debtor's cell. Edric spent ten years learning exactly how the Reach's money moves, then built an army out of everyone the Reach discarded. He does not want revenge on a person; he wants the Council's world replaced with one where a man's worth is what he can take. The blackfire seam under the Deadvein Deep is the anvil on which he intends to forge that world.

Personality

Courteous, quiet, unhurried. He offers wine before he offers violence and thanks a man before he has him killed. He never raises his voice and never repeats an order. He is genuinely interested in the party as people and will remember their names, their families and their weaknesses.

Resources

  • The Redband Brotherhood: roughly three thousand men in companies across the Reach and the coast
  • The Deadvein Deep: a fortified mine with slave pens, a refining floor and a blackfire seam
  • Mother Sallow's alchemy and Gorek Blacktusk's field companies
  • Bought councilors and blackmailed guildmasters in Moonharbor
  • Nessa Crowe's privateer fleet and the Salt Ledger warehouse front
  • A network of Redband couriers who move letters under the mark of a single red hand

Battle Plan

Vane does not fight until he must. He lets Blacktusk and Sallow absorb the party's opening, uses the refining floor's cover and catwalks, and duels the party's strongest fighter one at a time while his guard screen holds the others. If reduced below half his hit points he retreats toward the seam and threatens to fire the charges himself, forcing the party to choose between stopping him and stopping the collapse. He never surrenders; he offers terms instead.

Defeat or Redemption

Vane can be killed, taken alive for a Moonharbor trial that will be a circus, or — if the party has proven the Council's corruption to him — persuaded to give up the seam in exchange for the Council's public confession. Redemption is narrow but real: he wants the truth told more than he wants the city burned.

Gorek Blacktusk Character Sheet

Lieutenant — commander of the Redband's field companies

Motivation

Gorek was a Warden of Ironjaw Hold until he was exiled for killing a caravan master who had cheated his clan. He believes the Wardens chose coin over blood, and he has spent three winters proving that the road belongs to whoever is willing to burn it. He follows Vane because Vane is the first man to give him an army instead of a lecture.

Personality

Loud, generous, quick to laugh and quicker to anger. He respects strength and despises cleverness. He remembers every man who ever did him a kindness and every man who ever did him a slight, and he will mention both at length.

Resources

  • Three field companies of Redband bandits and scouts
  • A blackfire-forged greatsword taken from Sallow's first forging
  • The burned caravan routes of the Ashen Road and the coast road
  • A personal guard of a dozen veterans who have followed him since the exile

Battle Plan

Gorek charges the biggest target and stays on it. He uses his blackfire blade to set terrain alight and splits the party by forcing them out of cover. He fights to the death in front of his men but will withdraw if his company is broken and he is alone — he wants to be beaten by a worthy enemy, not executed by a mob.

Defeat or Redemption

Gorek can be killed, or beaten and spared, in which case he will tell the party everything he knows about the deep works out of sheer contempt for Vane's bookkeeping. He cannot be turned against Vane while Vane still holds the army, but he can be made to stand aside.

Mother Sallow Character Sheet

Lieutenant — alchemist and overseer of the deep works

Motivation

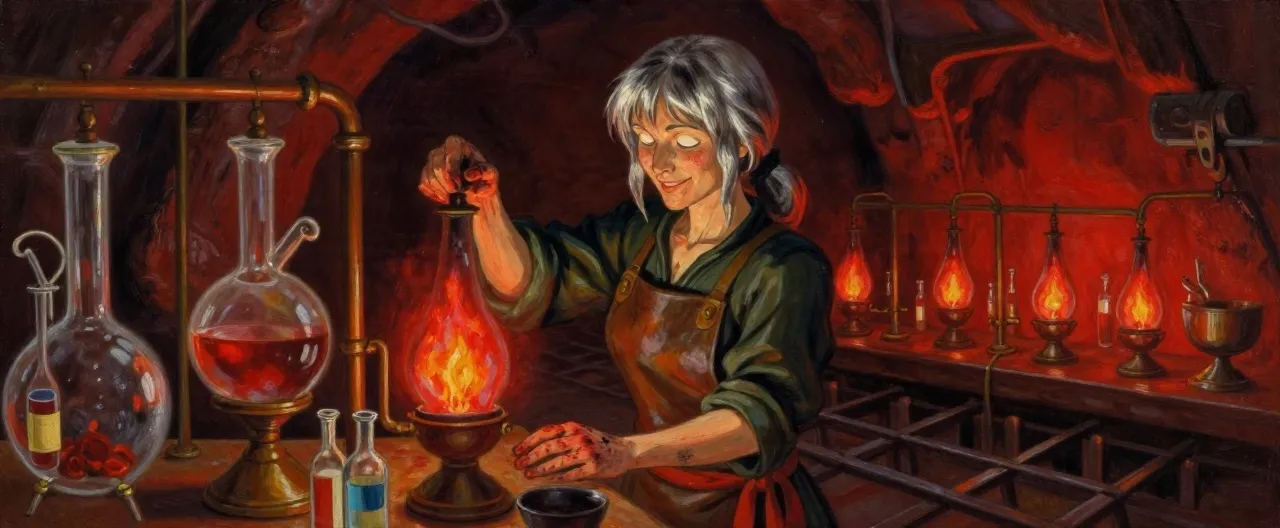
Sallow was a Moonharbor apothecary struck off for experimenting on patients. Vane gave her a mine, an unlimited supply of prisoners and a substance nobody had ever refined. She wants to know what blackfire does to a living body, and she is very close to finding out.

Personality

Warm, motherly, utterly detached. She calls the prisoners her children and the party her guests. She talks about pain the way other people talk about weather. She is genuinely delighted by clever questions.

Resources

  • The deep works' refining floor, slave pens and alchemical laboratory
  • A dozen Redband cultists who believe she can cure death
  • Blackfire residue, poison, and a working knowledge of every alchemical reagent in the Reach
  • The blackfire-forged weapons she has already made for Blacktusk's officers

Battle Plan

Sallow does not close. She uses the refining floor's channels, fire and fumes, forcing Constitution saves and splitting the party with alchemical barriers. She keeps two cultists between herself and the front line and drinks a blackfire tincture at half hit points that makes her faster and reckless. She will not destroy her own laboratory unless she is certain she is losing.

Defeat or Redemption

Sallow can be killed, or captured and made to talk — she will trade her notes for her life without hesitation. There is no redemption; she is not interested in one. Her notes are the key to cleansing Cinderfall's well if the party has not already done so.

Nessa Crowe, the Harbor Wraith Character Sheet

Rival — privateer captain in the Redband's pay

Motivation

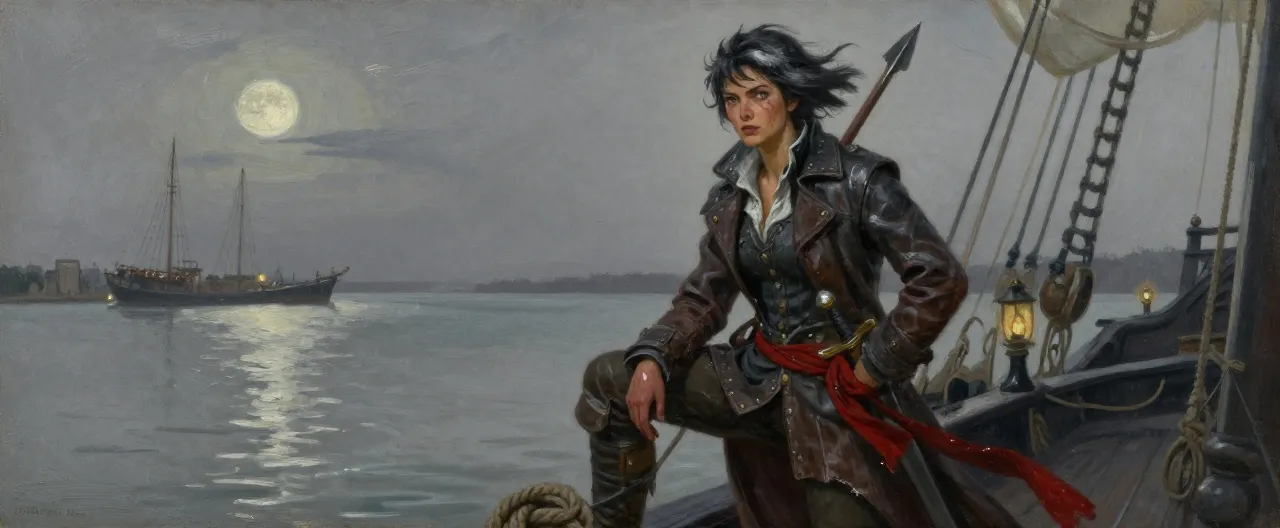
Nessa runs the fastest ship on the Verdigris Coast and owes Vane a debt she cannot pay in coin. She does not care about blackfire or the Reach; she cares about keeping her crew fed and her ship out of the Council's impound yard.

Personality

Dry, profane, allergic to speeches. She negotiates like she fights — fast, dirty and always with an exit. She respects anyone who gets the better of her and despises anyone who moralizes.

Resources

  • The privateer Salt Wraith and a crew of forty cutthroats
  • The Salt Ledger warehouse front at Saltmarch Landing
  • Safe anchorages at Wrecker's Cay and along the Verdigris Coast
  • A working knowledge of every harbor patrol schedule between Saltmarch and Moonharbor

Battle Plan

Nessa fights on decks, rigging and docks, never in the open. She uses ropes, hatches and the sea itself, and she will abandon a fight the moment it stops being profitable. She keeps two crew within reach and uses them as cover.

Defeat or Redemption

Nessa can be bought, beaten or betrayed. If the party pays her debt or offers her something better than Vane's protection, she will turn — and her ship is the fastest way to the Deadvein coast. She will not die for a cause and will surrender the moment the odds turn.

Running Notes

Recommended party: Four characters of levels 1–11: a front-line warrior (fighter, barbarian or paladin), a healer (cleric or druid), a ranged or arcane damage dealer (ranger, wizard or warlock) and a skill-focused character (rogue or bard). A rogue is strongly recommended for Acts II and III, where locks, ledgers and stealth carry whole scenes.

Session Zero

Before play, agree on tone: this is a gritty frontier campaign with slavery, poisoning of a village's water, press-gangs and the murder of civilians. It is not graphic or gratuitous, but it is not light. Use the standard safety tools — lines and veils, the X-card, and an open door. Establish that the villains are courteous and patient rather than cackling, and that surrender, negotiation and retreat are always on the table. Confirm the party composition: a front-liner, a healer, a ranged or arcane damage dealer and a skill character; a rogue is strongly recommended for Acts II and III. Ask each player for one reason their character is in Ironjaw Hold and one reason they care what happens to the Ashen Road, and write both down. Explain that the campaign runs levels 1 to 11 over roughly 22 to 26 sessions, that each act ends with a milestone level-up, and that the party will be expected to investigate as much as fight. Finally, set the expectation that choices stick: the Wardens, the Council, the smugglers and the miners all remember what the party does.

Scaling Guidance

The module is written for four characters. For three characters, cut one creature of the lowest CR from each roster and lower one villain's hit points by 25 percent. For five or six characters, add one Veteran or two Bandits per extra character in combat-heavy encounters, and add a second lieutenant to the finale. If the party is one level below the suggested range, remove the highest-CR non-villain combatant; if two levels below, halve the number of minions and let the villain withdraw at half hit points instead of fighting to the death. If the party is one level above, add two minions; two levels above, add a Veteran and increase the villain's damage output by one die per attack. Never scale a villain's quantity above one. The XP budgets assume the SRD 5.2 encounter tables: Low, Moderate and High ratings in this module sit between 75 and 100 percent of the listed budget for the suggested level, so adjust quantities rather than adding new creature types.

DM Advice

Run the campaign as three acts with three different rhythms. Act I is a chase: one location, one hard clue, one fight, then move. Do not let the party linger in Ironjaw Hold past the first session. Act II is a social act and should breathe — give Moonharbor a full session before the docks, and let the party argue with magistrates, bribe dockmasters and drink with smugglers. Act III is a war march: the gate, the village, the mine, each bigger than the last, and Cinderfall exists to give the party something to save between two dungeons. Never let the clue chain stall. Every scene has a fallback: if the party misses the manifest, Brakka Thorn has a copy; if they miss the consignee letter, Father Cadoc's book has it; if they miss the mine maps, Kael Dross can draw them. Villain pressure should be felt, not seen. Vane's letters do the work until the finale. Blacktusk is the face the party meets first and should survive to the deep if possible. Sallow is heard of long before she is seen. Nessa Crowe is a wildcard who can be bought, betrayed or allied with, and she should always have an exit. Do not run two dungeon-style locations back to back. Rest often, and let the party spend their gold in the bazaar and the city.

Failure States

  • The party ignores the road: Blacktusk burns Saltmarch Landing's warehouses, the Salt Ledger's cargo escapes, and Act II begins with the party arriving in Moonharbor as unknown strangers who must earn the Council's help from nothing.
  • The party loses the Moonharbor ledgers: Orrin Tace is murdered by Redband agents within a week and the mine maps must be taken from Wrecker's Cay instead, costing the party the Council's warrant and the Guard's support.
  • Thornwatch falls: the militia is broken, the coast road is closed, and the party must reach the Deadvein Gate by Halden Grist's goat track with no allies. Act III becomes a stealth campaign with no militia to hold the pass.
  • Cinderfall's well is not cleansed: the miners will not guide the party, Gran Odda refuses the gallery map, and the deep must be entered through the gate's adit straight into the Redband garrison.
  • Kael Dross dies before he talks: the party must find the four supports by investigation (DC 16) under fire, and the Cinderfall Ledger is lost, so the Moonharbor case against the Brotherhood's financiers collapses in the epilogue.
  • The seam is not collapsed: the epilogue is a losing one. Vane's blackfire blades reach the coast, Moonharbor burns, and the campaign can continue at level 12 with the party as fugitives in a broken Reach.
  • Nessa Crowe is alienated or killed early: the party loses their fastest route to the Deadvein coast and must march the coast road, arriving at the gate after the Redband has reinforced it (add two Veterans to the gate encounter).

Secrets & Clues

  • The Ironjaw Wardens have known for a month that the raiders are led by an exiled Warden, Gorek Blacktusk, and have told no one because the shame would split the clans.
  • The Salt Ledger warehouse at Saltmarch Landing is owned by the Moonharbor shipwrights' guild, not by the Redband — the Brotherhood is being financed by a city that claims to be its enemy.
  • Old Marn's roadside shrine in the Redstone Draw is built over a Redband message cache; the hermit has been reading the Brotherhood's orders for a year and telling no one.
  • The Moonharbor Council's harbor chain has been quietly shortened by two links so a deep-keeled privateer can pass over it at high tide.
  • Orrin Tace, guildmaster of the shipwrights, has been forging manifests because Mother Sallow holds his son in the deep works.
  • The Thornwatch militia is being paid by the Moonharbor Council to stay on the ridge and not enter the city — the Council would rather fund a militia than admit the Redband exists.
  • The blackfire seam is unstable: if it is not collapsed, it will eventually consume the mountain and take Cinderfall with it.
  • Kael Dross, the deep works' foreman, has mapped a fourth support beam that will bring the entire refining floor down.
  • The Ironjaw Wardens have known about the deep works for a month and have been quietly massing at the gate under Warden Skarn.
  • The well at Cinderfall Hamlet is poisoned with blackfire residue dissolved in water — Mother Sallow is testing it as a weapon.
  • Gran Odda's old gallery comes out behind the deep works' refining floor and is the only unguarded way in.
  • Warden Skarn was Gorek Blacktusk's sworn brother before the exile and has never told anyone.

Appendix

Downtime

Working the Forge with Thokk

The party spends days at Thokk Brightsteel's forge in Ironjaw Hold, repairing armour, reforging looted blades and learning to spot blackfire contamination in steel. Thokk talks constantly and prices everything by weight.

Requirements: Access to Ironjaw Hold and a working relationship with Thokk Brightsteel. A character proficient with smith's tools gains double the benefit.

Rewards: Repair all damaged nonmagical weapons and armour; silver a weapon for 25 gp; identify blackfire-forged steel on sight for the rest of the campaign; a 10 percent discount on all later smithing.

Time: 3 days per item reforged, or 5 days for the full course of instruction.

Location: Ironjaw Hold is the only place in the Reach with a forge hot enough to work blackfire-tainted steel, and Thokk is the only smith who will touch it.

Use this to slow the party down between Act I locations and let them hear rumours. Complication: a Redband courier watches the forge and reports who is buying what.

Cracking the Cipher with Tessa Quill

Tessa Quill has half-broken the Redband's substitution cipher and needs quiet, paper and three more samples. A character can sit with her and work through the manifests, learning the Brotherhood's shorthand and its courier routes.

Requirements: Three Redband documents and a safe room in the Skullgate Bazaar or Moonharbor. A character with calligrapher's supplies or the Sage background gains advantage.

Rewards: All later Redband documents can be decoded with a DC 10 Intelligence check instead of DC 15; the party learns the courier schedule between Saltmarch Landing and Moonharbor.

Time: 2 days per document, or 4 days total if the party already has all three samples.

Location: Tessa works out of the Skullgate Bazaar and will not leave until the Brotherhood stops looking for her, so this activity is easiest in Act I.

Complication: once Tessa breaks the cipher, the Brotherhood realises it and sends a courier to silence her. The party must protect her or lose the advantage.

Sailing with Kessa Tide

Kessa Tide runs goods past the Moonharbor harbor chain and will take passengers who keep their mouths shut. A few days aboard her boat teaches the party the tides, the patrol schedules and which harbor officials can be bought.

Requirements: A favour owed to Kessa Tide, or 100 gp, and a willingness to help haul cargo.

Rewards: Learn the harbor patrol schedule (advantage on Stealth checks in Moonharbor harbor), a free run to Wrecker's Cay, and a permanent underworld contact.

Time: 4 days of coastal running.

Location: Moonharbor and the Verdigris Coast, where the tide-gates and patrol routes matter more than roads.

Complication: one of Kessa's buyers is a Redband paymaster, and the party may meet him without knowing it.

Tending the Wounded at Cinderfall

The party spends days at Cinderfall Hamlet helping Healer Om and Bim Sprocket treat blackfire poisoning, haul clean water and rebuild the burned houses. The miners watch everything they do.

Requirements: Access to Cinderfall Hamlet after the well is cleansed or the filter is built. A character proficient with herbalism kit or medicine gains double the benefit.

Rewards: The Free Miners become loyal allies (they will fight beside the party in the deep), a Bim's Blackfire Filter if it was not already built, and advantage on all Charisma checks with Cinderfall residents.

Time: 5 days.

Location: Cinderfall Hamlet, between the Deadvein Gate and the deep works, is the only settlement in the highlands and the only place to recover before the finale.

Complication: Redband press-gangs come down from the deep every few weeks. Roll a d6 each day; on a 1, a gang of four bandits and a scout arrives.

Rumors

  • Three caravans burned this month and the Wardens will not say who did it.
  • There is a man in the east row of the bazaar paying good silver to anyone who will sail south before the new moon.
  • The Salt Ledger warehouse loads at midnight and the harbor watch looks the other way.
  • A black-tusked orc was seen on the coast road with forty fighters and a sword that burns without smoke.
  • The Moonharbor Council has shortened the harbor chain. Ask anyone who works the mole.
  • Cinderfall Hamlet has not sent ore down the mountain in a season. The miners are either dead or hiding something.
  • The lighthouse on Wrecker's Cay has been burning wrong for a year. Ships that follow it end on the rocks.
  • Old Marn at the shrine in the Redstone Draw will trade news for news, and he knows more than he lets on.

Random Events

  • A caravan of salt wagons passes on the road, its master willing to pay 20 gp for two days of escort.
  • A Warden patrol stops the party for papers; a DC 12 Charisma check or a Warden's Road Token gets them through.
  • A dust storm rolls down the canyon and forces the party to shelter for four hours. Something follows them into the shelter.
  • A goblin tinker's cart has thrown a wheel. Helping costs an hour and earns a 10 percent discount on gear.
  • A Redband courier rides past at dusk without seeing the party. He carries a dispatch case worth taking.
  • A wounded ash-hound limps out of the rocks and collapses at the party's feet. It is not hostile and can be nursed back.
  • A child in Cinderfall asks the party to find her mother, who was taken by the press-gang three weeks ago.
  • A Moonharbor Guard patrol mistakes the party for smugglers and demands a bribe of 50 gp.
  • The tunnel ahead has collapsed. Clearing it takes two hours and a DC 14 Strength check, and something is breathing on the other side.
  • A Gallows Gull steals something small and shiny from the party's camp and leads them to a wreck with salvage in it.

Treasure Parcels

  • Act I, Ironjaw Hold cellar: 20 gp in a purse on the steps, a stamped crate-lid worth 15 gp, and a Warden's Road Token.
  • Act I, Skullgate Bazaar: 40 gp in Moonharbor silver, a coded manifest, and a Redband courier's token in Corvin Sash's satchel.
  • Act I, Redstone Draw cave camp: 120 gp and 30 sp in the pay chest, a bundle of orders signed G.B., and Cinderlash in the ogre's hands.
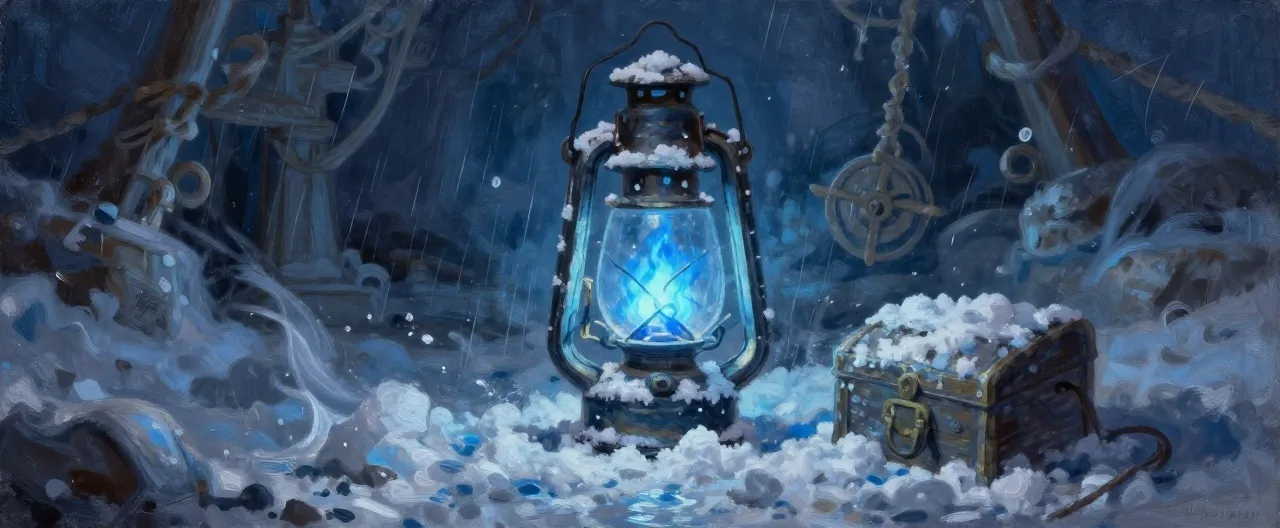
  • Act I, Salt Ledger undercroft: 200 gp in smuggled silver, the consignee letter, and a Salt-Crusted Lantern in the strongbox.
  • Act II, Moonharbor guild counting-house: 300 gp in guild scrip, the double ledgers, and a Harbor Chain Link in the strongbox.
  • Act II, north mole warehouse: 350 gp in Redband pay, the mine maps, Vane's letter, and Kessa Tide's crate.
  • Act II, Wrecker's Cay sea cave: 180 gp in shipwreck salvage, a silver locket worth 60 gp, and the signal codebook.
  • Act III, Deadvein Gate stores: 600 gp in Redband coin, blackfire ingots stamped for Moonharbor, and a Seam-Iron Plate in the armoury.
  • Act III, Deadvein Deep refining floor: 800 gp in Vane's war chest, Sallow's laboratory notes, and the Cinderfall Ledger.
  • Act III, the blackfire seam: 1,500 gp in Vane's war chest and Vane's Red Hand Signet.

Spare Names

  • Sergeant Vol Ashfell, a Warden with gambling debts
  • Corvin Sash, a Redband recruiter
  • Councilor Halvern, a bought magistrate
  • Corvel, a missing scholar of mineral alchemy
  • Nessa Sloe, a halfling recruit taken to the deep works
  • Kessa Tide's first mate, a quiet man called Brine
  • Old Marn's road god, the Walker of Ways
  • The Salt Wraith, Nessa Crowe's privateer
  • Warehouse nineteen on the north mole
  • The fourth support beam, Kael Dross's secret
  • Sump-Mother Gribble, an otyugh in the lower gallery
  • Undertow, a water weird bound to the Salt Ledger tide-gate

Starting Location

The Ashen Reach

# The Ashen Reach

The Ashen Reach is red stone and hard wind. Mesas stand over the road like the walls of a roofless hall, and between them the ground is dry, cracked and full of iron. Nothing here is soft: the grass is grey, the water is brackish, and the people are blunt because bluntness is cheaper than lying.

**Ironjaw Hold** sits at the head of the road, a hillfort city of dark brick on rough stone footings, its squat towers hung with iron banners and its lower gate open from dawn to dusk. The clans here have held the Reach for three centuries and they measure a person by whether they keep their word. Above the gate is the Warden's Hall; below it, the **Skullgate Bazaar**, where the road's stolen things go to become legal.

East of the city the **Ashen Road** runs through the **Redstone Draw**, a dry canyon of red walls and old wagon ruts where caravans have been burning all season. Beyond the Draw the land flattens into salt and the road ends at **Saltmarch Landing**, a port of grey water and white crust where everything that leaves the Reach by sea leaves from.

The Reach's trouble is simple and nobody will say it aloud: the caravans are being taken by men in red sashes, the Wardens cannot spare the fighters to chase them, and the iron is going somewhere. The road is the only thing holding the Reach together, and the road is being eaten.

## What the party finds here

- A hillfort city that hires them and a bazaar that tests them.
- A burned canyon with a raider camp in it.
- A salt port where the trail goes to sea.

## Tone

Frontier, loud, generous and dangerous. Orcish hospitality, goblin merchants, dust in everything.

Secrets

  • The Ironjaw Wardens have known for a month that the raiders are led by an exiled Warden, Gorek Blacktusk, and have told no one because the shame would split the clans.
  • The Salt Ledger warehouse at Saltmarch Landing is owned by the Moonharbor shipwrights' guild, not by the Redband — the Brotherhood is being financed by a city that claims to be its enemy.
  • Old Marn's roadside shrine in the Redstone Draw is built over a Redband message cache; the hermit has been reading the Brotherhood's orders for a year and telling no one.

Key Locations

Ironjaw Hold

# Ironjaw Hold

Ironjaw Hold is a city built for a siege that never came. Dark brick rises on rough stone footings, squat towers stand at every corner of the wall, and narrow windows look down on a lower gate wide enough for three wagons abreast. Timber galleries run along the inside of the wall, hung with iron banners and drying meat. The streets climb in switchbacks toward the Warden's Hall, and the whole city smells of coal smoke, wet leather and hot iron.

The clans here are not one people but nine, and they argue constantly in the open while presenting a single face to outsiders. The Wardens keep the peace, the smiths keep the forges hot, and the shrine with no walls in the middle of the hillfort keeps everyone honest. Below the gate, the Skullgate Bazaar spills out of the city like a market that got loose.

Travelers are welcome here as long as they keep their word. Those who do not are escorted to the gate and not invited back.

Additional Notes

Use Ironjaw Hold as the party's safe base for Act I. Prices are fair, the Wardens are watchful, and Thokk Brightsteel can identify blackfire-forged steel — a detail that pays off in Act III.

The Skullgate Bazaar

# The Skullgate Bazaar

The Skullgate Bazaar is what spills out when a hillfort city opens its lower gate and forgets to close it. Awnings of red and ochre canvas cover three crooked streets that climb back up toward the wall, and under them everything in the Reach is for sale: iron, salt, rope, stolen hinges, salvaged locks, letters, names. The air is dust and frying oil and the constant low argument of people who enjoy bargaining.

It is not lawless. The bazaar has its own rules, enforced by a woman named Madri Voss and a handful of stallholders who pay for the privilege. Thieves are dealt with quietly. Cheats are dealt with loudly. The Wardens come down twice a week and are politely ignored.

Lately the bazaar has been tense. Red-sashed recruiters have been working the east row, offering coin to any dockhand or drover willing to sail south, and the stallholders have started keeping their ledgers closer.

Additional Notes

The bazaar is a social location: play the bargaining, the noise and the crowding. The Redband press-gang in the east row is the only guaranteed fight, and it should be a small one — three bandits and a scout.

The Redstone Draw

# The Redstone Draw

The Redstone Draw is a dry canyon cut through the mesa country east of Ironjaw Hold, and the only road east runs along its floor. The walls are forty feet of banded red rock, close enough at the narrows that two wagons cannot pass, and the floor is packed hard by three centuries of wheels. There is no water in the Draw except at Old Marn's shrine, where a spring seeps out of the rock and a forgotten road god gets a fresh stone every morning.

It is beautiful in the way a knife is beautiful, and it is a perfect place for an ambush. The raiders know it. Three burned wagons lie along the last mile of the canyon floor, their axles stripped and their cargo beds empty, and the ravens have stopped bothering to leave.

At the eastern end, where the canyon opens onto the salt flats, a cave mouth sits above the road behind a screen of scrub. The raiders have been using it as a staging camp.

Additional Notes

The Draw is the party's first wilderness location. Use the narrows for a tense approach and the cave camp for the act's main fight. Brakka Thorn can be found tracking at the canyon's midpoint.

Saltmarch Landing

# Saltmarch Landing

Saltmarch Landing is a town built on salt and stubbornness. The salt flats run right up to the water, white and cracked, and the town sits on the only firm ground for miles: a long stone quay, two wooden piers, a warehouse row and a hundred timber houses leaning away from the wind. Everything is grey with salt. The gulls are enormous and completely unafraid.

The town lives on transshipment. Cargo comes down the Ashen Road and goes out by sea, and the harbor watch takes a cut of everything. There is an inn called the Wet Rope, a shrine with a leaking roof, and a warehouse at the end of the quay with no name on it and a great deal of traffic at midnight.

Two houses at the eastern edge burned last month. Nobody talks about it. The harbor captain has been watching the nameless warehouse for a season and has not yet found a reason to open it.

Additional Notes

Saltmarch is a short, tense location. The party should feel the clock: the shipment leaves before the new moon. Ilsa Ren is the ally here; Father Cadoc's shipping book is the proof.

The Verdigris Coast

# The Verdigris Coast

Across the water from the salt flats, the land turns green. The Verdigris Coast is a warm, wet country of shallow bays, tidal marshes and red-brick towns with round arches and shaded arcades. Olive and fig grow in the terraces above the water, fishing boats work the bays, and the air smells of salt, tar and something sweet from the orchards.

**Moonharbor** is the coast's great city: a walled harbor of arcaded streets, shipwrights' yards and a Council of nine who meet above the water and disagree about everything except the harbor chain. The city is rich, comfortable and deeply compromised. Its shipwrights have been forging manifests for two years, its councilors have been bought, and its magistrates have decided not to notice.

South of the city the coast turns wild. **Wrecker's Cay** is a shingle island with a leaning lighthouse and a reputation for eating ships, and the **Thornwatch** ridge above it is where the coast's militia has dug in against the Redband's raiders. Between them runs a coast road that the Brotherhood uses at night and the militia cannot hold by day.

The coast's trouble is the same trouble as the Reach's, wearing better clothes. The iron that left Saltmarch Landing is being landed here, and the men who land it are not merchants.

Secrets

  • The Moonharbor Council's harbor chain has been quietly shortened by two links so that a deep-keeled privateer can pass over it at high tide.
  • Orrin Tace, guildmaster of the shipwrights, has been forging manifests because Mother Sallow holds his son in the deep works.
  • The Thornwatch militia is being paid by the Moonharbor Council to stay on the ridge and not enter the city — the Council would rather fund a militia than admit the Redband exists.

Key Locations

Moonharbor

# Moonharbor

Moonharbor is the richest city on the Verdigris Coast and it knows it. Red brick rises in round arches and shaded arcades, shallow tiled roofs step down toward the water, and the whole city seems designed to keep the sun off a merchant's neck while he counts his money. The harbor is a great stone bowl with a chain across its mouth, and the shipwrights' yards below the wall turn out a hull a week.

The Council of nine meets in an arcaded hall above the harbor and governs by compromise. The Guard is well armed and slow. The guilds are rich and careful. The magistrates are honest in the way that men who own warehouses are honest, which is to say mostly, and expensively.

Underneath the comfort, the city is sick. The shipwrights have been forging manifests for two years, a councilor has been bought, and the harbor chain has been quietly altered. Nobody has said any of this aloud, because saying it would ruin the shipping season.

Additional Notes

Moonharbor is the campaign's social hub. Give the party a full session here before the docks. Magistra Selene Dorn is the honest ally; Orrin Tace is the weak link; Lira Fen is the witness nobody thinks to ask.

The Moonharbor Docks

# The Moonharbor Docks

The north mole is where Moonharbor does its actual work. A stone breakwater runs out into the harbor, lined with warehouses, cranes and the low arcade where the dock crews shelter from the rain. By day it is noise and rope and shouting; by night it is lanterns, gulls and the creak of hulls against fenders.

The warehouses are numbered, not named, and the numbers are not in order. The one the party wants is at the far end, leased last month by a company that paid in advance and never gave a name. It has a tide-gate under it, a crane on the roof and a great deal of traffic after dark.

Below the mole, the old tide-gates open into the harbor's undercroft — a maze of brick tunnels half-flooded at high water, used by smugglers, rats and anyone who needs to move something without being seen.

Additional Notes

Run the docks as a night heist. Kessa Tide is the way in; Bram Holt is the way to the paperwork. The warehouse garrison is six bandits, two scouts and a Redband veteran.

Wrecker's Cay

# Wrecker's Cay

Wrecker's Cay is a shingle island a mile off the Verdigris Coast, low and grey and surrounded by rocks that have eaten a hundred ships. A leaning lighthouse stands at its northern tip, and the keeper's cottage beside it has not been whitewashed in years. The rest of the island is gorse, driftwood and the bones of hulls.

Under the island, the sea has hollowed out a cave with two mouths — one above the tide line on the western beach, one below it on the eastern side, only open at low water. The Redband has been using the cave as a holding pen and a signal station for a year. Prisoners taken on the coast road wait here before they are shipped up to the deep works, and a garrison of a dozen men keeps them.

The lighthouse still burns, but it burns wrong. Ships that follow it end on the rocks, and the men who come ashore are met by men in red sashes.

Additional Notes

Wrecker's Cay is a short dungeon with a moral weight: the prisoners. Neddy Lamp is the guilt-ridden keeper; Mira Shoal knows the second mouth. The garrison is eight bandits, two scouts and a cultist of Sallow's.

Thornwatch Camp

# Thornwatch Camp

Thornwatch is a militia camp on the last coastal ridge before the mountains, and it is not a fort so much as a promise. A palisade of sharpened stakes runs along the ridge top, a watchtower leans over the seaward gate, and forty farmers and fishermen live in tents and lean-tos behind it. They have three crossbows, a bell, and a sergeant who has kept them alive for a season.

The camp exists because the Moonharbor Council would rather pay a militia to sit on a ridge than admit the Redband exists. The militia knows this and resents it. They are loyal to Sergeant Dara Vint, not to the city, and they will follow her anywhere she says the word.

From the watchtower you can see the coast road, the cay, and — on a clear day — the black scar of the Deadvein Gate in the mountains to the east.

Additional Notes

Thornwatch is the Act II climax: a three-wave defense. Use the signal codebook from Wrecker's Cay to let the party turn one wave aside. Healer Om keeps the militia standing.

The Deadvein Highlands

# The Deadvein Highlands

The Deadvein Highlands are what the coast looks like when the green runs out. The land climbs through pine and scree to a wall of grey mountains, and the mountains are full of holes. Three hundred years of mining have left the Deadvein riddled with galleries, adits, shafts and tramways, most of them abandoned, some of them not.

The only way in from the coast is the **Deadvein Gate**, a switchback pass above the treeline where an iron gate and a stone watchpost command the road. Below the gate, in a bowl of grey rock, sits **Cinderfall Hamlet**, a village of free miners who have worked the old galleries for six generations and who have not been heard from in a season. Their well is poisoned, their families are being taken, and their mayor is holding three hundred frightened people together with a bell and a ledger.

Below the village, the mountain opens into the **Deadvein Deep** — the old works, the slave pens, the refining floor, and a seam of blackfire ore that glows faintly red in the dark and burns without smoke.

This is where the iron has been going. This is where the army is being forged.

Secrets

  • The blackfire seam is unstable: if it is not collapsed, it will eventually consume the mountain and take Cinderfall with it.
  • Kael Dross, the deep works' foreman, has mapped a fourth support beam that will bring the entire refining floor down.
  • The Ironjaw Wardens have known about the deep works for a month and have been quietly massing at the gate under Warden Skarn.

Key Locations

The Deadvein Gate

# The Deadvein Gate

The Deadvein Gate is a switchback pass above the treeline, where the coast road narrows between two shoulders of grey rock and an iron gate closes the way. A stone watchpost stands above it, half ruined and fully manned, and the wind up here never stops. Below the gate the road falls away to Cinderfall Hamlet; above it, the mountain goes on forever.

The Redband has held the gate for a year. Its pickets are dug in on both shoulders, its veterans hold the watchpost, and its stores are full of blackfire ingots stamped for Moonharbor. The gate's winch is on the inside, and the gate itself is old Ironjaw work — three inches of iron on oak, and it will not fall to a ram.

A goat track, known to prospectors and shepherds, climbs around the eastern shoulder and comes down behind the watchpost. Halden Grist has been using it for two years.

Additional Notes

The gate is a set-piece assault. Warden Skarn's twenty wardens are the party's allies; Halden Grist's goat track is the alternate route. The signal codebook from Wrecker's Cay can open the gate from within.

Cinderfall Hamlet

# Cinderfall Hamlet

Cinderfall Hamlet sits in a bowl of grey rock below the Deadvein Gate, a village of dark brick on stone footings with hipped roofs and timber galleries, built by miners for miners. There is a well in the middle, a bell tower beside it, a smithy, a shrine with a slate roof, and three hundred people who have been having a very bad year.

Two houses at the eastern edge burned last month. The well has gone bad — the water tastes of metal and the children who drink it get sick. The Redband press-gangs come down from the deep works every few weeks and take whoever they can catch, and the village has stopped asking where the taken ones go.

Mayor Essa Crane has been holding it together with a bell, a ledger and sheer stubbornness. The miners still work the upper galleries on shares, but they work with one eye on the road.

Additional Notes

Cinderfall is the party's chance to save something rather than destroy it. The well is the central problem; Bim Sprocket can build the filter, Gran Odda has the gallery map, and the miners will follow the party if the water runs clean.

The Deadvein Deep

# The Deadvein Deep

The Deadvein Deep is the old works: a cathedral of a mine, three hundred years of galleries and shafts and tramways cut through grey rock and left to rot when the ore ran out. It did not run out. It changed.

The upper levels are flooded and dark. Below them, the Redband has rebuilt: timber props, iron rails, lamps that burn with a faint red light, and a refining floor where the blackfire ore is crushed, washed and forged. The air tastes of hot metal and something sweet underneath. Slave pens line the eastern wall, and the prisoners in them are the miners the press-gangs took.

At the bottom, the seam itself: a vein of blackfire ore running through the rock like a scar, glowing faintly red, hot to the touch, and unstable. Sallow's notes say it will consume the mountain if it is not collapsed. Vane's letters say it will arm an army.

Additional Notes

The finale is a three-part fight: the refining floor, the lieutenants, and the seam. Kael Dross knows the four supports. Set the charges under fire. Do not let the party rest inside the deep.

Monsters & Enemies

Cinder Ash-Hound Cinder Ash-Hound Completed · CR 1/2 · Beast

Lean ash-grey jackal-like hound with ember-red eyes and a cinder-flecked coat, throat glowing faintly as it growls, prowling a red rock can…

Drain Gnaw Drain Gnaw Completed · CR 1/4 · Monstrosity

A cat-sized hairless pink-grey burrower with milky blind eyes, chisel teeth, and long clawed forelimbs, crouched in a damp stone drain.

Gallows Gull Gallows Gull Completed · CR 1/4 · Beast

An enormous salt-crusted gull with a hooked yellow beak, ragged grey-white wings wider than a person is tall, and a screaming, rusty-hinged…

Generated monster placeholder Salt Husk Completed · CR 1 · Undead

A drowned sailor crusted white with salt crystals, clothes stiff as board, empty eye sockets, mouth packed with salt, shambling from a floo…

Brine Lurker Brine Lurker Completed · CR 2 · Aberration

Pale eyeless eel-bodied predator with a round lamprey mouth and six hooked fins, lurking beneath black water in a flooded brick cellar, onl…

Wrecklight Moth Wrecklight Moth Completed · CR 1 · Monstrosity

A pale, cat-sized moth with ragged white wings and a lantern-like abdomen glowing sickly green-white, hovering in a dark sea cave above wet…

Scree Stalker Scree Stalker Completed · CR 3 · Beast

A slate-grey, six-legged mountain predator with a flat wedge-shaped head, piton-like claws, and hide the exact colour of wet rock, clinging…

Blackfire Slagling Blackfire Slagling Completed · CR 3 · Elemental

A dog-sized crawling clot of black ore and cooling slag veined with red light, hissing faintly atop a trail of hot cinders in a flooded, so…

Tramway Shade Tramway Shade Completed · CR 4 · Undead

Translucent grey-blue miner ghost in a rotted coat, drifting above old tram rails with a broken pick, moaning amid damp dark mine timbers.

Seam Vein Wretch Seam Vein Wretch Completed · CR 6 · Elemental

A hulking humanoid mass of blackfire ore, fused rock, and rusted miner tools, with glowing red cracks and a forge-stoked glow, standing in …

Slagbound Sentinel Slagbound Sentinel Completed · CR 7 · Construct

A squat four-armed construct of blackfire ingots, chain, and cooled slag, with a glowing furnace grate for a chest and a hammer-head fist, …

Chainline Crab Chainline Crab Completed · CR 1/2 · Beast

A hound-sized crab encrusted with barnacles, green copper and old rope on its shell, clinging to a rusted harbor chain above dark water.

Villain Plans

Edric Vane, the Red Hand Character Sheet

BBEG — founder and master of the Redband Brotherhood

Motivation

Vane's father was a Moonharbor shipping clerk who was ruined by a Council tariff and died in a debtor's cell. Edric spent ten years learning exactly how the Reach's money moves, then built an army out of everyone the Reach discarded. He does not want revenge on a person; he wants the Council's world replaced with one where a man's worth is what he can take. The blackfire seam under the Deadvein Deep is the anvil on which he intends to forge that world.

Personality

Courteous, quiet, unhurried. He offers wine before he offers violence and thanks a man before he has him killed. He never raises his voice and never repeats an order. He is genuinely interested in the party as people and will remember their names, their families and their weaknesses.

Resources

  • The Redband Brotherhood: roughly three thousand men in companies across the Reach and the coast
  • The Deadvein Deep: a fortified mine with slave pens, a refining floor and a blackfire seam
  • Mother Sallow's alchemy and Gorek Blacktusk's field companies
  • Bought councilors and blackmailed guildmasters in Moonharbor
  • Nessa Crowe's privateer fleet and the Salt Ledger warehouse front
  • A network of Redband couriers who move letters under the mark of a single red hand

Battle Plan

Vane does not fight until he must. He lets Blacktusk and Sallow absorb the party's opening, uses the refining floor's cover and catwalks, and duels the party's strongest fighter one at a time while his guard screen holds the others. If reduced below half his hit points he retreats toward the seam and threatens to fire the charges himself, forcing the party to choose between stopping him and stopping the collapse. He never surrenders; he offers terms instead.

Defeat or Redemption

Vane can be killed, taken alive for a Moonharbor trial that will be a circus, or — if the party has proven the Council's corruption to him — persuaded to give up the seam in exchange for the Council's public confession. Redemption is narrow but real: he wants the truth told more than he wants the city burned.

Gorek Blacktusk Character Sheet

Lieutenant — commander of the Redband's field companies

Motivation

Gorek was a Warden of Ironjaw Hold until he was exiled for killing a caravan master who had cheated his clan. He believes the Wardens chose coin over blood, and he has spent three winters proving that the road belongs to whoever is willing to burn it. He follows Vane because Vane is the first man to give him an army instead of a lecture.

Personality

Loud, generous, quick to laugh and quicker to anger. He respects strength and despises cleverness. He remembers every man who ever did him a kindness and every man who ever did him a slight, and he will mention both at length.

Resources

  • Three field companies of Redband bandits and scouts
  • A blackfire-forged greatsword taken from Sallow's first forging
  • The burned caravan routes of the Ashen Road and the coast road
  • A personal guard of a dozen veterans who have followed him since the exile

Battle Plan

Gorek charges the biggest target and stays on it. He uses his blackfire blade to set terrain alight and splits the party by forcing them out of cover. He fights to the death in front of his men but will withdraw if his company is broken and he is alone — he wants to be beaten by a worthy enemy, not executed by a mob.

Defeat or Redemption

Gorek can be killed, or beaten and spared, in which case he will tell the party everything he knows about the deep works out of sheer contempt for Vane's bookkeeping. He cannot be turned against Vane while Vane still holds the army, but he can be made to stand aside.

Mother Sallow Character Sheet

Lieutenant — alchemist and overseer of the deep works

Motivation

Sallow was a Moonharbor apothecary struck off for experimenting on patients. Vane gave her a mine, an unlimited supply of prisoners and a substance nobody had ever refined. She wants to know what blackfire does to a living body, and she is very close to finding out.

Personality

Warm, motherly, utterly detached. She calls the prisoners her children and the party her guests. She talks about pain the way other people talk about weather. She is genuinely delighted by clever questions.

Resources

  • The deep works' refining floor, slave pens and alchemical laboratory
  • A dozen Redband cultists who believe she can cure death
  • Blackfire residue, poison, and a working knowledge of every alchemical reagent in the Reach
  • The blackfire-forged weapons she has already made for Blacktusk's officers

Battle Plan

Sallow does not close. She uses the refining floor's channels, fire and fumes, forcing Constitution saves and splitting the party with alchemical barriers. She keeps two cultists between herself and the front line and drinks a blackfire tincture at half hit points that makes her faster and reckless. She will not destroy her own laboratory unless she is certain she is losing.

Defeat or Redemption

Sallow can be killed, or captured and made to talk — she will trade her notes for her life without hesitation. There is no redemption; she is not interested in one. Her notes are the key to cleansing Cinderfall's well if the party has not already done so.

Nessa Crowe, the Harbor Wraith Character Sheet

Rival — privateer captain in the Redband's pay

Motivation

Nessa runs the fastest ship on the Verdigris Coast and owes Vane a debt she cannot pay in coin. She does not care about blackfire or the Reach; she cares about keeping her crew fed and her ship out of the Council's impound yard.

Personality

Dry, profane, allergic to speeches. She negotiates like she fights — fast, dirty and always with an exit. She respects anyone who gets the better of her and despises anyone who moralizes.

Resources

  • The privateer Salt Wraith and a crew of forty cutthroats
  • The Salt Ledger warehouse front at Saltmarch Landing
  • Safe anchorages at Wrecker's Cay and along the Verdigris Coast
  • A working knowledge of every harbor patrol schedule between Saltmarch and Moonharbor

Battle Plan

Nessa fights on decks, rigging and docks, never in the open. She uses ropes, hatches and the sea itself, and she will abandon a fight the moment it stops being profitable. She keeps two crew within reach and uses them as cover.

Defeat or Redemption

Nessa can be bought, beaten or betrayed. If the party pays her debt or offers her something better than Vane's protection, she will turn — and her ship is the fastest way to the Deadvein coast. She will not die for a cause and will surrender the moment the odds turn.

NPCs in The Ashen Reach

Gruma Ashfang

A broad, grey-tusked orc woman in a road-worn iron coat, one ear notched by an old arrow. She speaks slowly and writes everything down. Her hall smells of woodsmoke and wet leather, and she keeps a burned wagon wheel propped against the wall as a reminder.

Role: Warden of Ironjaw Hold; opening quest giver

Other Details: Gruma has held the Ashen Road for eleven years and has lost nine wardens this season. She suspects the Moonharbor Council is buying the raiders' silence but has no proof and no ships. She will pay the party in iron and road-tokens, and she will remember every promise they make.

Thokk Brightsteel

A young, soot-blackened orc with a shaved head and a leather apron burned through in a dozen places. He talks constantly while he works and prices everything by weight. His forge is the hottest in the Reach and he is very proud of it.

Role: Smith and armorer

Other Details: Thokk will repair and upgrade the party's weapons at a fair price and can identify blackfire-forged steel on sight — a skill that becomes important in Act III. He is Gruma's nephew and will not say so unless asked directly.

Sister Vale

A small, white-haired human woman in a sun-bleached robe, hands stained with salve. She runs a shrine with no walls in the middle of the hillfort and treats orc, human and goblin alike. She has a dry laugh and no patience for self-pity.

Role: Priest of the Dawn; healer

Other Details: Sister Vale has been quietly recording every caravan that has failed to arrive for two years, and her ledger is the best record of the Redband's raids in existence. She will give it to the party if they promise to bring the dead home.

Razzik Cogwhistle

A wiry goblin with brass goggles pushed up on his forehead and a cart that is more patch than cart. He sells rope, lamp oil, caltrops and things he insists are magical. He is honest about roughly half of it.

Role: Goblin tinker and general merchant

Other Details: Razzik knows every back gate and drainage tunnel in Ironjaw Hold and will guide the party down into the Skullgate Bazaar for a small fee. He is terrified of the Redband because they took his brother's hands.

Madri Voss

A tall, sharp-featured woman in a coat of salvaged locks, standing behind a stall of keys, hinges and stolen door-fittings. She never touches a customer and never forgets a face. Her voice is quiet enough that people lean in to hear it.

Role: Fence and information broker

Other Details: Madri sold the stolen iron to a Redband recruiter called Corvin Sash and has regretted it since. She is not Brotherhood and will not become Brotherhood. She wants out of the bazaar alive and will trade information for protection or passage.

Tessa Quill

A thin, ink-stained young woman with spectacles mended at the bridge and a satchel of half-finished letters. She writes contracts for the bazaar's merchants and reads anything left unattended. She is nervous, quick and much braver than she looks.

Role: Scribe and cipher-breaker

Other Details: Tessa has been quietly copying Redband manifests for a month and has the cipher half-broken. She is terrified of being found out and will attach herself to the party as a client if they offer her an exit from the bazaar.

Old Marn

A bent, sun-blackened old man with a beard like dry grass, living in a stone shrine to a forgotten road god. He talks to travelers whether or not they answer. He has not left the Draw in thirty years.

Role: Hermit and keeper of a roadside shrine

Other Details: Marn has watched every Redband column pass his shrine and can describe their numbers, their loads and their officers. He hides a cache of stolen Redband orders under his altar and will trade them for news of the outside world.

Pell

A scrawny, quick child of about twelve in a coat three sizes too big, with a whistle on a string and a talent for being where nobody looks. Pell talks fast and lies faster.

Role: Dock urchin and lookout

Other Details: Pell's older brother was taken by the Redband press-gang and is being held at the raider camp in the Redstone Draw. Pell will do anything for news of him and knows every loose board on the Saltmarch quay.

Father Cadoc

A round, red-faced old man in a robe stiff with salt, who blesses boats and buries sailors and has done both for forty years. He keeps a book of every ship that has left Saltmarch and every one that has not come back.

Role: Priest of the harbor shrine

Other Details: Father Cadoc's book records the Salt Ledger's shipments under three different names and is the proof Ilsa Ren needs. He will give it up only if the party promises to bury whatever they find at Wrecker's Cay.

Brakka Thorn

Open Character Sheet

A lean, weathered orc in a cloak of red-dust cloth, carrying a short bow and a knife for skinning. She speaks in short sentences and looks at the ground more than at faces. She has been tracking the raiders alone for two months.

Role: Scout and tracker; guide through the Draw

Other Details: Brakka's brother was taken by the Redband and she believes he is still alive in the deep works. She will follow the party to the Deadvein Deep if they promise to look for him, and she fights well in open country.

Captain Ilsa Ren

Open Character Sheet

A tall, grey-eyed woman in a salt-stained coat with a brass telescope on her belt. She has the flat, patient voice of someone who has argued with the sea and won. Her harbor watch is nine people and two boats.

Role: Harbor captain of Saltmarch Landing

Other Details: Ilsa Ren has been watching the Salt Ledger's midnight loadings for a season and cannot act without proof. She hates the Redband because they sank her brother's boat. She will lend the party a harbor boat and two guards if they bring her something she can take to the Council.

Hurgan Coalhand

Open Character Sheet

A heavy, sun-scarred human with coal dust permanently worked into his knuckles and a laugh that carries across a market. He wears a chain shirt under a merchant's coat and carries a boar spear he calls Negotiation.

Role: Caravan master; occasional ally in a fight

Other Details: Hurgan has lost two caravans to the Redband and will take the party east as guards for free if they help him keep the third. He knows the Redstone Draw better than anyone alive and can be persuaded to fight beside the party at the raider camp.

NPCs in The Verdigris Coast

Magistra Selene Dorn

A composed woman in a deep blue gown with silver at her throat, standing in the arcaded hall as though she owns the light. She is precise, courteous and completely aware that three of her colleagues are lying to her.

Role: Magistrate of Moonharbor; Act II quest giver

Other Details: Selene Dorn is the only honest magistrate on the Council and knows it makes her a target. She will back the party openly once they bring her proof, and she can put the city's Guard and the harbor chain at their disposal.

Orrin Tace

A heavy, well-dressed man with ink on his cuffs and a permanent tremor in his left hand. He is loud in public and silent in private. He has not slept properly in a month.

Role: Guildmaster of the shipwrights

Other Details: Orrin Tace has been forging manifests for the Redband because Mother Sallow holds his son in the deep works. He is not a believer and will break under pressure — but he is also the only man who knows every crate that has left Moonharbor in two years.

Lira Fen

A brisk young woman with her sleeves pinned back and a shop that smells of camphor and burnt sugar. She is cheerful, overworked and deeply nosy about her customers' wounds.

Role: Apothecary

Other Details: Lira Fen treated a Redband courier's blackfire burn last month and has been frightened ever since. She can identify blackfire residue and will tell the party what she knows if they promise to keep her name out of it.

Bram Holt

A squat, bald man with a ledger chained to his belt and a whistle around his neck. He knows every crate, every crane and every man on the mole, and he is proud of all three.

Role: Dockmaster of the north mole

Other Details: Bram Holt leased the north mole warehouse to a company that paid in advance and never gave a name. He is embarrassed about it and will help the party break in to clear his own record.

Neddy Lamp

A thin, hunched old man with a lantern burn across one cheek and hands that shake when he is not holding something. He keeps the light because nobody else will. He has not slept a full night in a year.

Role: Lighthouse keeper of Wrecker's Cay

Other Details: Neddy Lamp has been forced to darken his light so the Redband can wreck ships on the cay. He is sick with guilt and will help the party in any way he can, including leading them to the sea-cave's second mouth at low tide.

Mira Shoal

A weathered woman with wet hair and a coat of sealskin who lives in a beached hull on the cay and speaks to the tide as though it answers. She knows every rock and current for a mile.

Role: Tide-hermit and cave guide

Other Details: Mira Shoal has been watching the Redband load prisoners into the sea-cave for months and has counted them. She will guide the party through the cave's flooded lower passage if they bring her lamp oil and news of her sister, who was taken.

Healer Om

A small, round old man with a bag of herbs and a permanently worried expression. He has stitched more wounds this year than in the previous ten and has run out of everything except patience.

Role: Militia healer

Other Details: Healer Om can keep a militia standing through a night assault and can brew a blackfire antidote if given the right reagents — which the party can find at Cinderfall Hamlet or in Sallow's laboratory.

Kessa Tide

Open Character Sheet

A brown-skinned woman with salt-crusted braids and a knife she uses to clean her nails. She wears a fisherman's coat over good boots and smiles like she has already won an argument.

Role: Smuggler and occasional ally

Other Details: Kessa Tide runs goods past the harbor chain for anyone who pays and has no love for the Redband, who undercut her. She knows the tide-gates under the north mole and will guide the party through them for a cut of whatever they find.

Sergeant Dara Vint

Open Character Sheet

A stocky, scarred woman in a mismatched militia coat with a sergeant's stripe sewn on twice. She has forty farmers and fishermen under her and has kept them alive for a season. She does not waste words.

Role: Militia sergeant of Thornwatch Camp

Other Details: Dara Vint will march on the Deadvein Gate if Thornwatch holds and the party brings her proof of the deep works. She is loyal to the Moonharbor Council in name only and to her people in fact.

NPCs in The Deadvein Highlands

Halden Grist

A wiry, sunburnt man with a pick over one shoulder and a map case he never opens in front of strangers. He has been prospecting the Deadvein for twenty years and has been running from the Redband for two.

Role: Prospector and mountain guide

Other Details: Halden Grist knows the goat track around the Deadvein Gate and the old survey tunnels under the mountain. He is convinced there is a second seam and will not shut up about it, which is how he learned about the blackfire in the first place.

Mayor Essa Crane

A tired, capable woman in a miner's coat with a mayor's sash pinned crookedly over it. She has been holding three hundred frightened people together with a bell and a ledger. Her hands are cracked from hauling water.

Role: Mayor of Cinderfall Hamlet

Other Details: Essa Crane's brother Kael was the deep works' foreman before the Redband took him, and she believes he is still alive. She will give the party anything the village has if they cleanse the well and bring her brother home.

Bim Sprocket

A small, grease-covered goblin with a tool belt longer than they are tall and a habit of answering questions with diagrams. Bim built the village's pump and is furious that someone has ruined it.

Role: Goblin tinker and water-engineer

Other Details: Bim Sprocket can build a blackfire filter out of a pump, charcoal and copper if the party brings the parts. Bim is also the only person in Cinderfall who has been inside the deep works' refining floor and come out.

Gran Odda

A tiny, white-haired woman with a pick handle for a walking stick and eyes that have not seen well in years but miss nothing. She worked the Deadvein when it was a working mine and remembers every tunnel.

Role: Old miner and keeper of the gallery maps

Other Details: Gran Odda knows the old gallery that comes out behind the deep works' refining floor and will draw it from memory for anyone who brings her a lamp and a cup of something warm. She has been waiting sixty years for someone to ask.

Kael Dross

A gaunt, grey-faced man in a prisoner's smock with a foreman's chalk still tied to his wrist. He has been down here long enough that he flinches at daylight. He speaks slowly and precisely, as though each word costs him.

Role: Enslaved foreman of the deep works; final quest giver

Other Details: Kael Dross was taken from Cinderfall two years ago and has kept the deep works running under Sallow's whip while quietly mapping every support beam in the seam. He knows the fourth support that will bring the whole refining floor down, and he will only tell the party if they get him out alive.

Warden Skarn

Open Character Sheet

A tall, scarred orc in a Warden's iron coat with a broken tusk and a voice like gravel sliding. He has twenty wardens and no illusions about what twenty wardens can do.

Role: Ironjaw Warden commanding the mountain column

Other Details: Skarn was Gorek Blacktusk's sworn brother before the exile and has never spoken of it. He will hold the gate for the party to the last man and will fight beside them if the Redband counterattacks.
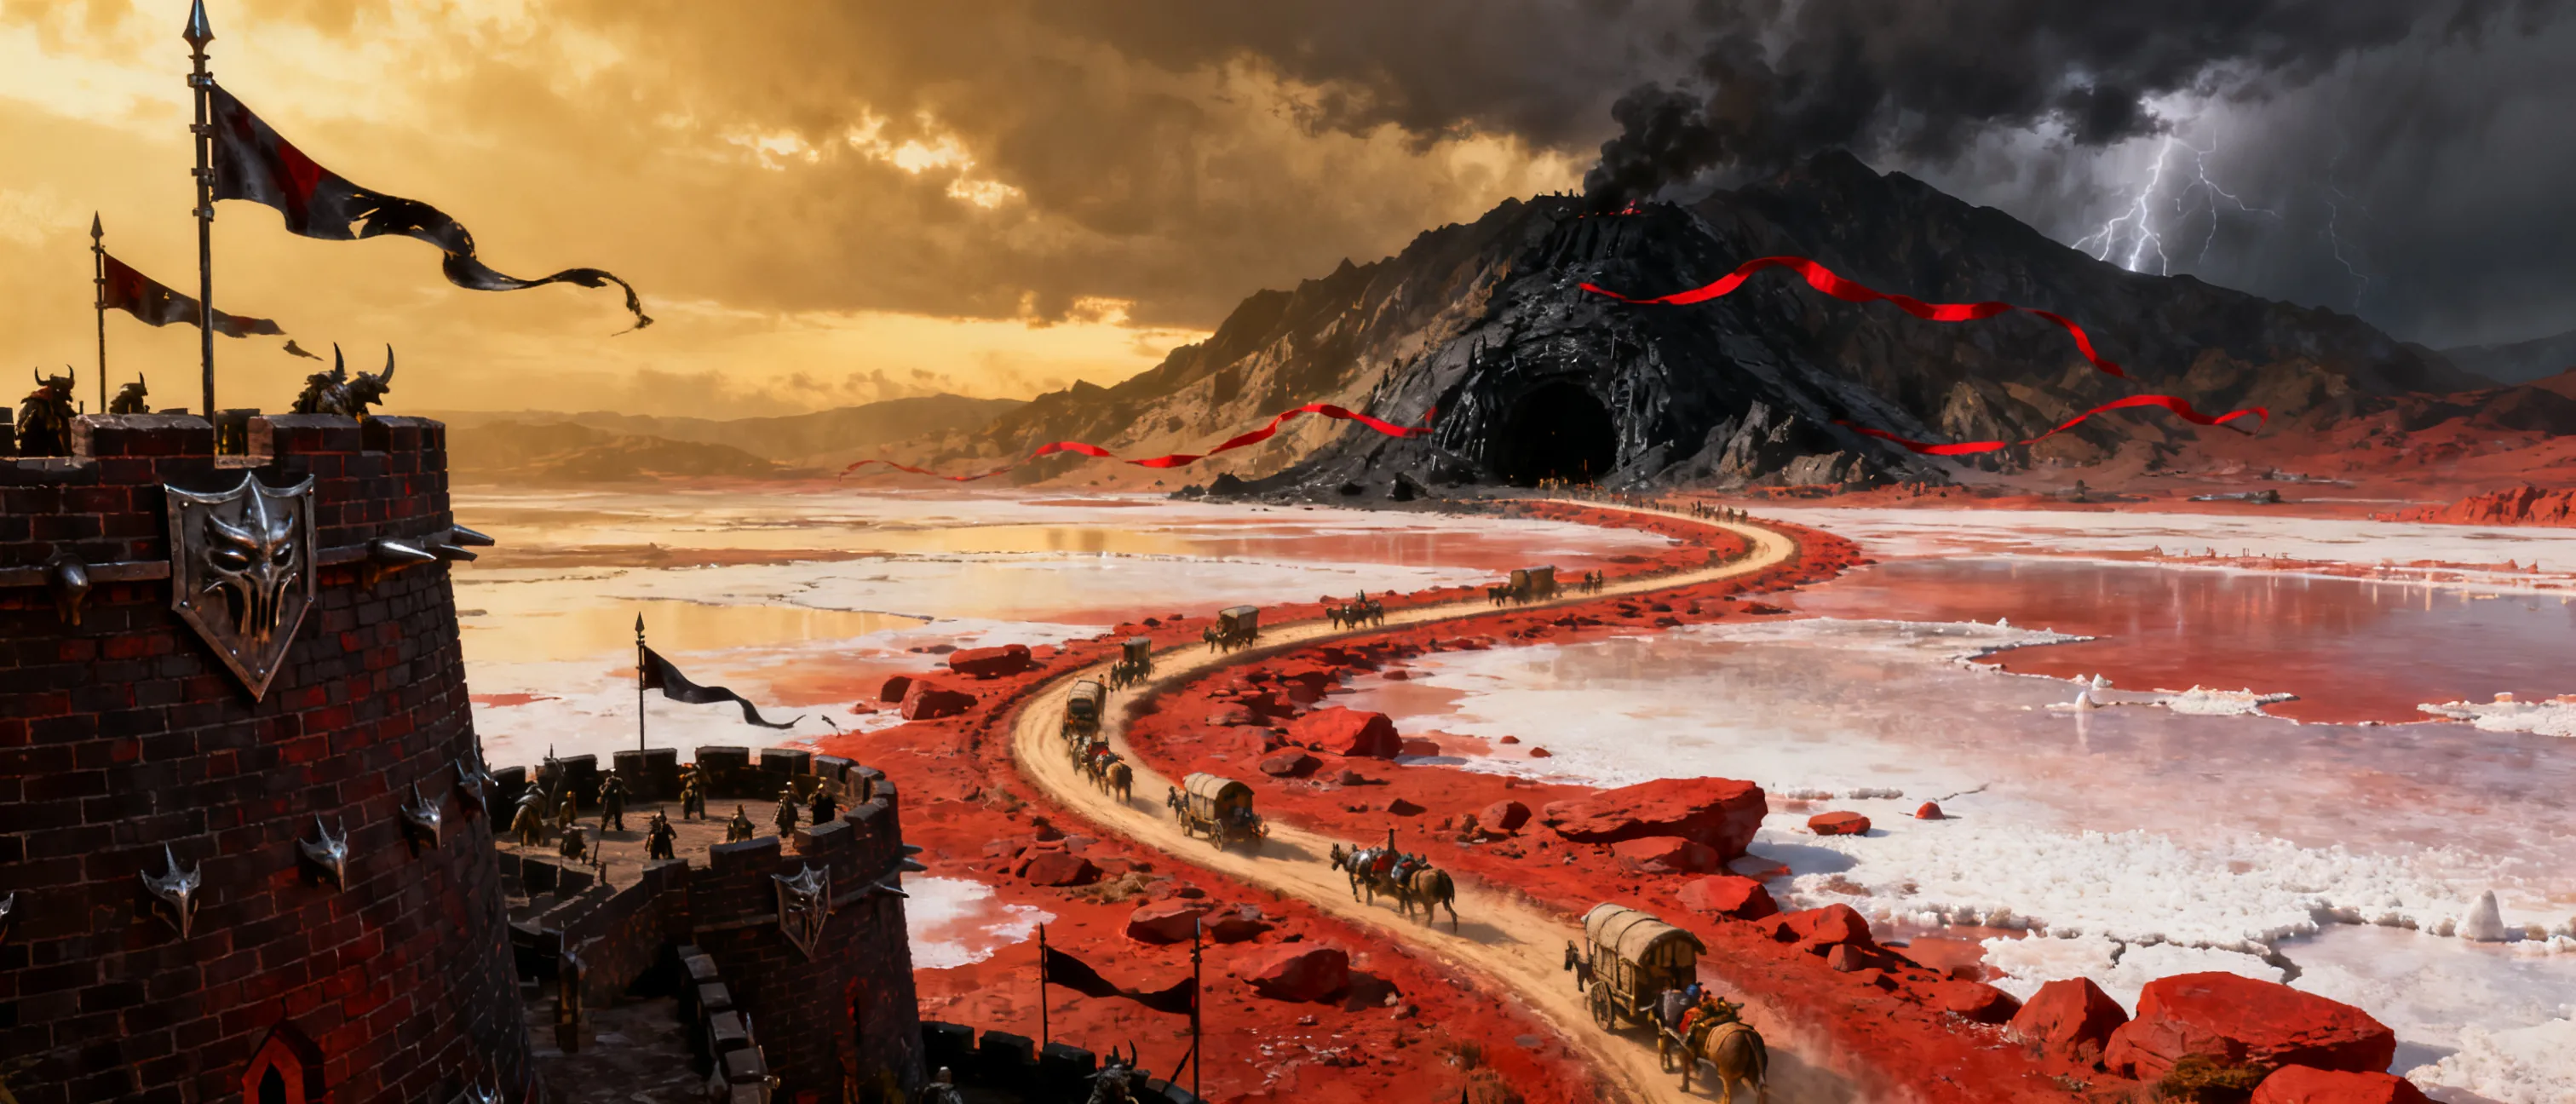
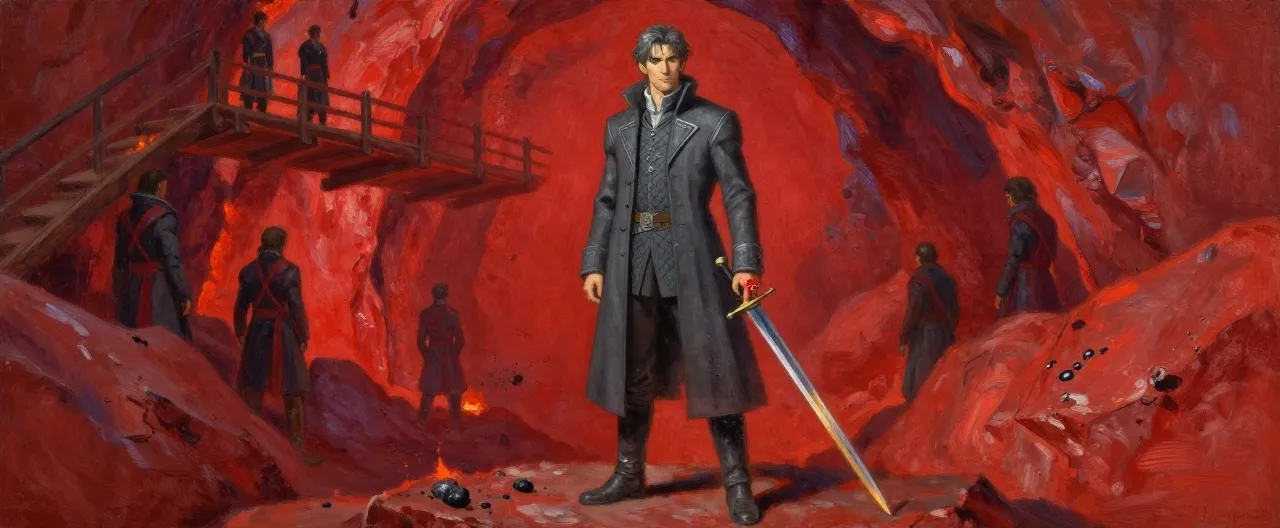
Factions

The Ironjaw Wardens

The Ironjaw Wardens are the hillfort city's guard, road patrol and court all at once. Founded by the clans that held the Ashen Reach against the salt raiders three centuries ago, the Wardens still wear the same iron token on a leather thong and still answer to a Warden rather than a lord. They are stretched thin: two hundred fighters for four hundred miles of road. Their hall is a smoke-blackened longhouse above the lower gate, and their word is the closest thing to law the Reach has.

Goals

Keep the Ashen Road open. Find who is arming the red-sash raiders. Hold Ironjaw Hold's neutrality between the Moonharbor Council and the clans. Recover the stolen iron without starting a war with the coast.

Relationships

With Other Factions
Wary of the Moonharbor Council, whom they suspect of buying the raiders' silence. Openly at war with the Redband Brotherhood. Tolerant of the Cinderfall Free Miners, who pay their road tolls in ore.
With Players
Wary at first — the Wardens do not trust outsiders with iron — but Gruma Ashfang hires the party in the opening scene and the relationship warms quickly if the party keeps its word.

The Redband Brotherhood

The Redband Brotherhood is what the Ashen Reach does with the men it throws away. Exiled soldiers, ruined clerks, debtors, deserters and orphans wear a strip of red cloth on the arm and call each other brother. They began as a protection racket in the Skullgate Bazaar and became an army. Their discipline is real, their loyalty is bought and their mercy is a rumor. Every company answers to a captain, every captain to Gorek Blacktusk, and Blacktusk to a man who signs his letters with a single red hand.

Goals

Dig the blackfire seam out of the Deadvein Deep. Refine it into weapons under Mother Sallow. Arm three thousand men. Seize Moonharbor's harbor chain and hold the coast. Break Ironjaw Hold's road monopoly forever.

Relationships

With Other Factions
At war with the Ironjaw Wardens. Infiltrating the Moonharbor Council through bought councilors and blackmailed guildmasters. Press-ganging the Cinderfall Free Miners into the deep works.
With Players
Hostile. Redband pickets attack the party on sight once the party has been seen on the road, and the Brotherhood marks them for death after the Skullgate Bazaar.

The Moonharbor Council

Moonharbor is ruled by a Council of nine magistrates, guildmasters and old merchant houses who meet in an arcaded hall above the harbor and disagree about everything except the harbor chain. The Council keeps the peace, keeps the tariffs and keeps its head in the sand. Its Guard is well armed and slow to move; its magistrates are honest in the way that men who own warehouses are honest. Two of the nine are already bought, and one more is being blackmailed, and the Council does not know it yet.

Goals

Keep the harbor chain secure. Keep tariffs high and the Reach's iron cheap. Avoid a war with the Brotherhood that would ruin the shipping season. Preserve the Council's authority against the Wardens and the smugglers.

Relationships

With Other Factions
Wary of the Ironjaw Wardens, whom they see as a rival power. Officially hostile to the Redband Brotherhood, in practice infiltrated by it. Tolerant of smugglers when the smugglers pay.
With Players
Neutral. The Council deals with the party as it deals with anyone — politely, for a fee — until the party brings proof of the Redband's infiltration, at which point Magistra Selene Dorn becomes a genuine ally.

The Cinderfall Free Miners

Cinderfall Hamlet is a village of free miners who work the old Deadvein galleries on shares and pay the Wardens a road toll in ore. They are not a guild and not a clan; they are three hundred stubborn families with picks, and they have held the mountain road for six generations. Their militia is a bell, a muster roll and whatever is in the tool shed. Since the Redband came to the deep works, the Free Miners have been disappearing one family at a time, and the ones who remain have stopped asking where.

Goals

Keep the village alive. Keep the old galleries free of the Redband. Recover the miners taken to the deep works. Get the poison out of the well.

Relationships

With Other Factions
Loyal to the Ironjaw Wardens, who have protected them for generations. Bitter toward the Moonharbor Council, which buys their ore cheap. Terrified of the Redband Brotherhood, which is press-ganging their families.
With Players
Friendly. The Free Miners will feed, house and guide the party from the moment they arrive — if the party can do something about the well.

Main Questline

The Burned Road

Given by: Gruma Ashfang
Three caravans have burned on the Ashen Road in a month and Warden Gruma Ashfang has no wardens to spare. She hires the party to trace the raiders, recover the stolen iron and name whoever is paying them. The trail runs from a burned wagon in her yard, down through the fence stalls of the Skullgate Bazaar, into a raider camp in the Redstone Draw, and out to the salt port of Saltmarch Landing, where the iron goes to sea.

Goals

- Examine the burned wagon and question the three survivors in the Warden's Hall.
- Trace the stolen iron through the Skullgate Bazaar and identify its buyer.
- Break the raider camp in the Redstone Draw and take its written orders.
- Follow the cargo to Saltmarch Landing and learn where it ships.

Reward

**400 gp** in iron and silver from the Warden's discretionary fund, a **Warden's Road Token** (advantage on Charisma checks with Ironjaw Wardens and free lodging at any Warden waystation), and the Wardens as standing allies for the rest of the campaign.

Secrets

  • Gruma already suspects the raiders are led by Gorek Blacktusk, an exiled Warden, and is hiding it because the shame would split the clans.
  • The caravan's route was sold by its own driver, not guessed by the raiders.
  • The stolen iron is consigned to a Moonharbor chandlery, which means a coastal city is buying what the Reach is losing.

DM Notes

Run this as a chase, not a mystery. Each location gives one hard clue and one fight. If the party stalls, have Brakka Thorn or Hurgan Coalhand push them east. Gruma never lies to the party but never volunteers the Blacktusk connection either.

The Salt Ledger

Given by: Captain Ilsa Ren
Captain Ilsa Ren has watched a nameless warehouse on the Saltmarch quay take midnight loadings for a season and cannot act without proof. She lends the party a harbor boat and two watchmen if they will get her something she can take to the Moonharbor Council. The warehouse is a front called the Salt Ledger, its cargo is stolen Reach iron, and its clerk answers to a privateer named Nessa Crowe.

Goals

- Get into the nameless warehouse on the Saltmarch quay, by stealth, by sea or by force.
- Recover the consignee letters naming Tace & Sons Shipwrights in Moonharbor.
- Decide whether to seize the cargo, follow the ship, or both.
- Carry the proof across the water to Moonharbor.

Reward

**250 gp** from the harbor watch's seizure fund, **free passage to Moonharbor** aboard a harbor boat, and a letter of introduction to Magistra Selene Dorn that gives the party advantage on their first social check in the city.

Secrets

  • The Salt Ledger is owned by the Moonharbor shipwrights' guild, not by the Redband, which means a city that claims to be the Brotherhood's enemy is financing it.
  • Father Cadoc's shipping book records the Salt Ledger's cargoes under three different names and is the proof Ilsa needs.
  • Nessa Crowe keeps a copy of her bribe ledger in her boat's false keel, so losing the warehouse crate does not ruin her.

DM Notes

Put a clock on this quest: the shipment leaves before the new moon. If the party dawdles, the cargo sails and they must stow away or buy passage. Nessa Crowe will not die for a crate and should escape to be a recurring problem.

The Mask of Moonharbor

Given by: Magistra Selene Dorn
Magistra Selene Dorn is the only honest voice on Moonharbor's Council of nine and she knows three of her colleagues are lying to her. She needs evidence, not accusations. The party must expose the Redband's agent inside the shipwrights' guild, seize the double ledgers from the guild counting-house, and raid a warehouse on the north mole for the mine maps that show where the stolen iron is really going.

Goals

- Bring Selene Dorn proof of the guild's double ledgers.
- Break Orrin Tace's silence without destroying him publicly.
- Raid the north mole warehouse and take the mine maps and Vane's letter.
- Expose Councilor Halvern before the Council votes on the harbor chain.

Reward

**1,000 gp** from the Council's contingency fund, the **Harbor Chain Warrant** (authority to detain any ship in Moonharbor harbor), and the Moonharbor Guard as allies for the march on the Deadvein Gate.

Secrets

  • Orrin Tace, guildmaster of the shipwrights, forges manifests because Mother Sallow holds his son in the deep works.
  • Councilor Halvern has been paid in Moonharbor silver that came out of the city's own tax chest.
  • The harbor chain has been quietly shortened by two links so a deep-keeled privateer can cross it at high tide.

DM Notes

This is the campaign's social act. Give the city a full session before the docks. Selene Dorn rewards evidence and punishes theatrics. Orrin Tace breaks under pressure but is not a villain; if the party ruins him, they lose the only man who knows every crate that left the city.

The Anvil of the Reach

Given by: Warden Skarn
Warden Skarn has twenty wardens and a pass to take. The Deadvein Gate is held by Redband veterans, the village below it is being poisoned, and the old works beneath the mountain are forging an army out of blackfire ore. Skarn needs the gate opened, the miners of Cinderfall rallied, and the seam collapsed before Edric Vane can arm three thousand men and take Moonharbor by its harbor chain.

Goals

- Break the Redband pickets at the Deadvein Gate and open the pass.
- Cleanse Cinderfall Hamlet's well and win the miners' loyalty.
- Descend through Gran Odda's old gallery into the deep works.
- Defeat Vane and his lieutenants and collapse the blackfire seam.

Reward

**2,500 gp** in iron ingots from the gate stores, the **Seam-Iron Plate** from the gate armoury, a formal alliance between the Ironjaw Wardens and the Cinderfall Free Miners, and a hero's naming in Ironjaw Hold that carries a permanent title and a seat at the Warden's table.

Secrets

  • The blackfire seam is unstable and will consume the mountain and Cinderfall with it if it is not collapsed.
  • Kael Dross has mapped a fourth support beam that will bring the entire refining floor down.
  • Warden Skarn was Gorek Blacktusk's sworn brother before the exile and has never told anyone.

DM Notes

Act III is a war march. Do not let the party rest inside the deep. Kael Dross is the key NPC: he knows the four supports and will not leave without the Cinderfall Ledger. If the party frees the slave pens first, the prisoners can carry charges and the finale gets easier.

Side Quests in The Ashen Reach

The Warden's Ledger

Given by: Gruma Ashfang
Gruma Ashfang has lost nine wardens this season and cannot prove which of her own sergeants is selling patrol routes to the Redband. She asks the party to quietly compare Sister Vale's shrine ledger of missing caravans against the Warden's duty rosters and find the man whose patrols always seem to be somewhere else. The answer is Sergeant Vol Ashfell, a twenty-year veteran with gambling debts and a Redband courier's token in his boot. Confronting him is delicate: he is popular, and accusing him publicly without proof will split the Wardens.

Goals

- Compare Sister Vale's shrine ledger with the Warden duty rosters.
- Identify the sergeant whose patrols never meet the raiders.
- Confront the traitor with proof, or bring the proof to Gruma and let her act.
- Decide whether to expose him publicly or let him resign quietly.

Reward

**300 gp** from Gruma's discretionary fund, a **Warden's Road Token** (grants advantage on Charisma checks with Ironjaw Wardens and free lodging at any Warden waystation), and Thokk Brightsteel's services at half price for the rest of the campaign.

Secrets

  • Sergeant Vol Ashfell has been selling patrol routes for eight months to pay gambling debts, and his handler is a Redband recruiter named Corvin Sash.
  • Vol's daughter is a Warden scout who knows nothing about her father's betrayal and will be devastated either way.
  • Gruma already suspects Vol and is using the party to confirm it without being seen to move against a popular veteran.

DM Notes

Run this as an investigation with three clues: the roster discrepancy, the gambling debt, and the Redband token. Vol will not fight unless cornered; if exposed publicly he tries to flee Ironjaw Hold and can become a recurring Redband informant. If handled quietly, the Wardens stay united and Gruma owes the party a real favor.

The Scribe's Cipher

Given by: Tessa Quill
Tessa Quill has been copying Redband manifests for a month and has a cipher she cannot quite break. She needs three more examples of the Brotherhood's writing, and she knows where they are: in the satchels of the recruiters working the bazaar's east row, in the strongbox of a bazaar moneylender who launders Redband silver, and in the hands of a courier who rides out at dusk every third day. Tessa is terrified and will not go herself. If the party brings her the samples, she can crack the cipher and read every Redband order the party recovers for the rest of the campaign.

Goals

- Obtain three Redband documents: a recruiter's satchel, the moneylender's strongbox ledger, and the courier's dispatch case.
- Bring them to Tessa Quill without alerting the bazaar's Redband contacts.
- Protect Tessa once the Brotherhood realizes she has broken their cipher.

Reward

**150 gp** from Tessa's savings, and Tessa Quill as a permanent cipher-breaker: any Redband document the party recovers can be decoded with a DC 10 Intelligence check instead of DC 15.

Secrets

  • The cipher is a simple substitution keyed to the phases of the moon, and Tessa has already guessed it — she needs the samples to be certain.
  • The bazaar moneylender is a Redband paymaster and keeps a list of every bought official in the Reach.
  • Tessa's father was a Moonharbor clerk ruined by the same tariff that ruined Edric Vane's father.

DM Notes

This quest rewards stealth and social play over combat. The courier rides out at dusk and can be ambushed on the road; the moneylender's strongbox needs a DC 15 Dexterity (Thieves' Tools) check or a DC 16 Charisma (Deception) to talk him into opening it. Once the cipher is broken, every later Redband document in the campaign is readable.

Side Quests in The Verdigris Coast

A Favor for Kessa Tide

Given by: Kessa Tide
Kessa Tide has been running goods past the Moonharbor harbor chain for six years, and the Redband has been undercutting her for two. She wants the party's help to take back a shipment the Brotherhood stole from her — a crate of Verdigris brandy and, more importantly, a ledger of every bribe she has ever paid to the harbor Guard. If that ledger reaches the Council, Kessa hangs. The crate is in the north mole warehouse the party is already planning to raid, and Kessa will guide them through the tide-gates in exchange for getting it out before the Guard arrives.

Goals

- Enter the north mole warehouse and find Kessa's crate before the Guard arrives.
- Recover the bribe ledger without letting it fall into Council hands.
- Get the crate to Kessa's boat at the undercroft stairs.
- Decide what to do about the names in the ledger.

Reward

**200 gp** in smuggled brandy and coin, **Kessa Tide's boat** for the run to Wrecker's Cay (saving the party a day and a DC 14 Charisma check with Ilsa Ren), and a permanent contact in the Moonharbor underworld.

Secrets

  • Kessa's bribe ledger names three harbor Guard officers and one Council clerk.
  • The Redband stole the crate not for the brandy but to get the ledger and blackmail Kessa into working for them.
  • Kessa has already hidden a copy of the ledger in her boat's false keel, so losing the crate is not fatal to her — but she will not say so.

DM Notes

This quest runs alongside the docks scene and adds a timer: the crate is in the warehouse office, and the Guard arrives ten rounds after the alarm. If the party hands the ledger to Magistra Dorn, Kessa is arrested and the party loses a useful ally; if they destroy it, Kessa owes them a life debt and the Council loses a corruption case.

The Lamp That Lied

Given by: Neddy Lamp
Neddy Lamp has kept a list of every ship he has darkened his light for — nineteen vessels and two hundred and six dead — and he wants the list to mean something. He asks the party to carry it to the Moonharbor Council and to find the families of the drowned, so that the wrecks are recorded and the Redband's crime is on paper. The list is dangerous: it names the dates, the cargoes and the Redband officers who came ashore, including Nessa Crowe and a black-tusked orc. Neddy cannot read well enough to be sure of the names, and he is terrified he has got them wrong.

Goals

- Take Neddy's list to a magistrate who will act on it.
- Find at least three of the drowned sailors' families and record their names.
- Protect Neddy from the Redband, who will kill him if they learn he kept a list.

Reward

**A lighthouse keeper's chart** of the Verdigris Coast (grants advantage on navigation checks along the coast and reveals the hidden approach to the Deadvein coast), **100 gp** collected from the families, and Neddy Lamp's undying gratitude.

Secrets

  • One of the names on Neddy's list is a Moonharbor Council clerk who has been selling ship schedules to the Redband.
  • Neddy's list includes the ship that carried Orrin Tace's son to the deep works.
  • Neddy has been sending unsigned letters to the Council for a year and one of them reached Magistra Selene Dorn, who has been quietly investigating ever since.

DM Notes

This is a roleplay-heavy quest with a real reward: the list is admissible evidence in Moonharbor and gives the party advantage on any social check against the Council for the rest of the campaign. If the party loses the list, Neddy is murdered within a week and the Council case collapses.

Side Quests in The Deadvein Highlands

The Crane Family Debt

Given by: Mayor Essa Crane
Essa Crane has run Cinderfall for six years and has never told the village that her brother Kael was the deep works' foreman before the Redband took him. She believes he is still alive and has been quietly sending food down the old gallery for a year. She asks the party to find him, and to bring back the ledger he kept — a record of every miner the Redband has taken, which is the only proof of the deep works' existence that would survive a Moonharbor trial. She cannot go herself; if she leaves the village, the miners will scatter.

Goals

- Find Kael Dross in the deep works' slave pens.
- Recover the Cinderfall Ledger from the fourth support housing.
- Get Kael and the ledger out alive.
- Decide whether to publish the ledger or use it as leverage.

Reward

**The Cinderfall Ledger** (proof of the Redband's crimes, worth 500 gp from the Moonharbor Council and a formal alliance with the Free Miners), **Kael Dross as a guide** through the deep works, and Essa Crane's lifelong loyalty.

Secrets

  • Kael Dross has been keeping the ledger hidden in the fourth support beam's housing, where Sallow never looks.
  • Essa Crane has been sending food down the gallery for a year and the Redband has been taking it, which is how they found the gallery in the first place.
  • Kael knows the fourth support will bring the refining floor down and has been waiting for someone to ask.

DM Notes

This quest ties directly into the finale. Kael is in the slave pens and will not leave without the ledger. If the party recovers it, the Moonharbor Council's case against the Redband is unassailable and the epilogue is a clean victory. If they lose it, the epilogue is a messy one where the Brotherhood's financiers escape justice.

Bim's Broken Pump

Given by: Bim Sprocket
Bim Sprocket built Cinderfall's water pump and is furious that someone has ruined it. The pump draws from the lower gallery, and Bim is certain the poison is coming from a specific flooded shaft rather than the whole aquifer. Bim needs three things to prove it: a copper fitting from the burned houses, a bag of charcoal from the smithy, and a sample of water from the flooded shaft itself — which means going down into the lower gallery where the Redband's press-gangs have been seen. Bim will build the filter if the party brings back the sample.

Goals

- Salvage a copper fitting from the burned houses.
- Collect charcoal from the smithy.
- Descend into the lower gallery and take a water sample from the flooded shaft.
- Bring everything back to Bim Sprocket.

Reward

**Bim's Blackfire Filter** (a portable alchemical device that can cleanse up to ten gallons of blackfire-tainted water per day, and grants advantage on saving throws against blackfire fumes), **150 gp** from the village's emergency fund, and Bim Sprocket as a permanent ally.

Secrets

  • The poison is entering through a single flooded shaft that connects directly to Sallow's laboratory drain.
  • Bim has been inside the deep works' refining floor once, disguised as a Redband porter, and knows the layout of the upper level.
  • The copper fitting Bim needs is in the burned house of a miner who was taken by the press-gang — his family is still living in the ruin.

DM Notes

The lower gallery is a short, tense dungeon: flooded tunnels, a Redband press-gang of four bandits and a scout, and a shaft that leads down toward Sallow's laboratory drain. The water sample is the key — with it, Bim's filter can cleanse the well and the party gains a portable defense against blackfire for the finale.

Character Quests for Halvard Keen

The Book of the Drowned

Father Cadoc keeps a book of every ship that has left Saltmarch Landing and every one that has not come back, and the page for Halvard's ship has nine names and a blank space where the tenth should be. Cadoc will not write Halvard's name in it while he is alive to object, and Halvard cannot ask him to. What he can do is prove what the book is for: the Salt Ledger's midnight loadings, the darkened light on the cay, and the nineteen wrecks the keeper has been forced to cause. Halvard must gather the proof at the quay and the nameless warehouse, carry it to the Council in Moonharbor, and then come back to the harbor shrine and let the old priest close the page.

Starting point

Gather proof of the wrecks: cross-reference Father Cadoc's shipping book with the Salt Ledger's true ledgers in the nameless warehouse's flooded undercroft, and recover Neddy Lamp's list of nineteen darkened lights.

Choice

Take the proof to Captain Ilsa Ren immediately, or hold it until more wrecks can be documented.

Ren can act faster with partial proof but the Council case is weaker; waiting strengthens the evidence but risks the Salt Ledger's cargo sailing before the new moon.
Alternative

Confront the keeper of Wrecker's Cay's light with the names of the drowned, or bring him alive to testify.

The keeper's testimony damns the Redband in Moonharbor; his death at Redband hands makes him a martyr whose grave Halvard digs himself.
Mechanical Rewards
  • The Salt-Crusted Lantern from the undercroft strongbox, which makes the drowned dead hesitate
  • A permanent +2 bonus to Charisma (Persuasion) checks with harbor folk, sailors and the Moonharbor Council once the proof is delivered
  • Father Cadoc's brass hand-bell, blessed at the shrine: once per long rest, its ring grants Halvard and allies within 30 feet advantage on saving throws against being Frightened for one minute
Narrative Rewards
  • Father Cadoc finally speaks the sentence he has withheld for eleven years: that he never once doubted Halvard deserved to live
  • The Book of the Drowned gains a completed page, and Halvard's name is written in it — not as a dead man, but as the man who closed the account

The Ninth Name

Halvard can name eight of the nine men who drowned the night his ship went onto the rocks. The ninth — a young deckhand called Tam Wicke — was never recovered, and Father Cadoc buried an empty box. Rumor among the Saltmarch dockhands says a man matching Tam's description was seen alive on the shingle of Wrecker's Cay two years ago, taken inland by men in red sashes. Halvard must follow the rumor through the Redstone Draw's raider camp tally-sticks and the deep works' slave pens to learn whether Tam lives, died in the mine, or — the thought Halvard cannot say aloud — was the one who arranged the light and swam away while nine men drowned.

Starting point

Find the tally-stick in the Redstone Draw cave camp that counts prisoners taken for 'the deep works', and search it for Tam Wicke's name or description.

Choice

Tell the party why this name matters, or pursue it quietly and alone.

Sharing the guilt lightens it; hoarding it risks Halvard walking into the deep works half-cocked.
Mechanical Rewards
  • The truth of the ninth name, which may be a living man, a corpse in the deep, or a traitor
  • A sailor's bone prayer-ring from Tam's effects, granting Halvard advantage on Wisdom (Perception) checks to spot hazards at sea or in flooded passages
  • A permanent +1 to Halvard's Wisdom score if he brings Tam home and Cadoc writes the true account
Narrative Rewards
  • The tenth name in the Book of the Drowned is finally written — and it is the name Halvard feared or hoped for
  • Father Cadoc's silence about the wreck is broken, and the two men finally speak of the night that made them both

The Bell That Answers

The brass hand-bell Halvard inherited from Father Cadoc's predecessor is older than the shrine itself, and it does something no harbor bell should: on certain nights, when rung over black water, something answers. Old sailors mutter that the bell was cast from the chain of a ship that was wrecked on purpose, and that the drowned remember the sound. Halvard must learn the bell's history — through the shrine's oldest records, a retired Moonharbor bell-founder, and finally the flooded lower mouth of the Wreckers' Cay sea cave — and decide whether the thing that answers is a haunting to be laid to rest, a witness to be questioned, or a god of the harbor that has been waiting for a priest who would listen.

Starting point

Research the bell's casting in the shrine's oldest records and the Moonharbor bell-founders' guild registry.

Choice

Report the bell's strangeness to Father Cadoc, or keep it from the old man to spare him.

Cadoc knows more about the bell than he has ever said; telling him unlocks his story and deepens their bond.
Mechanical Rewards
  • The hand-bell becomes a true holy symbol and focus, and its ring can, once per long rest, turn undead as a Cleric of Halvard's level plus two
  • Knowledge of the bell's origin: it was cast from the harbor chain of the Warden's Wrath, a Moonharbor customs ship wrecked by the first wreckers of the cay, forty years before Halvard was born
Narrative Rewards
  • The drowned of Wrecker's Cay are named, and Halvard's shrine gains a wall of remembrance that sailors begin visiting from three ports away
  • Halvard's faith stops being an inheritance and becomes a calling with a voice attached to it

Character Quests for Gorza Ironvow

The Brightsteel Oath

Thokk Brightsteel forged a masterwork blade that went east on the caravan that burned, and the Redband has reforged it with something that leaves a red sheen. Gorza must follow the trail from Thokk's forge through the burned wagons, the Skullgate Bazaar fence stalls, and the raider camp in the Redstone Draw, where the blade turns up in the hands of a Redband officer. She must choose whether to return it to the anvil for re-tempering, or carry it as it is, marked by what it did. Every step teaches her what the Redband is doing to good Ironjaw steel — and what her own word is worth when keeping it costs her something she wants to keep.

Starting point

Gorza examines the burned wagons in the Warden's yard with Thokk's description in mind and finds drag marks toward the Draw, plus a smith's punch mark only a Brightsteel blade would carry.

Choice

Report the forge punch mark to Warden Ashfang or keep Thokk's secret and the trail between the two of them.

Reporting it brings the Wardens in early but costs Thokk his anonymity and possibly his commissions; keeping it deepens the bond with the smith and keeps the Wardens from seizing the blade as Warden property.
Mechanical Rewards
  • A re-tempered Brightsteel blade (+1 greatsword, never dulls, +1d4 fire vs Redband) OR a permanent Warden's Road Token and Warden faction favor
  • Advantage on Smith's Tools checks and free access to Thokk Brightsteel's forge
  • +1 proficiency bonus to Intimidation or Stealth (depending on chosen path) when dealing with the Redband Brotherhood
Narrative Rewards
  • Thokk finally sleeps, and Gorza has answered for the burned caravan in a way the Wardens never could.
  • Gorza's word is tested and holds, and the clans of Ironjaw Hold know her name for it.
  • She understands what the Redband is doing to stolen steel, which is the knowledge that opens the Deadvein Deep.

Character Quests for Merrit Ashgrove

The Apothecary's Burn

Lira Fen treated a Redband courier's wound last month and has been frightened ever since, because the burn on his arm did not look like any fire she knew — it was cold at the edges and it kept glowing under the bandage. Merrit needs that residue sample, and Lira will only give it to someone who can tell her what she touched. The quest plays out in Lira's shop and the arcaded streets of Moonharbor: Merrit must analyze the blackfire residue, match it against the ore described in Corvel's last letter, and trace the courier's route through the docks to the north mole warehouse, where she finds her teacher's survey case in the Brotherhood's office. What she does with the case — and with the knowledge that blackfire can be cleansed as well as weaponized — decides whether Cinderfall's well can be saved.

Starting point

Analyze the residue in Lira Fen's shop and identify it as blackfire, matching Corvel's letter.

Mechanical Rewards
  • The cleansing formula written into her spellbook: once per Long Rest, Merrit can neutralize blackfire residue on an object or in one gallon of liquid with a ten-minute ritual.
Narrative Rewards
  • Lira Fen sleeps with the shop lamp lit for the first time in a month, and becomes a standing source of alchemical supplies and harbor gossip.

The Survey That Stopped

Corvel went up the coast road two years ago to survey the old Deadvein workings and sent one letter and then nothing. Merrit has recited its last line so often she can hear his voice saying it: 'the ore here burns without smoke, and it should not.' Following the survey's route — the coast road, Thornwatch, the Deadvein Gate, and at last the deep works — Merrit retraces her teacher's steps, interviewing everyone he wrote to and everyone who saw him pass. The trail ends in the slave pens of the Deadvein Deep, where an old scholar's survey instruments hang on a wall like trophies, and where Mother Sallow has been reading Corvel's notes with genuine delight. What happened to him is the question the whole campaign has been asking, and the answer is worse than death.

Starting point

Reconstruct Corvel's route from his letter and interview witnesses along the coast road.

Mechanical Rewards
  • Corvel's brass survey instruments (advantage on Intelligence checks to map or navigate the Deadvein galleries) and either Corvel's Chill or the journal's recall benefit.
Narrative Rewards
  • The truth of Corvel's fate, and the right to sign the finished survey with both their names.

What Burns Without Smoke

Merrit prepared fire and cold spells for one reason: to test blackfire's weaknesses in the field. This quest is her laboratory, and the laboratory is the road. Across the campaign she must document blackfire under real conditions — a courier's burn, a poisoned well, a forge-tainted blade, a slagling in a flooded gallery, the seam itself — building a working theory of what the ore is and what it fears. Old Marn will trade shrine-news for her findings; Tessa Quill will cipher-check her copied manifests; Thokk Brightsteel will burn his fingers proving her cold hypothesis right. Each verified finding hardens the theory, and the finished theory is the only reason the party will know that the fourth support beam must come down before the seam is fired.

Starting point

Document three independent blackfire phenomena and compare them against Corvel's letter.

Mechanical Rewards
  • Blackfire Lore: Merrit gains advantage on all checks to identify, counter or cleanse blackfire, and her cold-damage spells treat blackfire creatures as vulnerable.
Narrative Rewards
  • A finished treatise — the survey completed at last — that survives the campaign and names every hand that helped.

Step into your campaign

A world you can explore

Play a 3D adventure with your party: explore settlements, wilderness and dungeons, and fight in real time with pause. Best on a desktop or laptop with a mouse and keyboard.

Preparing game world
Play in browser

Encounters

Rats in the Warden's Cellar

Suggested Level: Level 1

Gruma Ashfang sends the party down to check the salvaged crates from the burned wagon before she will discuss payment. The lamp oil has been chewed through, the rope is in pieces, and something is moving behind the salt sacks.

Creatures

Terrain Features

A low stone cellar with a barrel-vaulted ceiling, stacked crates and salt sacks that give half cover. Two narrow drains in the floor are six inches wide — the gnaws squeeze through them. A spilled lamp oil slick covers one five-foot square and is flammable.

Treasure

The salvaged cargo holds a stamped crate-lid bearing a Moonharbor chandlery mark, worth 15 gp as scrap and worth far more as a clue. Gruma also leaves a purse of 20 gp on the cellar steps for a job done quickly.

DM Notes

For three characters, use three Drain Gnaws. For six characters, use six and add a slick of lamp oil that catches fire if a torch is brought within five feet.

The East Row Press-Gang

Suggested Level: Levels 1–2

A Redband recruiter named Corvin Sash is working the east row with a satchel of manifests and a fistful of Moonharbor silver. When the party starts asking about stolen iron, he decides they are a problem and sends his press-gang to make an example.

Creatures

Terrain Features

Three crooked streets of awnings and stalls, crowded with civilians. Canvas awnings give half cover and catch fire easily. A brazier has been kicked over and creates a five-foot square of difficult, burning ground. The crowd counts as difficult terrain until it scatters.

Treasure

Corvin Sash's satchel holds a coded manifest naming Saltmarch Landing as the transshipment port, 40 gp in Moonharbor silver, and a Redband courier's token. The stallholders, grateful, knock 10 percent off everything the party buys in the bazaar for the rest of the act.

DM Notes

For a level 1 party, drop to three bandits and one scout. For a level 3 party, add a Thug as the gang's leader and give the scouts a rooftop position with advantage on their first shot.

The Redstone Cave Camp

Suggested Level: Level 3

Brakka Thorn has tracked the raiders to a cave above the canyon floor. A guard fire burns at the mouth, a dozen chained prisoners sit in the second chamber, and an ogre called Mugor Bonechew sleeps in the back with a wagon axle for a club.

Creatures

Terrain Features

Three chambers climbing away from the road. The entrance is a five-foot-wide choke point. A guard fire in the first chamber gives bright light and can be kicked over for a burning hazard. The second chamber has chained prisoners who will not fight but can be freed. A hidden back exit behind the supply crates leads out onto the mesa.

Treasure

A pay chest with 120 gp and 30 sp, a tally-stick counting prisoners taken for the deep works, and a bundle of orders signed G.B. naming a shipment due at Saltmarch Landing before the new moon. The prisoners include Pell's brother, who can be freed and sent home.

DM Notes

For a level 2 party, remove the ogre and add two more bandits. For a level 4 party, add a second ogre or give Mugor Bonechew maximum hit points and a Veteran as his handler.

The Salt Ledger Undercroft

Suggested Level: Level 4

The party gets into the Salt Ledger warehouse and finds the real books in the cellar. The tide-gate below is guarded by a bound water weird called Undertow, and the drowned dead of the quay have been rising in the flooded tunnels.

Creatures

Terrain Features

Half the undercroft is knee-deep black water and counts as difficult terrain. The dry half has stacked crates for cover and a narrow stair. The tide-gate is a five-foot iron grille that can be opened from below at low tide. Salt crust makes the dry floor slippery — a DC 10 Dexterity saving throw to avoid falling prone when dashing.

Treasure

The Salt Ledger's true books, a consignee letter naming Tace & Sons Shipwrights in Moonharbor, and a note mentioning the deep works and a foreman named Kael Dross. A locked strongbox holds 200 gp in smuggled silver and a **Salt-Crusted Lantern**.

DM Notes

For a level 3 party, remove the water weird and use one salt husk. For a level 5 party, add a second water weird and two more bandits on the stairs.

The Wreckers' Sea Cave

Suggested Level: Level 5

Neddy Lamp leads the party to the western cave mouth. Eleven prisoners are chained in the second chamber, a chuul lairs in the flooded eastern mouth, and the garrison is eating supper around a signal brazier.

Creatures

Terrain Features

Four chambers running from the shingle beach to the flooded eastern mouth. The eastern mouth is only open for two hours at low tide. Standing water in the lower chambers is difficult terrain and hides the lurkers. The signal brazier gives bright light and can be extinguished to blind the moths.

Treasure

The signal codebook in the cave office, 180 gp in shipwreck salvage, a lighthouse keeper's silver locket worth 60 gp, and eleven freed prisoners who know the mountain road to the Deadvein Gate.

DM Notes

For a level 4 party, remove the chuul and one brine lurker. For a level 6 party, add a second chuul and two more bandits, and have the cultist cast spiritual weapon on the first round.

Night on the North Mole

Suggested Level: Level 5

Bram Holt gives the party the lease and the crane schedule. Kessa Tide can get them in through the tide-gate at low tide. The warehouse is guarded by a Redband crew who have been told the mole's own Guard will look the other way.

Creatures

Terrain Features

A stone breakwater with a warehouse, a roof crane, a loading dock and a tide-gate. Crates and barrels give cover. The gantry is twenty feet up with a ladder at each end. The tide-gate opens onto black water at low tide. Lanterns give bright light in a twenty-foot radius and dim light beyond.

Treasure

The mine maps marking a blackfire seam beneath the Deadvein Deep, a letter from Edric Vane calling the mine the anvil of the Reach, 350 gp in Redband pay, and Kessa Tide's crate with her bribe ledger in it.

DM Notes

For a level 4 party, use two veterans and four bandits. For a level 6 party, add a fourth veteran and a Redband captain using the Knight stat block, and shorten the Guard's arrival to six rounds.

The Salt Wraith's Deck

Suggested Level: Level 5

If the party tries to take the Salt Ledger's cargo by sea, Nessa Crowe meets them on her own deck with a boarding pike and forty crew behind her. She will parley first and fight second, and she will not die for a crate.

Creatures

Terrain Features

A narrow deck with a raised quarterdeck, hatches that can be slammed on a hand, rigging ropes that can be cut, and open water on both sides. The gangplank is a five-foot-wide choke point. A swinging yardarm can knock a character into the harbor on a failed DC 12 Dexterity saving throw.

Treasure

Nessa's bribe ledger in the false keel, 300 gp in smuggled coin, a **Tide-Gate Key**, and the Salt Wraith herself if the party can buy her debt or beat her fairly.

DM Notes

For a level 4 party, use two bandits and let Nessa flee at half hit points. For a level 6 party, add four bandits and a Veteran first mate, and give Nessa the high ground on the quarterdeck.

The Stand at Thornwatch

Suggested Level: Levels 6–7

Gorek Blacktusk brings a company up the ridge in three waves to break the militia before it can march. Sergeant Dara Vint has forty farmers, three crossbows and one bell, and she needs the party on the palisade.

Creatures

Terrain Features

A palisade of sharpened stakes on a ridge top, a leaning watchtower, a seaward gate and a bell. The ground falls away steeply on both sides. The palisade can be breached in one ten-foot section. Healer Om's tent gives a safe point between waves. Torchlight and smoke limit visibility to sixty feet.

Treasure

Blacktusk's blackfire-forged greatsword if he falls, 400 gp in Redband pay chests, a **Blackfire Ward Amulet** in the militia stores, and the militia's march on the Deadvein Gate.

DM Notes

For a level 5 party, run two waves and remove Blacktusk, replacing him with a Veteran captain. For a level 8 party, add a second wave of four bandits and give Blacktusk two Veteran bodyguards.

The Deadvein Gate

Suggested Level: Level 9

Warden Skarn's twenty wardens assault the gate frontally while the party takes the watchpost from the goat track. The Redband garrison is dug in on both shoulders and its stores are full of blackfire ingots stamped for Moonharbor.

Creatures

Terrain Features

A switchback road above the treeline with a forty-foot drop on one side. The iron gate is three inches of iron on oak and will not fall to a ram. The watchpost is half ruined and gives three-quarters cover. The goat track around the eastern shoulder comes down behind the watchpost and is unguarded. Ice and loose scree make the switchbacks difficult terrain.

Treasure

The gate stores hold blackfire ingots stamped for Moonharbor, 600 gp in Redband coin, a **Seam-Iron Plate** in the armoury, and the pass itself.

DM Notes

For a level 8 party, use six veterans and two scouts. For a level 10 party, add a Knight as the Redband gate captain and a third scree stalker on the goat track.

The Cinderfall Lower Gallery

Suggested Level: Levels 8–9

Bim Sprocket needs a water sample from the flooded shaft, and the shaft is past a press-gang and a thing that has grown fat in the poison. The gallery is dark, wet and full of old rails.

Creatures

Terrain Features

A flooded mine gallery with old rails, rotten timber props and a shaft that drops into black water. Half the floor is difficult terrain. The slaglings leave hot slag behind them. The ceiling is low enough that Large creatures have disadvantage on attack rolls in the upper gallery. Total darkness beyond sixty feet.

Treasure

A water sample from the flooded shaft, 200 gp in old mine silver, a set of miners' tools worth 50 gp, and a vial of Sallow's alchemical reagent that grants advantage on saves against blackfire fumes for one hour.

DM Notes

For a level 7 party, remove the otyugh and two slaglings. For a level 10 party, add a second otyugh and two more slaglings, and have the press-gang collapse the gallery behind them.

The Refining Floor

Suggested Level: Level 10

Mother Sallow and Gorek Blacktusk hold the refining floor with a slagbound sentinel and a screen of cultists. Kael Dross is chained at the fourth support with the Cinderfall Ledger hidden in its housing.

Creatures

Terrain Features

A cavern floor with iron rails, timber props and channels of blackfire that deal 1d6 fire damage to anyone who enters them. Catwalks run overhead. Four great support beams stand at the corners of the floor. The air is hot and thin — a DC 12 Constitution saving throw each hour or gain one level of exhaustion.

Treasure

Sallow's laboratory notes with the formula for cleansing blackfire residue, the Cinderfall Ledger from the fourth support housing, 800 gp in Vane's war chest, and Blacktusk's blackfire greatsword if he falls here.

DM Notes

For a level 9 party, remove Blacktusk and two cultists. For a level 11 party, add a second slagbound sentinel and give Sallow two more cultists and a prepared alchemical trap on the stair.

The Blackfire Seam

Suggested Level: Level 11

Edric Vane waits at the seam with his guard and a seam vein wretch. The four supports are set. The party must fight him and set the charges before the mountain comes down on all of them.

Creatures

Terrain Features

A cathedral of a cavern with a glowing seam in the far wall, four great support beams, catwalks overhead and a floor of broken rock. The seam deals 1d6 fire damage to anyone who starts a turn within ten feet of it. Setting and lighting a charge takes a DC 15 Dexterity (Thieves' Tools) or Strength (Athletics) check under fire. Total collapse begins three rounds after the fourth charge is lit.

Treasure

Vane's red hand signet, 1,500 gp in his war chest, Sallow's cleansing formula if it was not taken earlier, and the collapse of the seam itself.

DM Notes

For a level 10 party, remove the two veterans and one tramway shade. For a level 12 party, add two more veterans and a second seam vein wretch, and shorten the collapse timer to two rounds.

Magic Items

Salt-Crusted Lantern Salt-Crusted Lantern Completed

Salt-Crusted Lantern

Uncommon
A ship's lantern caked in white salt that burns with a cold blue flame. It never goes out in wind or rain, and its light makes the drowned dead hesitate.

Location

Act I - the Salt Ledger undercroft strongbox beneath the nameless warehouse at Saltmarch Landing

Attunement

False

Warden's Road Token Warden's Road Token Completed

Warden's Road Token

Uncommon
A palm-sized iron disc stamped with the Ironjaw gate and worn smooth by a hundred hands. Wardens who carry one are fed, housed and believed anywhere on the Ashen Road.

Location

Act I - Ironjaw Hold, given by Gruma Ashfang on completion of The Burned Road

Attunement

False

Marn's Waystone Charm Marn's Waystone Charm Completed

Marn's Waystone Charm

Common
A flat grey stone from Old Marn's roadside shrine, scratched with a forgotten road god's mark. It grows warm when the bearer is being followed and points, faintly, toward the nearest safe water.

Location

Act I - the Redstone Draw, hidden under Old Marn's altar with the Redband orders

Attunement

False

Cinderlash, the Brightsteel Blade Cinderlash, the Brightsteel Blade Completed

Cinderlash, the Brightsteel Blade

Rare
Thokk Brightsteel's masterwork longsword, recovered from a Redband officer. Its edge carries a faint red sheen from being reforged with blackfire, and it never dulls.

Location

Act I - the Redstone Draw raider camp, in the hands of the camp's ogre enforcer

Attunement

True — by a character proficient with martial weapons

Tide-Gate Key Tide-Gate Key Completed

Tide-Gate Key

Uncommon
A green copper key grown over with barnacles that fits any tide-gate, sluice or harbor lock on the Verdigris Coast. It turns easily in salt water and never rusts.

Location

Act II - the Salt Wraith's false keel, aboard Nessa Crowe's privateer at Saltmarch Landing

Attunement

False

Harbor Chain Link Harbor Chain Link Completed

Harbor Chain Link

Rare
A single black iron link from Moonharbor's great chain, worn as a pendant. It steadies the wearer on any deck and lets them hold a rope one-handed in a storm.

Location

Act II - Moonharbor, in the guild counting-house strongbox behind the double ledgers

Attunement

True — by any character

Warden's Signal Codebook Warden's Signal Codebook Completed

Warden's Signal Codebook

Uncommon
A slim oilskin book of Redband signal flags, bell patterns and countersigns. Anyone carrying it can pass a Brotherhood checkpoint with a confident wave and the right whistle.

Location

Act II - Wrecker's Cay, in the sea-cave's signal office

Attunement

False

Blackfire Ward Amulet Blackfire Ward Amulet Completed

Blackfire Ward Amulet

Rare
A disc of hammered lead on a leather cord, scorched black on one side. It drinks the heat out of blackfire fumes and lets the wearer breathe where the air should kill.

Location

Act II - Thornwatch Camp, in the militia stores behind the watchtower

Attunement

True — by any character

Bim's Blackfire Filter Bim's Blackfire Filter Completed

Bim's Blackfire Filter

Rare
A copper and charcoal contraption the size of a hatbox, built by a goblin who was furious about a well. It cleanses ten gallons of tainted water a day and hums when it works.

Location

Act III - Cinderfall Hamlet, built by Bim Sprocket from parts the party salvages

Attunement

False

Seam-Iron Plate Seam-Iron Plate Completed

Seam-Iron Plate

Very Rare
Blackfire-forged plate armour with a dull red sheen and a heat that never quite leaves it. Blows that would stagger the wearer slide off it, and fire cannot touch it.

Location

Act III - the Deadvein Gate, in the Redband armoury behind the watchpost

Attunement

True — by a character proficient with heavy armour

Sallow's Cleansing Draught Sallow's Cleansing Draught Completed

Sallow's Cleansing Draught

Rare
A stoppered green vial from Mother Sallow's laboratory, bitter as gall. Drunk, it purges blackfire residue from the blood and leaves the drinker clear-headed and very cold.

Location

Act III - the Deadvein Deep refining floor, in Sallow's laboratory case

Attunement

False

Vane's Red Hand Signet Vane's Red Hand Signet Completed

Vane's Red Hand Signet

Very Rare
A heavy signet ring cut with a single red hand. Redband couriers and captains obey the hand before they obey the man, and the ring still carries that weight.

Location

Act III - the Deadvein Deep, on Edric Vane at the blackfire seam

Attunement

True — by any character