Hook 01
The Bounty That Went Wrong
You turned in a thief for a bounty and the King's Warden jailed you both. Escape the overflow cells and find out why the Warden wanted the thief's iron coffer more than the gold.

The adventure ahead
This campaign will be deleted in 0 days. Create a free account to claim all your generated content.
Stonebarrow is a hill town built over an old silver mine, and it lives on one thing: the toll road that runs down the Marrow Vale to the capital. Everything in Stonebarrow gets counted, weighed, and taxed twice — once by the Crown, and once by whoever is holding the ledger that week.
You know this better than most. One of you walked into the Goldmark Counting-House with a pry bar and a plan and walked out with four hundred gold crowns that were not yours. The other of you tracked the thief down in a rainstorm three days later, marched him to the Keep, and demanded the posted bounty from the King's own gaoler — because a bounty is a bounty, and a dwarf's word is a contract.
That was the mistake. The King's Warden, Halvard Bren, took the thief into custody, took the dwarf into custody beside him, and locked you both in the overflow cells beneath Stonebarrow Keep without trial, without charges, and without explanation. He wanted the iron coffer you stole far more than he wanted the gold, and now he has it and he has you.
He should have checked the bars first.
THE BROKEN LEDGER is a campaign about the machinery of a kingdom that runs on debt, leverage, and silence. Act I begins with an escape through the flooded underworks of a hill-town gaol and ends with the first, faint proof that the man who jailed you is only a middle rung on a ladder that climbs much higher than Stonebarrow. A handful of guards, a nest of rats, a walking suit of armour, and a pack of hired swords stand between you and the truth. Beyond that truth waits a burned-out copper coin, a name nobody says out loud, and a road that leads out of the vale.
Share with your players
IRON BARS AND IRON COIN
A two-player opening act for a human Fighter and a dwarf Cleric. Levels 1 to 3. Three to four sessions.
THE SETUP. Stonebarrow is a hill town on the Marrow Vale toll road, and it counts everything. Grain, debts, sins, and people. You have both learned that last one the hard way.
One of you is a human fighter who put a pry bar through the front door of the Goldmark Counting-House and walked out with four hundred gold crowns that belonged to other people. It was a good plan for exactly three days.
The other is a dwarf cleric who tracked the thief through a cold rain, cornered him behind a tannery, and marched him up the hill to Stonebarrow Keep to claim the posted bounty from the King's own gaoler. A bounty is a contract. Contracts are holy.
The gaoler — Warden Halvard Bren — took them both. Not the thief to the noose and the dwarf to the pay chest. Both. Into the overflow cells beneath the Keep, in the dark, with the water rising and no charge read out, because the ragged iron coffer the thief carried out of the counting-house was worth more to Halvard than a bank full of crowns.
He should have checked the bars.
YOUR PARTY.
TONE. Gritty. Wet stone, cheap tallow, blood on the flagstones, men with wives and duty rosters. This is not a story about heroes saving a kingdom. It is a story about two people who were used as paperwork, and who intend to find out who signs the paperwork.
HOW IT OPENS. You are in the overflow cells. You have been in them for nine hours. The dwarf has already counted the stones in his wall twice and has opinions about the mortar. Down the corridor, two guards are arguing about how long to wait before fetching the gaoler. Somewhere above, water is dripping through the vaulting, and it is not stopping.
When the torch guttering in the corridor bracket goes out, that is your moment.
There are four guards between you and the stairwell. There is a mastiff. There is a flooded cistern under the Keep full of rats the size of hounds. There is a locked annex full of the Warden's private accounts, a vault with something in it that walks, and a stretch of the King's road where hired swords are already waiting for you.
And behind all of it, on a scrap of paper and a burned copper coin, there is a word: AUDITOR.
Nobody in Stonebarrow will say it out loud.
Behind the screen
THE BROKEN LEDGER is a full campaign. This free preview contains Act I only: a complete, runnable opening act for levels 1 to 3, ending on a hard cliffhanger that points at the campaign's true antagonist. Later acts, faction write-ups, location gazetteers, downtime rules, custom stat blocks, and appendices are subscriber-only material and are not included here.
TIER AND TONE. Act I is tier 1: dirty, claustrophobic, and personal. The stakes are survival and reputation, not the fate of the realm. Nobody in Stonebarrow is a hero. The Crown is distant, the King is indebted, and the town's real authority is a gaoler with a ledger of favours.
THE ACT I ANTAGONIST — WARDEN HALVARD BREN. Halvard is the human gaoler-magistrate of Stonebarrow Keep: soft-voiced, well-dressed, immaculate hands, and a genuine talent for making people disappear legally. He is not a world-shaking villain. He is a mid-tier functionary who has been skimming the Crown's tithe for years and passing it up a chain he barely understands. He has a character sheet forthcoming in the subscriber build — do NOT run him as an SRD monster, do not give him a monster stat block, and do not describe him as a 'guard captain' or similar.
In Act I he fights only when cornered, uses his hired muscle as a shield, and flees the moment the odds turn. His defeat is a local victory, not a campaign-ending one.
THE CAMPAIGN VILLAIN — THE ASHEN AUDITOR. Never named in Act I, never seen in Act I. The party finds only the sigil: a copper coin with a hole burned through the middle. Halvard takes orders, and gold, from a direction he is too frightened to describe. The Ashen Ledger is a quiet conspiracy inside the Kingdom's tax and treasury apparatus, and the Auditor is the one who audits the auditors. Act I shows the party the very bottom of the ladder. Later acts climb it.
CENTRAL MYSTERY OF ACT I. Why did Halvard lock the thief AND the bounty hunter in the same cell instead of paying the bounty and hanging the thief? Because the dwarf saw the iron coffer, and the coffer did not contain gold. It contained a ledger, a sealed writ, and a burned coin — evidence of the Ashen Ledger's operation in the Marrow Vale. Halvard needs the party dead, quietly, before anyone in the capital asks where the vale's tithe has been going.
WHAT THE PARTY LEARNS IN ACT I (in this order):
PROGRESSION AND LEVELING (starting level 1, ending level 3, three to four sessions).
WHAT THE CHARACTERS GAIN WITH LEVELS.
TREASURE AND MAGIC ITEMS AVAILABLE IN ACT I (all SRD items). Potion of Healing (multiple), Potion of Climbing, Wand of Secrets, Weapon +1, Goggles of Night, Cloak of Protection, Potion of Greater Healing, plus roughly 620 gold pieces in mixed coin and a small bag of unset gemstones. Subscriber acts expand the treasure tables considerably.
RUNNING NOTES FOR THE DM. Keep the escape fast. The party should feel pursued, not powerful. Guards in Stonebarrow are tired, underpaid, and poorly armoured — but they are also somebody's neighbours, and the campaign is more interesting if the party notices that the men they are killing have names on the duty roster. Halvard never fights fair: he spends Thugs and Guards as though they were coins, retreats through a door he has already planned to retreat through, and taunts the party about the bounty they will never be paid.
Do not let him die in Act I if you can help it. A living Halvard who has fled to the capital with the ledger's location in his head is worth more to the campaign than a corpse in a toll house.
Hook 01
You turned in a thief for a bounty and the King's Warden jailed you both. Escape the overflow cells and find out why the Warden wanted the thief's iron coffer more than the gold.
Hook 02
A copper coin with a hole burned through it appears on tally sticks, wax seals, and letters. Follow it from the gaol cistern to the Old Toll House and learn who signs their name with fire.
A human thief and the dwarf bounty hunter who turned him in are imprisoned together in the overflow cells beneath Stonebarrow Keep by Warden Halvard Bren, who wants the iron coffer from the Goldmark Counting-House far more than he wants either prisoner. The pair break out through a flooded cistern, fight their way through a counting-house annex holding Halvard's private accounts, survive an ambush on the King's road, and corner the Warden in the Old Toll House.
Halvard escapes — or dies badly and briefly — but the party recovers the coffer, its burned copper coin, and the first written proof that the vale's stolen tithe is being collected by someone Halvard calls the Auditor.
Read aloud
The corridor is twelve feet of wet flagstone, one guttering torch, and four iron doors. Yours is the second on the left. Rainwater has been seeping through the vaulting since the second hour and now stands an inch deep across the floor, carrying with it the smell of the tannery quarter and something older underneath it. Down the passage, two guards are arguing about who fetches the Warden and who stays. Their halberds are leaning against the wall, out of reach, because nobody has ever escaped the overflow cells. Above you, somewhere, a dog begins to growl at nothing.
4 Guard and 1 Wolf (the gaol mastiff, chained near the stair landing). XP: 150 per character (Guard 25 each, Wolf 50).
TACTICS. Two Guards are in the corridor, two are at the stair landing with the wolf. The wolf is chained and cannot reach past the landing unless a character moves into its ten-foot radius; use it to punish anyone who runs for the stair without dealing with the corridor first. The Guards are tired, underpaid, and reluctant. They will shout for help on the first round and one will flee up the stair on the second if two of his fellows are down. That fleeing guard brings reinforcements in four rounds, so the party has a ticking clock.
HALVARD'S WHEREABOUTS. Halvard Bren is not here. He is upstairs in his counting-house annex drinking tea and waiting for the water to do his work for him. If the party asks a captured guard where the Warden is, the guard will say, honestly, 'Up the hill. Where he always is.'
PRISONER'S STARTING KIT. Neither character begins with a weapon. The Fighter's pry bar was confiscated (it is in the evidence locker in Scene 3 and can be recovered), and the Cleric's holy symbol was taken and hung on a nail by the guardroom door. Until the party arms itself, treat improvised weapons as 1d4 bludgeoning plus Strength. The Cleric cannot cast spells with a material or somatic component until the holy symbol is reclaimed — this is a deliberate, one-scene pressure, and it should push the fighters into the corridor fast.
TREASURE. On the guardroom table: 12 gp in mixed coin, a ring of iron keys, a jack of cheap ale, and a Potion of Healing hidden behind a loose brick below the duty roster (DC 12 Intelligence (Investigation) to notice the disturbed mortar). The guard's halberds, a light crossbow with 12 bolts, a shortsword, and two sets of leather-and-chain kit are all available to be looted.
THE DROWNING ROOM. Water is rising about an inch per ten minutes of real time. After twenty minutes in-game, the floor of the overflow cells floods to knee depth and any character still inside the cells must make a DC 10 Constitution saving throw every ten minutes or gain one level of Exhaustion. This is the pacing device for the whole scene. Do not soften it; the party should feel the town closing its throat around them.
VOICE. The guards call the Fighter 'the bank man' and the Cleric 'the bounty'. One of them, a young man named Coll, has a sister who works in the counting-house. Let the party hear that. Act I is more interesting if the men they kill had names on a duty roster.
Read aloud
The grate drops you into black water up to your chest, and the cold takes your breath before the smell does. You are in a vaulted cistern the size of a chapel, its ceiling lost somewhere above the torchlight, its walls furred with pale mineral scum. Stone channels cross the floor in a grid. On the far side, a low arch leads out and down, and beyond it you can hear running water, and beyond that, faintly, dogs and drums and the tannery quarter.
Between you and the arch, the water is moving in ways that water should not move. Then the first one surfaces — the size of a hound, wet as oiled rope, and there are more behind it.
6 Giant Rat and 1 Swarm of Rats. XP: 200 per character (Giant Rat 25 each, Swarm of Rats 50).
TACTICS. The giant rats attack from the water in two waves of three, using the channel walls for cover and retreating into the water when badly hurt — do not run them as fearless. The Swarm of Rats does not appear until round three, when the fighting has churned the water and blood has spread; it pours out of a collapsed side channel and goes for whoever is standing in the deepest water. Standing water is difficult terrain for Medium characters, so movement costs double, and ranged weapon attacks into the water are at disadvantage.
ENVIRONMENTAL PRESSURE. The cistern has two hazards. First, the ceiling drips a fine mineral dust that makes surfaces slick: any character who moves more than their speed in one turn must make a DC 12 Dexterity saving throw or fall Prone. Second, the water is cold: at the end of the scene, any character who was submerged must make a DC 10 Constitution saving throw or gain one level of Exhaustion, which lasts until the party takes a short rest somewhere dry.
THE CLERIC'S MOMENT. This is the scene where the Cleric reclaims their identity. If they took their holy symbol back in Scene 1, they can turn undead-adjacent vermin narratively, bless the party before the swarm arrives, and heal the Fighter out of a bad rat-bite round. If they did not, the scene is brutal — and that is the point. Do not fudge it.
TREASURE. Wedged in the silt beneath the third channel grating: a rusted strongbox containing 60 gp in older Crown coin, a Potion of Climbing, and a folded tally stick. XP is not awarded for treasure, but the tally stick is worth more than the gold.
THE LEDGER SCRAP. The tally stick is carved with a running account in a cipher — short vertical strokes in groups of nine, each group topped by a small circle with a dot in its center. A character who successfully reads it (see checks) learns it is a record of monthly payments out of Stonebarrow, labeled in plain dwarven numerals as 'tithes' but totalling roughly six times what the vale could plausibly owe the Crown.
Read aloud
The annex is not what a bank should look like. It is a merchant's private house with the walls taken out. Long tables run the length of the room under hanging lamps that still burn good oil, and every table is buried in paper: ledgers, writs, tallies, and the flimsy carbon copies of letters. In the center of the room, on a reading stand under its own lamp, sits the iron coffer you carried out of the Goldmark — open, and empty, except for a circle of scorched metal where something used to rest. On the far wall, past a locked iron door, you can hear the low, patient hum of something that is not breathing.
2 Spy (Halvard's 'clerks', who are in fact quietly armed and very good at their jobs) and 1 Animated Armor with 3 Flying Sword in the sealed vault. XP: 275 per character (Spy 200 each is far too high for this scene — use 2 Spy as non-combat infiltrators; combat XP in this scene is 1 Animated Armor at 200 plus 3 Flying Sword at 25 each, for 275 per character).
If the party fights the two Spies outright on top of the vault guardians, the scene will be lethal for two 2nd-level characters. Run the Spies as social obstacles first. They are Halvard's auditors: polite, unarmed-looking, and equipped with a whistle. Give the party every chance to bluff, bribe, or ambush them. If a Spy reaches a window and blows the whistle, 2 Guard arrive in three rounds.
TACTICS. The Animated Armor stands motionless in the vault until the vault door opens or until a character touches the coffer's scorched plate. It fights in the doorway to hold the choke point and does not pursue beyond the vault's threshold. The 3 Flying Sword fight as a swarm of blades, harrying spellcasters and cutting at anyone who tries to carry the coffer out. Describe them as ceremonial swords mounted above a merchant's strongbox — because that is exactly what they were, in the capital, before someone sent them here.
THE COFFER. The iron coffer is empty of gold. Its interior plate is scorched in a perfect circle the size of a coin, and etched around the burn is a faint spiraling cipher. The party's heist was never about the money. Inside the coffer's false bottom (DC 14 Intelligence (Investigation)) is a folded writ of Crown authority made out in Halvard's name, granting him 'discretionary collection authority over the Marrow Vale tithe for a term of six years.' Six years is exactly the length of the shortfall on the tally stick from Scene 2.
THE FIGHTER'S PRY BAR. The pry bar used in the original robbery is here, logged as evidence on the front table, tagged in Halvard's handwriting. Let the Fighter take it back with some ceremony.
TREASURE. In the vault: 150 gp in mixed coin and trade bars; 3 unset gemstones worth 25 gp each (bloodstone, moss agate, and one flawed garnet); a Wand of Secrets on the records-room shelf; 2 Potion of Healing in the clerk's desk; the coffer's false-bottom writ; and Halvard's private letter-case.
TIME PRESSURE. The annex is a working office. If the party spends more than twenty minutes searching, a runner arrives from the Keep with a sealed message. He is a Commoner (no XP; do not turn him into a fight) and he will flee screaming if threatened — and if he escapes he tells the town that the bank man and the bounty are out of their cells.
Read aloud
The road runs narrow between the slate on your right and a forty-foot drop to the river on your left, and the rain has turned the going to grease. Ahead, a cart lies on its side across the full width of the road, one wheel spinning slowly, the horse gone, and the driver nowhere. Behind you, three men in leather step out of the slate cut and stand in the road with their crossbows up.
In front of the cart, someone is clapping, slowly, the way a man claps at the theatre, and a fourth and fifth figure rise from behind the boards. 'The Warden sends his regards,' the one clapping says. 'He says you can keep the coffer. He says he already has what was in it.'
4 Bandit and 1 Bandit Captain. XP: 550 per character (Bandit 25 each, Bandit Captain 450). This is the act's biggest fight and it is a hard one for two characters. Run it fairly, but let the environment matter.
THE CAPTAIN. The Bandit Captain is a professional named Rusk Halloran, down from the capital with six years of garrison service and a signed contract. He talks the entire fight. He is not loyal to Halvard, only paid by him, and will surrender if reduced below a third of his hit points — at which point he will happily sell Halvard out and complain about the terms of his contract, which he produces from inside his coat.
TACTICS. Two Bandit hold the front behind the cart, using it for three-quarters cover, and shoot crossbows. Two Bandit come up behind the party from the slate cut. The Bandit Captain works the middle, using his Parry against the Fighter and targeting the Cleric with his first attacks to break concentration on any ongoing spell. If the party pushes toward the drop-off on the left, the Captain orders his men to shove — any character fighting within five feet of the ledge can be forced off with a contested Athletics check, a forty-foot fall, and 4d6 bludgeoning damage.
MERCY AND CONSEQUENCE. If the party spares the Bandit Captain, he hands over his contract: a bond payable by 'the office of the Warden of Stonebarrow' — not the Crown, and not the King — with the burned coin pressed into the wax seal. He knows nothing about the Auditor except that the money came through three hands and that the man who paid him wore gloves in summer.
TREASURE. The Bandit Captain carries a Weapon +1 (a well-kept shortsword with capital-made hilt work), 80 gp in advance payment, the signed contract, and a hand-drawn map of the King's road marking three other ambush sites — all of which suggests Halvard has been doing this for a long time. The four Bandit carry 40 gp between them, a light crossbow each, and a case of twenty bolts.
AFTER THE FIGHT. Let the party take a short rest here if they have earned it. The ledge, the cart, and the rain make a defensible camp, and the Cleric will need the spell slots. Use the respite to let them read the contract and realize, together, that this is not about a bank robbery anymore.
Read aloud
The Old Toll House has been closed for thirty years, and somebody has been paying to keep the rain out of it. New shutters, new hinges, a new lock on a door that should be rotten. There is a lamp burning behind the second-floor window, and a cart backed up to the side door with two trunks already loaded on it. Through the wall you can hear a man's voice, calm and precise, giving instructions about what to burn and what to take. Then the lamp goes out, and the voice says, clearly: 'Let them in. It saves time.'
3 Thug and 2 Guard, defending the ground floor and stair. XP: 350 per character (Thug 100 each, Guard 25 each).
HALVARD BREN IS NOT A MONSTER. He is the act's villain and he has a character sheet forthcoming in the subscriber build. Do not give him an SRD stat block, do not run him as a Guard, Thug, Bandit Captain, or any other creature entry, and do not describe him using another creature's name. Run him narratively: he fights only if cornered with no exit, he spends his hired men as currency, he keeps a hand crossbow and a knife he is competent but unhurried with, and he talks the entire time. If you need to resolve an action he takes, describe what happens cinematically and call for an opposed check from the character trying to stop him.
HALVARD'S TACTICS. He opens by offering a deal — the party walks away with the coffer, the gold, and a signed pardon, and nobody follows him. He means roughly one third of that offer. If refused, he has the 3 Thug hold the stair while the 2 Guard haul the trunks out the side door, and he retreats up the internal stair to a rooftop ladder and a waiting horse the moment the fight turns.
He will not die easily: he has already laid a rope across the stairwell and cut a hole in the first-floor boards, and he will use both. If the party kills him here, that is a legitimate outcome, but a living Halvard who escapes to the capital with his ledgers half-burned is the stronger Act I ending, and the campaign's later acts are built on the version where he gets away.
IF HALVARD ESCAPES. He takes one trunk, the letter-case, and a burned coin. He leaves behind the second trunk, the ground-floor records, and — crucially — a single letter he did not have time to burn, still smoking in the grate. Let the party see the smoke and snatch it. That letter is the act's payoff.
THE LETTER. Signed only 'A.', it reads: 'Your discretion in the matter of the Marrow Vale is noted and approved. The shortfall has been absorbed. Send the coffer's seal and the two witnesses are to be closed as accounts. Do not write to me again. You will be contacted before the next quarter, as always. — A.' It is sealed with a copper coin burned through the middle.
TREASURE. In the second trunk and the toll house strongroom: 300 gp, a Potion of Greater Healing, a pair of Goggles of Night, a Cloak of Protection in a merchant's oilskin, a sealed writ of passage bearing the burned coin, three years of tithe ledgers documenting the shortfall, and the smoked letter from 'A.' Subscribers receive additional currency and item tables for the road out of the vale.
CLOSING THE ACT. Whether Halvard is dead or fled, the party ends Scene 5 with the coffer's sigil, the ledgers, the writ, and the letter. They are wanted in Stonebarrow. The King still has not heard their side of anything. The road south runs to the capital, and somewhere up that road is a person who signs their name with a burned coin and thinks of people as accounts.
Milestone: The party reaches 2nd level at the end of Scene 2, when they emerge from the cistern into the tannery district with the carved tally stick and proof that the vale's tithe has been short for six years. The party reaches 3rd level at the end of Scene 5, when they open the second trunk in the Old Toll House and read the letter signed 'A.' sealed with the burned coin — whether Warden Halvard Bren escapes to the capital or dies in the toll house. Awarding both milestones gives roughly 1,525 XP per character if you also use the encounter XP listed in each scene, which leaves the party at 3rd level with about 625 XP of progress toward 4th. ACT I ENDS HERE. The party is wanted in Stonebarrow, holds the coffer's sigil, three years of tithe ledgers, a forged writ of collection authority, and a single letter that proves the robbery, the arrest, and the gaolbreak were all small parts of a much older theft. The trail of the burned coin leads out of the vale and toward the capital — and toward the Ashen Auditor, who has just been informed that two witnesses have become a problem.
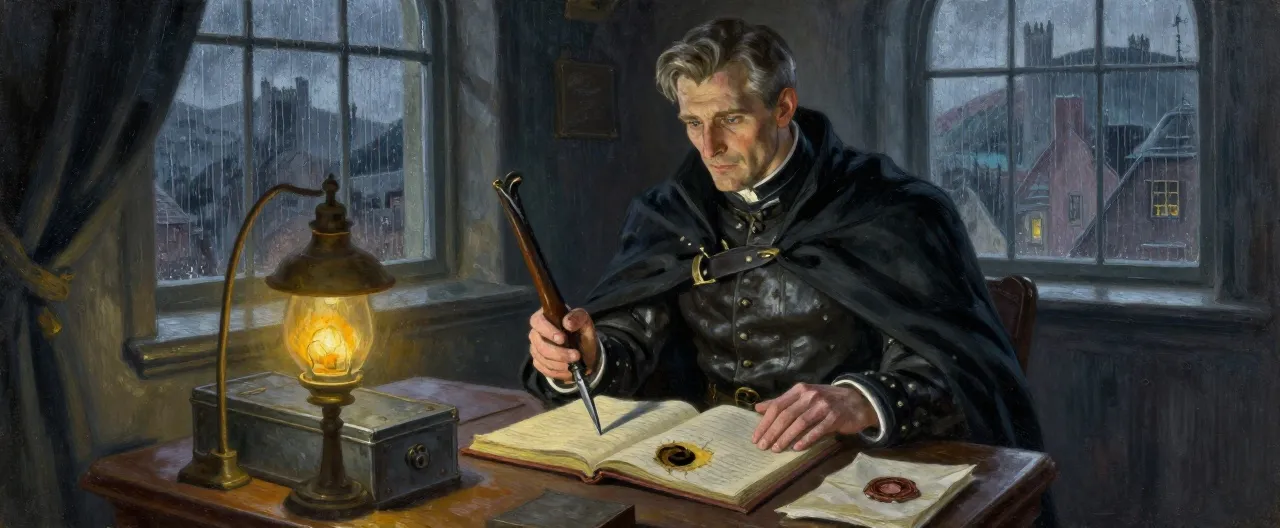 Warden Halvard Bren
Warden Halvard Bren is a tall, lean man in his forties, immaculate in a dark clerk's coat buttoned to the throat over a studded leather jer…
Free campaign generations include one villain sheet. Additional villain, NPC, and player-facing module character sheets are available in premium campaigns.
Subscribe NowFree campaign encounters use official monster sheets, plus the campaign villain character when referenced. They do not include generated custom monster sheets. Subscribe to create custom campaign monsters and enemy stat blocks.
Subscribe NowHe has been diverting the Marrow Vale tithe for six years and passing the difference up a chain he barely understands. He wants the iron coffer's seal, the party silenced, and a clean escape to the capital before the Auditor notices the shortfall.
Soft-voiced, immaculate, patient, and utterly transactional. He treats people as accounts to be balanced, closed, or written off. He never raises his voice and never fights fair.
Halvard opens with a deal he does not intend to honor. If refused, he spends his 3 Thug and 2 Guard as shields, retreats up the internal stair, uses the cut floorboards and rope to slow pursuit, and escapes through a rooftop ladder to a waiting horse. He fights only if cornered with no exit, using a hand crossbow and knife competently but without heroics.
If killed, the party recovers his ledgers but loses the trail; a sealed courier satchel addressed to a capital office becomes the thread for Act II. If captured, he bargains with information about the Auditor, the burned coin, and the capital waystation. The intended outcome is that he escapes to the capital, half-burned ledgers in hand, leaving the party with the letter signed 'A.'
Recommended party: Exactly 2 player characters, built for the campaign's premise: one human Fighter (the thief) and one dwarf Cleric (the bounty hunter). Act I is balanced around two characters starting at 1st level. If you bring a third or fourth player, add one additional Guard to Scene 1 and Scene 5, one additional Thug to Scene 5, and one additional Bandit to Scene 4 per extra character; do not change the treasure, which is sized for a small party and will feel generous in a full group. No particular subclass, feat, or spell choices are required, though the Cleric will be far more comfortable in Scenes 3 and 5 with access to Aid or Spiritual Weapon at 3rd level, and the Fighter will be happiest with a decent Strength or Dexterity and Athletics proficiency for the bar-bending and climbing in Scenes 1 and 2.
Before play, discuss tone: gritty, low-fantasy, morally grey. The party are not heroes; they are a thief and a bounty hunter who were used as paperwork. Establish safety tools (lines and veils, X-card, open-door policy). Create the two characters: a human Fighter (the thief) and a dwarf Cleric (the bounty hunter). No particular subclass or feat is required, but Athletics and Investigation are useful. The Cleric should have a holy symbol that can be confiscated in Scene 1. The Fighter should have a pry bar that can be logged as evidence in Scene 3. Explain that Act I is a free preview and later acts are subscriber-only. Set expectations that Halvard may escape and that the Ashen Auditor is only hinted at.
Act I is balanced for exactly two characters starting at 1st level. If you bring a third or fourth player, add one additional Guard to Scene 1 and Scene 5, one additional Thug to Scene 5, and one additional Bandit to Scene 4 per extra character. Do not change the treasure. For a single player, reduce each encounter's creature count by one Guard, one Giant Rat, one Flying Sword, one Bandit, and one Thug, and consider starting at 2nd level. The XP awards are per character, not divided.
Keep the escape fast and claustrophobic. The party should feel pursued, not powerful. Guards are tired, underpaid, and somebody's neighbours; let the players hear their names. Halvard never fights fair: he spends his men as coins, retreats through planned exits, and taunts the party about the bounty they will never be paid. Do not let him die in Act I if you can help it. A living Halvard who has fled to the capital with the ledger's location in his head is worth more to the campaign than a corpse in a toll house. Award XP per character as listed. The act ends when the party reads the letter signed 'A.' and understands that Stonebarrow is closed to them. The trail of the burned coin leads out of the vale and toward the capital.
Discover intricate areas, locations, and points of interest that will bring your D&D world to life. Premium users get access to fully detailed locations including taverns, dungeons, cities, and more!
Level Up to Premium!Join the ranks of Dungeon Masters creating unforgettable adventures!
Warden Halvard Bren
Warden Halvard Bren is a tall, lean man in his forties, immaculate in a dark clerk's coat buttoned to the throat over a studded leather jer…
Free campaign generations include one villain sheet. Additional villain, NPC, and player-facing module character sheets are available in premium campaigns.
Subscribe NowFree campaign encounters use official monster sheets, plus the campaign villain character when referenced. They do not include generated custom monster sheets. Subscribe to create custom campaign monsters and enemy stat blocks.
Subscribe NowHe has been diverting the Marrow Vale tithe for six years and passing the difference up a chain he barely understands. He wants the iron coffer's seal, the party silenced, and a clean escape to the capital before the Auditor notices the shortfall.
Soft-voiced, immaculate, patient, and utterly transactional. He treats people as accounts to be balanced, closed, or written off. He never raises his voice and never fights fair.
Halvard opens with a deal he does not intend to honor. If refused, he spends his 3 Thug and 2 Guard as shields, retreats up the internal stair, uses the cut floorboards and rope to slow pursuit, and escapes through a rooftop ladder to a waiting horse. He fights only if cornered with no exit, using a hand crossbow and knife competently but without heroics.
If killed, the party recovers his ledgers but loses the trail; a sealed courier satchel addressed to a capital office becomes the thread for Act II. If captured, he bargains with information about the Auditor, the burned coin, and the capital waystation. The intended outcome is that he escapes to the capital, half-burned ledgers in hand, leaving the party with the letter signed 'A.'
Get access to detailed NPCs, faction relationships, and character backgrounds that will make your campaign truly memorable!
Unlock Premium Features!Create compelling characters and factions that your players will never forget!
Unlock detailed quest structures, branching storylines, and meaningful rewards that will keep your players engaged for months!
Start Your Epic Journey!Join DMs creating unforgettable adventures with our premium quest system!
Free campaigns can't be played as a game. Premium campaigns become a 3D adventure you play in the browser: explore settlements, wilderness and dungeons with your party, and fight in real time with pause.
Level Up to Premium!Suggested Level: 1st level
Wet flagstone corridor, rising water, iron cell doors, guardroom table, stair landing.
12 gp, iron key ring, Potion of Healing, halberds, light crossbow with 12 bolts, shortsword, two sets of leather-and-chain kit.
The party starts unarmed. The Cleric cannot cast material or somatic spells until the holy symbol is reclaimed. Water rises 1 inch per 10 minutes; after 20 minutes, DC 10 Constitution saving throw every 10 minutes or gain one level of Exhaustion.
Suggested Level: 1st-2nd level
Chest-deep water, slick mineral scum, stone channels, low archway grate, collapsed side channel.
60 gp in older Crown coin, Potion of Climbing, carved tally stick.
Standing water is difficult terrain. Ranged attacks into water have disadvantage. The Swarm of Rats arrives in round 3. DC 10 Constitution saving throw after submersion or gain one level of Exhaustion.
Suggested Level: 2nd level
Long tables of ledgers, hanging oil lamps, locked iron vault door, records room, tannery drainage entrance.
150 gp, 3 unset gemstones worth 25 gp each, Wand of Secrets, 2 Potion of Healing, iron coffer with false bottom, discretionary-collection writ, Halvard's letter-case.
Run the Spies as social obstacles first. If a Spy blows a whistle, 2 Guard arrive in 3 rounds. The Animated Armor holds the vault doorway. The coffer's scorched plate bears the burned-coin sigil.
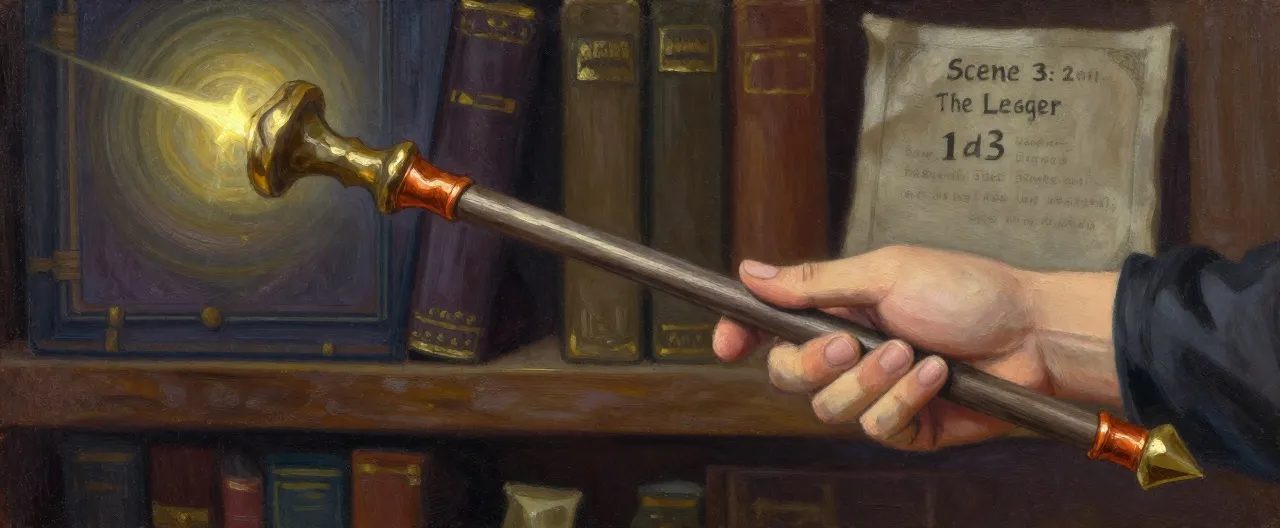 Wand of Secrets
Completed
Wand of Secrets
Completed
Scene 3: The Ledger Room, on the records-room shelf.
Requires attunement
 Weapon +1
Completed
Weapon +1
Completed
Scene 4: Ambush on the King's Road, carried by the Bandit Captain.
No attunement required
 Goggles of Night
Completed
Goggles of Night
Completed
Scene 5: The Old Toll House, in the second trunk.
Requires attunement
You need to register to create and view player characters in this campaign.
Register Now