Hook 01
The Warden's Invitation
You wake in a cold cell with no memory of your trial. A voice echoes: 'You are guilty. Serve your sentence.' But a scratched message on the wall reads: 'The Warden lies.' Will you uncover the truth?
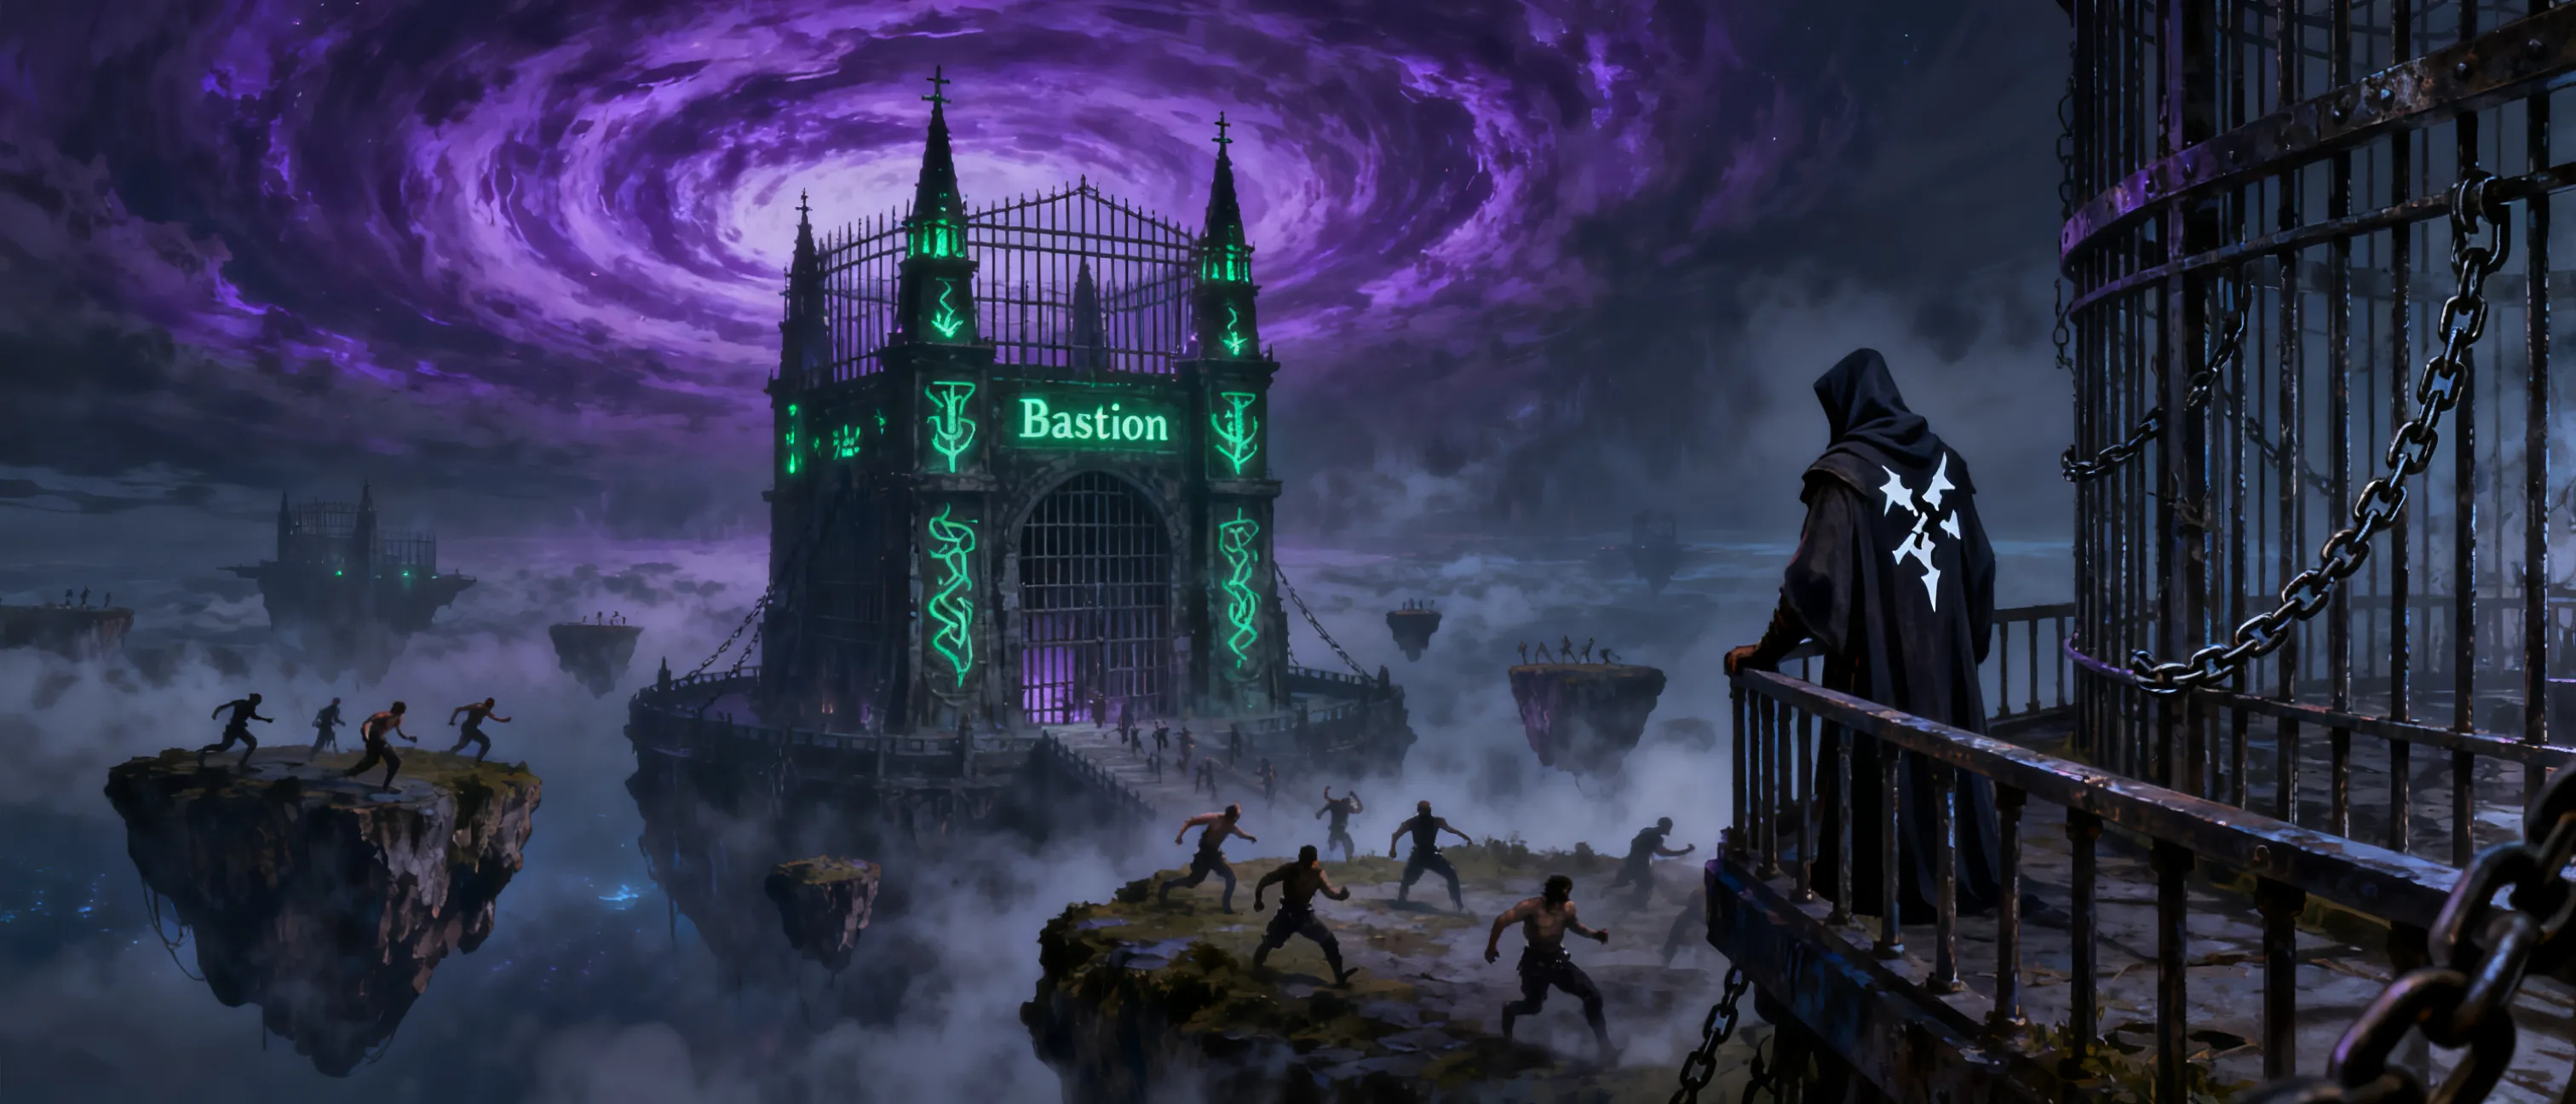
The adventure ahead
The Phantom Zone is a demiplane prison for the multiverse's most vile criminals. You wake here with no memory of your trial, only a burning question: Why are you here? What did you do? The Warden rules with an iron fist, feeding on guilt. To escape, you must navigate prison factions, uncover the Warden's secret, and decide whether you can be redeemed—or if you will become the next Warden.
Share with your players
You wake on a cold stone floor. The air smells of rust and ozone. A voice echoes from everywhere and nowhere: 'Welcome to the Phantom Zone. You are here because you are guilty. Serve your sentence.' You remember fragments—a crime, a trial, a verdict. But the details are hazy. Around you, other inmates stir. Some weep. Some sharpen makeshift weapons. A scratched message on the wall reads: 'The Warden lies.'
You have no gear, no allies, and no way out. But you are not like the others. You still have your skills, your spells, your will. The Phantom Zone is a prison for the worst criminals in the multiverse. Why are you here? What did you do? How do you get out? Can you be redeemed? The answers lie within the Bastion. Survive the yard. Uncover the tunnels. Confront the Warden. And decide your fate.
Behind the screen
DM-only overview. The Warden is Malakar, a former mortal who trapped a forgotten god and stole its power, creating the Phantom Zone as his phylactery. He feeds on the guilt of inmates to sustain his immortality. His plan: accumulate enough guilt to break free into the material plane. The players are actually innocent of the crimes they were convicted of—they were framed by Malakar to fuel his ritual. Clue flow: Act 1 introduces the Warden's lies and factions.
Act 2 reveals the tunnels, the Forge, and the Archive, where players learn Malakar's true name and the nature of the Zone. Act 3 is the riot, the Core confrontation, and the final choice. Failure states: If players die, their souls are absorbed into the Zone, becoming new guards. If they take too long (more than 15 in-game days), Malakar completes his ritual and escapes, dooming the material plane. Pacing: Act 1 is survival and introduction (3-4 sessions).
Act 2 is investigation and alliance (4-5 sessions). Act 3 is heist and confrontation (3-4 sessions). Key NPCs: Sora the Penitent (ally), Kaelen the Smith (ally), Warden Malakar (villain). The Warden uses legendary actions and lair actions; his character sheet will be provided separately. Do not use SRD monster stat blocks for him.
Hook 01
You wake in a cold cell with no memory of your trial. A voice echoes: 'You are guilty. Serve your sentence.' But a scratched message on the wall reads: 'The Warden lies.' Will you uncover the truth?
Hook 02
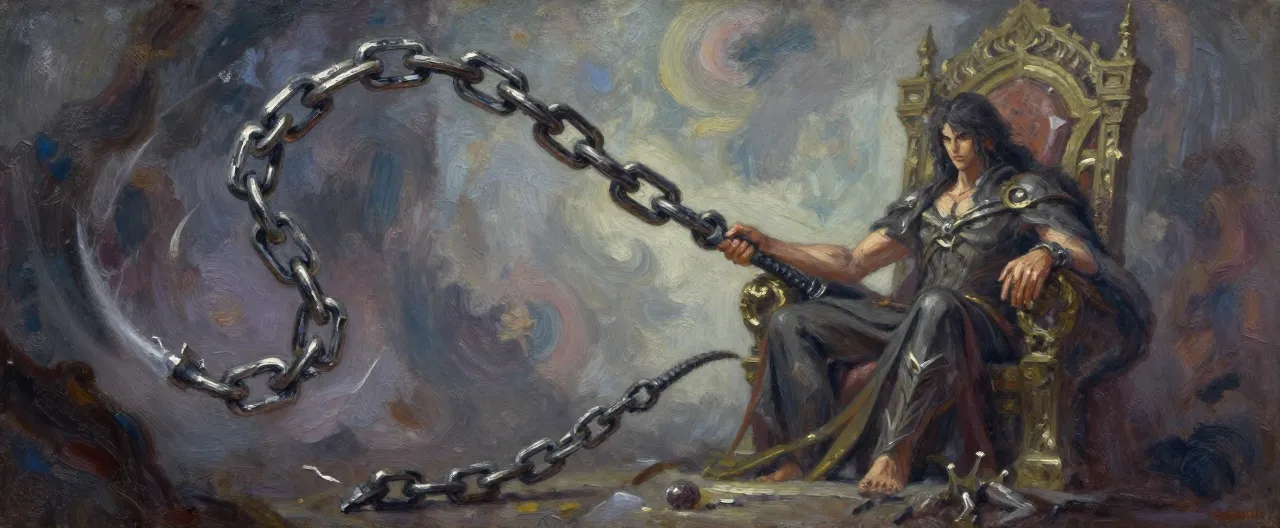
A mysterious inmate whispers that the Warden's symbol is a broken chain, but the real symbol is a whole chain—meaning the Warden is the one who broke it. What does that imply about his power?
Hook 03
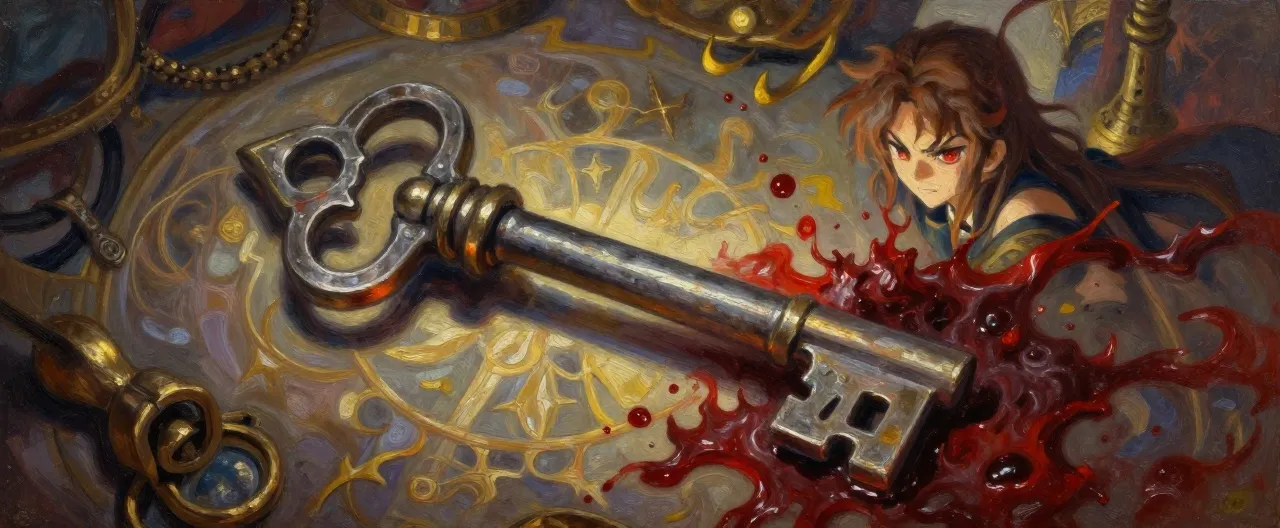
A dwarf-like smith named Kaelen can forge a key to escape the Phantom Zone, but he needs starmetal and a drop of the Warden's blood. Can you gather the components and earn his trust?
Hook 04
The prison is on the brink of rebellion. The Breakers want to fight, the Penitents seek redemption, and the Collaborators serve the Warden. Will you lead the charge or seek another way?
The players arrive in the Phantom Zone, survive processing, meet the prison factions, and face their first trial. They learn the basic rules of the prison and begin to question the Warden's justice.
Read aloud
You wake on a cold stone floor. The air smells of rust and ozone. A voice echoes: 'Welcome to the Phantom Zone. You are here because you are guilty. Serve your sentence.' Around you, other inmates stir in cramped cells. A scratched message on the wall reads: 'The Warden lies.'
The players have no equipment except rags. They can search their cells. The voice is the Warden's, but he is not present. A guard golem patrols every 10 minutes. Encourage roleplay to establish why each character thinks they are here. This is a chance to introduce the mystery of their crimes.
Read aloud
A vast cavern with a false sky of swirling purple. Inmates huddle in groups. A fight breaks out over a scrap of bread. Three factions watch: the Penitents in white robes, the Breakers with scarred arms, and the Wardens' collaborators in black sashes.
The yard is a social hub. The Penitents seek redemption through suffering. The Breakers want to escape. The Collaborators trade favors with guards. Sora, a Penitent, approaches the players if they seem lost. A Breaker named Rusk offers a deal: help him steal a key, and he'll show them a tunnel. The fight can be resolved or ignored.
Read aloud
The Warden's voice booms: 'Face your crimes.' Illusions of your past appear—a murder, a theft, a betrayal. You must confront them. The chamber is circular, with a pit of green fire in the center.
This is a roleplay-heavy scene. Each player sees an illusion of their supposed crime. They can deny, accept, or attack the illusion. The Warden watches from a balcony. If they deny convincingly, they gain a point of Inspiration. If they accept, they take 1d6 psychic damage but gain a clue. The trial ends when all players have faced their illusion.
Milestone: Reach level 4. Gain a contact (Sora or Rusk). Learn that the Warden's justice is flawed.
The players explore hidden tunnels, forge alliances, and uncover the Warden's secret. They learn that the Warden is Malakar, a mortal who stole a god's power and created the Zone as a phylactery. They must gather components for the Key of Absolution.
Read aloud
Narrow tunnels carved by desperate hands. Runes glow faintly on the walls. The air is thick with dust and the distant sound of dripping water. A fork ahead: left leads to a collapsed shaft, right to a glowing door.
The tunnels are a maze. The runes tell the story of the First Prisoner, a god named Aethel who was trapped by Malakar. The collapsed shaft can be cleared with strength. The glowing door leads to the Forge. Random encounters: 1-2 guard golems or a cave fisher.
Read aloud
A massive cavern with a lava flow. A dwarf-like smith named Kaelen works at an anvil, his hammer ringing. He looks up: 'You're not guards. What do you want?' Behind him, a chest of starmetal shards glows.
Kaelen is a prisoner who was a master smith. He can forge the Key of Absolution if given starmetal and a drop of the Warden's blood. He knows Malakar's true name but is afraid to speak it. He will trade the key for a promise to free him. The starmetal is guarded by a fire elemental (use SRD fire elemental).
Read aloud
Endless shelves of crystal records. Each contains a soul's guilt. A central pedestal holds a black crystal—Malakar's personal record. Sentries of shadow patrol the aisles.
The Archive is heavily guarded. The players must sneak or fight. The black crystal contains Malakar's memories: he was Aethel's high priest, betrayed him, and stole his power. The Zone is his phylactery. Destroying the crystal would weaken him but also collapse the Zone. The players need only read it to learn his true name and weakness.
Milestone: Reach level 7. Learn Malakar's true name and weakness. Obtain the Key of Absolution (or its components).
The players incite a riot, confront Malakar in the Core, and make a final choice: escape, redeem the Warden, or take his power. The fate of the Phantom Zone and the material plane hangs in the balance.
Read aloud
You stand before the inmates. 'Today we break chains!' The crowd roars. Guards march in. The air fills with the clash of metal and the crackle of magic.
The players must rally the factions. The Penitents hesitate, the Breakers join eagerly, and the Collaborators may betray them. The riot is a skill challenge: 3 successes before 3 failures. Success opens a path to the Core. Failure means the players are captured and must escape their cells.
Read aloud
A vast chamber with a floating crystal of pure guilt. Malakar stands before it, his form shifting between a mortal priest and a monstrous shadow. 'You think you can escape? You are your crimes.'
Malakar uses his character sheet (provided separately). He fights with legendary actions and lair actions. The crystal is the key to the Zone. If the players use the Key of Absolution, they can either shatter the crystal (destroying the Zone, killing all inmates) or pierce Malakar's heart (redeeming him, but he must accept his guilt). If they fight him, he is a deadly foe. Encourage roleplay: Malakar can be convinced to stand down if confronted with Aethel's name and his own betrayal.
Read aloud
A portal shimmers before you. The Zone trembles. Inmates cry out for help. Malakar's power fades—or grows. You can leave, or stay to free the others. What do you do?
This is the final scene. The players must decide: escape to the material plane, stay to free the inmates (risking their lives), or take Malakar's power and become the new Warden. Each choice has consequences. If they escape, they are free but the Zone remains. If they stay, they can free the inmates but may be trapped. If they take the power, they become the new Warden and must maintain the prison. The campaign ends with the players' decision and its aftermath.
Milestone: Reach level 10. Resolve the campaign: escape, redeem, or rule.
 Warden Malakar
Warden Malakar is a towering figure of engineered contradiction: half porcelain judgment, half writhing shadow. His hooded face is split by…
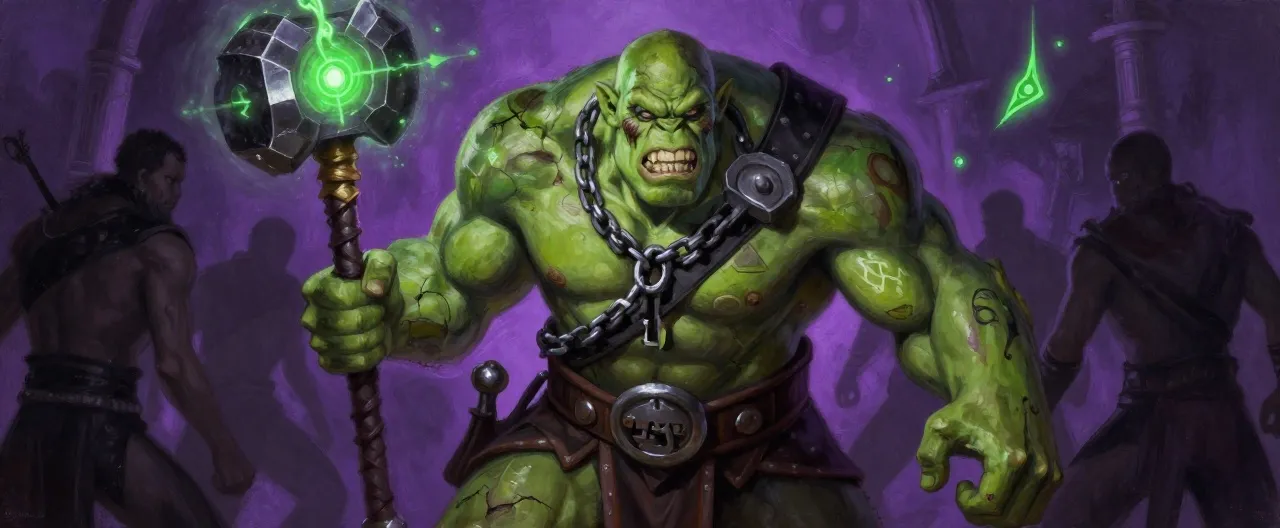 Ironjaw
Ironjaw is a mountain of green-grey muscle barely contained by dented half plate painted with the Bastion's sickly-green broken chain sigil…
 Shadowtongue
Shadowtongue is a gaunt tiefling of Chthonic lineage, his ashen grey skin seeming to drink the Archive's dim light rather than reflect it. …
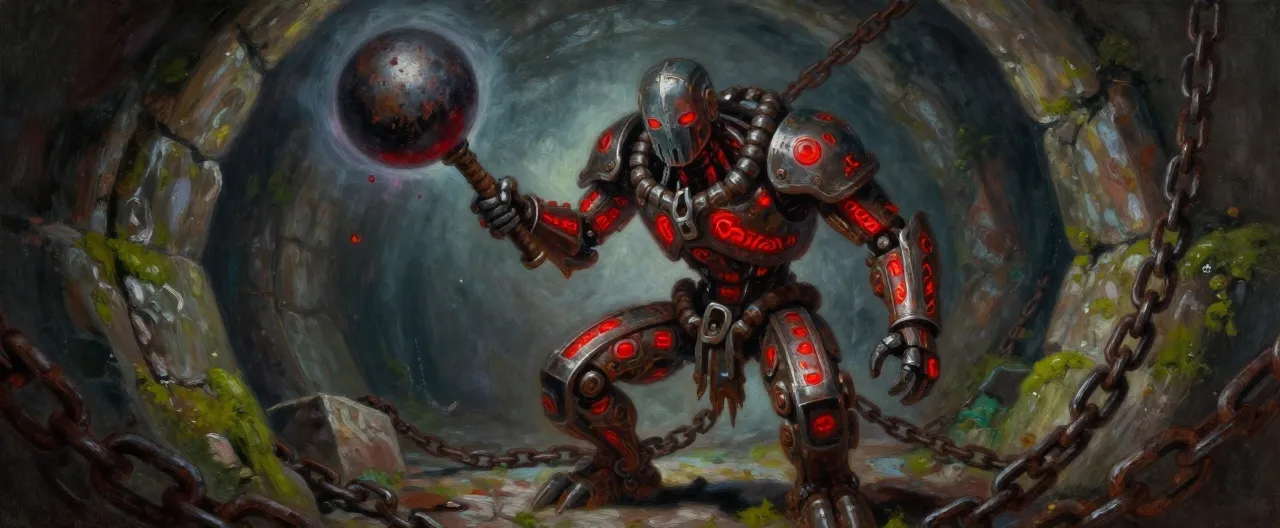 Chain Golem
Completed
· CR 3
· Construct
Chain Golem
Completed
· CR 3
· Construct
The Chain Golem is a horrifying amalgamation of iron, rust, and arcane malice, standing as a testament to the cruel ingenuity of ancient ar…
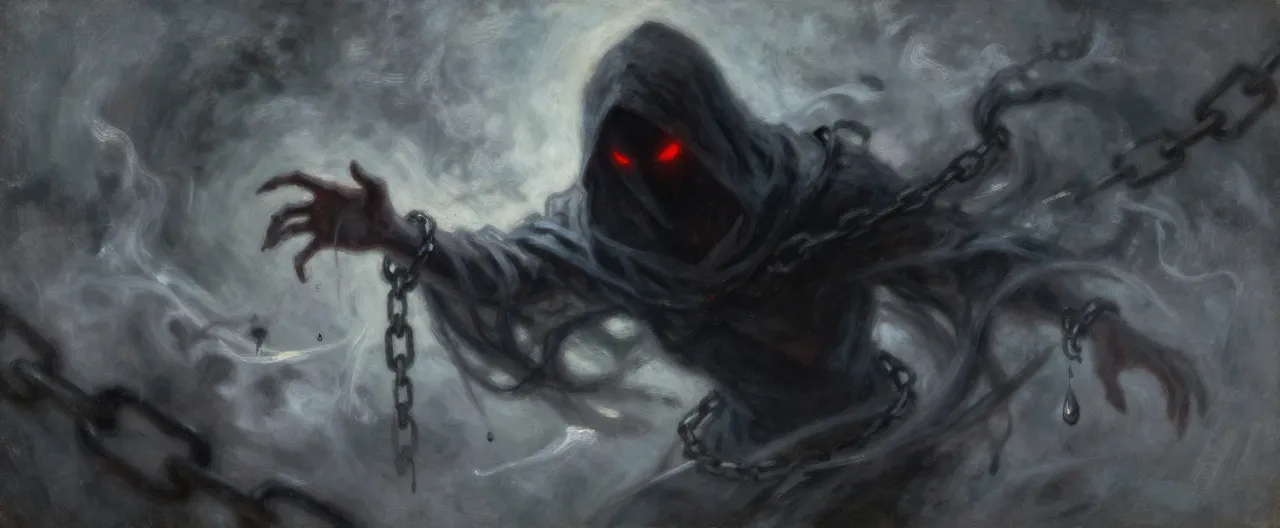 Guilt Wraith
Completed
· CR 4
· Undead
Guilt Wraith
Completed
· CR 4
· Undead
The Guilt Wraith manifests as a translucent, humanoid silhouette composed of swirling grey mist and shadowy chains that seem to writhe with…
 Archive Sentinel
Completed
· CR 5
· Construct
Archive Sentinel
Completed
· CR 5
· Construct
The Archive Sentinel is a towering, nine-foot-tall construct that commands immediate attention through its unsettling blend of rigid geomet…
Malakar was once a mortal priest of Aethel, the god of chains. He betrayed and imprisoned Aethel, stealing his power to create the Phantom Zone as his phylactery. He feeds on the guilt of inmates to sustain his immortality. His ultimate goal is to accumulate enough guilt to break free into the material plane and become a god.
Malakar is cold, calculating, and manipulative. He presents himself as a stern but fair judge, but beneath that is a deep-seated guilt and self-loathing. He genuinely believes he is doing good by imprisoning the guilty, but he is also a hypocrite. He can be redeemed if forced to confront his own guilt.
Malakar fights from the Core, using lair actions to create illusions of the players' crimes, forcing Wisdom saves. He uses legendary actions to teleport, attack with chains of guilt, and dominate a player. He targets the most morally conflicted characters. If reduced to half HP, he becomes desperate and may offer a deal. If confronted with Aethel's name and his own betrayal, he may hesitate, allowing a Persuasion check to redeem him.
If defeated in combat, Malakar's form dissolves and the Zone begins to collapse. If redeemed, he accepts his guilt, releases Aethel's power, and opens a stable portal, sacrificing himself to free the inmates. If the players take his power, they become the new Warden.
Ironjaw is a brutal enforcer who serves Malakar in exchange for promises of freedom. He enjoys the power and privileges his position gives him. He is loyal to Malakar out of fear and greed.
Ironjaw is a thug: violent, short-tempered, and cruel. He respects only strength and has no qualms about killing. He is easily provoked and holds grudges.
Ironjaw fights head-on, using his mace and intimidating presence. He targets spellcasters and weak-looking characters. He may take hostages or use prisoners as shields. If losing, he tries to flee and warn Malakar.
Ironjaw is not redeemable; he is a brute. If defeated, he can be interrogated for information about the Archive and the Core. He may beg for mercy but will betray the players if given a chance.
Shadowtongue is a former spymaster who was imprisoned for his crimes. He now serves Malakar as the guardian of the Archive, collecting secrets and using them to maintain power. He seeks to learn Malakar's true name to blackmail him.
Shadowtongue is soft-spoken, polite, and utterly ruthless. He enjoys psychological manipulation and prefers to let others fight while he pulls strings. He is paranoid and always has an escape plan.
Shadowtongue avoids direct combat, using illusions, shadows, and the Archive's terrain to confuse and divide the party. He targets the players' secrets and fears, using them to demoralize. If cornered, he fights with a poisoned dagger and shadow magic.
Shadowtongue can be persuaded to betray Malakar if offered a better deal or if his own secrets are threatened. He is not truly loyal to anyone but himself. If defeated, he may reveal Malakar's weakness in exchange for his life.
Recommended party: 4-5 characters, any classes, but a mix of combat, social, and exploration skills is recommended. At least one character with proficiency in Arcana or Investigation, one with Persuasion or Deception, and one with Athletics or Acrobatics. A cleric or paladin may struggle with moral themes; a rogue or warlock may thrive.
Before starting, discuss the themes of guilt, redemption, and justice with your players. Ensure everyone is comfortable with the moral ambiguity and the possibility of their characters being innocent yet imprisoned. Establish boundaries regarding torture, psychological horror, and character death. The campaign is designed for mature players who enjoy roleplay and investigation. Create characters together, and ask each player to decide what crime their character was accused of—but keep it secret from the other players. The DM should know these crimes to weave them into the First Trial. Explain that the campaign will involve making difficult choices and that there are multiple endings. No character should be forced into a specific moral path; the story is about their choices.
The Phantom Zone is designed for a party of 4-5 characters starting at level 3 and ending at level 10. Encounters are balanced for that range. For larger parties (6+), add one or two additional creatures of the same type or increase HP by 25%. For smaller parties (3 or fewer), reduce the number of creatures by one or decrease HP by 25%. The final confrontation with Malakar is a solo boss fight; if the party is struggling, allow them to use the environment (the crystal, the portal) to gain advantages. If they are dominating, have Malakar use his legendary actions more aggressively and summon additional shadow sentries. The skill challenge in The Riot can be adjusted by changing the number of successes required (3 for standard, 4 for hard, 2 for easy).
The Phantom Zone is a sandbox with a strong narrative spine. Act 1 is about survival and introduction; keep the pace brisk and emphasize the mystery. Act 2 is investigation and alliance; allow players to explore the tunnels and the Archive at their own pace, but keep the 15-day time limit in mind. Act 3 is the climax; build tension and make the final choice meaningful. Use the factions to create dynamic relationships. The Warden should be a constant presence, his voice echoing in the players' minds. Foreshadow his weakness and his past. The Guilt Wraith and other custom monsters should feel unique and terrifying. Remember that Malakar is a character, not just a stat block; roleplay his dialogue and his internal conflict. If the players try to redeem him, make it a challenging but possible path. If they fight him, make it epic. The campaign's ending should reflect the players' choices and the themes of redemption and justice.
Spend time at the Forge with Kaelen, learning the smith's trade. You can gain proficiency with smith's tools or craft a simple weapon.
Requirements: Access to the Forge, Kaelen's permission.
Rewards: Proficiency with smith's tools, or a masterwork weapon (if you spend 10 days).
Time: 5 days for proficiency, 10 days for a weapon.
Location: The Forge of Broken Chains, Act II.
Kaelen is a patient teacher but demands respect for the craft.
Spend time in the Central Yard, listening to inmates and trading stories. You can learn secrets about the prison, the Warden, or other inmates.
Requirements: Access to the Central Yard.
Rewards: One secret or rumor per day (roll on the rumors table in the Appendix).
Time: 1 day per rumor.
Location: Central Yard, Act I.
The Penitents and Breakers have different rumors. Collaborators may spread false information.
Spend time in solitude, reflecting on your supposed crime. You can gain insight into your own past or the nature of the Phantom Zone.
Requirements: A quiet place, such as your cell or a secluded tunnel.
Rewards: Advantage on your next Intelligence (Investigation) or Wisdom (Insight) check related to the Warden or your past.
Time: 1 day.
Location: Any quiet location.
This activity may trigger visions or clues at the DM's discretion.
Search the tunnels or abandoned areas for useful items, weapons, or tools.
Requirements: Access to the tunnels or other unexplored areas.
Rewards: Roll on the treasure parcels table in the Appendix. You might find a weapon, armor, or useful item.
Time: 1 day.
Location: Tunnels of Remorse, Act II.
Scavenging may attract the attention of guard golems or other creatures.
Narrow tunnels with runes that tell the story of Aethel, the god of chains, betrayed by Malakar.
A collapsed shaft can be cleared with Strength (Athletics) DC 15. A glowing door leads to the Forge.
A cavern with a lava flow and a massive anvil. Kaelen the Smith works here, forging weapons and tools for the inmates.
Kaelen can forge the Key of Absolution if given starmetal and the Warden's blood. A fire elemental guards the starmetal.
Endless shelves of crystal records, each containing a soul's guilt. A central pedestal holds Malakar's personal record.
Shadow sentries patrol the aisles. The black crystal contains Malakar's memories and weakness.
The entrance to the Core, where a portal to the material plane can be opened. The Zone trembles here.
The final choice is made here: escape, redeem, or rule.
A massive crystal of pure guilt, the source of Malakar's power and the phylactery of the Phantom Zone.
Shattering it destroys the Zone. Piercing Malakar's heart with the Key of Absolution can redeem him.
Warden Malakar
Warden Malakar is a towering figure of engineered contradiction: half porcelain judgment, half writhing shadow. His hooded face is split by…
Ironjaw
Ironjaw is a mountain of green-grey muscle barely contained by dented half plate painted with the Bastion's sickly-green broken chain sigil…
Shadowtongue
Shadowtongue is a gaunt tiefling of Chthonic lineage, his ashen grey skin seeming to drink the Archive's dim light rather than reflect it. …
Chain Golem
Completed
· CR 3
· Construct
The Chain Golem is a horrifying amalgamation of iron, rust, and arcane malice, standing as a testament to the cruel ingenuity of ancient ar…
Guilt Wraith
Completed
· CR 4
· Undead
The Guilt Wraith manifests as a translucent, humanoid silhouette composed of swirling grey mist and shadowy chains that seem to writhe with…
Archive Sentinel
Completed
· CR 5
· Construct
The Archive Sentinel is a towering, nine-foot-tall construct that commands immediate attention through its unsettling blend of rigid geomet…
Malakar was once a mortal priest of Aethel, the god of chains. He betrayed and imprisoned Aethel, stealing his power to create the Phantom Zone as his phylactery. He feeds on the guilt of inmates to sustain his immortality. His ultimate goal is to accumulate enough guilt to break free into the material plane and become a god.
Malakar is cold, calculating, and manipulative. He presents himself as a stern but fair judge, but beneath that is a deep-seated guilt and self-loathing. He genuinely believes he is doing good by imprisoning the guilty, but he is also a hypocrite. He can be redeemed if forced to confront his own guilt.
Malakar fights from the Core, using lair actions to create illusions of the players' crimes, forcing Wisdom saves. He uses legendary actions to teleport, attack with chains of guilt, and dominate a player. He targets the most morally conflicted characters. If reduced to half HP, he becomes desperate and may offer a deal. If confronted with Aethel's name and his own betrayal, he may hesitate, allowing a Persuasion check to redeem him.
If defeated in combat, Malakar's form dissolves and the Zone begins to collapse. If redeemed, he accepts his guilt, releases Aethel's power, and opens a stable portal, sacrificing himself to free the inmates. If the players take his power, they become the new Warden.
Ironjaw is a brutal enforcer who serves Malakar in exchange for promises of freedom. He enjoys the power and privileges his position gives him. He is loyal to Malakar out of fear and greed.
Ironjaw is a thug: violent, short-tempered, and cruel. He respects only strength and has no qualms about killing. He is easily provoked and holds grudges.
Ironjaw fights head-on, using his mace and intimidating presence. He targets spellcasters and weak-looking characters. He may take hostages or use prisoners as shields. If losing, he tries to flee and warn Malakar.
Ironjaw is not redeemable; he is a brute. If defeated, he can be interrogated for information about the Archive and the Core. He may beg for mercy but will betray the players if given a chance.
Shadowtongue is a former spymaster who was imprisoned for his crimes. He now serves Malakar as the guardian of the Archive, collecting secrets and using them to maintain power. He seeks to learn Malakar's true name to blackmail him.
Shadowtongue is soft-spoken, polite, and utterly ruthless. He enjoys psychological manipulation and prefers to let others fight while he pulls strings. He is paranoid and always has an escape plan.
Shadowtongue avoids direct combat, using illusions, shadows, and the Archive's terrain to confuse and divide the party. He targets the players' secrets and fears, using them to demoralize. If cornered, he fights with a poisoned dagger and shadow magic.
Shadowtongue can be persuaded to betray Malakar if offered a better deal or if his own secrets are threatened. He is not truly loyal to anyone but himself. If defeated, he may reveal Malakar's weakness in exchange for his life.
A scarred brute with a fierce grin. He wants to escape and will help anyone who aids his cause.
A calm woman in white robes, she believes in redemption through suffering. She offers guidance to new inmates.
The enigmatic ruler of the Phantom Zone. He appears as a shifting figure of shadow and light, his voice echoing everywhere.
A faint whisper in the tunnels, the remnant of the god Aethel. It offers guidance and reveals the truth about Malakar.
A dwarf-like smith with a thick beard and soot-stained apron. He was a master smith before his imprisonment.
The god's remnant speaks one last time, offering a choice: redemption or destruction.
The final antagonist. He appears as a shifting figure of shadow and light, his voice echoing with power and pain.
Suggested Level: 7-8
Endless shelves, crystal records, central pedestal, dim lighting.
Malakar's record (black crystal), knowledge of his true name and weakness.
Stealth is key. The Archive Sentinel is a powerful guardian. The black crystal contains Malakar's memories.
Suggested Level: 9-10
Main cell block, barricades, throne, hidden staircase.
A key to the Core dropped by a dying guard.
Skill challenge: 3 successes before 3 failures. Success opens the path to the Core. Failure means capture.
Suggested Level: 9-10
Floating crystal, black stone bridge, throne, unstable portal.
The Core of Guilt, the Key of Absolution, Malakar's power.
Malakar uses legendary actions and lair actions. He can be redeemed with DC 20 Persuasion. The crystal can be shattered with the key.
Suggested Level: 3-4
Cramped cells, rusty bars, a loose stone hiding a rusty nail, dim lighting.
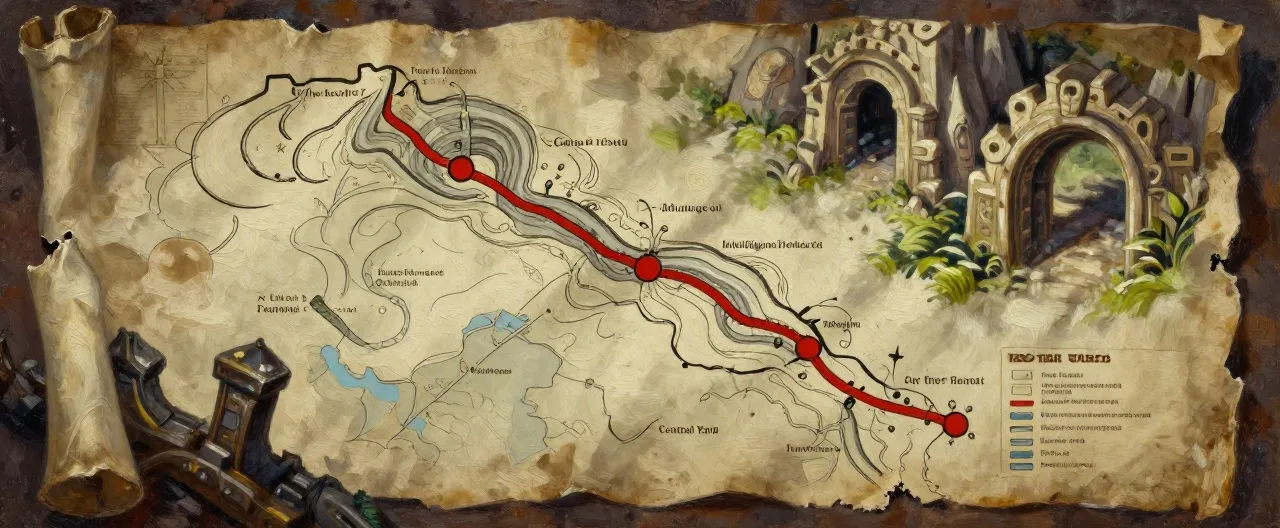
Rusty nail (improvised weapon), a torn cloth map fragment.
The players have no equipment. They can use stealth or combat. The guard golems are slow but tough.
Suggested Level: 3-4
Open yard, false sky, scattered debris, factions watching.
A guard's key ring (if pickpocketed), a map fragment from Rusk.
This is a social encounter with potential combat. The players can make allies or enemies.
Suggested Level: 3-4
Circular chamber, pit of green fire, balcony for the Warden.
A clue: the Warden's symbol is a broken chain, but the real symbol is a whole chain.
Roleplay-heavy. Denying the crime convincingly grants Inspiration. Accepting deals 1d6 psychic damage but grants a clue.
Suggested Level: 6-7
Narrow tunnels, collapsed shaft, glowing runes, dripping water.
Runes reveal Aethel's story, a mural of Malakar's betrayal.
The collapsed shaft can be cleared with Athletics DC 15. The glowing door leads to the Forge.
Suggested Level: 6-7
Lava flow, massive anvil, chest of starmetal shards, secret door.
3 Starmetal Shards, Kaelen's assistance, a hidden tunnel to the Archive.
The fire elemental is a tough fight. Players can use the lava flow to their advantage. Kaelen can be persuaded with DC 17.
 Rusty Nail of Defiance
Completed
Rusty Nail of Defiance
Completed
Act I - Cell Block D, hidden under a loose stone.
No
 Penitent's Robe
Completed
Penitent's Robe
Completed
Act I - Central Yard, given by Sora the Penitent if you earn her trust.
No
 Map Fragment of the Tunnels
Completed
Map Fragment of the Tunnels
Completed
Act I - Cell Block D or Central Yard, found or given by Rusk.
No
 Starmetal Shard
Completed
Starmetal Shard
Completed
Act II - The Forge of Broken Chains, guarded by a fire elemental.
No
 Kaelen's Hammer
Completed
Kaelen's Hammer
Completed
Act II - The Forge, given by Kaelen if you assist him at the forge.
Yes
 Archive Crystal
Completed
Archive Crystal
Completed
Act II - Archive of Sins, found among the shelves.
No
 Key of Absolution
Completed
Key of Absolution
Completed
Act III - The Forge, forged by Kaelen after gathering components.
Yes
 Malakar's Broken Chain
Completed
Malakar's Broken Chain
Completed
Act III - The Core, found on Malakar's throne or taken from him.
Yes
 Aethel's Heart
Completed
Aethel's Heart
Completed
Act III - The Core, given by Aethel's Echo if the players choose redemption.
Yes
You need to register to create and view player characters in this campaign.
Register Now