Campaign Overview

Whispers of the Abyssal Lineage

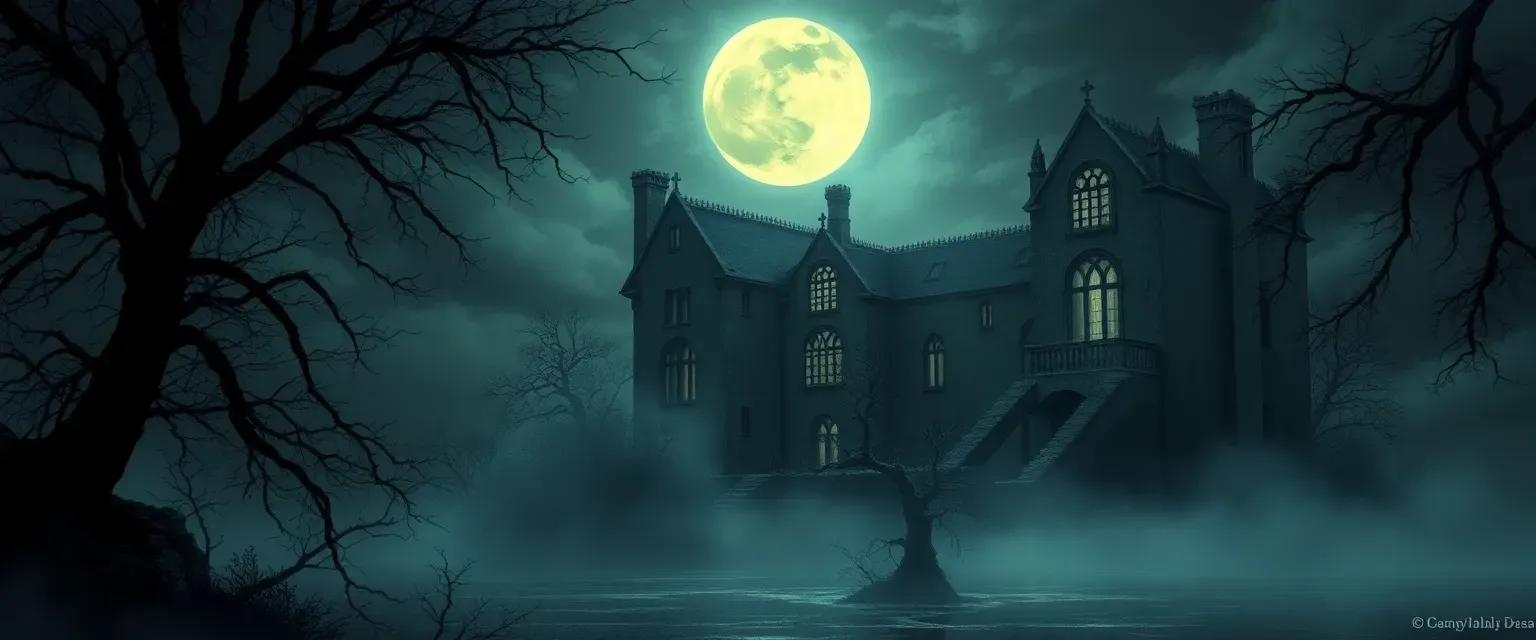
In the mist-clad archipelago of Morvath, an age-old demonic pact lies awakened. The Whispering Ones—a cursed bloodline bound to infernal powers—haunt every ruined manor, echo through submerged crypts, and beckon from shadow-draped forests. Whispers tug at the minds of those who listen too long, eroding sanity and luring innocents into ritual murder. Family members mutate into shadow-tendril-wreathed vessels, prophets of terror whose nightmares summon eldritch horrors across reality’s seams.

As adventurers, you may be unwitting heirs seeking salvation, or driven exorcists determined to end the line’s damnation. Your journey begins on Fogshore Isle, where Blackspire Manor’s haunted halls and the drowned Sunken Crypts hold torn pages of the Infernal Codex. Decipher its secrets, sail through the Moonlit Archipelago’s treacherous reefs, and confront sea wraiths beneath a silver-lit lighthouse. Along the way, moral quandaries wait: do you slay a possessed heir to stop the ritual bloodletting, or risk a dangerous exorcism to spare an innocent?

Beyond the sea lies the Shadowfell Conflux, where rifts crack open to hellish realms. Seal portals, foil cultist rites in the Mire of Whispers, and recover reforged chains to bind the Black Crystal’s power. Allies can be found in the zealous Silver Eucharist or the clandestine Whisperbound Circle, each offering aid at perilous cost. Smugglers of the Black Network provide passage—but their loyalties shift with the tides of profit.

In the final surge, you will storm the Obsidian Spire, navigate trials of mind and soul, and face Wraith-Lord Zhaeleth amid collapsing obsidian halls. Will you shatter the Black Crystal and risk releasing an even greater horror? Or will you claim its abyssal might to stand against darker threats, pledging your blood to an unholy legacy?

Whispers beckon from every shadow. Steel your resolve, for in Morvath’s gloom, every secret costs a bit of your mind—and the choice to embrace or end the curse lies in your hands. Good luck, brave souls: may your willhold against the Abyssal Lineage’s call.

Starting Location

Fogshore Isle

Fogshore Isle is a moss-draped land of rocky cliffs and thick grey mist, perpetually shrouded by the breath of the sea. Ancient cairns dot low rolling hills, half-buried under bracken. Wind-bent pines lean over jagged outcrops that plunge into roiling surf. At its heart stands Blackspire Manor, built of dark granite, its towers broken by centuries of storms. Below the manor sprawls the abandoned village of Edrith’s Hollow, where empty cottages sag and doors gape. Narrow lanes thread between collapsed walls, and the air reeks of salt, decay, and hidden dread. Hidden coves along the shore house crumbling ruins of a once-proud temple, its altar shattered. Everywhere, whispers linger just beyond hearing — the cursed breath of the Whispering Ones. Locals speak of ghostly lights on moonless nights, and sailors avoid the isle, fearing they’ll never return. The boundary between waking and nightmare is thin: nightmares often bleed into reality here, unraveling minds. Sea-fog winds carry mind-twisting murmurs that prey on the vulnerable. Scraps of old journals hint at a demonic pact forged long ago, now reawakened. The land itself seems alive to the curse, twisting pathways overnight and luring unwary travelers. Those who remain become vessels for infernal curses, manifesting shadow-tendrils around their bodies and tortured prophecies echoing in their dreams. To lift the primordial darkness, adventurers must seek lost tomes and confront restless ancestors in spectral mansions — but trust is scarce when every whisper may betray them.

Secrets

  • A hidden letter beneath Blackspire’s fireplace reveals the original pact’s terms.
  • Fungi spores in the temple produce temporary telepathy, revealing unseen messages.
  • One cavern carving is actually a hidden lever opening a secret tunnel beneath Edrith’s Hollow.

Key Locations

Blackspire Manor

Blackspire Manor dominates the island’s center: a sprawling Gothic fortress of dark granite. Towering spires pierce low clouds, and shattered windows stare like empty eyes. Moss and lichen climb the walls, echoing the creeping corruption within. Inside, grand halls with vaulted ceilings are draped in dusty tapestries that depict the Whispering Ones’ blood-stained history. Rotting staircases ascend to servants’ quarters, chambers, and a ritual sanctum carved into living rock. Echoing corridors hide secret doors to crypts where shadow tendrils writhe across marble tombs. The basement holds an obsidian altar stained with dried blood, rings of infernal runes faintly glowing. In the private chapel, statues of angelic figures have chipped faces, replaced by gouged demonic masks. Light from tallow candles struggles through dust, casting monstrous silhouettes. Every drawn-out corridor seems to shift: hallways lengthen, doorways appear where none existed. The very stones seem to whisper, promising power or madness in the same breath.

Additional Notes

Rooms often shift when unobserved — use to complicate exploration. Whispering walls can deal minor psychic damage (1d4) each minute if ignored. Consider playing faint murmurs and moving walls to unnerve the party.

Edrith’s Hollow

Once a fishing hamlet, Edrith’s Hollow is now a ghost town where broken doors tremble in the sea breeze and rotting boats lie half-buried in sand. Cracked stone cottages exhale the stench of salt and decay. Barns and sheds slump inward, roof timbers long collapsed. Signs carved into driftwood still hang over shuttered windows. In the village square stands a dried fountain carved with anguished faces, its basin filled with stagnant water. Narrow lanes wind between collapsed walls, leading to cellars where cultists once performed sacrificial rites. Beneath a collapsed granary lies a hidden hatch leading to flooded tunnels. Sea mist slinks in among overturned carts and rusted tools. Lanterns of strange design hang in trees, their flames flickering with ghostly blue light. Eclipsed windows peer into dark interiors, revealing fleeting shadows of former villagers reenacting their final, terror-stricken moments. The silence is oppressive: only gull cries and distant thunder break it. Beneath the earth, cult sigils carved in red clay mark places of ritual. The ground is uneven, covered in moss and broken iron nails. Rats squeak in the gloom.

Additional Notes

Village layout should feel maze-like; secret tunnels connect houses. Cult sigils can erupt psychic effects if disturbed. The fountain may act as a scrying focus for demonic guardians.

Ruined Temple of the Deep Whisper

High above the sea on a grassy knoll stand the broken remnants of the Temple of the Deep Whisper. Eight stone columns, half-collapsed, circle an altar carved with half-erased infernal glyphs. A shattered mosaic floor depicts a demonic deity rising from ocean waves. The roof has fallen inward, and rainwater pools around fallen statues of hooded acolytes. Vines choked with black blossoms flourish among the rubble. Strange phosphorescent fungi glow a sickly green. The altar’s front bears the carved outline of a severed hand clutching a black crystal. On full moons, ghostly chants echo across the hilltop, carried on the wind. Overturned pews, broken drums, and smashed flutes litter the floor, hinting at music once used to summon eldritch entities. Under the altar lies an ossuary filled with skeletal remains bound by iron shackles. The skulls whisper secrets when spun, though each glimpse costs a fragment of sanity. The temple’s foundation still glows faintly at night, tracing ley-line currents. Coastal storms lash the site, and the wind carries mournful lamentations.

Additional Notes

Fungi spores can cause hallucinations (DC 13 CON save or suffer illusions for 1 hour). Whispers grant insights (advantage on Arcana checks) but cost 1d4 HP.

Sable Caverns

Carved over millennia by sea and darkness, the Sable Caverns lie beneath the island’s northwest cliffs. A narrow crevice in the rock face opens into a network of twisting tunnels slick with algae and brine. Stalactites drip mineral-stained water, echoing in the gloom like distant heartbeats. Bioluminescent moss dots walls, casting a faint blue glow on rippled pools. Narrow ledges over chasms force careful navigation. Deeper, the air grows warmer and acrid; rising steam obscures vision. Grotesque carvings of twisting tendrils and screaming faces cover the rock walls, illuminated by strange phosphor stones. In one cavern hangs a giant clam shell filled with black ichor said to be a drop of demonic blood. Echoes distort every step, and tremors occasionally shake the floor. A central chamber opens into a cathedral-like hall where water-soaked pews face a submerged altar, corporal hands reaching from the water’s depths. The only exit is behind a waterfall of inky liquid that stains clothing and flesh.

Additional Notes

Navigate carefully or risk falling into pools containing shadow-spawn. Black ichor can be used for infernal rituals or sold as rare alchemical reagent.

The Sunken Crypts

Beneath Blackspire Manor’s west wing, hidden behind a false wall, stairs descend to the Sunken Crypts. The air grows damp and cold, dripping water pooling on flagstones engraved with protective runes now cracked. Filthy water covers ankles in most corridors, rising to waist height in larger chambers. Low arches of carved bone line the passageways, and skeletal remains of ancestors slumped against walls. Tombs sealed with rusted iron bars line the halls, each bearing the family crest: a coiling tendril. In the larger vaults lie stone sarcophagi etched with prophecies foretelling murders and sacrifices. A hidden alcove holds ceremonial daggers and vials of ichor. Bioluminescent fungus flickers in cracks, revealing more runes warning of forbidden rites. Beyond the wards lies the Heart Chamber, where a black crystal pulses like a heartbeat. Each pulse sends ripples through the water, and drowned whispers echo. Souls of the damned swirl around the crystal, bound to its power.

Additional Notes

Crypt wards delay digital locks by 1d4 rounds. Crystal pulse can be disrupted by a DC 17 Arcana check, briefly silencing demons within.

Moonlit Archipelago

After leaving Fogshore, adventurers sail through a scattered chain of rocky isles called the Moonlit Archipelago. By day, the waters shimmer with phosphorescence; by night, the moon lights black waves like liquid silver. Each isle has its own secret: ruined watchtowers, drowned villages half-submerged at high tide, caves echoing with ghostly chants. Underwater grottos reveal coral-encrusted idols of the Whispering Ones. Storm spirits swirl between granite spires, and currents shift unpredictably. The Archipelago is a halfway point: travelers can rest at hidden coves, barter with reclusive fishermen, and investigate arcane anomalies caused by lingering abyssal energies. An abandoned lighthouse on Peregrine Isle still houses a functioning beacon—if someone can unlock its mechanisms. Sea serpents lurk beneath the keel, and lighthouse libraries hold forbidden logs hinting at another demonic conclave planned centuries ago. Wrecks of ghost ships drift near jagged reefs, and their drifting crews chant in unison when anchored in moonlight.

Secrets

  • Journal in Peregrine Lighthouse lists names of original cult leaders, some still alive on Morvath.
  • Drowned casket tear is a key component to sever the black crystal’s bond.
  • Fisherfolk tattoos are actually ward sigils granting partial protection from demonic whispers.

Key Locations

Peregrine Lighthouse

Perched on a jagged promontory, the stone lighthouse towers above churning surf. Its iron door hangs off hinges, and broken windows reveal a spiral staircase winding upward. Oil lamps and lens shards lie strewn on the floor. In the old logbook, entries by former keepers detail strange lights at sea and harrowing storms. A locked journal cabinet demands a three-digit code based on moon phases. At the top platform, a massive Fresnel lens still holds a faint glow, powered by a magically sealed oil lamp. Beneath the lantern room is a hidden cell containing the bones of a keeper sacrificed to appease the sea deity Whisper-Mother. Strange runes carved into floor tiles channel lunar energy. If lit by pure moonlight through the lens, these runes project a ghostly map of Morvath’s ley lines.

Additional Notes

Lens mechanism can be used to reveal hidden sigils on other islands. Journal cabinet code: last three digits of dates in logbook.

Drowned Reef Ruins

At low tide, broken columns and shattered walls rise from shallow waters around a reef carpeted with barnacles. Beneath the waves, colorful coral obscures carved stone guardians half-submerged. A submerged plaza shows a giant statue of a hooded figure holding a broken black crystal staff. Currents here form looping eddies, dragging small boats under if pilots are careless. Sunken halls house drowned statues and coral-encrusted cultist arms. In the center, a sunken aria chamber still echoes trapped melodies when water levels fluctuate. Pockets of air form under certain arches, allowing exploration. Beneath one collapsed dome lies a flooded tomb marked “Here sleeps the echo whose voice will shatter worlds,” containing a sealed glass casket with a single tear crystallized inside.

Additional Notes

Air pockets last 1 hour; note breathing time. Coral limits movement (DC 12 STR to break free).

Mistshroud Inlet

A narrow finger of sea cutting into rock, the inlet is blanketed in dense fog even at midday. Limestone cliffs enclose a concealed lagoon where simple huts perch on stilts. The inhabitants are squat fishermen with dark tattoos of tentacles on their arms. They barter sea-salted fish, driftwood relics, and whispered rumors of black whirlpools. Paths of driftwood planks connect huts; trapdoors lead into hidden cellars. In one hut, a hidden library of weathered scrolls details moon-tide rituals. An underground tunnel leads into the Sable Caverns network. The inlet’s mouth is protected by a reef that appears only at high tide. On the full moon, the lagoon mirrors the sky so perfectly that it disorients travelers. At midnight, ritual lanterns are lowered into the water, summoning water wraiths that dance on the surface.

Additional Notes

Fisherfolk may hide clues about main quest if approached with silver or fish offerings. Lanterns can be used to repel wraiths.

Shadowfell Conflux

Beyond the archipelago lies a rift-laced isle known as the Shadowfell Conflux, where the barrier between realms is thin. Twisted trees with black bark and crimson leaves stand amid pools of ink-black water that reflect otherworldly skies. Floating stones hover above fissures disgorging pale light. Demonic portals ring the island’s edges, each framed by obsidian obelisks carved with glowing runes. Alive with ephemeral shapes drifting between planes, the land crackles with eldritch energy. Paths of bone-white sand wind through fields of corrupted vegetation: flowers that whisper, vines that twitch in hunger. At the island’s heart sits the Abyssal Scar, an open wound in reality: a crater filled with seething shadows. From its depths rise wraiths, imps, and shadow mastiffs. Half-ruined temples to forgotten gods crowd the confluence, and high on a spire stands the Obsidian Spire: a black tower stretching beyond the clouds. At its apex, the locus of the original pact crystal pulses with malevolent power. The wind here carries infernal lamentations, and time warps unpredictably: a minute in one glade may be an hour elsewhere. To break the curse, the adventurers must descend into the Scar, defeat its guardians, and shatter the crystal.

Secrets

  • Obsidian Spire’s central void is a gateway to a demiplane where past heirs are trapped.
  • Altar in the Mire holds a binding chain that can imprison the Black Crystal’s power.
  • Hidden rune beneath a Shadowgrove stone unites all portals, allowing a single devastating ritual.

Key Locations

Obsidian Spire

The black tower is carved from living obsidian, its surface reflecting impossible angles. Interior halls are lined with infernal runes that glow when approached. Staircases ascend around a central void, each step echoing with distant screams. Doors open onto balconies overlooking the Scar’s swirling shadows. In the top chamber sits the Black Crystal of Oaths, hovering above a dais of charred bones. Tentacles of shadow coil around it, and ghostly apparitions reach out as if begging for release. The spire’s windows are slits high above, distorting sunlight into sickly beams of crimson. To reach the summit, adventurers must pass trials of mind, body, and soul: illusions of fallen comrades, pools that drain memory, and shifting stairways.

Additional Notes

Use illusions and psychic traps heavily. Black Crystal pulses every round, sending out a psychic shock (2d6 psychic damage).

Mire of Whispers

A foul swamp of black water and matted vines, where every footstep is swallowed. Trees stand knee-deep in water, their roots forming natural bridges. The air rings with sibilant voices that latch onto passersby, pulling at their minds. Phantom figures flicker between trees, luring travelers off safe paths into quickmud pits. At the heart of the mire sits a stone altar covered in tattered veils and bone charms. Cultists perform midnight rituals here, drawing power to fuel the portals. Vile toads croak unnatural hymns, and swarmers of will-o’-wisps lead the unwary astray. Among the reeds, a hidden cache of demonic relics lies beneath a collapsed column.

Additional Notes

Quickmud deals 1d6 damage per turn; voices impose disadvantage on WIS saves. Cultists: 4 Cult Fanatics + 2 Will-o’-wisps.

Shadowgrove

A grove of twisted ebony trees encircles a ring of standing stones. The ground is carpeted with black petals that whisper secrets when crushed. Between trees, glowing sigils float in the air, creating shifting walls of glyphs. Beneath the largest stone stands a hidden doorway sealed with demonic blood. This leads to an underground library holding the forbidden Grimoire of Ancestral Nightmares. Pages float and shift as one reads, requiring constant focus. Beneath the library is a tomb where a long-dead Whispering One known as Lady Malvora sleeps. Her shadowy form still lingers, able to possess intruders.

Additional Notes

Groove charges psychic traps on 1d4 round delay. Lady Malvora’s shade can possess bodies (Magic Jar effect).

NPCs in Fogshore Isle

Maris Thornhart

A gaunt scholar obsessed with lifting the family curse; nervous twitch in one hand.

Role: Quest giver Other Details: Offers lore and reagents; may ask players for rare ingredients.

Captain Eamon Vale

Weathered ship captain stranded on Fogshore; lost a crew to the crypts.

Role: Ally/guide Other Details: Knows hidden bays and safe passages; haunted by survivor guilt.

Seraphine Duskfell

A hooded exorcist from the Silver Eucharist order; calm, steel-eyed.

Role: Potential ally or rival exorcist Other Details: Wields silvered chains and incenses; distrusts intruders in her domain.

NPCs in Moonlit Archipelago

Marilla Wavesong

A fisher-magistrate with braided seaweed hair; keen eyes reflect moonlight.

Role: Barterer/Information broker Other Details: Sells exotic fish, offers safe harbor for a price.

Old Keeper Bram

Last keeper of Peregrine; ghostly figure bound to lighthouse.

Role: Spirit mentor Other Details: Can teach a ritual to reveal hidden runes if helped find eternal rest.

Tilda Reefwalker

A childlike woman who wades into the lagoon, speaking to spirits.

Role: Guide into flooded tomb Other Details: Knows safe paths under water but demands a silver token.

NPCs in Shadowfell Conflux

High Inquisitor Caldre

A zealot of the Silver Eucharist, scarred by past failures; hunts any use of demonic power.

Role: Antagonist-turned-ally Other Details: May oppose harnessing the curse, offering a final exorcism instead.

Searing Wraith-Lord Zhaeleth

An infernal general bound to the Scar; oppressive presence dims hope.

Role: Final boss lieutenant Other Details: Commands shadow minions; vulnerable to radiant damage.

Lady Malvora’s Shade

A whispering apparition of the first matriarch; cunning and manipulative.

Role: Guide or deceiver Other Details: Offers aid if players promise to restore her body.

Factions

The Silver Eucharist

A militant order of exorcists and holy knights dedicated to eradicating demonic influence across the realms. They travel in armored caravans, armed with blessed weapons and relics. Clerics perform daily rites to strengthen their bonds, while paladins undergo harsh trials to purify their souls. Their doctrine emphasizes sacrifice and unwavering faith.

Goals

To locate and seal all demonic rifts on Morvath; to destroy or redeem any who bear infernal taint.

Relationships

With Other Factions
Hostile toward the Whisperbound Circle, suspicious of the Black Network’s neutrality; respectful but distant toward the Fisherfolk Pact.
With Players
Initially wary, they may withhold support if players use demonic power. Successful aid and exorcisms can earn their trust and resources.

The Whisperbound Circle

A secretive cabal of scholars and blood-line descendants who believe the infernal curse can be harnessed for greater ends. They operate from hidden libraries and underground vaults, studying forbidden tomes. Their members range from benevolent healers seeking cures to radical zealots desiring transcendence through darkness.

Goals

Uncover the complete ritual of the Whispering Ones; transform humanity into a new demonic-divine race.

Relationships

With Other Factions
Opposed by the Silver Eucharist; in uneasy cooperation with the Black Network when interests align.
With Players
Offer arcane knowledge and sometimes powerful artifacts—but their true aims may betray the adventurers.

The Black Network

A loose alliance of smugglers, fishermen, and neutral parties who profit from shipping goods through cursed waters. They maintain contacts in Fogshore Isle, the Archipelago, and even the Shadowfell Conflux. Their leader, Marilla Wavesong, negotiates peace between coastal villages and cultists seeking supplies.

Goals

Maintain profitable trade routes; secure safe passage for merchants; exploit demonic pockets for profit.

Relationships

With Other Factions
Broker deals between The Silver Eucharist and The Whisperbound Circle; occasionally supply the latter with reagents.
With Players
Friendly so long as deals are honored. They can arrange transport, sell rare goods, and offer intelligence on hidden sites.

Main Questline

The Whispered Pact

Given by: Maris Thornhart

Maris tasks the party with investigating the origin of the curse by exploring Blackspire Manor. Recover the torn pages of the Infernal Codex scattered throughout the key locations. Beware shadow tendrils and spectral ancestors poised to kill. Your sanity is at stake.

Goals

Find and assemble three pages of the Codex.

Reward

1,500 XP; Infernal Codex (partial) revealing ritual structure.

Secrets

  • One page is hidden in a cultist’s skeleton in the crypt.
  • Spectral ancestor holds a clue but must be exorcised.

DM Notes

Encourage players to role-play fear effects; use Madness rules sparingly.

Echoes Across the Isles

Given by: Captain Eamon Vale

Using the partial Codex, sail to the Moonlit Archipelago to decipher the demonic runes using the Fresnel lens. Unlock the second half of the ritual needed to sever the Black Crystal. Navigate storms and evade sea wraiths to reach Peregrine Lighthouse.

Goals

Activate the lens; map glyphs; survive the wraith attack.

Reward

2,000 XP; Lunar Sigil granting advantage on Arcana checks in moonlight.

Secrets

  • Lens projection reveals hidden glyphs on submerged ruins.
  • Old Keeper Bram is bound to the ritual’s first attempt failure.

DM Notes

Use naval travel encounter tables; incorporate storm hazard checks.

The Tides of Betrayal

Given by: Seraphine Duskfell

With the runes mapped, the party must return to Fogshore Isle to confront a possessed heir in Edrith’s Hollow. Stop a ritual murder set for midnight that would empower the Black Crystal. Choices: kill the heir or attempt a dangerous exorcism.

Goals

Prevent the murder; cleanse or slay the heir.

Reward

3,000 XP; Blessed Talisman (advantage vs. possession).

Secrets

  • The heir was manipulated by Lady Malvora’s Shade.
  • Exorcism requires use of binding chains from side quests.

DM Notes

Exorcism is a skill challenge: 3 successes before 3 failures with Religion, Insight, Medicine.

Riftfall Assault

Given by: High Inquisitor Caldre

The portals on Shadowfell Conflux must be sealed. Lead an assault on the northern rift, place holy wards, and fight through demonspawn. Coordinate with Caldre’s forces but beware his intolerance of any demonic allies you may have.

Goals

Seal the portal; retrieve the fragment.

Reward

4,000 XP; Caldre’s Blessing (resistance to necrotic damage).

Secrets

  • Missing ward chain fragment held by Zhaeleth.
  • Portal closure opens a smaller internal rift in the Spire.

DM Notes

Use large-scale battle rules; incorporate civilians and cultists.

Heart of the Scar

Given by: Lady Malvora’s Shade

At the Abyssal Scar’s center lies the Black Crystal of Oaths. With reforged chains and the Infernal Codex, invade the Obsidian Spire, overcome psychic trials, defeat Zhaeleth, and shatter the crystal. Decide whether to destroy it or claim its power for yourselves.

Goals

Enter the spire; defeat final guardians; deal with the crystal.

Reward

6,000 XP; choice of either Purifying Hammer (legendary) or Shadowheart Blade.

Secrets

  • Shattering the crystal may release an even greater horror.
  • Harnessing the power binds you to the pact forever.

DM Notes

Prepare cinematic final battle with environmental hazards: collapsing floors, psychic storms.

Side Quests in Fogshore Isle

Echoes in the Tide Pools

Given by: Captain Eamon Vale

Eamon found strange lights flickering in a tide pool cavern. Rumors say a drowned spirit of a lost sailor can grant hints about hidden passages in the Sable Caverns… for a price. Investigate the tide pools at low tide, calm or exorcise the spirit, and recover the sailor’s journal, which hints at a secret crypt beneath the village.

Goals

Find tide pool cave; interact with or banish the spirit; recover journal.

Reward

1,200 XP; Sailor’s Journal granting advantage on History checks about Morvath.

Secrets

  • The spirit can possess one party member temporarily.
  • Journal pages contain a half-erased map of submerged tunnels.

DM Notes

Spirit is a Wraith (use weaker stats) and moors strong emotions.

Tainted Harvest

Given by: Maris Thornhart

Maris’s experimental potion needs a rare black blossom fungus from the temple ruins. Collect 3 specimens without succumbing to hallucinations. Beware the temple’s spores which cause vivid nightmares.

Goals

Harvest 3 black blossoms; return to Maris.

Reward

Maris’s Potion of Insight (grants +2 to next skill check); 500 GP.

Secrets

  • One fungus was tampered with by Seraphine.
  • Consumption yields prophetic nightmares.

DM Notes

Use fungi hallucination rules from location notes.

The Silvered Chains

Given by: Seraphine Duskfell

Seraphine needs silvery iron forged in sea-blasted smiths’ forges. Travel to Edrith’s Hollow’s forge and reclaim her family’s chainmail pieces, rusted and buried. Beware drowned cultists that guard the ruins.

Goals

Locate the forge; defeat guardians; retrieve chainmail.

Reward

Silvered Chain Shirt (AC 14 + DEX mod); 800 XP.

Secrets

  • Forge bellows echo with cursed voices.
  • One armor piece is inscribed with a hidden protective rune.

DM Notes

Cultists use shadow blades (treat as short swords + shadow touch).

Whisper in the Walls

Given by: Anonymous Note

A scrap of parchment directs players to listen at key manor walls at midnight. There they’ll hear fragments of forbidden incantations and the location of a concealed cell holding a captive relative with vital knowledge.

Goals

Eavesdrop in manor; find cell; free captive.

Reward

1,500 XP; secret family sigil granting +1 AC against demonic entities.

Secrets

  • The note’s author is a traitorous heir.
  • Visions in the cell hint at a future betrayal.

DM Notes

Use Duress skill challenge to avoid detection.

Storm-Tossed Reliquary

Given by: Captain Eamon Vale

A battered box washed ashore holds relics from the original pact. Retrieve it before scavengers do. Clues etched on the box point to a submerged wreck near the caverns.

Goals

Locate wreck; retrieve box; return to Eamon.

Reward

Relic Box (holds ritual scrolls worth 1,000 GP); 1,000 XP.

Secrets

  • Box triggers a psychic alarm when opened incorrectly.
  • Inside lies a shard of the black crystal, still pulsing.

DM Notes

Wreck guarded by 3 Drowned Zombies.

Side Quests in Moonlit Archipelago

The Broken Compass

Given by: Old Keeper Bram

Bram’s compass, essential for charting shifting currents, was stolen by smugglers on Sea Serpent Atoll. Steal it back. Beware smugglers allied with merrow hunters.

Goals

Infiltrate atoll; recover compass; return to Bram.

Reward

Compass (never leads astray in fog); 800 XP.

Secrets

  • Compass needle points to demonic focal points.
  • Smugglers plan to auction it to a cult.

DM Notes

Smugglers have 4 Thugs + 1 Smuggler Boss.

Lanterns of the Deep

Given by: Marilla Wavesong

Lanterns sank during a storm. Recover 3 submerged lanterns from Drowned Reef without alerting sea wraiths. Marilla wants them refitted to ward her village.

Goals

Dive to wrecks; evade or banish wraiths; recover lanterns.

Reward

200 GP; Lanterns grant darkvision up to 60 ft. for 1 hour once per day.

Secrets

  • One lantern contains a shard of crystalline tear.
  • Wraiths respond differently to each lantern color.

DM Notes

Sea wraiths use phantasmal force and water jets.

Side Quests in Shadowfell Conflux

Seal the Northern Rift

Given by: High Inquisitor Caldre

The northern portal spews forth demons each dawn. Plant five holy wards around its frame to close it. Caldre provides warding runes—acquire sanctified oil from Fogshore to empower them.

Goals

Collect oil; plant wards; close portal.

Reward

Caldre’s Sigil of Warding (cast Protection from Evil once daily); 1,500 XP.

Secrets

  • One ward inadvertently strengthens the portal until all five are placed.
  • Oil must be blessed under a full moon.

DM Notes

Warding runes require an Arcana or Religion check (DC 15).

Recover the Binding Chains

Given by: Lady Malvora’s Shade

Chains that once bound her to the crypt lie scattered among the portals. Recover three fragments and reforge them to tether the Black Crystal’s power forever.

Goals

Search rifts; gather fragments; return to Malvora.

Reward

Reforged Chains (attaches to crystal to trap its power temporarily); 2,000 XP.

Secrets

  • Chain fragments are cursed, requiring purification rituals.
  • Reforged chains make the crystal brittle, not destroyed.

DM Notes

Fragments guarded by shadow fiends (use Shadows and Shadow Demons).

Encounters

Shadowspawn on the Cliffs

Medium

Suggested Level: 5–7

A pack of Shadow Mastiffs leaps from rock ledges to ambush the party on coastal paths.

Creatures

  • 4 Shadow Mastiffs

Terrain Features

  • Narrow cliff path (10 ft. wide)
  • Loose rocks (DC 12 DEX save or fall)
  • Sea spray grants partial concealment (half-cover).

Treasure

50 GP; one Mastiff Fang (alchemical reagent).

DM Notes

Mastiffs use pack tactics; terrain hazards increase tension.

Crypt Guardian Awakens

Hard

Suggested Level: 6–8

A skeletal knight bound to the crypt’s heart chamber rises to defend the Black Crystal’s first shard.

Creatures

  • 1 Skeleton Knight (use Death Knight stats, but CR 5)

Terrain Features

  • Water-logged floor (difficult terrain)
  • Glowing runes trigger a necrotic pulse every 3 rounds (1d8 necrotic).

Treasure

Armor scraps worth 200 GP; Necro-Shard (minor magic item).

DM Notes

Scale HP down if players unfamiliar with Death Knight.

Sea Wraith Ambush

Deadly

Suggested Level: 5–7

Three water wraiths swirl beneath a dinghy at dawn, dragging one member into the depths.

Creatures

  • 3 Water Wraiths

Terrain Features

  • Shallow tide pools and submerged rocks
  • Slippery algae (DC 13 DEX saves)
  • Hidden caverns beneath water.

Treasure

Wraith Tear Gem (500 GP); 100 GP coins.

DM Notes

Wraiths should toy with players; use stealth tactics.

Cultist Ritual Obstruction

Hard

Suggested Level: 7–9

Midnight in the Mire of Whispers: four Cult Fanatics and two Will-o’-Wisps attempt to complete a portal-empowering rite.

Creatures

  • 4 Cult Fanatics
  • 2 Will-o’-Wisps

Terrain Features

  • Black water pools (difficult terrain)
  • Flickering ghost lanterns
  • Vines that animate on command.

Treasure

Cult robes worth 150 GP; Ritual Parchments.

DM Notes

Interrupting the ritual changes enemy tactics; time pressure crucial.

Zhaeleth’s Shadow Legion

Deadly

Suggested Level: 8–10

At the Scar’s rim, legions of shadow demons and imps muster under Wraith-Lord Zhaeleth’s banner.

Creatures

  • 1 Shadow Demon
  • 4 Imps
  • 6 Shadows

Terrain Features

  • Floating obsidian platforms
  • Shadow pits (fall into them = unconscious for 1d4 rounds)
  • Eldritch pillars granting high ground.

Treasure

Demonic Sigil (50 GP); Spell scroll of Banishment.

DM Notes

Consider a skill challenge to navigate platforms safely while fighting.

Magic Items

Black Crystal Shard

Very Rare
A jagged fragment of the Black Crystal that pulses with infernal energy.

Location

Sunken Crypts

Attunement

Yes, must be studied for 1 hour

Purifying Hammer

Legendary
A warhammer brimming with radiant energy, wards off shadow creatures.

Location

Reward for Heart of the Scar quest

Attunement

Yes, by a paladin or cleric

Shadowheart Blade

Very Rare
A slender longsword that deals extra psychic damage and grants stealth.

Location

Reward from shattering the Black Crystal

Attunement

Yes, requires a pact boon

Infernal Codex

Rare
A half-burned tome detailing abyssal rituals and binding spells.

Location

Assembled from Blackspire Manor pages

Attunement

No

Caldre’s Sigil of Warding

Uncommon
A silver emblem that grants Protection from Evil once per day.

Location

Seal the Northern Rift quest reward

Attunement

No

Lunar Sigil

Uncommon
A crescent-shaped amulet granting advantage on Arcana checks by moonlight.

Location

Echoes Across the Isles quest reward

Attunement

No

Reforged Binding Chains

Rare
Rusty chains imbued with holy and shadow energy to trap demonic power.

Location

Recover the Binding Chains quest

Attunement

Yes, requires attunement by two persons

Maris’s Potion of Insight

Uncommon
A swirling vial that grants +2 on one skill check when consumed.

Location

Side quest: Tainted Harvest

Attunement

No

Sailor’s Journal

Common
An old log granting advantage on History checks about Morvath.

Location

Echoes in the Tide Pools side quest

Attunement

No

Mastiff Fang

Common
A sharpened fang that can be ground for alchemical reagents or used as a dagger.

Location

Shadowspawn on the Cliffs encounter

Attunement

No

Player Characters

You need to register to create and view player characters in this campaign.

Register Now
Login to start your adventure