Campaign Overview
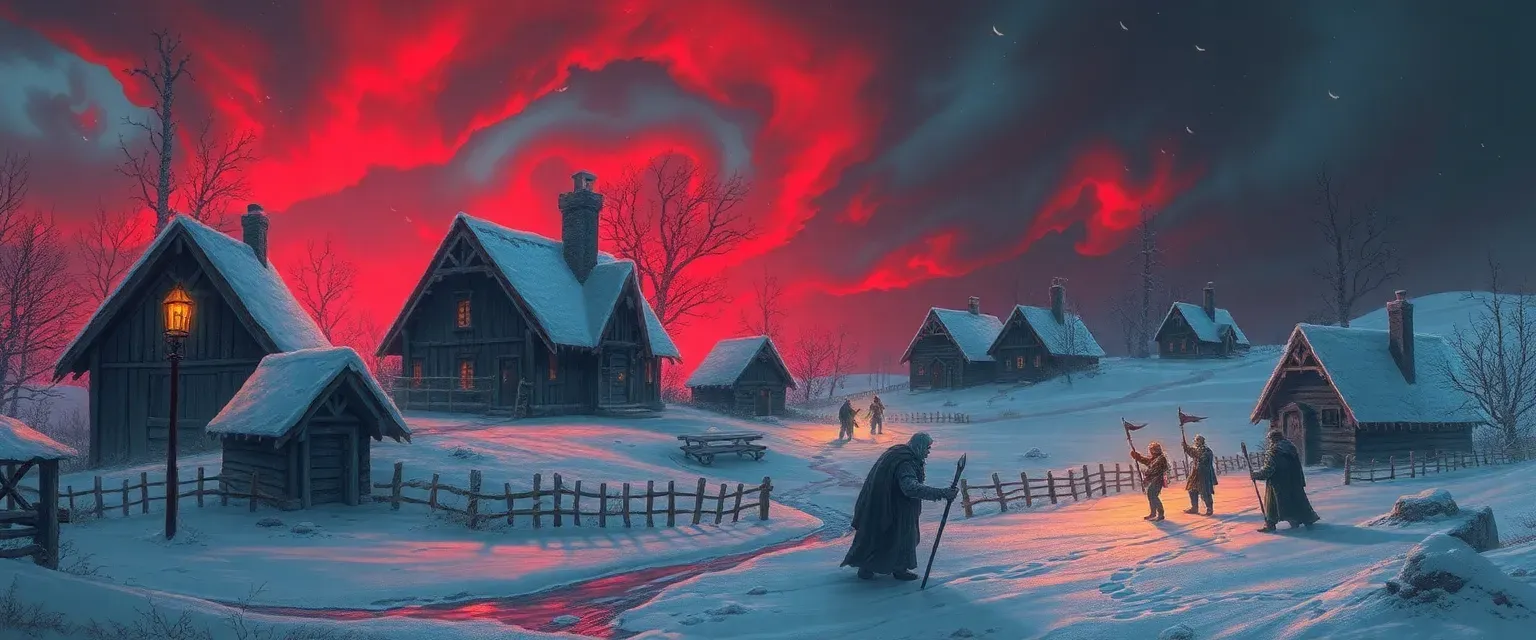
Centuries have passed since the cataclysm known as the Great Sundering, when arcane energies—once a wellspring of creation—were tainted by malevolent forces. The world still feels the aftershocks: entire continents reshaped, civilizations undone, and the veil between realities forever weakened. In the frozen village of Highwinter’s End, whispers stir in the bones of the icebound dead, foretelling a new age of madness. From these chilling prophecies emerges your call to adventure: recover ancient artifacts, navigate forests that think and libraries that bleed, and chase the truth through crimson-lit ruins and nightmare-twisted citadels.
You are outcasts and survivors: a half-mad warlock haunted by voices beyond comprehension; a cleric wrestling grief and divine doubt; a cartographer driven to map unwieldy labyrinthine forests; and others marked by personal tragedies wrought by the Sundering’s fallout. Together, you must piece together fragments of the arcane source—Sanctum’s Tear, Verdant Sigils, and rift-bound shards—before the archmage Malrec the Unbound uses them to rip open reality and reign over the world’s final winter.
Your journey leads you first through snow-crusted streets where buried corpses mutter doomsday warnings, then through verdant nightmares where vines argue politics and mushrooms hum secrets. Each artifact you wield grants power—but edges you closer to insanity. Moral dilemmas wait at every turn: do you sacrifice innocents to seal a rift or risk floods that drown entire nations? Do you trust a shadowy guide who saved your life or kill her before she betrays you? And in the end, will you stand as heroes who healed a broken world, or become the destroyers you swore to stop?
Echoes of the Sundering is a campaign of creeping horror, moral ambiguity, and epic confrontation. Prepare to face madness incarnate, forge uneasy alliances with druids and planar opportunists, and confront the ultimate question: can you purify an arcane source corrupted at its core—or will the final spell transform you into the very monsters you fight? Your choices will echo through ages to come, and the fate of reality itself rests in your trembling hands.
Starting Location
Highwinter’s End
Secrets
- A half-mad fisherman wanders the woods chanting an ancient prophecy—he knows a hidden path to the Verdant Labyrinth.
- Beneath the chapel’s altar rests a shattered fragment of the Sanctum’s Tear, critical to purifying local leylines.
- A secret blood-rune sealing the crypt can be undone only with a memory from the cleric’s past.
Key Locations
The Snowed Spire
A jagged watchtower looms over Highwinter’s End on the highest knoll. Its stone blocks, once white limestone, are now smothered in layered ice that glitters under the aurora. The interior spiral staircase is half-buried in drifts, and each landing reveals rooms repurposed by desperate villagers: a makeshift infirmary littered with frostbitten carcasses, a library where mad scribes scrawl forbidden runes across blank tomes, and a final chamber with a shattered telescope pointing at the blood-tinted sky. Strange whispers echo through the halls—voices of those entombed in the ice below. At the spire’s base, arcane markings pulse faintly, hinting at rituals to cleanse the ambient corruption, but any who attempt them risk being claimed by delirium.
Additional Notes
The spire offers a vantage point for the aurora’s source. DM can introduce a hidden chamber beneath the ice, containing a prophetic crystal that fractures the mind of anyone who gazes too long.
Bone-Chilled Chapel
This ruined chapel, once a sanctuary of warmth, now stands roofless, its pews encased in crystalline frost and its altar cracked open. Statues of holy patrons have been gouged, their faces worn into anguished grimaces. Blood-red runes scrawled across the walls pulse with malignant energy, and a frozen choir of specters drifts through the aisles, laments resonating like wind through hollow glass. Beneath the cracked floorboards lies a hidden ossuary where the bones of revered martyrs are arranged in a protective ward; even so, the ward fails to hold back the creeping madness manifesting as shrieking wraiths. A single stained-glass window remains intact, depicting a prophet who gazed too deeply into arcane depths and was turned to ice by his own vision.
Additional Notes
An underground crypt lies behind the altar, sealed by a rune-locked door that requires either arcana checks or a blood offering to open. Inside is a fragment of Sanctum’s Tear, an artifact for the main quest.
Frozen Well
At the village center stands a well rimmed with frost, its water so cold it steams faintly in the bitter air. Locals whisper that any who drink from it gain fleeting glimpses of the future—but at the cost of their sanity. Icicles hang like stalactites from its circular lip, and ghostly hands pressed against the icy walls beg for release. An ancient water spirit, half-frozen, slumbers at the bottom; it murmurs prophecy when disturbed, yet each word twists the listener’s mind. Marks around the well hint at previous sacrifices: runestones, torn journals, and a silver chalice etched with runes of warding. The well’s true bottom is sealed by eldritch ice that none have yet broken.
Additional Notes
If players repeatedly consult the well, they suffer cumulative madness. A secret lever beneath loose stones drains half the water, revealing a hidden tunnel to the Whispering Crypt.
Whispering Crypt
The crypt lies hidden beneath the chapel’s foundations, access through a narrow trapdoor obscured by snow. Slippery, rune-inscribed steps descend into gloom, where clusters of skeletal remains line alcoves. Soft murmurs drift through the corridors, urging intruders to betray companions. At the heart of the crypt sits a tomb bearing three coffin lids, each carved with a prophetic symbol: a shattered sun, a weeping moon, and a bleeding star. Disturbing any lid releases arcane echoes that warp memory and sow mistrust. The final chamber holds the Frozen Choir’s reliquary—a sealed urn containing shards of a shattered diadem that once stabilized ley lines here.
Additional Notes
Coaches can trigger a parley among voices in the walls, causing NPCs to argue if persuasion or insight fails. Hidden passage behind the reliquary leads to the Fractured Market’s sewers.
Fractured Market
Long-abandoned stalls line this semi-collapsed quarter, their wooden frames splintered by gale and time. Barrels of preserved fish lie half-buried, their contents turned to icy dust. Vendors once hawked frozen goods from odd travel routes; now, animated mannequins dressed in ragged furs wander between stalls, clasping cracked clay mugs and reciting trade prices in a slow, mechanical drone. Beneath the cobblestones, a network of sewers carries blood-stained ice melt into the forest, feeding a corrupted spring upstream. The market’s central fountain has been defiled by arcane graffiti, and its basin overflows with spectral wraiths that hiss warnings of approaching doom.
Additional Notes
A locked vendor’s cabin contains a set of ice-forged tools—key to unlocking an ancient vault in the middle region. The sewers host a secret cult meeting when the aurora peaks.
Verdant Labyrinth
Secrets
- A hidden root-walled passage under the Mirror Pool leads directly to Heartgrove.
- Shrieking Thicket sentinel is host to a slumbering spirit of a fallen archmage.
- Fungal guardians can be pacified with rare amber spores found in the Finisterre Marsh.
Key Locations
Shrieking Thicket
This dense bramble patch emits high-pitched wails when brushed. The vines are lined with razor-sharp thorns coated in paralyzing sap. Once inside, every cut echo amplifies, disorienting travelers and drawing predatory beasts. Distant voices mimic screams of past victims—a haunting siren to lure rescuers into traps. A hidden alcove shelters a petrified druid sentinel who can guide the party for a price—his memory is fragmented, and he may betray the group unless convinced.
Additional Notes
A successful Animal Handling or Nature check reveals the sentinel’s true identity and intentions.
Mirror Pool
A still pool of black-green water reflects not reality but dreams and secrets. Any who gaze upon it see twisted scenes: a lost love weeping, a fallen comrade raising a blade, or a future ruin. Extracting water grants visions necessary for main-quest puzzles, but each sip risks confusion. Beneath its surface lies a submerged cavern housing a shard of the Verdant Sigil, guarded by a will-o’-wisp queen whose jesting riddles can charm intruders into self-harm.
Additional Notes
DM should roleplay riddles to push party members toward paranoia. Insight checks mitigate risk.
Broken Druid’s Hall
A moss-covered ruin of a circular stone hall, once seat of the Greenwarden Circle. Pillars carved with leaf motifs have collapsed, pooling nutrient-rich water that spawns horrific fungal growths. Groaning myconids roam here, communicating through spores that induce shared hallucinations. In the central dais rests the Greenwarden’s Staff, shattered but still thrumming with latent power. Piecing together the shattered halves requires collecting three fungus-forged crystals nearby, each protected by fungal guardians.
Additional Notes
Crafting checks and Arcana checks needed to reforge the staff. Failure triggers spore burst (hallucinatory terrain).
The Abyssal Rift
Secrets
- A hidden ascension chamber beneath North Pillar holds the final Sanctum’s Tear fragment.
- Malrec’s personal diaries reveal his plan to sacrifice the players to stabilize the bastion.
- One anchor pillar can be reactivated to create a portal of escape instead of a collapse.
Key Locations
North Anchor Pillar
A frozen plateau where lava once flowed. Now, glacial ridges and black ice form a labyrinth around a rune-inscribed pillar encased in obsidian. Rift-borne wind occasionally solidifies into razor-cold gusts, slicing flesh. Frost wraiths patrol the perimeter, bound to the pillar’s magic. Disabling the pillar requires melting the obsidian seal, but lava veins are trapped beneath the ice—risking an eruption if mishandled.
Additional Notes
Provide environmental hazards: ice cracks, magma steam vents, and visibility challenges.
East Anchor Pillar
Among shattered towers of volcanic glass stands the ember-stained pillar. Magma flows invisibly beneath basalt slabs, fueling the pillar’s flame motifs. Shadowmoths swarm here, drawn to the pillar’s flickering glow. A living golem of emberstone defends this location, regenerating from magma pools. Disrupting the pillar’s fire runes requires a water elemental bound by arcana—accessed through a locked sanctum at the base of a collapsed tower.
Additional Notes
Include puzzle to summon and bind the elemental. Failure awards disadvantage vs. golem’s heat aura.
West Anchor Pillar
This pillar floats on a giant basalt boulder mid-air, accessible only by treacherous crystal bridges. Rift lizards skitter along the pathways, skirmishing in packs. Gales of abyssal energy threaten to hurl intruders into the void below. The pillar’s runes are etched in sheer obsidian; dismantling them requires a resonant sound—either magical or musical—tuned precisely to the runic frequencies.
Additional Notes
Offer a magical instrument side-quest tie-in. Bridges collapse after repeated crosses, forcing quick action.
NPCs in Highwinter’s End
Aaric Frostbrand
A hulking ex-soldier clad in frost-crusted armor, his breath visible in the coldest air. Practiced at wielding a frostbite greataxe, he lost his mind after witnessing arcane horrors during the Sundering.
Sister Elidyr
A grief-stricken cleric of the Winter Mother, her eyes ringed with dark circles. She holds the village’s last holy relic and hears the whispers of the frozen dead.
Soren Icebrand
A rogue of questionable sanity who claimed to escape the Verdant Labyrinth. He trades maps for favors, his grinning mask hiding shattered memories.
Dalia Moorcart
A stooped cartographer scribbling endless revisions to her maps, her ink stained crimson with her own blood.
Brother Corin
A timid lantern-bearer who hauls flammable lantern oil from a hidden cache under the market.
NPCs in Verdant Labyrinth
Lyra Mossheart
A tiefling ranger who lost her pack to the labyrinth’s illusions. She guides travelers—for a steep price—in exchange for help recovering her lost animal companion.
Warden Orin
A skeleton druid bound to the Hall’s broken staff. His speech is slow but his wisdom deep; he bargains fiercely for restoration.
Mirella Sporeveil
A myconid sovereign who commands fungal creatures. She values knowledge above violence and may trade spores for secrets.
NPCs in The Abyssal Rift
Malrec the Unbound
A once-revered archmage driven mad by his own experiments with arcane taint. He wields shattered fragments of the arcane source and believes only he can reshape reality.
Vesha Voidbound
A tiefling warlock who betrayed the party in the labyrinth, now Malrec’s lieutenant. She commands shadowmoths and rift beasts.
Erathis Stormveil
An imprisoned planar scholar, forced to catalog Malrec’s ritual progress. He offers knowledge in exchange for freedom.
Factions
Order of the Sanctified Aurora
Goals
Relationships
With Other Factions
They clash with the Verdant Circle over methods—Order demands outright destruction where Circle seeks balance. They mistrust Malrec’s rebels.With Players
Offer support if players show unwavering faith; otherwise, view them as potential heretics subject to intervention.Verdant Circle
Goals
Relationships
With Other Factions
Their moderate stance earns distrust from the Order but cautious respect from the Riftbound Coalition. They spurn Malrec’s annihilationist aims.With Players
Provide guidance in the labyrinth if welcomed; test party’s moral compass through trials of symbiosis.Riftbound Coalition
Goals
Relationships
With Other Factions
Open enemies of the Order; engage in clandestine trade with Verdant Circle dissenters. Malrec once allied with them before betraying Valea.With Players
Offer knowledge or artifacts if approached—but always at a steep moral cost. They track the party, seeking to recruit or eliminate them.Main Questline
Whispers of Frost
Given by: Sister Elidyr
Goals
Explore the Whispering Crypt, collect three prophecy shards, return to Elidyr.Reward
• Sanctified Lantern (illuminates undead) • 200 XPSecrets
- One shard speaks of a living forest that kills with illusions.
- The crypt ground is tainted by a fragment of the arcane source.
DM Notes
Use prophecy shards to foreshadow middle_region challenges.Path of Thorns
Given by: Lyra Mossheart
Goals
Reach Heartgrove, defeat the Will-o’-Wisp Queen, secure the Sigil fragment.Reward
• Verdant Sigil Fragment • 500 XPSecrets
- The Sigil fragment can be used to locate anchor pillars in final region.
- Lyra knows a betrayal hidden in the group’s past.
DM Notes
Introduce party discord mechanics; use illusion checks and Wisdom saves.Echoes of the Abyss
Given by: Erathis Stormveil
Goals
Deactivate North, East, and West Pillars in any order.Reward
• Rift-walker’s Medal • 1,000 XPSecrets
- One pillar’s deactivation will partially collapse the Bastion, altering final battle terrain.
- Erathis’s freedom can shift final alignment of events.
DM Notes
Pillar order can be player’s choice; each deactivation spawns an elite sentinel.Shadows of the Unbound
Given by: Vesha Voidbound
Goals
Escort Vesha, bypass fortification wards, reach Malrec’s ritual chamber.Reward
• Shade Dagger • 1,500 XPSecrets
- Vesha intends to kill Malrec and seize his power.
- The passages she knows bypass remaining traps but trigger new threats.
DM Notes
Trust decision triggers branching fight or surprise ally.Heart of Madness
Given by: None (self-initiated)
Goals
Defeat or redeem Malrec, use or destroy arcane source.Reward
• Purified Arcane Source • 3,000 XP • World’s fate decided by playersSecrets
- Using all artifacts to purify may drive the party mad.
- Failing to act creates a new world ruled by Malrec’s madness.
DM Notes
Epic moral climax—allow players to choose sacrifice of innocents or embrace madness.Side Quests in Highwinter’s End
The Whisper in the Snow
Given by: Soren Icebrand
Goals
Locate the whisper source, retrieve three prophetic fragments, return to Soren.Reward
• 100 GP • Soren’s dragonbone key • Temporary protection (+1 to saving throws vs. madness)Secrets
- The source is a half-awakened aboleth fragment buried under ice.
- Soren plans to use the fragments to bend prophecies to his own ends.
DM Notes
Scale whispers as creeping madness. Track fragments to reveal future main-quest clues.Lost Heirloom of the Icebrand
Given by: Aaric Frostbrand
Goals
Descend into sewers, defeat animated mannequins, recover Frostbrand, return to Aaric.Reward
• Frostbrand greataxe (+1) • 200 GP • Aaric’s lifelong loyaltySecrets
- Frostbrand’s pommel houses a hidden compartment with a piece of Sanctum’s Tear.
- Aaric cannot bear to see Frostbrand; locating it may trigger his breakdown.
DM Notes
Mannequins fight with mimicry—copy PCs’ weapons/styles. Use confiscated Tear shard in pommel for main-quest synergy.Soothe the Howling Spirits
Given by: Sister Elidyr
Goals
Perform rites at three statue locations, pacify spirits, report back to Elidyr.Reward
• Divine Favor (blessing, +2 Radiant damage for one hour) • Holy symbol of Winter Mother (+1 to Turn Undead) • 75 GPSecrets
- The spirits belong to villagers who died protecting a hidden sanctum beneath the chapel.
- Performing rites incorrectly can strengthen the spirits instead.
DM Notes
Rites require skill checks in Religion; failure empowers wraiths for next main quest.Cartographer’s Request
Given by: Dalia Moorcart
Goals
Locate midnight thorn, harvest 5 petals, return to Dalia.Reward
• Custom Labyrinth Map (advantage on navigation checks) • Potion of Mind Shielding • 50 GPSecrets
- The petals are sentient and resist harvesting, attacking intruders.
- Dalia’s map will twist reality; she intends to sell it to rival factions.
DM Notes
Midnight thorn vines animate; potions of poison resistance help. Map bonus applies in middle_region.Trail of the Crimson Snow
Given by: Brother Corin
Goals
Follow trail, resolve concealed threat, return to Corin safely.Reward
• Silvered Longsword (counts as magical) • 150 GP • Corin’s gratitude (later safe lodging)Secrets
- The trail is a lure laid by a masked caster to harvest survivors’ memories.
- One refugee holds a key memory for the cleric’s lost faith.
DM Notes
Include stealth and moral challenge: rescue villagers versus slaying warped refugees.Side Quests in Verdant Labyrinth
Echoes in the Thorns
Given by: Lyra Mossheart
Goals
Locate Silvermane, resolve its fate, report back.Reward
• +1 Longbow with silver tips • 150 GP • Lyra’s steadfast support or grief-laden curseSecrets
- Silvermane’s corruption is reversible with a vial of moonlit dew from the Mirror Pool.
- Mossheart fears mercy may unleash a greater threat.
DM Notes
Include roleplaying choices; final decision affects main-quest outcome regarding archmage’s familiars.Fungal Foray
Given by: Warden Orin
Goals
Harvest three amber crystals, return to Orin.Reward
• Staff of Thorns (functions as Quarterstaff +1) • 100 GP • Advantage on Nature checks in forested areasSecrets
- One crystal contains a dormant spore that can animate the staff unpredictably.
- Marsh-born spores can be refined into potent hallucinogens.
DM Notes
Spore clouds require Constitution saves; crystals break on critical failures.Mapping the Madness
Given by: Dalia Moorcart
Goals
Escort Dalia to waypoints, record changes, obtain finalized glyph.Reward
• Stabilized Labyrinth Glyph (teleport party once out of region) • Potion of Clarity • 75 GPSecrets
- Dalia’s mind is fracturing; reveal her secret journal for bonus insight.
- The teleport glyph anchors a fleeting rift to the Abyss.
DM Notes
Introduce random corridor realignment. Each waypoint may spawn illusionary foes.Side Quests in The Abyssal Rift
Shatter the Rift Hounds
Given by: Erathis Stormveil
Goals
Defeat or capture a rift hound, return to Erathis.Reward
• Cloak of Abyssal Resistance (resistance to psychic damage) • 100 GP • Erathis’s arcane scroll (grants True Strike once)Secrets
- Captured hound contains a rift-born parasite tied to Malrec’s life force.
- Erathis plans to use the parasite to bargain for his freedom.
DM Notes
Include chase across unstable ground and possible ally interventions.Echoes of the Sundering
Given by: Vesha Voidbound
Goals
Infiltrate lower Bastion, break Vesha’s cage, decide whether to trust her.Reward
• Vesha’s Shade Dagger (+1, deals psychic damage) • Detailed ward schematics • 50 GPSecrets
- Vesha is bound by a geas to kill Malrec once freed.
- Her schematics include a hidden passage to the final sanctum.
DM Notes
High-stakes choice—betrayal leads to extra mini-boss fight.Song of the Shattered Spires
Given by: Erathis Stormveil
Goals
Retrieve obsidian horn, activate at West Pillar, return to Erathis.Reward
• Horn of Shattering (one-time area-effect acoustic attack) • 75 GPSecrets
- The horn belonged to Malrec’s mentor, its tone infused with redemption magic.
- Using it improperly may drop players into the central chasm.
DM Notes
Requires performance check; failure triggers environmental hazard.Encounters
Frost Wraith Ambush
HardSuggested Level: 5–7
Creatures
- Frost Wraith
- Wraith Spawn
- 2 Specters
Terrain Features
- Deep snow slows movement by half
- Icicles drop on failure of DC13 Dex save
Treasure
Ring of Cold Resistance
DM Notes
Use winter weather effects; spectral attacks bypass non-magical armor.
Hallucinatory Fungus Patch
MediumSuggested Level: 6–8
Creatures
- Myconid Sovereign
- 2 Myconid Sprouts
Terrain Features
- Spore clouds: Con save DC14 or hallucinate for 1 minute
- Slippery moss: DC12 Dex save or fall prone
Treasure
Heart Mold Fungus (alchemy reagent)
DM Notes
Encourage roleplay during hallucinations; use Wisdom saves to distinguish illusions.
Shadowmoth Swarm
MediumSuggested Level: 7–9
Creatures
- Shadowmoth Swarm
- 2 Void Hounds
Terrain Features
- Dim light
- Flickering lanterns at intervals, DC13 Arcana to maintain light
Treasure
Lantern of True Sight (reveals invisible creatures)
DM Notes
Use encroaching darkness for tension; moths disrupt torches.
Rift Lizard Hunt
DeadlySuggested Level: 8–10
Creatures
- 6 Rift Lizards
- Rift Serpent (if reinforcements)
Terrain Features
- Floating boulders drift slowly
- Narrow bridges (falls inflict 2d6 bludgeoning)
Treasure
Rift Scale (crafting magical armor)
DM Notes
Include chase mechanics; exhaustion may accrue if failed to keep up.
Golem of Emberstone
DeadlySuggested Level: 9–11
Creatures
- Ember Golem
- 2 Fire Elementals
Terrain Features
- Pools of magma (DC15 Dex save for half damage)
- Overheated air (fire damage each round)
Treasure
Molten Core (staff forging component)
DM Notes
Scale HP based on party size; use environment to grant advantage or peril.
Magic Items
Shard of Sanctum’s Tear
Very RareLocation
Hidden under Bone-Chilled Chapel altar
Attunement
True—requires meditation in a sacred site
Verdant Sigil Fragment
RareLocation
Heartgrove in the Verdant Labyrinth
Attunement
True—must be held aloft while resting
Horn of Shattering
LegendaryLocation
West Anchor Pillar
Attunement
True—musical proficiency required
Frostbrand Greataxe
RareLocation
Fractured Market sewers
Attunement
True—bonded by ancestral oath
Lantern of True Sight
UncommonLocation
Shadowmoth Swarm encounter
Attunement
False
Cloak of Abyssal Resistance
UncommonLocation
Shatter the Rift Hounds side quest
Attunement
True—requires spending a hit die while wearing
Staff of Thorns
RareLocation
Fungal Foray side quest
Attunement
True—requires a druidic ritual
Ring of Cold Resistance
UncommonLocation
Frost Wraith Ambush
Attunement
False
Resonant Obsidian Key
Very RareLocation
Cartographer’s Request side quest
Attunement
False
Moonlit Dew Vial
RareLocation
Mirror Pool
Attunement
False
Player Characters
You need to register to create and view player characters in this campaign.
Register Now