Campaign Overview
Welcome, bold adventurers, to a world where moonlight drips like honey and shadows conceal both enchantment and corruption. “Whispers of the Twilight Feywild” is a short but rich 5th Edition campaign that takes characters from the mortal threshold into the heart of planar intrigue. Starting at Moonlace Glade—a place where mortal footsteps fade among silvered grass and phosphorescent blooms—you’ll unravel riddles, brew fey elixirs, and earn the trust (or ire) of ancient guardians.
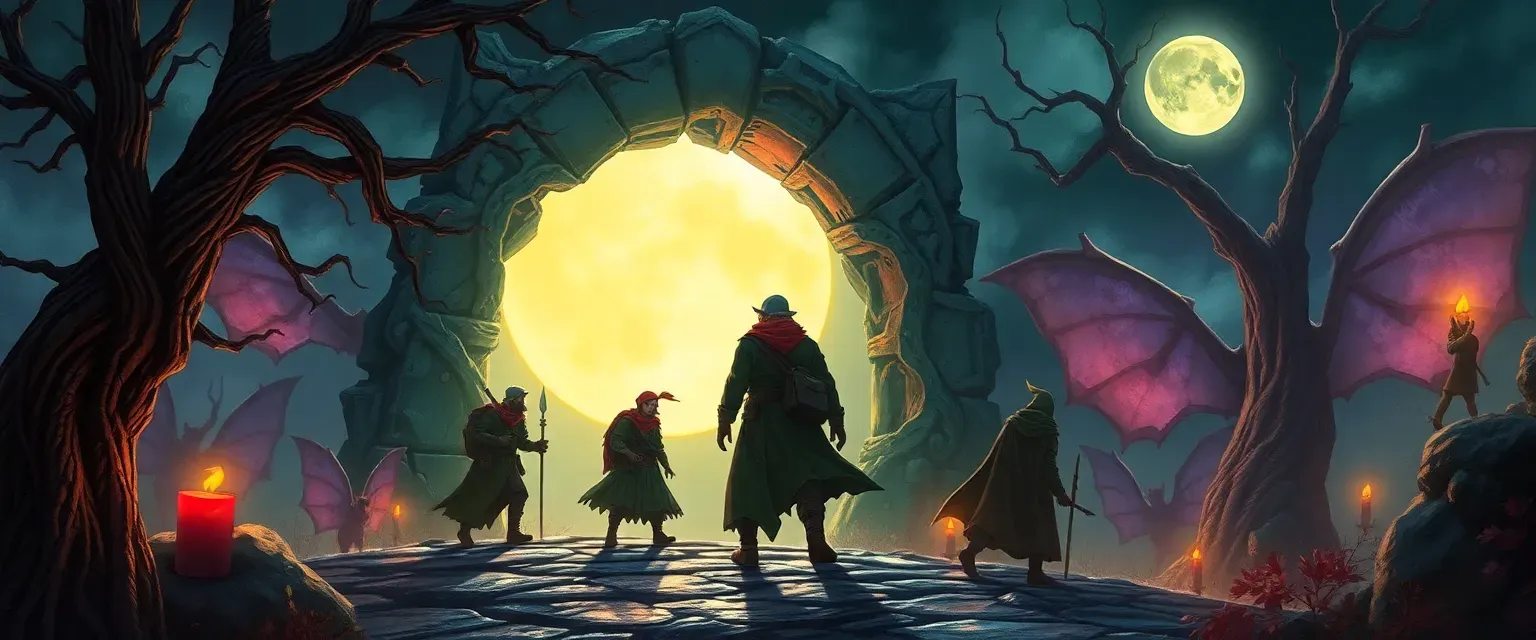
A glimmering archway, Feylight Arch, awaits activation: solve the mysteries of Silverwhisper Pool, reclaim an enchanted flute from Echoing Oak, and unlock the Twilight Stone Circle’s magic. Beyond lies Gloomvale Court, a twilight domain ruled by corrupted fey lords and Abyssal conspirators. Navigate deadly etiquette, break pernicious pacts, and rescue imprisoned emissaries or risk the Court’s thorns closing around you.
Hardened by intrigue, descend to the Shadowvault Citadel—an ominous fortress hovering above a void—where the Crown of Twilight sits on a skeletal throne. Will you purify its power or seize the diadem to control both Feywild and Abyss? Face archfey champions, demon heralds, and shifting halls of obsidian mirrors in a climactic duel of magic, wits, and steel.
Along your journey, side quests abound: gather mushrooms for a reclusive hermit, race pixies in riddle hunts, sabotage Abyssal artifact shipments, and rescue tormented spirits. Discover ten unique magic items—moon-touched amulets, whisper-soft cloaks, and components that shape the final ritual. Align (or oppose) three powerful factions: the noble Circle of Moonlace Guardians, the duplicitous Court of Twilight, and the infernal Abyssal Covenant. Each choice ripples across realms, offering moral dilemmas, perilous alliances, and unexpected betrayals.
Expect ever-shifting terrain, illusions that question your senses, and encounters ranging from blink dog ambushes to deadly wild surges. Puzzle-driven challenges in stone circles, mirrored halls, and living root bridges test both mind and mettle. Ultimately, you must decide the fate of two worlds: uphold the natural balance or let shadows reign.
Sharpen your wits, steel your resolve, and heed the fey’s whisper: in the Twilight Feywild, every secret has a price, and every promise could be your undoing. The moon beckons—will you answer?
Starting Location
Moonlace Glade
Secrets
- A buried hollow root beneath Silverwhisper Pool holds a shard of ancient Fey key.
- Echoing Oak’s hum accelerates if players play the hidden melody found in Harlene’s journal.
- Twilight Stone Circle glyphs reveal a locked pit that houses an imprisoned fey seer.
- Harlene’s secret door behind the cottage cellar leads to a mushroom-lit subterranean alchemy lab.
- Feylight Arch’s keystone hides an Abyssal sigil—disturbing it draws a lesser demon.
Key Locations
Silverwhisper Pool
Additional Notes
Echoing Oak
Additional Notes
Twilight Stone Circle
Additional Notes
Harlene’s Homestead
Additional Notes
Feylight Arch
Additional Notes
Court of Gloomvale
Secrets
- A hidden alcove beneath Hall of Thorns contains the Abyssal envoy’s sealed letter.
- A mirror in Ebony Pavilion reverses enchantments if its riddle is solved.
- One catacomb chamber holds a trapped Summer Court emissary who can grant aid.
Key Locations
Hall of Thorns
The Hall of Thorns is Gloomvale’s central audience chamber, its vaulted ceiling of interlaced black vines dripping crimson sap. Thorn-shaped pillars loom like sentries, and the floor is paved with polished obsidian tiles inlaid with silver tragic verses. At the far end sits the Ebony Throne, carved from a single colossal rosewood trunk and inlaid with Abyssal runes that pulse faintly. Royally dressed fey nobles observe from side balconies, their laughter echoing like snapping twigs. Any who approach the throne must bow deeply and recite a stylized greeting in Infernal and Sylvan. One mispronounced syllable or inappropriate flourish can trigger hidden arrow traps set into the walls, or worse, animate the thorns to constrict and impale. Despite its dangers, the hall contains a carved map of the Abyssal alignment beneath Gloomvale—a resource for those brave enough to decipher it. A secret lever disguised as a rose petal opens a hidden corridor leading to the Ebony Pavillion.
Additional Notes
Use trap glyphs (DC 16 Investigation to find). Bowing and invocation require DC 17 Performance to avoid traps.
Ebony Pavillion
A crescent-shaped veranda built over a foul canal, the Ebony Pavilion’s floor is suspended by root-like pillars that drip corrosive ichor. Long ebony drapes flutter overhead in a wind no one feels. At its center stands a marble brazier burning with purplish flames that cast eerie reflections in the water below. Courtly gatherings occur here under twisted lanterns shaped like snarling beasts. Guests who breathe the brazier’s fumes become susceptible to enchantment—DC 15 Wisdom saving throw or fall under the sway of the court’s barbed compliments. The pavilion floor hides hidden compartments for smuggled poisons and folded contracts. A concealed whispering gallery beneath the platform amplifies secrets spoken in confidence to all corners of the court. A hidden hatch under the brazier leads down to the Shattered Fountain’s catacombs.
Additional Notes
Encounters here can involve aura-based enchantments. Ensure the party contends with Chain Whip Vine traps and illusions.
Shattered Fountain
This trough once spouted silver water that granted visions of future glories. Now it lies shattered, cracked stones jutting upward like broken teeth. Black water pools in its recesses, shimmering with twisted reflections of those who peer into it. Corrupted water sprites—eyeless and gleaming—haunt the fountain, attacking intruders with venomous laughter. The pool contains the drowned journal of an exiled courtier, revealing vital secrets: locations of hidden Abyssal vaults and a ritual to cleanse or further taint the court. The fountain’s shattered edges conceal altars to abyssal entities; inserting a token of the court’s cruelty—like a thorn from the Hall of Thorns—momentarily restores its original power. The catacombs beneath weave toward the Obsidian Ballroom, with side passages leading to imprisoned fey.
Additional Notes
Journal is written in Ancient Sylvan (DC 15 Arcana to read). Water sprites use water whip attacks; ambush from behind broken stone.
Shadowvault Citadel
Secrets
- One column’s control panel hides an inscription revealing how to cleanse rather than corrupt the crown.
- Blood used to summon the skeletal king is a component of the final cleansing ritual.
- The vault’s floor tiles shift to trap intruders unless they step in the pattern mirror-reflected in the Hall of Reflected Vows.
Key Locations
Outer Root-Spire Bridge
Living root-spires reach skyward from the void, braided together to form narrow bridges. Each step vibrates as if the fortress itself pulses underfoot. Odd blooms—black roses with blood-red petals—line the edges. Passing cracks the roots, triggering rallies of Abyssal gargoyle watchers perched on gargantuan thorns. The bridges retract unpredictably, separating allies if not careful. Roots exude hallucinogenic spores—Con DC 14 or see fleeting illusions of past battles.
Additional Notes
Time pressures: roots retract 1 foot per round when a horn sounds. Gargoyles patrol in pairs.
Hall of Reflected Vows
A cavernous hall lined with tall obsidian mirrors, each reflecting a twisted version of the viewer. Some mirrors display one’s darkest fears; others show potential futures. Spells cast in the hall can become permanent if they interact with a mirror—fire spells may burn a reflection to ash, binding it to the caster. At the hall’s far end is a blood-slick dais supporting a glass sarcophagus containing the skeletal king of twilight. Breaking the glass summons a shade (use wraith stats) who challenges intruders to duels of honor.
Additional Notes
Encourage roleplay: each PC faces a personal vision. Wraith can be negotiated with knowledge of the crown’s secret.
Crown Vault Inner Sanctum
A circular chamber carved from voidstone, lit by swirling violet auras. At its center rests the Crown of Twilight on a rune-etched pedestal. Four Abyssal columns overhead drain planar energy into the diadem. Trapped spirits swirl in ghostly chains around the room’s edge, and a massive Abyssal archfey stands guard, staff crackling with shadow lightning. To claim the crown, adventurers must disable or reorient the columns (DC 17 Arcana) and withstand an aura of despair (Wis DC 16 save). If done correctly, the crown’s magic purifies the citadel; if botched, it explodes in a wave of destructive energy.
Additional Notes
Coordinate multi-step puzzle under combat. Column controls are on opposite sides—requires teamwork.
NPCs in Moonlace Glade
Aiofe Moonshadow
An eladrin druid whose eyes shimmer like moonbeams, clad in robes of shifting seasons.
Other Details: Knows ancient Feywild pathways; harbors guilt for unleashing Abyssal taint.
Bramblethorn Sprig
A bright-eyed pixie scout, armed with a tiny crossbow and endless mischievous energy.
Other Details: Offers cryptic hints in exchange for sweets and riddles.
Warden Thornwick
A stern dryad guardian bound to the Echoing Oak, skin mottled with bark and vines.
Other Details: Will aid against Abyssal intruders but mistrusts mortals.
Elder Rowan
An aged human seer whose staff holds a trapped moonlit shard.
Other Details: Foresees pieces of the main quest; deals in visions for coin.
Aluvar the Hedgeknight
A planar knight wearing battered armor etched with fey and infernal runes.
Other Details: Sworn to defend portals; seeks redemption for past treachery.
NPCs in Court of Gloomvale
Lady Caelmara Duskthorn
A Winter Court noble bound to Abyssal pacts; elegant cruelty drips from her every word.
Other Details: Seeks to tear the veil between Feywild and Abyss.
Lord Ilanthir Sunspire
A broken Summer Court paladin turned court insider, eyes hollow and haunted.
Other Details: Harbors remorse; clues to final ritual.
Marissa Chainwhisper
A cunning imp scribe disguised as a court clerk, tail flicking with delight.
Other Details: Trades secrets for obsidian gems.
Sablethorn Sentinel
A towering armored satyr whose halberd pulses with Abyssal energy.
Other Details: Patrols the perimeter, immune to charm spells.
Feyla Nighthollow
A wistful sprite who escaped corruption and hides among shadows.
Other Details: Offers map of secret tunnels if convinced.
NPCs in Shadowvault Citadel
Archfey Umbraxis
An Abyssal-tinged archfey, gaunt and regal, eyes glowing violet.
Other Details: Fueled by crown’s power; vulnerable to combined Summer & Winter magics.
Shade of the King
The skeletal shade of the long-dead fey monarch, bound to defend his crown.
Other Details: Can be bargained with through truthfulness.
Demon Herald Saraziel
A horned envoy flanked by burnished cuirass and wicked glaives.
Other Details: Commands Abyssal thralls; blesses crown with demonic wards.
Lirael Starbloom
A spirit of the Summer Court trapped in chains, her voice like spring breeze.
Other Details: Offers guidance on restoring crown’s purity if freed.
Captain Vaermoth
A tiefling defector guarding the Inner Sanctum’s rear entrance.
Other Details: Swears loyalty to the one who claims the crown.
Factions
Circle of Moonlace Guardians
Goals
- Research forgotten Feywild lore
- Prevent Abyssal corruption from spreading
Relationships
With Other Factions
Allied with Summer Court envoys who respect balance; opposed by Abyssal Covenant due to conflicting aims.With Players
They provide support, minor quests, and vital lore, viewing the party as prodigious recruits or unreliable outsiders depending on choices.Court of Twilight
Goals
- Maintain façade of diplomatic civility
- Expand shadow-tinged territories
Relationships
With Other Factions
Acknowledge Moonlace Guardians as enemies; uneasy rivalry with the Moonlace Guardians and suspicion of the Abyssal Covenant’s motives.With Players
They see the party as either pawns to exploit or threats to eliminate—trust is scarce.Abyssal Covenant
Goals
- Harvest soul-energy from fey and mortals
- Corrupt powerful relics for ritual use
Relationships
With Other Factions
Openly hostile to the Circle of Moonlace Guardians and in covert alliance with corrupt members of Court of Twilight.With Players
They may offer dark bargains, tempting the party with power or secrets at a terrible price. Some agents might be convinced to betray their masters if outmaneuvered.Main Questline
The Faerie’s Call
Given by: Aiofe Moonshadow
Goals
Retrieve the reed flute, solve the Twilight stone riddle, and open the portal.Reward
• 500 XP• Moonlace Amulet (magical compass to Fey light)
Secrets
- Aiofe’s staff conceals a hidden map to Gloomvale.
- Flute reeds grow only in a hazardous fungal cluster by Harlene’s cottage.
DM Notes
Manage time pressure: spores poison at end of round 6. Fungal hazards require careful exploration.Court of Gloomvale
Given by: Warden Thornwick
Goals
Acquire proof of Caelmara’s Abyssal pact without drawing attention.Reward
• 1,200 XP• Thornkissed Blade (magical shortsword, +1 to hit, deals necrotic burst once per day)
Secrets
- Lady Caelmara’s wine is spiked with madness-inducing venom.
- A hidden passage under Ebony Pavilion leads to the Shattered Fountain.
DM Notes
Use social skill challenges (DC 16) and traps. Balance roleplay with stealth segments.Abyssal Intrusion
Given by: Aluvar the Hedgeknight
Goals
Stop the ritual, defeat guardians, and secure the onyx vial.Reward
• 1,500 XP• Court’s Whisper Cloak (advantage on Stealth checks in Feywild)
Secrets
- Catalyst removal awakens a bound Summer Court spirit.
- Vial fluid can weaken the Crown of Twilight’s aura.
DM Notes
Combat-heavy. Use water-based environmental hazards (slippery floors, flooding chambers).Siege of Shadowvault
Given by: Elder Rowan
Goals
Disable two ward columns, open the main gate, and enter the citadel.Reward
• 2,000 XP• Shadowvault Key (opens Inner Sanctum door)
Secrets
- Root patterns shift every dawn, requiring updated warding spells.
- Abyssal patrol schedules reveal a calm window for entry.
DM Notes
Include puzzle elements for ward columns and time the assault to avoid overwhelming forces.Crown of Twilight
Given by: Shade of the King
Goals
Realign columns, purify the crown, and defeat Umbraxis and Saraziel.Reward
• 3,000 XP• Crown of Twilight (quest artifact; grants planar warding, see DM notes)
Secrets
- One column’s runes mask a fail-safe: disrupting it prematurely detonates wards.
- Shade offers an alternate ritual if the onyx fluid is lost.
DM Notes
Complex multi-stage final encounter. Encourage teamwork; allow creative use of magic items.Side Quests in Moonlace Glade
Mushrooms for Harlene
Given by: Harlene Greenbriar
Goals
Collect three mature midnight poppies without triggering the hallucinogenic spores.Reward
• Potion of Moonfire (advantage on one spell attack)• 150 GP worth of alchemical reagents
Secrets
- A hidden fungus tunnel branches toward Feylight Arch.
- A ghostly whisper warns of a sleeping myconid lord beneath the hollow.
DM Notes
Use fungus-themed hazards: poison spores (Con DC 13), difficult terrain from fungal mats.Pixie’s Riddle Race
Given by: Bramblethorn Sprig
Goals
Find all five runic stones and solve their riddles before the pixie.Reward
• Pixie Charm (small bonus to Stealth or Deception)• 75 XP
Secrets
- One stone is hidden inside the Twilight Stone Circle’s sealed pit.
- Failure unlocks a trap that summons a swarm of knockers.
DM Notes
Prepare five custom riddles. Each correct answer grants one clue; wrong answers trigger minor illusions.Echo Hunt
Given by: Warden Thornwick
Goals
Defeat three corrupted echoes and perform the cleansing ritual at the oak’s roots.Reward
• Dryad’s Bark Shield (grants +1 AC)• 200 XP
Secrets
- A hidden chamber holds an Abyssal spore bomb ready to detonate.
- One echo whisper hints to the location of the Feylight Arch tune.
DM Notes
Use specter stats with poison attacks. Ritual requires 10 minutes and DC 14 Nature check.Stone Circle Forlorn
Given by: Elder Rowan
Goals
Break the chains, communicate with the spirit (DC 15 History), and release it gently.Reward
• Spirit’s Touch (once per day, cast Spare the Dying)• 100 XP
Secrets
- The spirit’s name is the key to opening the Feylight Arch permanently.
- The chains are wards bound to an Abyssal contract written nearby.
DM Notes
Use poltergeist stats; offer interaction over combat for full reward.Knight’s Lost Edict
Given by: Aluvar the Hedgeknight
Goals
Locate the goblin camp, recover the edict, and return it to Aluvar before sunrise.Reward
• Knight’s Oath Ring (+1 bonus to Charisma checks with planar beings)• 125 XP
Secrets
- The edict is hidden inside a goblin warlord’s crown.
- Imps plan to hand the edict to an Abyssal envoy at dawn.
DM Notes
Goblins + two imps. Use stealth or social approach to avoid full-scale battle.Side Quests in Court of Gloomvale
Rescue the Emissary
Given by: Feyla Nighthollow
Goals
Free the emissary without raising the alarm.Reward
• Emissary’s Blessing (+1 to saving throws vs. enchantment)• 300 XP
Secrets
- Emissary hides a concealed dagger etched with planar runes.
- Key to their chains is disguised as a court signet ring.
DM Notes
Use gargoyle stats; alarms bring two additional sentinels after 2 rounds.Spoil the Spoils
Given by: Marissa Chainwhisper
Goals
Seize or ruin the artifacts without destroying the evidence of the envoy’s presence.Reward
• 4 Obsidian Gems (500 GP total)• 200 XP
Secrets
- One artifact contains a trapped Abyssal servitor that can be released or bound.
- Crew manifest reveals a hidden passenger: an Abyssal envoy.
DM Notes
Barge fight with animated armors (AC 18) and deck hazards: slippery surfaces.Side Quests in Shadowvault Citadel
Echoes in the Void
Given by: Lirael Starbloom
Goals
Collect all four echo shards and sprinkle silver dust at the chasm’s edge.Reward
• Spectral Bow of Spring (+1 magical bow, deals extra radiant damage)• 400 XP
Secrets
- One shard is hidden beneath the skeletal dais’s foundation.
- Abyssal wisps can be pacified by playing the fey rhyme used at Feylight Arch.
DM Notes
Wisp uses will-o’-wisp stats; dust requires a DC 14 Sleight of Hand to sprinkle correctly.Sabotage the Spires
Given by: Demon Herald Saraziel
Goals
Disable both designated columns without triggering the ward explosion.Reward
• 1,000 XP• Access token to the Vault’s rear entrance
Secrets
- Columns reveal hidden glyphs when struck with consecrated steel.
- Sabotage accelerates the crown’s corruption, making purging more difficult.
DM Notes
Columns require DC 16 Athletics to force open or DC 18 Thieves’ Tools to lockpick control panels.Encounters
Blink Dog Ambush
MediumSuggested Level: 3–5
Creatures
- 4 Blink Dogs
Terrain Features
- Underbrush provides half cover
- Pockets of magical mist grant invisibility (DC 13 Perception to see through)
Treasure
Moonlit Fang (component for Moonlace Amulet)
DM Notes
Scale dogs up to 6 for higher-level parties; use teleportation to flank.
Abyssal Dryad Corruption
HardSuggested Level: 4–6
Creatures
- 1 Corrupted Dryad (use dryad with added poison thorns)
- 2 Twig Blights
Terrain Features
- Slippery fungi spores (Dex DC 12 save or prone)
- Narrow root pathways (difficult terrain)
Treasure
Corrupted Sap Vial (ingredient for Court’s Whisper Cloak)
DM Notes
Encourage use of ranged attacks; DC 15 Nature check reveals corruption’s weakness.
Feywild Wild Surge
DeadlySuggested Level: 5–7
Creatures
- 2 Quicklings
- 3 Sprite Archers
Terrain Features
- Floating platforms rearrange each round
- Shifting light patterns create illusions
Treasure
Spark of Fey Chaos (quest component)
DM Notes
Use Wild Magic Surge table for environmental effects; rotate platforms unpredictably.
Mirror Maze Duel
MediumSuggested Level: 6–8
Creatures
- Party’s Illusionary Doubles (use specter stats)
Terrain Features
- Obsidian mirror walls (reflect spells)
- Corridors shift if not observed (Int DC 14 to track)
Treasure
Fragmented Mirror Shard (key to final puzzle)
DM Notes
Encourage creative solutions: shattering mirrors can dispel illusions.
Archfey and Demon Clash
DeadlySuggested Level: 7–9
Creatures
- 1 Archfey Umbraxis (use custom Archfey stats)
- 1 Demon Herald Saraziel (use barbed devil stats)
Terrain Features
- Cracked voidstone floor (Dex DC 15 else fall into mist)
- Columns pulsing with auras of despair
Treasure
Abyssal Ember (component to cleanse crown)
DM Notes
Adjust HP and resistances per party level; dynamic terrain hazards keep combat tense.
Magic Items
Moonlace Amulet
RareLocation
Reward for The Faerie’s Call
Attunement
True—must spend 1 hour under moonlight
Silveroak Branch
UncommonLocation
Echoing Oak grotto
Attunement
False
Thornkissed Blade
RareLocation
Reward from Court of Gloomvale
Attunement
True—requires oath to protect fey
Court’s Whisper Cloak
RareLocation
Reward for Abyssal Intrusion
Attunement
False
Gloomtear Gem
UncommonLocation
Hidden alcove in Hall of Thorns
Attunement
False
Celestial Dew Jar
RareLocation
Bramblethorn’s stash
Attunement
False
Shadowvault Key
Very RareLocation
Reward from Siege of Shadowvault
Attunement
True—must be inserted by three people together
Feywild Compass
UncommonLocation
Market of Spring Court (side quest)
Attunement
False
Light of Eon
Very RareLocation
Shattered Fountain ruins
Attunement
True—attune while overseeing a fey ritual
Crown of Twilight
LegendaryLocation
Final reward of main quest line
Attunement
True—requires sacrifice of a fey relic
Player Characters
You need to register to create and view player characters in this campaign.
Register Now