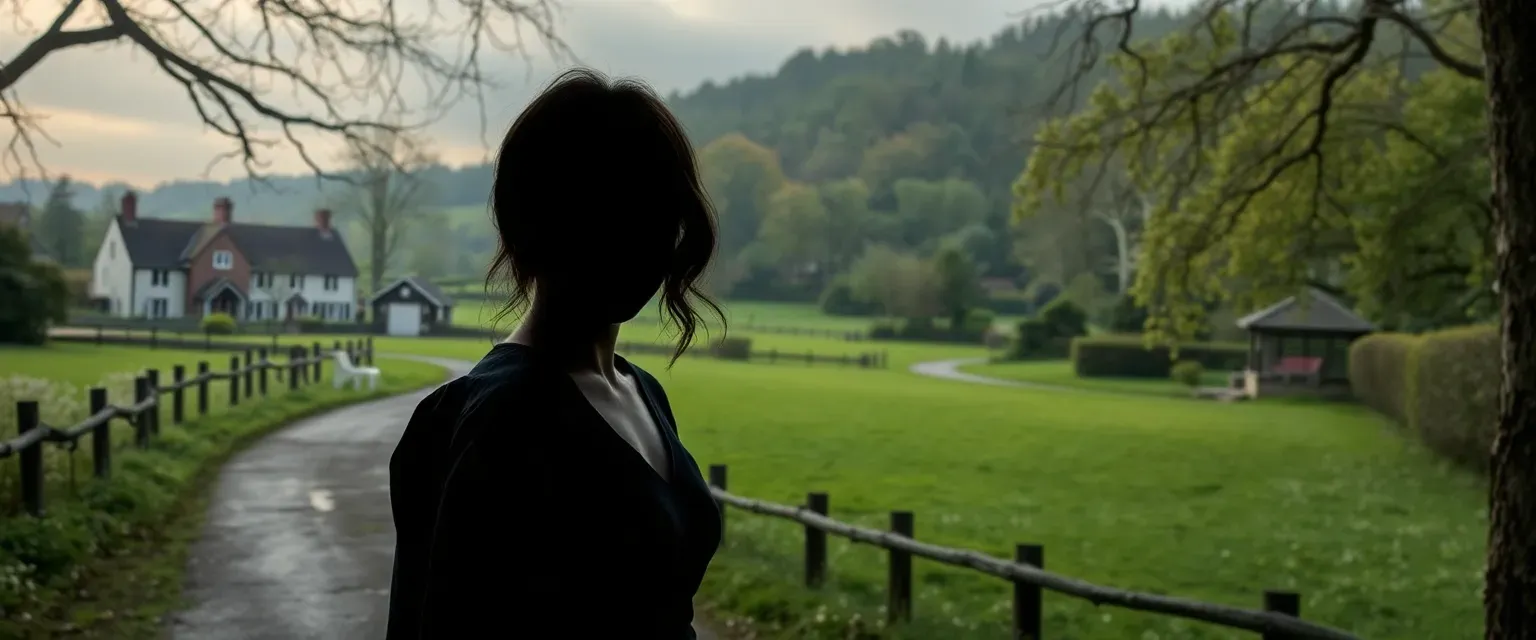
Campaign Overview
Dawnvale was once a peaceful hamlet, renowned for its golden wheat fields, vibrant festivals, and welcoming inns. Yet the stillness shattered when a prominent merchant was discovered dead under mysterious circumstances. Whispers spread through cobblestone lanes: was it a crime of passion, foul play, or something more sinister? Dark rumors cling to the timber-framed cottages like ivy, and the villagers shudder at every creak and whisper. As dawn breaks on this new era, the Watch calls upon a fresh band of heroes—perhaps novices, certainly inquisitive—to unravel the web of secrets threatening the village’s heart.
In Shadows Over Dawnvale, players will wade through a tapestry of intrigue across five distinctive locales: the opulent halls of Garrick Manor, the candlelit corridors of the Starlit Inn, the rotted beams of the Old Mill Ruins, the bustling Village Square, and the silent tombs of Duskridge Graveyard. Each location harbors clues to a wider conspiracy that stretches into Mirewood Hollow’s shadowy bogs and finally into the haunted expanse of the Crimson Marsh. Along the way, side quests challenge sleuthing skills and bravery—rescuing missing villagers, banishing restless spirits, recovering stolen relics—while the main quest line unspools a coherent narrative: gather evidence, confront dark rituals, and prevent an apocalyptic resurrection of a forgotten swamp god.
Designed for beginners and first-time Dungeon Masters, this campaign balances investigation, roleplay, and low-stakes combat. Detailed DM notes guide scene-setting, puzzle design, and tension-building. Key secrets, such as coded ledgers and spectral helpers, reward careful observation and creative problem-solving. A cast of vivid NPCs—from the weary Mayor Tallis and determined Constable Hawke to reclusive druid Eldra Fenwalker and zealot Kael Voss—offers betrayal, alliance, and moral complexity. Familiar factions will align or clash as trust is earned or squandered.
Whether questioning servants under candlelight, navigating collapsing mill beams, or facing off against cult sorcerers in acid-spewing vaults, players will learn how to follow leads, piece together cryptic clues, and bring a killer to justice. Shadows Over Dawnvale invites newcomers to experience the thrill of a classic murder mystery—where every shadow hides a secret and the light of dawn reveals the path to truth.
Starting Location
Dawnvale Village
Secrets
- A hidden memorial under the village fountain points to the next murder target.
- A coded ledger page in the Old Mill reveals the killer’s identity concealed by cipher.
- Servant’s journal in Garrick Manor names a secret accomplice among the townsfolk.
Key Locations
Garrick Manor
Perched on a slight rise north of the plaza, Garrick Manor is a two-story stone house surrounded by wrought-iron fencing. Its slate roof is laced with moss and its window panes fogged with age. Inside, the grand foyer’s marble floors glint under tarnished candelabras, and portraits of stern-faced Garricks line the walls. The late patriarch—Master Cedric Garrick—was found in his study, slumped at the mahogany desk. His open ledger and a shattered wine glass lie beside him, stained red. Servants whisper of midnight visits and strange chanting drifting through corridors long after the household retired. A secret passage is rumored to lead from the study to an underground cellar, where clandestine meetings might have taken place. Flickering candlelight and distant footsteps plague those who venture within after dark. Ancient tomes fill the oak shelves in the library, some bound in cracked black leather, others embroidered with silver runes. A hidden alcove behind a false bookshelf stores family heirlooms—and perhaps clues. Servants recall Master Garrick burning papers late at night. Could those ashes hide confessions? Meanwhile, a rusted grate in the basement hints at a tunnel burrowed beneath the estate walls. Moonlight sliced through dusty shutters reveals footprints in powdered dust. Beneath the veneer of nobility, dark secrets fester. Garrick Manor stands at the heart of the mystery, its rooms suffused with the scent of old parchment and stale wine, its shadows heavy with unspoken sins. Investigators must piece together financial ledgers, servant testimonies, and arcane symbols scrawled in hidden diaries to unmask the killer.
Additional Notes
DM: The manor’s hidden cellar connects to the graveyard crypt via a secret tunnel. A successful DC 15 Investigation check in the study reveals a loose panel behind the fireplace. Witness NPC: Lady Helena Garrick is evasive—she may hide vital evidence under the rose-tinted rug in her quarters.
Starlit Inn
High on the eastern slope overlooking Dawnvale, the Starlit Inn’s golden windows shine like beacons against the forest. Travelers praise its hearty stew, soft beds, and the hearth-side minstrel. Owner Marta Holloway, a kindly widow, greets guests with warm tea and gentle smiles. But in recent days, strange howls echo beneath the dining hall, and rooms once comfortable are now chilled to the bone. Patrons report furtive shadows flitting between rafters and an unseen hand tapping at their doors in the dead of night. Some whisper the inn sits atop a ley-line junction, amplifying restless spirits. Several rooms feature carved runes in the floorboards, scars of wards hastily etched to keep malevolent forces at bay. When adventurers arrive, they find a fractured clientele: the bard Crescent Ryure swears he saw a phantom bride drifting through corridors at dawn; a local huntsman claims tortured screams emanate from the wine cellar; Marta guards her back stairs with a tremulous composure. A locked trapdoor under the bar beckons investigation, rumored to lead into an abandoned stables once used for sacrifices long ago. Above the roaring fireplace hangs an old tapestry depicting a lunar eclipse, its silver threads shimmering unnaturally. In the lounge, a hidden money box is stashed behind loose planks, containing coin—and possibly a confession letter. Whispers say Marta paid someone to cover up her late husband’s disgrace, with deadly consequences. The inn’s well-worn floorboards creak in different patterns at night, guiding inquisitive ears to hidden alcoves stuffed with dusty relics. Below, the ancient stables have collapsed; their remains hold rusted shackles, rotted straw, and broken idols carved from bone. The air tastes of damp earth and sorrow. Intruders must navigate narrow hallways, avoid traps set decades ago, and decipher cryptic murals etched beneath plaster. The Starlit Inn is both sanctuary and prison, concealing truths under its hospitable facade.
Additional Notes
DM: Use fog effects in the dining hall to obscure vision. A DC 13 Perception check spots footprints leading to the stable trapdoor. Room 4’s floor has a pressure plate releasing rotten wine onto the intruder.
Old Mill Ruins
South of Dawnvale, the Old Mill stands in ruins on the riverbank, its once-rotating waterwheel splintered and still. Ivy chokes the timber beams and stone foundation, while stagnant pools bubble where the wheel once turned. Nearby villagers avoid the mossy walkways, claiming the ghost of miller Tomas Reed haunts the grounds. His daughter vanished one stormy night, and Reed’s grief drove him to madness, ending with his body discovered in the millrace, twisted by the sluice’s current. Now, lantern-wielding explorers speak of disembodied giggles near the rotten hatches and shadowy shapes climbing the broken rafters. Beneath the collapsed roof, scattered wooden crates once held grain; now they hide rusted tools and a bloodstained ledger tracking payments for midnight deliveries. A locked granary door bears scratch marks—possibly clawed from within. A hidden loft above the chute shelters a smashed alchemical kit, fragments of vials shimmering with strange blue residue. Reed’s daughter’s diary pages flutter near a gaping hole in the floor, hinting at a forbidden romance with an outsider. Locals fear the river’s eddies carry restless spirits, and the mill’s broken mechanism groans like mournful wails when wind gusts through crevices. At night, a blue phosphorescent glow seeps from beneath the sluice gate. Brave investigators must balance on rotting beams, avoid sudden collapses, and contend with a territorial water weird rumored to guard the lower sluice. The mill’s secrets tie directly to Dawnvale’s murders—cargo run by shadowy figures, coded ledgers, and the tragedy that fractured one family’s soul.
Additional Notes
DM: The water weird emerges if characters disturb the sluice chamber. A DC 14 Investigation in the loft reveals the diary page describing a hidden meeting spot under the mill floor.
Village Square
At Dawnvale’s pulsing heart, the Village Square stretches wide, paved in circular cobblestones around a tiered fountain sculpted as a weeping maiden. Market stalls ring the plaza at dawn, with bakers, weavers, and potters displaying goods beneath colorful awnings. Children scamper along the fountain’s edge, and elders gather on benches to swap tales. But since the murder, an aura of unease lingers: ribbons once hung from stall posts droop lifelessly; a pall of gray mist sometimes pours from the fountain, chilled and heavy. The mayor’s notice board is plastered with reward posters, each demanding justice for the slain Garrick merchant. A troupe of fire dancers practices nightly despite the tension, flames reflecting anxiously in watchful eyes. Under the fountain’s basin lies a rusted lockbox—tracks lead to it, as though someone visited after dark. Stone gargoyles at the plaza’s corners bear scratch marks, gouged sometime in the past week. A vine-entangled well beneath a willow tree squats to one side; old legends say tossing a coin in yields answers whispered on the wind. Tabletops of nearby benches hold carved initials—some recent, some centuries old—but one fresh carving spells out a cryptic phrase: "Seek dawn’s true face." Stalls host curious NPCs: an apothecary quietly dusts glass bottles, a storyteller recounts ancient superstitions, and a masked jester performs before anxious crowds. Sentinels of the Watch patrol at irregular intervals, uneasy under the weight of unsolved crime. The Square is a crossroads for gossip, chance encounters, and hidden leads—an open stage where clues float through the air like dandelion seeds, awaiting discovery.
Additional Notes
DM: The lockbox under the fountain contains a torn portrait and a cryptic note. A DC 12 Arcana check on the mist reveals faint necrotic energy. The well responds to Insight DC 13—answer reveals whispered clue in rhyme.
Duskridge Graveyard
Southwest beyond the village walls, Duskridge Graveyard sprawls across wind-swept hills dotted with weathered tombstones and cracked mausoleums. Gnarled oaks twist skyward, their bare branches scraping wind-rattled gates. The scent of damp earth and decaying petals lingers underfoot. Tombs of local worthies stand in silent rows, engraved with years stretching into the witch-hunts. Moss covers stones inscribed with names long forgotten; some faces are cracked and half-buried in dirt. Rumors hold that a secret catacomb lies beneath the largest crypt—said to house evidence of a secret society that once convened here. At twilight, occasional flickers of green light dance among the graves, and mournful whispers ride the breeze. Villagers swear they’ve seen phantom processions—their torches dim ghosts of funeral rites centuries old. In a secluded corner, a shattered headstone marks a child’s grave; fresh flower petals appear nightly, but no one knows who places them. A rotting fence panel has been pried open recently; foot prints lead to the crypt’s sealed doorway. Within, six iron-bound coffins sit cold and empty, save for one that holds a rotted ledger listing names—dates matching the recent murder. Clenched in the ledger’s clasp lies the key to Cedric Garrick’s vault. Investigators must negotiate uneven ground, avoid spectral guardians, and puzzle over cryptic epitaphs to uncover the entrance. Beneath the largest vault, a sliding slab reveals mossy steps descending into darkness. Every footstep echoes in whispered anticipation. This is where the trail of blood meets the bones of secrets long kept.
Additional Notes
DM: The green lights are will-o’-wisps lured by fresh blood. A DC 15 Religion check in the main crypt reveals the catacomb’s hidden trigger—running water drips from a carved gargoyle head, activating the sliding slab.
Mirewood Hollow
Secrets
- A secret boardwalk segment collapses into a hidden cave beneath the mire.
- An arcane symbol under the idol corresponds to an inscription in the manor’s library.
- A spectral figure appears at the clearing if the ritual phial is removed.
Key Locations
Witch’s Altar Clearing
At Mirewood’s heart lies a circular clearing where a black stone altar stands, covered in moss and ancient bloodstains. Runes carved deep into the altar glow faintly by moonlight. Charred sacrificial markings surround it, and scattered offerings—bones, silver coins, wilted herbs—lie at its base. Broken clay jars, once filled with vermillion oils, lie shattered near the foot of a bent standing stone. Roots coil around the altar like watchful serpents. Each full moon, luminescent mushrooms sprout in perfect concentric rings around the site, pulsing with eerie light. The air here pulses with residual magic, each breath tasting of iron and damp earth. A half-buried diary hints at the coven’s last ritual—seeking immortality through a blood pact. Beneath loose earth, a hidden chest holds ritual tools and the key to the graveyard catacomb.
Additional Notes
DM: If characters disrupt the altar recklessly, summon 2d4 twig blights. A DC 14 Arcana check reveals how to safely extract the buried chest.
Bog Mother’s Idol
Half-swallowed by mud and cypress roots, the alabaster idol depicts a crowned figure with horns of stag and multiple arms holding vessels. Its chipped eyes seem to follow intruders. The base is carved with cryptic sigils hinting at sacrificial rites. The idol emits a low hum when thunder rumbles. Underneath, a hidden compartment contains a glass phial with glowing red liquid—the witch-folk’s final draught. Animal bones tied with crimson thread lie beside it. A successful DC 15 Religion check decodes the idol’s sigils, revealing the coven’s pleas for eternal protection against intruders. The idol’s crown jewels—raw garnets—are worth 50 gp each to a jeweler but may have arcane uses.
Additional Notes
Use PHB advice for arcane objects; a DC 13 History recall links the idol to the village founder’s dark past.
Sunken Cottage
Collapsed beams and rotted floorboards mark the remains of the coven’s meeting hut. A half-rotted altar stands amid fungal growth, its carved bas-relief showing dancing figures. Journals smeared with blood list names—including one matching the slain merchant—and locations of hidden runes around Dawnvale. Rats and poisonous centipedes scuttle through the debris. A locked chest chained to a felled post calls out for theft: it contains a moonstone dagger and a letter describing deliveries of strange cargo to Garrick Manor. Dozens of skeletal remains lie in a shallow pit beneath the floor, bound with red cords.
Additional Notes
Provide a small clue scroll in the chest that hints at the next main quest step. Swarming centipedes can surprise on a failed DC 12 Stealth check.
Crimson Marsh
Secrets
- A submerged entry tunnel bypasses the runestone puzzle.
- The obsidian mask holds a trapped spirit that recognizes the murderer.
- Bone totem initials rearranged spell the murderer’s name.
Key Locations
Basalt Spire Temple
Rising thirty feet above the marsh, this monolithic spire is cracked and hollow. Inside, spiral stairs of jagged stone lead to a rotted sanctum. The walls bear faded frescoes of winged knights battling monstrous serpents. At the heart lies an empty altar carved with broken vials and bas-relief showing bound spirits. Pools of stagnant water lap at the base, glowing faintly when disturbed. Cultists once slaughtered here to resurrect the swamp god. Now, the sanctum is inhabited by mud mephits and slimes drawn to residual magic. A hidden door at the altar’s back conceals a trapdoor down to a submerged vault—sealed by a rusted glyph lock requiring four runestones scattered in the marsh. Those who enter feel the spire’s oppressive weight—a palpable hunger for sacrifice. Use purple worm fang trap: a glyph causes acid spray if handled incorrectly. Provide a puzzle of runestone placements on the altar to open the vault.
Additional Notes
DM: Runestone puzzle requires DC 15 Intelligence (Investigation). Vault door’s glyph lock triggers an acid mist (DC 13 Dex save or take 2d6 acid damage).
Bone Totem Circle
A half-mile from the spire stands a ring of twelve bone totems: human skulls bound to wooden stakes with sinew. Each skull is carved with a symbol corresponding to a letter of an ancient dialect. Arranging the symbols in order spells the temple’s true name, opening a hidden path through reeds to the spire. The area is patrolled by swamp wraiths, drawn to the bones’ residual anguish. Beneath one totem, a clay shard hints at the murderer’s initials. Moss-covered footprints run between stakes, indicating secret nightly ceremonies. Scattered at the perimeter are rotten satchels containing vials of crimson spores—potent hallucinogens. A DC 14 Arcana check deciphers the glyphs; a DC 15 Stealth check avoids wraith patrols. Disturbing totems without deciphering the names summons two swamp wraiths.
Additional Notes
DM: Wraiths use telekinetic choke; treat as lower-CR (3) to keep manageable. Provide audio cue (moaning) when they approach.
Sunken Vault
Beneath the spire’s trapdoor lies the Sunken Vault—a half-flooded chamber lined with basalt and iron rings. The water’s surface distorts reflections, and faint runes glow along the walls. In the center stands a stone sarcophagus, lid ajar, revealing a shattered obsidian mask engraved with ancient words of binding. At each corner, rusted metal braziers hold blackened coals that snap to life at midnight, releasing acrid smoke. Four pedestals carved with runes accept the runestones from the totem circle; placing them correctly locks away or frees an imprisoned spirit. Careless handling causes the water to boil and acid droplets to rain from stalactites. Among the wreckage lies a hidden leather pouch containing a torn page from the murderer’s journal—pinpointing his next destination. Investigation reveals a lever behind the sarcophagus that deactivates acid traps when pulled. Characters sensing magic can detect a faint aura around the mask, requiring attunement to harness its protective power.
Additional Notes
DM: If party fails trap save, deal 2d6 acid per round until they escape. Obsidian mask grants resistance to acid but must be carried carefully.
NPCs in Dawnvale Village
Mayor Rosalynn Tallis
A dignified woman in her early fifties with silver-streaked hair and keen green eyes. She carries herself with calm authority but trembles over the village’s unrest.
Constable Bram Hawke
A stout, earnest man wearing a mud-spattered cloak and an antique badge. He’s dedicated but in over his head with a high-profile murder.
Marta Holloway
Widowed innkeeper of the Starlit Inn. Her warm smile masks sorrow and fear as odd events unfold at her establishment.
NPCs in Mirewood Hollow
Eldra Fenwalker
A reclusive witch-finder druid who’s studied Mirewood legends for decades. Her barkskin and wooden staff make her look part-tree.
Bog Merchant Garrad
A traveling trader who collects rare mushrooms and herbs. He knows safe paths through quickmud.
Serena the Reed Maiden
Ghost of the miller’s daughter, trapped between worlds. She can’t speak but points to clues with her finger.
NPCs in Crimson Marsh
Marsh Warden Torrik
A reclusive guide covered in mud and reeds, Torrik knows the marsh’s shifting channels. His half-crazed gaze flickers with knowledge.
Cult Sorcerer Kael Voss
Clad in crimson robes and bone charms, Kael attempts to reunite the swamp god with its worshippers.
Wisp of Beckoning
A will-o’-wisp bearing the murderer’s aura, guiding intruders deeper—often to their doom.
Factions
Dawnvale Watch
Goals
Relationships
With Other Factions
They are at odds with the Coven of Mirewood, fearing their magic. Cooperative—but cautious—relations with the Crimson Marsh cultists who keep to themselves.With Players
Supportive: often request assistance and provide local knowledge. May withhold rumors that could spark panic.Mirewood Covenant
Goals
Relationships
With Other Factions
Traditionally hostile toward Dawnvale Watch. Tentative alliance with cultists who oppose common enemies. Distrustful of Crimson Marsh cult.With Players
Mixed: will aid if convinced the party respects the woods. Requires persuasion or demonstration of goodwill.Cult of the Crimson Spire
Goals
Relationships
With Other Factions
Warring with both Dawnvale Watch and Mirewood Covenant. Infiltrated some Watch circles subtly. Hostile to all except willing allies.With Players
Antagonistic: will send spies and attack intruders. Some cultists masquerade as innocents to set traps for the party.Main Questline
Murder at Garrick Manor
Given by: Mayor Rosalynn Tallis
Goals
Find the ledger and decipher its top-secret cipher. Report back to Mayor Tallis.Reward
200 gp, Garrick family’s endorsement, and Letter of Introduction in Dawnvale.Secrets
- The ledger contains coded entries referencing the Old Mill Ruins.
- Lady Helena Garrick knows more than she admits.
DM Notes
Scale NPC reactions: servants distrust inexperienced investigators at first.Secrets of the Starlit Inn
Given by: Constable Bram Hawke
Goals
Expose the inn’s dark rituals and retrieve the cellar key. Present findings to Bram Hawke.Reward
300 gp, Potion of Clarity, and Marta’s key to the cellar underneath the graveyard.Secrets
- Bard Crescent Ryure overheard a meeting between the murderer and a cloaked figure.
- Runes match those in the miller’s diary.
DM Notes
Use noisy patrons to obscure player actions and ramp up tension.Echoes in the Mill
Given by: Clara Reed
Goals
Retrieve the diary page and survive the mill’s hazards. Decode the page at Dawnvale’s library.Reward
350 gp, +1 Shield inscribed with Dawnvale crest, and Clara’s loyalty.Secrets
- The murderer used the mill’s granary as a drop point.
- A secret ledger lists shipments to Crimson Marsh.
DM Notes
Introduce environmental puzzle assembling torn diary under strobing lantern light.Catacombs Beneath Duskridge
Given by: Father Alric
Goals
Secure the catacomb key and escape with proof. Deliver it to Father Alric.Reward
400 gp, Scroll of Protection from Undead, and Father Alric’s holy favor.Secrets
- A parchment lists the cultist’s meeting place in Crimson Marsh.
- A secret blessing scrawled on crypt wall grants advantage on final confrontation.
DM Notes
Skeletons should be easy foes but use numbers for tension; include optional stealth bypass.Confrontation at Crimson Marsh
Given by: Marsh Warden Torrik
Goals
Defeat Kael Voss, secure or destroy the obsidian mask, and return safely to Dawnvale.Reward
500 gp, Obsidian Mask of Acid Resistance, and Dawnvale’s eternal gratitude.Secrets
- Kael’s true accomplice was among Dawnvale’s elite.
- The swamp god is bound within the mask; destroying it ends the curse permanently.
DM Notes
Final battle: add environmental hazards—acid geysers, collapsing basalt steps. Scale Kael to party level.Side Quests in Dawnvale Village
Missing Milkmaid
Given by: Clara Reed
Goals
Find Lily, recover the heirloom rings, and return them to Clara.Reward
100 gp and Clara’s heirloom ring (+1 AC while worn).Secrets
- Lily ran off with a secret lover tied to the merchant’s murder.
- The rings bear inscriptions matching the cipher found in Garrick’s ledger.
DM Notes
Include a small river ambush by bandits pretending to help; players learn of a connection to the main murderer.Haunted Harrowing
Given by: Father Alric
Goals
Safely calm or banish the spirit and return the stolen ledger pages.Reward
Scroll of Protection from Evil and Good and Father Alric’s blessing (advantage on one Wisdom saving throw).Secrets
- The witch’s real name is inscribed in a stolen chapel ledger.
- Father Alric personally sympathized with her and removed vital pages from church records.
DM Notes
Skeletons (2-4) fight in claustrophobic corridors. Provide handouts of rune shapes for puzzle-solving.Stolen Goblet
Given by: Leona McCreary
Goals
Locate the goblet, confront its buyer, and return it to Leona.Reward
Silver Mug of Message Sending (sends short notes to Leona once per day) and 50 gp.Secrets
- Leona’s jewel cart had moonstone dust—she intentionally destroyed evidence to claim insurance.
- The goblet was secretly used in the murder ritual.
DM Notes
Run a stakeout at a known fence’s shack; include a non-lethal chase scene through the plaza.Herbal Remedy
Given by: Apothecary Rife
Goals
Recover wolfsbane root from the rival shop and return it to Rife.Reward
Potion of Greater Healing and Rife’s everlasting gratitude (discounts on potions)Secrets
- Rife sells a tincture to dark cultists at midnight markets.
- The rival apothecary was framed—the real thieves work for the murderer.
DM Notes
Introduce simple negotiation or stealth options to retrieve the root without combat.Broken Sundial
Given by: Gilda the Watcher
Goals
Salvage marble fragments, have the sundial repaired, and learn what Gilda saw that night.Reward
Custom timing device: once per long rest, grants advantage on an initiative roll.Secrets
- Gilda once witnessed a clandestine meeting under the sundial at midnight.
- The shattered dial fell after a struggle—evidence of the murderer’s path.
DM Notes
Use a social conflict at the forge: players convince stubborn blacksmith to help, DC 12 Persuasion.Side Quests in Mirewood Hollow
Mushroom Foray
Given by: Bog Merchant Garrad
Goals
Collect 5 glowing mushrooms and return them without losing more than one to leech attacks.Reward
Antitoxin Potion for each batch collected, plus 30 gp.Secrets
- The mushrooms can be used to detect necrotic magic on touch.
- Garrad plans to sell them to dark sorcerers unless bribed to hand them over.
DM Notes
Use giant leech stats; place mushrooms on raised logs to encourage creative thinking.Druid’s Vigil
Given by: Eldra Fenwalker
Goals
Gather incense, complete the ritual, and survive the cottage's spectral backlash.Reward
Nature’s Ward Amulet (once per day cast Protection from Evil) and Eldra’s friendship.Secrets
- Eldra’s ritual scroll is incomplete—players find missing lines in the cottage.
- Performing the vigil reveals dream-visions of the murderer’s face.
DM Notes
Introduce simple puzzle assembling torn scroll pieces under candlelight.Side Quests in Crimson Marsh
Lantern of Guiding Light
Given by: Marsh Warden Torrik
Goals
Defeat mephits, retrieve the lantern without breaking its glass prism.Reward
Silver Lantern of Wisp Capturing and Torrik’s guidance through the marsh.Secrets
- The lantern also detects invisible spirits within 30 feet.
- Mephits know the murderer once bartered for magic tinder here.
DM Notes
Use small environmental hazards: sticky mud, vision obscured by reeds.Offerings for the Reed Gods
Given by: Ghost-in-the-Mist
Goals
Collect reeds, perform ceremony at dawn, convince ghost to share knowledge.Reward
Whispering Reed Horn (can cast Message twice per day) and the ghost’s secret map.Secrets
- The epitaph letters match runestone names.
- The ghost’s true name is needed for final confrontation with Kael.
DM Notes
Scene at dawn; allow Insight checks to recall epitaph words from the ghost’s moaned hints.Encounters
Fogbank Ambush
MediumSuggested Level: 2-4
Creatures
- Bandit (4)
- Bandit Captain (1)
Terrain Features
Fog: heavily obscures vision beyond 5 feet. Wagon Ruts: difficult terrain in places.
Treasure
50 gp split, a map fragment leading to a side-quest.
DM Notes
Ideal as a tutorial combat; reduce bandit HP if group of 3.
Haunted Crypt Crawl
HardSuggested Level: 3-5
Creatures
- Skeleton (6)
- Shadow (1)
Terrain Features
Tomb Alcoves: offer half cover. Loose Bones: trip hazards (DC 10 Dex save to avoid).
Treasure
Potion of Healing, 75 gp in fractured coins.
DM Notes
Encourage use of turn undead; shadows can drain light sources.
Quickmud Quagmire
MediumSuggested Level: 2-4
Creatures
- Giant Leech (3)
Terrain Features
Quicksand Patches: DC 12 Str save to avoid restrained condition. Muddy Ground: half speed.
Treasure
Each leech has 1d4 leech glands (healing reagents).
DM Notes
Use environmental strain; avoid overwhelming new players.
Wraiths at Bone Circle
DeadlySuggested Level: 4-6
Creatures
- Swamp Wraith (2)
Terrain Features
Bone Totems: block line of sight but offer room for movement.
Treasure
Wraith’s phylactery shard (quest item).
DM Notes
Warn players this is lethal; reduce to 1 wraith for smaller groups.
Cultist Escape Party
HardSuggested Level: 5-7
Creatures
- Cultist (3)
- Cult Fanatic (1)
- Mud Mephit (2)
Terrain Features
Acid Geysers: random 5 ft blasts, DC 14 Dex save for half damage (2d6 acid). Reed Thickets: provide concealment.
Treasure
Obsidian Shard (used to craft final runestone), 120 gp.
DM Notes
Emphasize dynamic battlefield; geysers erupt unpredictably.
Magic Items
Ledger of Silent Whispers
RareLocation
Secret shelf in Garrick Manor library.
Attunement
True by any character proficient in Investigation.
Starlit Key
UncommonLocation
Starlit Inn stable trapdoor reveals it.
Attunement
False
Millwright’s Ring
UncommonLocation
Salvaged from Old Mill Ruins granary loft.
Attunement
False
Well Whisperer’s Coin
UncommonLocation
Duskridge Graveyard well.
Attunement
False
Crypt Keeper’s Lantern
RareLocation
Hidden catacomb beneath Duskridge Graveyard.
Attunement
True
Runestone of Binding
RareLocation
Bone Totem Circle.
Attunement
False
Obsidian Mask of Acid Resistance
Very RareLocation
Sunken Vault beneath Basalt Spire.
Attunement
True
Whispering Reed Horn
UncommonLocation
Offered by Ghost-in-the-Mist.
Attunement
False
Silver Lantern of Wisp Capturing
RareLocation
Witch’s Altar Clearing.
Attunement
True
Tome of Bog Lore
UncommonLocation
Sunken Cottage.
Attunement
False
Player Characters
You need to register to create and view player characters in this campaign.
Register Now